• Skip to primary navigation
  • Skip to main content
  • Skip to primary sidebar
  • Recipe Index
    • Air Fryer
  • Side Dishes
  • Substitutes
  • About
  • Contact
  • Subscribe

ForkLiftKitchen

menu icon
go to homepage
  • Recipe Index
    • Air Fryer
  • Side Dishes
  • Substitutes
  • About
  • Contact
  • Subscribe
subscribe
search icon
Homepage link
  • Recipe Index
    • Air Fryer
  • Side Dishes
  • Substitutes
  • About
  • Contact
  • Subscribe
×

Blog

Roasted Cauliflower Steaks

January 24, 2026

You need 35 minutes and one head of cauliflower. No marinating, no multi-step prep, no babysitting a hot pan.

Roasted Cauliflower Steaks

Slice thick steaks, brush with oil, and roast at 425°F while you prep the rest of dinner. The high heat caramelizes the edges without drying out the center.

This works for weeknight dinners when you want something that looks intentional but doesn't require much effort. Make it when the fridge needs a reset or you're meal prepping for the week ahead.

QUICK SUMMARY

Roasted cauliflower steaks deliver crispy edges and tender centers in 30 minutes. High heat at 425°F caramelizes the surface while keeping the interior juicy. The key is slicing thick steaks, coating evenly with oil, and giving them space on the pan.

⏱️Time reality: 10 minutes prep, 25-30 minutes hands-off roasting
🔪First critical action: Slice steaks ¾-inch thick to prevent drying or falling apart
⚠️Watch out: Skimping on oil leads to burnt edges and dry steaks-brush both sides generously

Why This Recipe Works

The trick is treating cauliflower like an actual steak instead of florets that roast unevenly. For a lighter version that still hits, this simple dip recipe pairs well with roasted vegetables when you want something creamy to balance the char.

Quick Reference
⏱️
Prep Time
10 min
🔥
Cook Time
25-30 min
⏰
Total Time
35-40 min
🍽️
Servings
4 servings
📊
Difficulty
Easy
🏷️
Category
Side
💡
Quick Tip
Slice ¾-inch thick for best results
🎯
Best For
Weeknight | Meal prep | Entertaining

Here's what makes it work:

  • Steak thickness: Cut ¾-inch thick so the edges crisp before the center dries out
  • High heat roasting: 425°F caramelizes the surface and creates golden-brown edges in 25-30 minutes
  • Even oil coating: Brushing both sides with oil prevents burnt spots and promotes browning
  • Spacing on the pan: Leave 1-2 inches between steaks so they roast instead of steam
  • Fork-tender test: Pierce the center with a fork-done when tender but still holds shape
Quick Tip
Flip steaks halfway through roasting for even color on both sides, or skip flipping if you prefer one crispy top surface.

What You'll Need

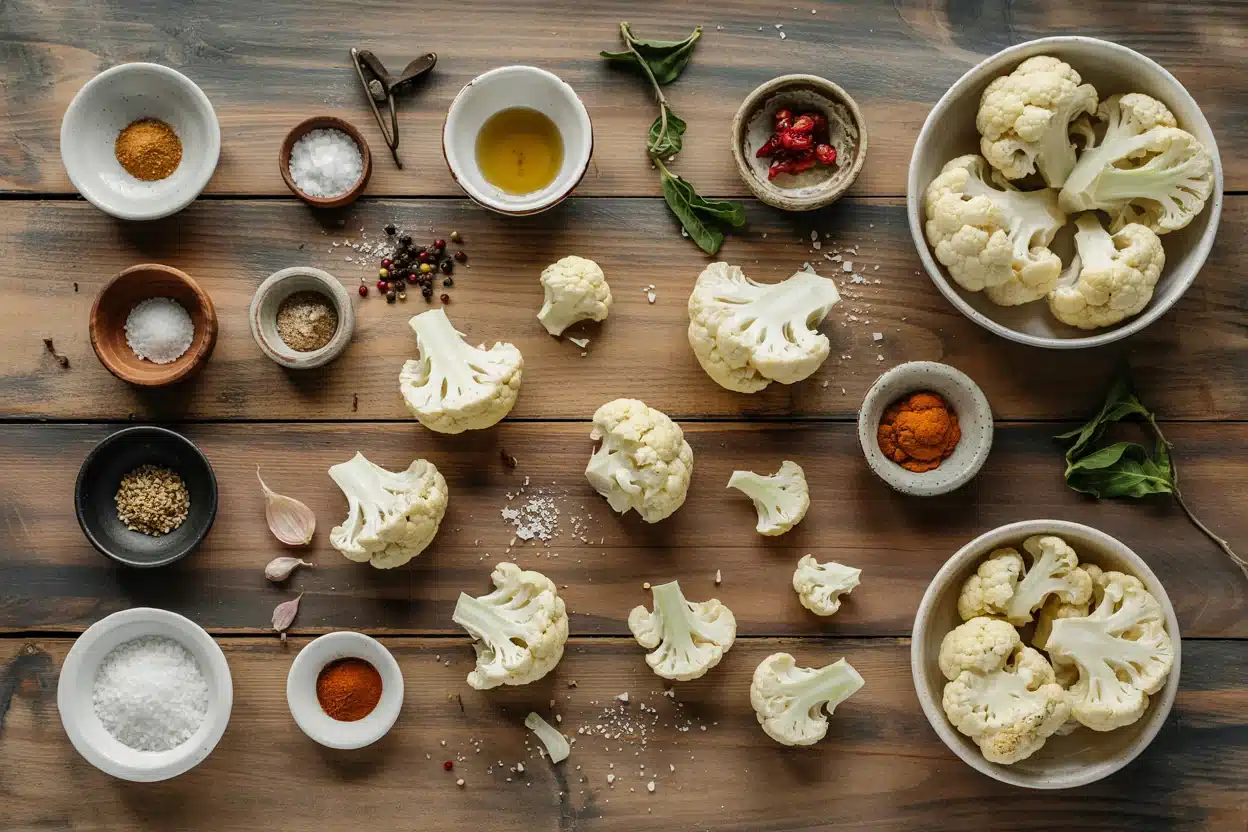
Roasted Cauliflower Steaks - Roasted Cauliflower Steaks

Shopping for this takes five minutes if you stick to the basics. Rich mains need something to cut through, and this easy boats recipe balances roasted vegetables when you need a lighter main option.

🥬
Base
  • 1 medium-large cauliflower head
🥢
Coating
  • 3-4 tablespoons olive oil
  • 1 teaspoon salt
  • ½ teaspoon black pepper
  • 1 teaspoon garlic powder
🌶️
Optional Flavor
  • ½ teaspoon smoked paprika
  • 1 tablespoon lemon juice
  • Fresh parsley or thyme

Ingredient Details

  • Cauliflower head
    Look for a head with tight florets and no brown spots-larger heads yield more intact steaks
  • Olive oil
    Use regular olive oil, not extra virgin, for high-heat roasting without burning
  • Salt
    Kosher salt works best for even coverage-adjust amount if using fine table salt
  • Garlic powder
    Sticks to the surface better than fresh garlic, which can burn at high heat
  • Smoked paprika
    Adds a subtle smoky note without overpowering the cauliflower's natural flavor
  • Lemon juice
    Drizzle after roasting to keep the acidity bright instead of cooking it off
  • Fresh herbs
    Chop and sprinkle on top right before serving-they wilt if added too early

Ingredient Swaps

Most swaps work if you match the heat tolerance and coating properties. Most people skip this simple vegetarian variation, but it balances the meal when you need more plant-based options on rotation.

Four swaps that work:

  • Olive oil → Avocado oil: Same high-heat performance, slightly more neutral flavor
  • Garlic powder → Fresh minced garlic: Stronger flavor but mix with oil first to prevent burning
  • Smoked paprika → Regular paprika or chili powder: Less smoky aroma, adjust heat level to taste
  • Lemon juice → Lime juice or white wine vinegar: Similar acidity, different flavor profile
Instead Of Use Ratio
Olive oil Avocado oil 1:1
Garlic powder Fresh minced garlic (in oil) 1 teaspoon powder = 2 cloves minced
Smoked paprika Regular paprika 1:1
Lemon juice Lime juice or vinegar 1:1

Instructions

The total time runs about 35 minutes from start to finish. Fries adds the contrast this plate needs, but timing matters-pair it with crispy golden french fries if you want something crunchy to round out the plate.

  1. Prep the cauliflower: Remove outer leaves, trim the stem flat but leave the core intact. Slice the head vertically into ¾-inch thick steaks, starting from the center. You'll get 2-4 intact steaks depending on size-save loose florets for another use.

  2. Season both sides: Brush each steak with olive oil on both sides, using about 1 tablespoon per steak. Sprinkle evenly with salt, pepper, and garlic powder. Add smoked paprika if using.

  3. Arrange on the pan: Place steaks on a parchment-lined baking sheet with 1-2 inches of space between each. Crowding traps steam and prevents browning.

  4. Roast at high heat: Bake at 425°F for 25-30 minutes. Flip halfway through if you want even color, or skip flipping for one extra-crispy side. The edges should turn golden brown and the center should pierce easily with a fork.

  5. Rest and finish: Let steaks rest on the pan for 5 minutes. Drizzle with lemon juice and sprinkle with fresh herbs if using. Serve immediately while edges are still crisp.

Shortcut
Skip flipping and broil for the last 2 minutes instead-you get crispy edges without the extra step.

What to Serve With It

Roasted cauliflower works as a side or a light main, but the plate feels empty without something to fill the gap. For a version that comes together quickly, check out these easy grilled cauliflower steaks dinner nights for complete meal ideas when planning vegetarian dinners.

Side Dish Prep Why It Works How to Serve
Quinoa or brown rice Easy Adds whole grain and soaks up any pan juices Serve warm underneath steaks as a base
Simple green salad Easy Provides freshness and crunch contrast Dress lightly and serve on the side
Roasted sweet potatoes Easy Adds natural sweetness and smooth texture Roast alongside steaks at same temp
Garlic mashed potatoes Medium Comforting pairing with savory roasted steaks Serve as a creamy base for steaks
Herbed couscous Easy Light and elegant complement for entertaining Fluff with fork and place steaks on top

Three ways to serve it:

  • As a main: Top with tahini sauce or chimichurri and serve over quinoa or couscous
  • As a side: Pair with grilled chicken, roasted salmon, or a hearty lentil dish
  • For entertaining: Arrange on a platter, drizzle with lemon garlic aioli, and garnish with fresh herbs
Best Pick
Tahini sauce is the easiest pairing-whisk tahini with lemon juice, garlic, and water until pourable, then drizzle over warm steaks.

Store and Reheat

Cauliflower steaks keep for 3-4 days but lose some crispness in the fridge. The quick potato dish works best when it hits the table at the same time as the main, but leftovers reheat better than you'd expect if you use the oven instead of the microwave.

Method Time Best For
🔥 Oven 10 min at 375°F Restores crispy edges, closest to fresh
🍳 Stovetop 5-7 min over medium heat Quick reheat with slight crisp, one steak at a time
📦 Microwave 1-2 min Fast but softens texture, best for mixed dishes

For best results when storing:

  • Cool completely: Let steaks sit at room temp for 10 minutes before storing to prevent sogginess
  • Use shallow containers: Single-layer storage in airtight containers keeps steaks from steaming each other
  • Reheat in the oven: Place on a baking sheet at 375°F for 10 minutes to restore crispness
  • Skip the microwave: It makes the texture mushy-only use if you're adding steaks to a soup or grain bowl
  • Freeze for up to 1 month: Wrap individually in foil, freeze flat, and reheat from frozen at 400°F for 15 minutes

Frequently Asked Questions

How long to cook roasted cauliflower steaks at 425°F?

Roast for 25-30 minutes at 425°F, flipping halfway through if desired. The edges should be golden brown and the center should pierce easily with a fork.

Can I make roasted cauliflower steaks ahead and refrigerate?

Yes, roast steaks up to 3 days ahead and store in an airtight container. Reheat in the oven at 375°F for 10 minutes to restore crispness before serving.

What goes well with roasted cauliflower steaks?

Serve with quinoa, brown rice, or couscous as a base. Top with tahini sauce, chimichurri, or lemon garlic aioli for added flavor.

How do I know when roasted cauliflower steaks are done?

Pierce the center with a fork-steaks are done when tender but still hold their shape. The edges should be golden brown and caramelized.

Can I use frozen cauliflower instead of fresh for steaks?

No, frozen cauliflower is pre-cut into florets and too soft to slice into steaks. Use a fresh head for the best structure and texture.

Roasted Cauliflower Steaks

Roasted Cauliflower Steaks

No ratings yet
Roasted cauliflower steaks offer crispy, caramelized edges with tender centers through high heat roasting at 425°F. This simple recipe emphasizes thick slicing and generous oil coating to achieve perfect texture without complicated prep.
Print Recipe Pin Recipe
Prep Time 10 minutes mins
Cook Time 30 minutes mins
Total Time 40 minutes mins
Servings: 4 servings
Course: Side Dish
Cuisine: American
Ingredients Method Notes

Ingredients
  

  • 1 medium-large cauliflower head trimmed, outer leaves removed, core left intact
  • 4 tablespoons olive oil for brushing both sides of steaks, use regular olive oil for high heat
  • 1 teaspoon salt prefer kosher salt for even seasoning
  • 0.5 teaspoon black pepper freshly ground
  • 1 teaspoon garlic powder sticks better than fresh garlic at high heat
  • 0.5 teaspoon smoked paprika optional, adds subtle smoky flavor
  • 1 tablespoon lemon juice drizzle after roasting to keep bright acidity
  • fresh parsley or thyme chopped, for garnish after roasting

Method
 

  1. Remove outer leaves and trim the stem flat, leaving the core intact. Slice the head vertically into ¾-inch thick steaks starting from the center. Set aside any loose florets for another use.
    1 medium-large cauliflower head
  2. Brush each steak generously with olive oil on both sides (about 1 tablespoon per steak). Evenly sprinkle salt, black pepper, garlic powder, and smoked paprika if using.
    4 tablespoons olive oil, 1 teaspoon salt, 0.5 teaspoon black pepper, 1 teaspoon garlic powder, 0.5 teaspoon smoked paprika
  3. Place steaks on a parchment-lined baking sheet spaced 1-2 inches apart to avoid steaming and ensure browning.
  4. Bake at 425°F for 25-30 minutes. Flip steaks halfway through roasting for even color or skip flipping for extra crisp top side. Roast until edges are golden and centers pierce easily with a fork.
  5. Let the steaks rest on the pan for 5 minutes after roasting. Drizzle with lemon juice and sprinkle with fresh parsley or thyme if desired. Serve immediately to maintain crisp edges.
    1 tablespoon lemon juice, fresh parsley or thyme

Notes

  • Slice steaks ¾-inch thick to avoid drying or crumbling.
  • Generously brush oil on both sides to prevent burnt edges.
  • Leave space on the pan to allow proper roasting instead of steaming.

Tried this recipe?

Let us know how it was!

Homemade Fruit Leather Rolls

January 24, 2026

When you need portable snacks that work for lunchboxes, road trips, or weekend hikes, fruit leather delivers. One sheet pan, a few hours in the oven, and you get chewy rolls that last for weeks.

Homemade Fruit Leather Rolls

The low heat does all the work. You spread pureed fruit thin and let it dry slowly while you do other things.

This is what we make during meal prep when fresh fruit is cheap and we want something healthier than store-bought snacks. Works for camping trips and kids' lunch boxes.

QUICK SUMMARY

Homemade Fruit Leather Rolls turn fresh fruit puree into chewy, portable snacks by spreading it thin on parchment and drying slowly at low heat. The key is even spreading at ⅛ inch thickness so edges and center dry at the same rate. Check after 4 hours - leather should peel clean with a tacky center, not wet or brittle.

⏱️Time reality: 4-6 hours mostly unattended, 15 min prep
🔥First move: Spread puree ⅛ inch thick with offset spatula
⚠️Watch out: Thick spots stay soggy - return to oven to dry more

Why This Recipe Works

Low heat preserves the fresh fruit flavor while slowly evaporating moisture. You spread the puree thin and let physics do the work - no flipping or rotating required.

For something warm that pairs well at snack time, try simple pretzels side dish that bakes while your fruit leather dries.

Quick Reference
⏱️
Prep Time
15 min
🔥
Cook Time
4-6 hours
⏰
Total Time
4-6 hours 15 min
🍽️
Servings
8-10 rolls
📊
Difficulty
Easy
🏷️
Category
Snack
💡
Quick Tip
Spread puree thinly for even drying
🎯
Best For
Meal prep | Kids snack | Camping
  • Uniform thickness matters most - ⅛ inch across the entire pan means everything finishes drying at once without burnt edges or wet centers
  • Lemon juice preserves color and adds tang - 1 tablespoon per 2 cups fruit prevents browning and balances sweetness
  • Low temperature (135-140°F) prevents caramelization - higher heat browns the sugars instead of drying the puree
  • Tacky center signals doneness - edges peel clean from parchment while center feels slightly sticky, not wet
  • Blending pureed fruit creates smooth texture - no chunks or seeds that create uneven drying or tough spots
Quick Tip
Set oven or dehydrator at 135-140°F to avoid browning - check after 4 hours, then every 30 minutes.

What You'll Need

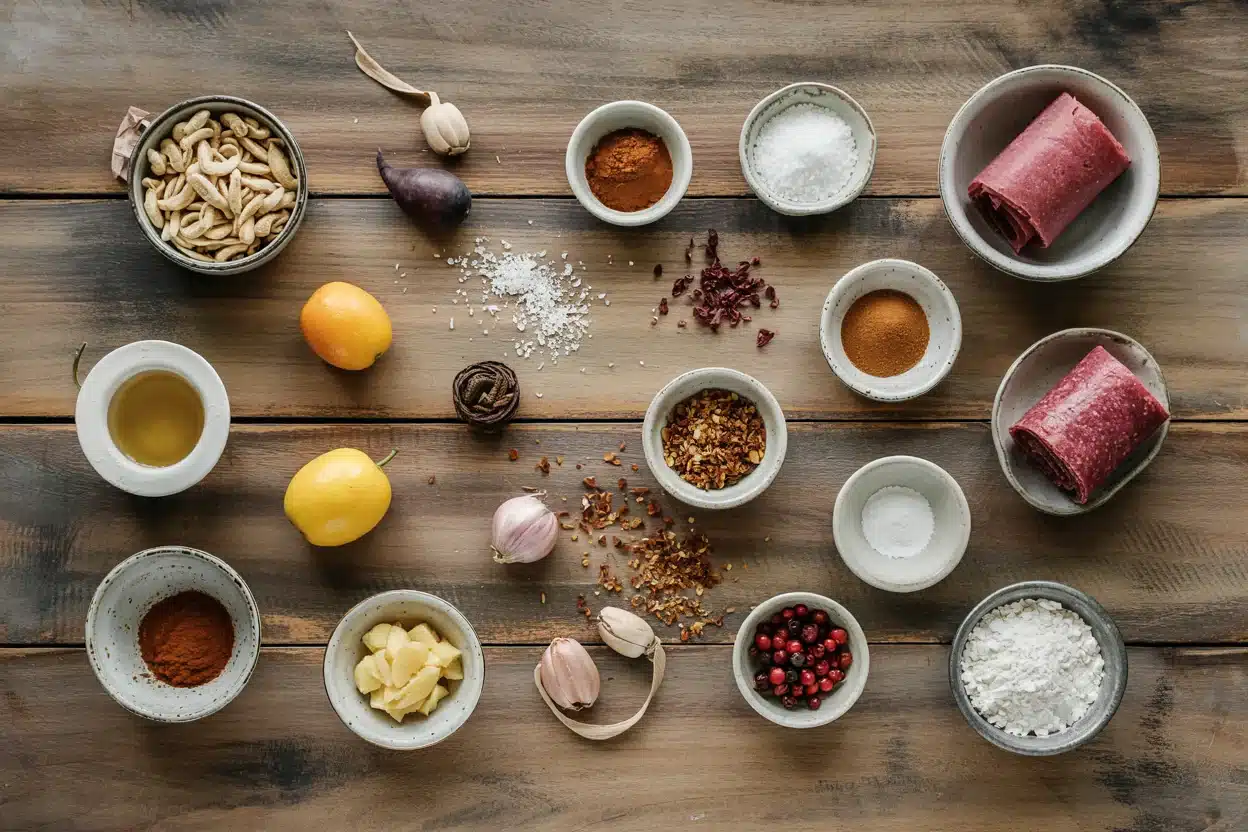
Homemade Fruit Leather Rolls - Homemade Fruit Leather Rolls

Fresh or thawed fruit goes in the blender, then spreads on parchment. Use ripe fruit for natural sweetness that reduces added sugar.

A a warm rice side uses similar rolling technique but skips the long drying time.

🍓
Fruit Base
  • 2-3 cups ripe fruit puree (strawberries, mango, apples, or peaches)
  • 1 tablespoon lemon juice
  • 2-4 tablespoon sweetener (honey, sugar, or agave syrup)
🫙
Optional Thickeners
  • 1 teaspoon pectin or gelatin (for firmer texture)
  • Pinch of salt
  • 1-2 tablespoon water (if puree is too thick)

Ingredient Details

  • Ripe fruit puree
    Use fresh or thawed frozen fruit - avoid excess moisture that delays drying
  • Lemon juice
    Add 1 tablespoon per 2 cups fruit to preserve color and balance sweetness
  • Sweetener
    Start with 2 tablespoon honey or sugar, taste and add more if needed for tart fruits
  • Pectin or gelatin
    Optional thickener improves texture for watery fruits like watermelon or citrus
  • Parchment paper
    Use quality parchment or silicone mat - cheap parchment can stick to finished leather
  • Salt
    Pinch enhances fruit flavor and balances sweetness without tasting salty
  • Water
    Add 1-2 tablespoon to thin very thick purees like banana or applesauce for easier spreading

Ingredient Swaps

Most fruit purees work if you adjust sweetener and drying time. Watery fruits like melon need longer in the oven, dense fruits like banana need thinning.

Four practical swaps:

  • Honey → maple syrup - slightly different flavor, similar moisture, vegan-friendly (1:1 ratio)
  • Fresh fruit → frozen fruit - may add moisture and require 30-60 minutes longer drying time (same amount)
  • Gelatin → pectin or agar agar - vegetarian substitute with similar thickening power (1:1 ratio)
  • Lemon juice → lime juice - similar acidity and preservative effect with different citrus note (1:1 ratio)
Instead Of Use Ratio
Sugar Erythritol (keto) 1:1 (less browning)
Parchment paper Silicone baking mat Direct swap
Fresh fruit Unsweetened applesauce Same amount
Water to thin Apple juice 1:1 (adds sweetness)

Instructions

Blend fruit until smooth, spread thin on parchment, then dry low and slow. Check after 4 hours - edges should peel clean while center stays tacky.

For another snack that rolls like this one, a rich beef on the side cooks unattended while you prep other meals.

  1. Blend pureed fruit until completely smooth - add lemon juice, sweetener, and salt, then blend 30-60 seconds until no chunks remain. Strain through fine-mesh sieve if using seeded berries.

  2. Line baking sheet with parchment paper - use 13x18-inch rimmed sheet pan, smooth parchment flat with no wrinkles that create uneven spots.

  3. Spread puree evenly ⅛ inch thick - pour puree onto parchment, use offset spatula to spread in thin layer, checking edges and center for uniform thickness.

  4. Dry at 135-140°F for 4-6 hours - set oven or food dehydrator to low heat, prop oven door open slightly with wooden spoon if using oven, rotate pan once halfway through.

  5. Test doneness and cool completely - peel corner of leather after 4 hours - should lift clean with tacky center, not wet or brittle. Cool 30 minutes, then roll with parchment and cut into 1-inch strips.

Shortcut
Use a food dehydrator instead of oven - maintains steady 140°F without propping door open and uses less energy.

What to Serve With It

Fruit leather works as standalone snack or paired with protein for balanced energy. Pack it with nuts, cheese, or yogurt for longer-lasting fullness.

If you're planning ahead, check out complete bunless burgers meal ideas for more meal prep combinations.

Side Dish Prep Why It Works How to Serve
Greek yogurt Easy Adds protein and creamy contrast to chewy sweetness Serve 6 oz yogurt with 1-2 fruit leather rolls on top
Cheese slices Easy Salty-savory balances fruit sweetness, adds fat for satiety Pack 1-2 oz cheddar or string cheese with fruit leather
Mixed nuts or trail mix Easy Crunchy texture contrasts with chewy leather, adds protein Serve ¼ cup nuts alongside 1-2 fruit rolls
Fresh fruit salad Easy Refreshing and light pairing with varied textures Serve 1 cup mixed berries or melon with fruit leather
Nut butter Easy Rich, creamy protein pairs with sweet-tart fruit flavors Spread 1-2 tablespoon almond or peanut butter on unrolled leather

Three ways to serve it:

  • Pack in lunchboxes with sandwich and veggies for portable weekday snack
  • Roll around soft cheese stick for sweet-savory combo at parties
  • Cut into small squares for toddler-friendly finger food
Best Pick
Greek yogurt with granola and fruit leather makes a balanced breakfast when you're rushing out the door.

Store and Reheat

Fruit leather stays fresh for weeks if stored properly. Wrap rolls individually to prevent sticking and keep in cool, dry place away from moisture.

When you need more grab-and-go options, simple homemade chicken meal preps just as well for dinner.

Method Time Best For
🍴 Room Temperature 0 min Eating as is - fruit leather ready anytime
🔥 Oven (200°F) 2-3 min Softening leather that became too firm in fridge
📦 Microwave (low) 5-10 sec Quick softening - watch closely to avoid melting

For best results when storing:

  • Wrap each roll individually in plastic wrap or wax paper to prevent sticking together
  • Store wrapped rolls in airtight container at room temperature for 2-3 weeks
  • Refrigerate for 3-4 weeks if kitchen is humid or above 75°F
  • Freeze wrapped rolls up to 6 months - thaw at room temperature 15 minutes before eating
  • Check for mold spots before eating - discard entire batch if any mold appears

Frequently Asked Questions

Can I make fruit leather ahead and how to store it?

Yes - wrap rolls individually in plastic wrap or wax paper, store airtight at room temperature for 2-3 weeks. Refrigerate for 3-4 weeks or freeze up to 6 months for longer storage.

How long do I cook fruit leather at 140°F?

Dry for 4-6 hours at 135-140°F - check after 4 hours by peeling corner, then every 30 minutes. Edges should lift clean while center feels tacky but not wet.

What are signs that fruit leather is done drying?

Edges peel cleanly from parchment without tearing, center feels tacky but not wet or sticky, and leather flexes without cracking. If wet spots remain, dry 30 more minutes.

Why does my fruit leather stick to parchment and how to fix it?

Underdrying causes sticking - return to oven for 30-60 minutes until leather peels clean. Use quality parchment or silicone mat next time, and chill leather 15 minutes before peeling to firm it up.

Can I use applesauce instead of fresh fruit for fruit leather?

Yes - unsweetened applesauce works well and may need less added sweetener. Spread same thickness (⅛ inch) and dry 4-6 hours until tacky center and clean edges.

Homemade Fruit Leather Rolls

Homemade Fruit Leather Rolls

No ratings yet
Homemade Fruit Leather Rolls transform fresh fruit puree into chewy, portable snacks by drying the puree thinly at low heat. The process preserves fresh fruit flavor and produces flexible leather with a tacky center perfect for rolling and storing.
Print Recipe Pin Recipe
Prep Time 15 minutes mins
Cook Time 6 hours hrs
Total Time 6 hours hrs 15 minutes mins
Servings: 9 rolls
Course: Snack
Ingredients Method Notes

Ingredients
  

  • 2 cups fruit puree ripe, fresh or thawed frozen fruit
  • 1 tablespoon lemon juice to preserve color and add tang
  • 2 tablespoons sweetener honey, sugar, or agave syrup
  • 1 teaspoon pectin or gelatin optional thickener for firmer texture
  • 1 pinch salt enhances fruit flavor
  • 1 tablespoon water optional; to thin thick puree like banana

Method
 

  1. Blend fruit until completely smooth, adding lemon juice, sweetener, salt, and optional thickener. Continue blending 30-60 seconds until no chunks remain. Strain if using seeded berries.
    2 cups fruit puree, 1 tablespoon lemon juice, 2 tablespoons sweetener, 1 teaspoon pectin or gelatin, 1 pinch salt
  2. Line a 13x18-inch rimmed baking sheet with parchment paper, smoothing out wrinkles to avoid uneven drying.
  3. Pour the puree onto the parchment and spread evenly to about ⅛ inch thick using an offset spatula, ensuring uniform thickness across edges and center.
    2 cups fruit puree
  4. Dry in an oven or food dehydrator set to 135-140°F for 4-6 hours. If using an oven, prop the door slightly open with a wooden spoon and rotate the pan halfway through drying time.
  5. Check after 4 hours by peeling a corner; leather should lift cleanly with a tacky center, not wet or brittle. If not done, continue drying checking every 30 minutes. Once done, cool 30 minutes.
  6. Roll the cooled fruit leather with the parchment, then cut into 1-inch strips for convenient snack rolls.

Notes

  • Spread puree uniformly ⅛ inch thick to ensure even drying without burnt edges.
  • Add lemon juice to preserve color and balance sweetness.
  • Dry at low temperature (135-140°F) to prevent browning and caramelization.

Tried this recipe?

Let us know how it was!

Cinnamon Apple Chips

January 24, 2026

Baking thin apple slices at 225°F with a light cinnamon-sugar coating produces crispy chips in under two hours.

The low temperature dehydrates the fruit while caramelizing the natural sugars, creating snappy edges without burning.

Cinnamon Apple Chips

A mandoline slicer cuts uniform ⅛-inch slices that bake evenly. Soaking them briefly in lemon water prevents browning and adds subtle brightness.

Make these for meal prep, weeknight snacking, or when you need a budget-friendly treat that works for kids' lunchboxes.

QUICK SUMMARY

Cinnamon Apple Chips are thin apple slices baked low and slow until crispy. The key is uniform slicing and patient baking at 225°F - rushing the temperature causes burnt edges while the centers stay soggy. Choose firm apples like Granny Smith or Honeycrisp for chips that snap cleanly without bending.

⏱️Time Reality: 15 minutes prep, then 1.5-2 hours unattended baking time
🔪Critical First Step: Slice apples ⅛ inch thin with mandoline for even cooking
⚠️Watch Out: Slices too thick stay chewy - test by snapping a cooled chip cleanly

Why This Recipe Works

Low oven temperature removes moisture without scorching the natural sugars. Firm apples hold their structure during the long bake, while the cinnamon-sugar coating caramelizes into a thin, crispy shell. For another snack that uses simple pantry staples, try this a simple buddies side that requires no baking at all.

Quick Reference
⏱️
Prep Time
15 min
🔥
Cook Time
1.5-2 hours
⏰
Total Time
1 hr 45 min - 2 hr 15 min
🍽️
Servings
4-6 servings
📊
Difficulty
Easy
🏷️
Category
Snack | Dessert
💡
Quick Tip
Slice apples ⅛ inch thin for crisp chips
🎯
Best For
Weeknight | Meal prep | Budget

Success markers you can see:

  • Slices are uniform thickness - a mandoline ensures every piece bakes at the same rate
  • Edges turn golden brown without black spots - this means sugars caramelized without burning
  • Chips snap cleanly when cooled - any bend means they need more time
  • No moisture beads on the surface - fully dehydrated chips stay crispy in storage
  • Spacing between slices prevents steaming - overlapping creates soggy patches
Quick Tip
Flip slices halfway through baking to dry both sides evenly and prevent curling at the edges.

What You'll Need

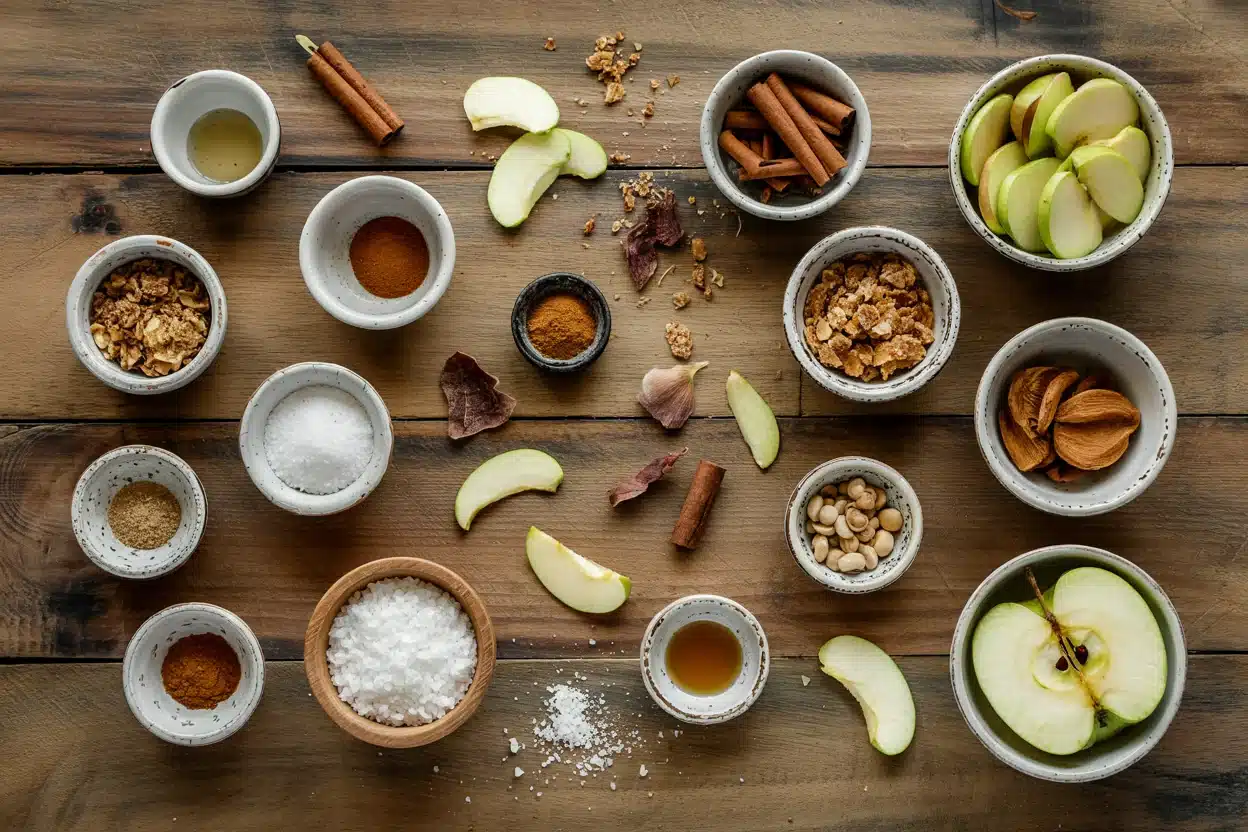
Cinnamon Apple Chips - Cinnamon Apple Chips

Firm apples are non-negotiable - soft varieties turn mushy instead of crispy. The lemon water soak takes seconds but prevents the browning that makes chips look unappetizing. If you want a savory snack with similar crispiness, check out this smoky pork recipe that uses a different cooking method entirely.

🍎
Base
  • 4-5 firm apples (Granny Smith, Honeycrisp, or Fuji)
  • 2 cups water
  • 1 tablespoon lemon juice
🌶️
Coating
  • 2 teaspoon ground cinnamon
  • 2 tablespoon granulated sugar
  • Pinch of salt (optional)
🫙
Optional
  • ½ teaspoon vanilla extract

Ingredient Details

  • Apples
    Choose firm varieties - Granny Smith adds tartness, Honeycrisp brings natural sweetness, Fuji balances both.
  • Cinnamon
    Mix with sugar before sprinkling to distribute evenly and avoid clumps that taste bitter.
  • Lemon juice
    Prevents oxidation - dilute with water so the acid doesn't overpower the apple flavor.
  • Sugar
    Granulated works best for even caramelization; omit entirely for unsweetened chips.
  • Mandoline slicer
    Set to ⅛ inch (3 mm) for uniform thickness - a knife creates uneven slices that bake inconsistently.
  • Parchment paper
    Prevents sticking without added fat; silicone mats work equally well and are reusable.
  • Wire rack
    Cooling on a rack sets the crispness faster by allowing air circulation on all sides.

Ingredient Swaps

Different apple varieties change the flavor profile - tart Granny Smiths need more sugar, while sweet Honeycrisps can skip it entirely. Brown sugar adds molasses notes that pair well with cinnamon, but it darkens the chips faster. If you're looking for more meatless meal ideas that use simple produce, start there for weeknight inspiration.

Four swaps that work:

  • Coconut sugar for granulated sugar - Use 1:1 ratio, expect darker color and subtle caramel taste
  • Pear slices for apples - Sweeter flavor, softer texture, reduce baking time by 15-20 minutes
  • Pumpkin spice blend for cinnamon - Use 1.5 teaspoon blend for more complex spice notes
  • Food dehydrator for oven - Set to 135°F, extend time to 6-8 hours for consistent drying
Instead Of Use Ratio
Lemon juice Apple cider vinegar diluted 1 tablespoon vinegar + 2 cups water
Oven baking Food dehydrator 135°F for 6-8 hours
Granulated sugar Stevia or erythritol Follow package conversion
Apples Fuyu persimmon Slice thinner, reduce time

Instructions

The entire process takes 15 minutes of active work. Slice uniformly, space properly, and let time do the rest. Flipping halfway ensures both sides crisp evenly without curling.

  1. Slice and soak: Cut apples ⅛ inch thin using a mandoline, then soak slices in lemon water (1 tablespoon lemon juice + 2 cups water) for 5 minutes to prevent browning.

  2. Coat with cinnamon sugar: Pat slices dry with paper towels, then toss with mixed cinnamon and sugar (2 teaspoon cinnamon + 2 tablespoon sugar) until lightly coated.

  3. Arrange on baking sheet: Line sheet with parchment paper, then arrange slices in a single layer with ½ inch gaps between each piece to prevent steaming.

  4. Bake low and slow: Set oven to 225°F and bake for 1 hour, then flip each slice and continue baking 30-60 minutes until edges are golden and surfaces are dry.

  5. Cool completely: Transfer chips to a wire rack and cool 10 minutes - they crisp further as they cool and moisture evaporates.

Golden Rule
Test doneness by breaking a cooled chip - it should snap cleanly without any bend or moisture.

What to Serve With It

Cinnamon apple chips work as a standalone snack or paired with creamy dips that balance the sweetness. The crispy texture contrasts with soft cheeses or yogurt, while nutty spreads add richness. For a protein-forward meal that needs a light side, this tender shrimp recipe keeps the plate interesting without competing flavors.

Side Dish Prep Why It Works How to Serve
Greek yogurt Easy Tangy contrast to sweet chips, adds protein Serve in bowl with chips for dipping
Sharp cheddar slices Easy Salty-sweet pairing, balances cinnamon spice Arrange on plate with chips for snacking
Almond butter Easy Rich, nutty flavor, adds healthy fats Use as dip or spread on chips
Caramel sauce Medium Classic pairing, amplifies sweetness Drizzle over chips or serve in ramekin
Spiced herbal tea Easy Warming beverage complements cinnamon Serve hot alongside chips

Three ways to serve it:

  • Snack plate: Arrange chips with cubed cheese, roasted nuts, and honey drizzle for variety in texture and flavor
  • Dessert topper: Crumble chips over vanilla ice cream or yogurt parfaits for added crunch and spice
  • Lunchbox addition: Pack in small container with nut butter for a portable snack that stays crisp
Best Pick
Maple yogurt dip brings tangy sweetness that complements the cinnamon without adding excessive sugar.

Store and Reheat

Store chips in an airtight container with a paper towel to absorb any residual moisture. They stay crispy for 3-5 days at room temperature. If you need a side that pairs with heartier mains, try this quick potatoes dish that works for cold-weather dinners.

Method Time Best For
🔥 Oven 5-7 min at 250°F Restoring crispness to stored chips without drying
💨 Air fryer 3-4 min at 300°F Quick crisping when you need immediate texture
📦 Microwave Not recommended Causes sogginess, ruins texture completely

For best results when storing:

  • Cool chips completely before sealing - trapped heat creates condensation that softens texture
  • Add a paper towel to the container to absorb ambient moisture during storage
  • Store at room temperature in pantry - fridge adds moisture that causes sogginess
  • Use silicate packs if storing longer than 3 days to maintain crispness
  • Freeze in single layer on parchment, then transfer to freezer bag for up to 1 month

Frequently Asked Questions

How long to cook cinnamon apple chips at 225°F?

Bake for 1.5-2 hours total, flipping halfway through. Chips are done when edges are golden and surfaces feel dry with no moisture beads.

Can I make cinnamon apple chips ahead and store?

Yes - store in airtight container with paper towel for 3-5 days at room temperature. Re-crisp in oven at 250°F for 5 minutes if needed.

What goes well with cinnamon apple chips as a snack?

Greek yogurt, sharp cheddar cheese, almond butter, or caramel sauce all pair well. The tangy or salty contrast balances the sweet cinnamon coating.

How do I know when cinnamon apple chips are done and crispy?

Test by breaking a cooled chip - it should snap cleanly without bending. Edges should be golden with no moisture on the surface.

Can I use red apples instead of green for apple chips?

Yes - red apples like Fuji or Honeycrisp work well and add natural sweetness. You may need less added sugar compared to tart Granny Smiths.

Cinnamon Apple Chips

Cinnamon Apple Chips

No ratings yet
Cinnamon Apple Chips are thinly sliced apples baked slowly at a low temperature until crispy, coated lightly with cinnamon and sugar. Uniform slicing with a mandoline and patient baking at 225°F create perfectly crispy, snap-worthy chips without burning.
Print Recipe Pin Recipe
Prep Time 15 minutes mins
Cook Time 1 hour hr 45 minutes mins
Total Time 2 hours hrs
Servings: 5 servings
Course: Dessert, Snack
Cuisine: American
Ingredients Equipment Method Notes

Ingredients
  

  • 4 - apple firm variety like Granny Smith, Honeycrisp, or Fuji
  • 2 cups water
  • 1 tablespoon lemon juice for soaking apple slices to prevent browning
  • 2 teaspoon ground cinnamon mixed with sugar for coating
  • 2 tablespoon granulated sugar for coating with cinnamon
  • 0.5 teaspoon vanilla extract optional, for additional flavor
  • pinch - salt optional, to balance sweetness

Equipment

  • Mandoline slicer Use to slice apples uniformly to ⅛ inch thickness
  • Baking sheet For arranging apple slices in single layer
  • Parchment paper Prevents sticking of apple slices during baking
  • Wire rack To cool chips and allow air circulation for crisping

Method
 

  1. Cut apples into ⅛-inch thin slices using a mandoline slicer. Soak slices in a mixture of 1 tablespoon lemon juice and 2 cups water for 5 minutes to prevent browning.
    4 - apple, 2 cups water, 1 tbsp lemon juice
  2. Pat apple slices dry with paper towels. In a bowl, combine ground cinnamon and granulated sugar, then toss the dry slices with this mixture until lightly coated.
    2 tsp ground cinnamon, 2 tbsp granulated sugar
  3. Line a baking sheet with parchment paper. Arrange apple slices in a single layer, leaving about ½ inch gap between each slice to prevent steaming.
  4. Preheat oven to 225°F (107°C). Bake the apple slices for 1 hour, then flip each slice carefully. Continue baking for another 30 to 60 minutes, until the edges are golden and surfaces are dry without moisture beads.
  5. Transfer the baked apple chips to a wire rack and let cool for at least 10 minutes. The chips will crisp further as they cool. Test for doneness by breaking a cooled chip; it should snap cleanly without bending.

Notes

  • Use a mandoline slicer set to ⅛ inch for uniform slices to ensure even baking.
  • Flip apple slices halfway through baking to dry both sides and prevent curling.
  • Store chips in an airtight container with a paper towel at room temperature for 3-5 days to maintain crispness.

Tried this recipe?

Let us know how it was!

15 Easy Sides for Baked Potatoes (Quick Ideas)

January 24, 2026

Baked potatoes bring fluffy texture, crispy skin, and starchy comfort-but the plate needs protein, vegetables, and balance. The potato delivers warmth and substance without much else.

15 Easy Sides for Baked Potatoes (Quick Ideas)

We build the meal around what's missing: something juicy, something green, something sharp to cut through richness. Grilled meats add savory protein, roasted vegetables provide color and texture, and bright salads refresh between bites.

QUICK SUMMARY

Baked potatoes are creamy and mild, so they need protein and vegetables to complete the plate. Grilled chicken adds juicy savory notes, roasted broccoli brings crisp green freshness, and Caesar salad delivers tangy crunch that balances the starchy base.

🍗Add protein: Grilled chicken, pork chops, salmon
🥗Bring freshness: Caesar salad, arugula, mixed greens
⏱️Fastest option: Sautéed spinach (10 minutes)

What to Serve With Baked Potatoes: 15 Easy Sides

These 15 sides bring protein, vegetables, and bright flavors to complete your baked potato meal.

# Side Dish Best For Prep
1 Lemon Herb Grilled Chicken Breast ✨ Any Night ✅ Easy
2 Garlic Butter Roasted Broccoli Florets 🌙 Weeknight ✅ Easy
3 Classic Caesar Salad with Shaved Parmesan ✨ Any Night ✅ Easy
4 Honey Dijon Pan-Seared Pork Chops 🌙 Weeknight ⚡ Medium
5 Roasted Carrot and Beet Medley ✨ Any Night ⚡ Medium
6 Sour Cream and Chive Dip ✨ Any Night ✅ Easy
7 Garlic and Herb Butter Dinner Rolls 🎉 Hosting ⚡ Medium
8 Grilled Rosemary Lemon Salmon Fillets 🌙 Weeknight ✅ Easy
9 Fresh Arugula and Parmesan Salad ✨ Any Night ✅ Easy
10 Smoky Paprika Roasted Sweet Potatoes ✨ Any Night ⚡ Medium
11 Herbed Mushroom Cream Sauce ✨ Any Night ✅ Easy
12 Warm Spinach and Garlic Sauté 🌙 Weeknight ✅ Easy
13 BBQ Pulled Beef Sliders 🎉 Hosting ⚡ Medium
14 Simple Mixed Green Salad with Vinaigrette ✨ Any Night ✅ Easy
15 Bacon and Cheddar Twice Baked Potatoes 🎉 Hosting 🔪 Involved

1. Lemon Herb Grilled Chicken Breast

Bright citrus notes and savory charred edges bring juicy protein to the plate. The chicken stays tender when you marinate for at least 30 minutes before grilling.

Slice the breast on a diagonal after resting for five minutes to keep moisture inside. Serve juicy chicken breast on the side when you want lean protein that cooks fast.

Quick Tip
Pound chicken to even thickness before marinating so it cooks uniformly on the grill.

2. Garlic Butter Roasted Broccoli Florets

Roasted florets turn tender with crispy edges that catch butter and garlic. Spread broccoli evenly on the baking sheet so every piece gets direct heat.

A few notes:

  • Cut florets evenly - Uniform size ensures everything finishes at the same time.
  • Roast at 425°F - High heat creates caramelized edges without steaming the broccoli.

The garlic toasts without burning when you toss it with olive oil first. Add a bright broccoli florets side dish when you need green vegetables that roast in 20 minutes.

3. Classic Caesar Salad with Shaved Parmesan

Crisp romaine and tangy dressing cut through the creamy potato. Fresh romaine holds its crunch better than pre-bagged lettuce.

Homemade dressing tastes sharper and creamier than bottled versions. Shave parmesan with a vegetable peeler for thin ribbons that melt on your tongue.

If You Want Try This
Extra crunch Add homemade croutons toasted in olive oil
More protein Top with grilled chicken strips
Anchovy-free Use Worcestershire sauce for umami depth

4. Honey Dijon Pan-Seared Pork Chops

Juicy meat with a tangy-sweet glaze adds rich protein. Sear over high heat to create a golden crust that seals in moisture.

  • Pat chops dry first - Moisture prevents browning.
  • Let rest five minutes - Juices redistribute instead of running out.
  • Use bone-in chops - They stay juicier than boneless cuts.

The glaze thickens in the pan after you remove the meat. For comforting pork dinner options that work with potatoes, this delivers in 30 minutes.

Our Pick
Bone-in pork chops stay tender and cook evenly when seared at medium-high heat.

5. Roasted Carrot and Beet Medley

Earthy sweetness and bright colors bring vegetables to the plate. Toss vegetables in olive oil before roasting so edges caramelize without sticking.

What to know:

  • Cut to similar size - Carrots and beets roast evenly when pieces match.
  • Roast at 400°F - Lower heat steams instead of caramelizing.
  • Add fresh herbs after - Rosemary or thyme burn in the oven.

The natural sugars concentrate as moisture evaporates. Try fresh beet medley we love when you need root vegetables that add color and nutrition.

Roasted

Works for: Caramelized edges and concentrated flavor

Skip if: You need something ready in under 20 minutes

Steamed

Works for: Quick prep and tender texture

Skip if: You want crispy edges and deeper flavor

6. Sour Cream and Chive Dip

Zesty creaminess enhances the potato without overwhelming it. Mix fresh chives just before serving so they stay bright green.

Keep in mind:

  • Use full-fat sour cream - Low-fat versions turn thin and watery.
  • Add garlic powder - Fresh garlic can taste too sharp.

The dip thickens after 30 minutes in the fridge as flavors meld. Serve this zesty side dish recipe when you want something cold that takes 10 minutes.

7. Garlic and Herb Butter Dinner Rolls

Soft bread with buttery herbs soaks up any sauce or melted cheese from the potato. Brush rolls with herb butter while warm so it melts into the crust.

  • Warm before serving - Cold rolls turn dense and chewy.
  • Use fresh herbs - Dried herbs lack the bright flavor.
  • Melt butter completely - Softened butter clumps instead of coating evenly.
  • Brush generously - The butter creates golden color and flavor.

The rolls stay soft when you store them in a covered basket. For our favorite dinner rolls side, these work for weeknight dinners or holiday meals.

Method Time Best For
Bake fresh 40 minutes Special occasions when you want homemade flavor
Store-bought + butter 10 minutes Weeknight meals when time is tight
Make ahead + reheat 5 minutes Hosting when you need less active cooking

8. Grilled Rosemary Lemon Salmon Fillets

Flaky fish with bright citrus and herby notes adds lean protein. Grill skin-side down first so the flesh stays moist.

Fresh rosemary sprigs on the grill add smoky aroma without overpowering the fish. The lemon cuts through any richness on the plate.

Shortcut
Use a fish basket to flip salmon without breaking the fillets apart.

9. Fresh Arugula and Parmesan Salad

Peppery greens with sharp cheese bring crisp freshness. Dress just before serving so arugula stays perky instead of wilting.

  • Use lemon juice - The acidity balances peppery arugula.
  • Shave parmesan thin - Thick chunks overpower the greens.
  • Add olive oil last - Toss greens in lemon first for even coating.
  • Serve immediately - Dressed arugula wilts in minutes.

The peppery bite contrasts with creamy potato toppings. Try fresh parmesan salad on the side when you need something light that takes 10 minutes.

Golden Rule
Dress arugula at the last possible moment to prevent soggy greens.

10. Smoky Paprika Roasted Sweet Potatoes

Sweet, smoky wedges add color and root vegetable contrast. Cut evenly so all pieces finish at the same time.

A few notes:

  • Use smoked paprika - Regular paprika lacks the depth.
  • Flip halfway through - Both sides caramelize for crispy edges.
  • Roast at 425°F - Lower heat steams instead of crisping.

The natural sugars caramelize as the potatoes roast. Serve a crisp paprika potatoes side dish when you want something sweet that balances savory toppings.

If You Want Try This
Extra smoky flavor Add chipotle powder with the paprika
Crispy edges Spread potatoes in single layer with space between
Faster cooking Cut into smaller wedges to reduce roasting time

11. Herbed Mushroom Cream Sauce

Rich umami depth with velvety texture enhances the potato without competing. Cook mushrooms until golden so they release moisture and concentrate flavor.

What to know:

  • Use mixed mushrooms - Cremini, shiitake, and button add complexity.
  • Don't crowd the pan - Overcrowding steams instead of browning.
  • Add cream at the end - High heat can break the sauce.
  • Simmer to thicken - The sauce reduces and coats the back of a spoon.

Fresh thyme or rosemary brightens the earthy mushrooms. Pour tangy cream sauce on the side when you want something rich that takes 15 minutes.

Watch Out
Do not boil the cream sauce or it will separate and turn grainy.

12. Warm Spinach and Garlic Sauté

Tender greens with garlicky punch add quick vegetables. Cook just until wilted so spinach stays bright green.

Fresh spinach wilts down to about one-third its raw volume. The garlic toasts in olive oil before you add the greens for deeper flavor without harshness.

Fresh Spinach

Works for: Bright color and tender texture in minutes

Skip if: You need something that holds up longer on the table

Frozen Spinach

Works for: Budget-friendly option with longer shelf life

Skip if: You want fresh flavor and bright green color

13. BBQ Pulled Beef Sliders

Smoky, tender meat on soft mini buns brings hearty protein. Serve on small rolls so guests can enjoy multiple flavors without filling up.

Keep in mind:

  • Shred while warm - Cold meat tears instead of pulling apart.
  • Toast the buns - Prevents them from getting soggy.

The smoky sauce complements any savory potato toppings. For satisfying beef meals we love, these work for casual gatherings where you want easy finger food.

Quick Tip
Warm the beef in its sauce before assembling sliders so the meat stays moist.

14. Simple Mixed Green Salad with Vinaigrette

Crisp greens with bright lemon dressing refresh the palate. Use a mix of textures-romaine for crunch, butter lettuce for softness, radicchio for color.

The vinaigrette should taste sharp and acidic to cut through creamy potato toppings. Whisk lemon juice and olive oil just before serving for the brightest flavor.

Method Time Best For
Homemade vinaigrette 5 minutes Fresh bright flavor you control
Store-bought dressing 1 minute Quick weeknight meals
Pre-washed greens 2 minutes Minimal prep when time is short

15. Bacon and Cheddar Twice Baked Potatoes

Double the richness with crispy bacon and sharp cheese. Scoop out potato flesh gently so skins stay intact for refilling.

Mash the filling with butter and sour cream before adding cheese and bacon. The mixture bakes until golden on top and creamy inside.

Our Pick
Sharp cheddar delivers more flavor than mild cheese without using as much.

Here are answers to common questions about serving sides with baked potatoes.

Frequently Asked Questions

What are the best toppings to put on baked potatoes?

Sour cream, shredded cheddar, crispy bacon, chives, and butter create classic combinations that balance creamy texture with salty richness.

How do I make baked potato skins crispy?

Rub the skin with olive oil and salt before baking at 400°F directly on the oven rack for one hour without wrapping in foil.

What protein goes well with baked potatoes?

Grilled chicken, pan-seared pork chops, salmon fillets, and pulled beef add savory protein that goes with the starchy base.

Can I prep baked potatoes ahead of time?

Bake potatoes fully, then reheat at 350°F for 15 minutes wrapped in foil to restore heat without drying out the inside.

What vegetables pair best with baked potatoes?

Roasted broccoli, sautéed spinach, roasted carrots, and fresh salads add color, nutrition, and texture contrast to the creamy potato.

Sides for Baked Potatoes (Quick Ideas)

15 Easy Sides for Baked Potatoes (Quick Ideas)

No ratings yet
We provide a list of 15 sides that complete a baked potato meal by adding protein, vegetables, and bright flavors. The list offers variety in textures, temperatures, and effort levels, helping create balanced and flavorful plates around the creamy, starchy base.
Print Recipe Pin Recipe
Prep Time 15 minutes mins
Cook Time 10 minutes mins
Total Time 25 minutes mins
Servings: 4 servings
Course: Dinner, Side Dish
Cuisine: American
Ingredients Equipment Method Notes

Ingredients
  

  • Lemon Herb Grilled Chicken Breast juicy
  • Garlic Butter Roasted Broccoli Florets crispy
  • Classic Caesar Salad with Shaved Parmesan tangy
  • Honey Dijon Pan-Seared Pork Chops tangy-sweet
  • Roasted Carrot and Beet Medley vibrant
  • Sour Cream and Chive Dip zesty
  • Garlic and Herb Butter Dinner Rolls buttery
  • Grilled Rosemary Lemon Salmon Fillets bright
  • Fresh Arugula and Parmesan Salad crisp
  • Smoky Paprika Roasted Sweet Potatoes smoky
  • Herbed Mushroom Cream Sauce velvety
  • Warm Spinach and Garlic Sauté garlicky
  • BBQ Pulled Beef Sliders smoky
  • Simple Mixed Green Salad with Vinaigrette bright
  • Bacon and Cheddar Twice Baked Potatoes crispy

Equipment

  • Sheet pan for roasting vegetables
  • Mixing bowl for salads and dips
  • Cutting board
  • Serving platter

Method
 

  1. Assess what the main dish already provides-if it has starch, focus on vegetables and fresh sides.
  2. Choose 2-3 sides that fill different gaps: one vegetable, one starch or bread, one sauce or dip.
  3. Start the longest-cooking side first. Prep quick items like salads while the oven works.
  4. Balance temperatures-pair hot roasted vegetables with a cold slaw or chilled dip.
  5. Plate the main dish with sides arranged around it. Drizzle sauce or add garnish last.

Notes

Add a fresh salad or bright vegetable and keep it chilled or separate until serving. This prevents the plate from feeling too heavy or bland when paired with creamy baked potatoes.

Tried this recipe?

Let us know how it was!

7 Best Substitutes for Amaranth Flour in Gluten-Free Baking

January 24, 2026

You measured out amaranth flour for the muffin batter and realized halfway through there's only half a cup left. The recipe calls for two cups, and the texture depends on that fine, protein-rich structure amaranth brings.

7 Best Substitutes for Amaranth Flour in Gluten-Free Baking

The swap you pick depends on Gluten-free flours vary in protein, starch, and how they absorb liquid, so matching the role matters more than the name.

Quick Substitute Reference
# Substitute Best For Ratio Key Note
1 Quinoa Flour 🥧 Baking 1:1 Earthy and nutty
2 Buckwheat Flour 🍳 Cooking 1:1 bold, slightly bitter
3 Rice Flour ✨ Both 1:1 Mild and neutral
4 Tapioca Flour 🥧 Baking ½ cup per 1 cup Adds chewiness
5 Chickpea Flour 🍳 Cooking 1:1 Earthy, dense
6 Almond Flour 🥧 Baking 1:1 Sweet, nutty
7 Oat Flour 🥧 Baking 1:1 Mildly sweet
QUICK SUMMARY

Quinoa flour and buckwheat flour offer the best protein and flavor match for amaranth. Prioritize texture and flavor when choosing a substitute. For lighter baked goods, add a binding agent like xanthan gum to improve structure.

🌱Closest match: Quinoa flour adds protein and structure similar to amaranth flour.
⚖️Ratio + fix: Swap 1:1; add xanthan gum for better binding if needed.
⚠️Watch out: Tapioca flour alone can cause gummy texture without protein support.

7 Top Amaranth Flour Alternatives That Hold Up

Each substitute below fills the role of amaranth flour in a slightly different way. Some work better for baking structure, others for thickening sauces or adding protein to flatbreads.

1 - Quinoa Flour

Quinoa flour delivers a similar protein boost and works well in gluten-free breads. The flavor runs earthier and slightly stronger than amaranth, so it stands out in mild batters.

Use a 1:1 swap in most recipes. The texture holds up in muffins, pancakes, and quick breads without extra binders.

Texture varies between grains. If you're also out of quinoa flour, tested Quinoa Flour replacements cover options that absorb liquid similarly.

Skip if: You need a neutral flavor or the recipe calls for a delicate crumb.

Quinoa Flour

Works for: High-protein gluten-free baking

Skip if: Flavor needs to stay mild

Amaranth Flour

Works for: Neutral protein-rich structure

Skip if: You need a slightly sweet note

2 - Buckwheat Flour

Buckwheat brings a bold, slightly bitter taste that pairs well with hearty pancakes and savory baked goods. The flavor dominates in delicate pastries, so save this for recipes with molasses, chocolate, or spices.

Swap 1:1 and expect a denser crumb. The flour absorbs moisture quickly, so watch the batter consistency and add liquid in small amounts if it thickens too much.

Skip if: The recipe needs a light, airy texture or subtle flavor.

3 - Rice Flour

Rice flour keeps the flavor mild and works in both baking and thickening applications. The texture runs lighter than amaranth, so baked goods may turn out slightly more crumbly without added xanthan gum or a binding agent.

Use a 1:1 ratio in most recipes. For sauces or gravies, whisk it into cold liquid first to prevent clumping.

Don't have rice flour either? The simple Rice Flour substitutes list includes swaps that thicken and bake without changing flavor much.

Skip if: You need extra structure or the recipe relies on protein content.

Best Pick
Rice flour works across the widest range of recipes without adding strong flavors or altering texture dramatically.

4 - Tapioca Flour

Tapioca flour adds chewiness and crispness but lacks the protein amaranth provides. Use it as part of a blend rather than a standalone replacement to avoid gummy results.

  • Replace half the amaranth flour with tapioca for improved texture.
  • Works well in pie crusts, flatbreads, and pizza dough where chew matters.

Missing tapioca flour too? The Tapioca Flour alternatives to try page covers starches that add elasticity without protein.

Skip if: The recipe depends on protein for structure or rise.

5 - Chickpea Flour

Chickpea flour delivers density and a mild bean flavor that works in savory baking and batters. The earthy taste makes it less suitable for sweet baked goods, but it shines in flatbreads, fritters, and omelets.

Use a 1:1 swap in recipes where the flavor won't clash. The flour absorbs liquid quickly, so add water or milk gradually to avoid a thick, pasty batter.

Use Ratio Notes
Savory pancakes 1:1 Add water slowly to control thickness
Fritters or pakoras 1:1 Flavor complements spices and vegetables
Sweet baking Not recommended Bean flavor overpowers mild ingredients

Legumes cook at different speeds. If chickpea flour isn't available either, common Chickpea swaps ranked includes protein-rich options that hold their shape.

Skip if: The recipe needs a neutral or sweet flavor.

6 - Almond Flour

Almond flour adds richness and a sweet, nutty flavor that works well in moist cakes and cookies. The texture runs denser than amaranth, and the flour doesn't provide the same protein structure for yeast breads or light pastries.

Use a 1:1 swap in recipes where moisture and richness improve the result. The higher fat content in almond flour keeps baked goods tender but can weigh down recipes that need lift.

Out of almonds too? The page covering instead of Almonds try these includes nut-free and seed-based swaps for similar richness.

Skip if: You're making yeast breads or need a light, airy crumb.

Watch Out
Almond flour browns faster than amaranth. Lower the oven temperature by 25°F to prevent over-browning.

7 - Oat Flour

Oat flour brings a mildly sweet, creamy texture that works in cookies, muffins, and pancakes. The flavor stays neutral enough for most recipes, but the flour may contain trace gluten if not certified gluten-free.

Swap 1:1 in recipes that don't need significant rise. The flour absorbs moisture quickly, so adjust liquid amounts if the batter thickens too much during mixing.

Skip if: You have severe gluten sensitivity or the recipe needs a strong protein structure.

Golden Rule
When swapping amaranth flour, match the recipe's main function first-structure, thickening, or protein content-before flavor.

Final Thoughts on Swapping Amaranth Flour

Most of these swaps work without major adjustments, but the best choice depends on what you're making. For baking that needs protein and structure, quinoa flour comes closest.

For thickening or recipes where flavor stays mild, rice flour handles the job without complications.

  • Closest match - Quinoa flour for protein-rich baking
  • Easiest grab - Rice flour for neutral, flexible use
  • Dietary option - Oat flour for mild sweetness in gluten-light recipes

Frequently Asked Questions

Can I use regular all-purpose flour instead of amaranth flour?

All-purpose flour contains gluten and behaves differently in recipes. Use it only if gluten isn't a concern, and expect a lighter texture with less protein. Start with a 1:1 swap and add liquid gradually.

Does amaranth flour taste different from these substitutes?

Amaranth flour has a mild, slightly nutty flavor. Quinoa and buckwheat taste earthier, while rice flour stays more neutral. Almond flour adds sweetness, and chickpea flour brings a bean-like note.

Can I mix amaranth flour substitutes together?

Yes. Blending rice flour with tapioca flour or almond flour balances texture and flavor. Start with equal parts and adjust based on the recipe's needs.

Which substitute works best for gluten-free baking?

Quinoa flour and rice flour both work well in gluten-free baking. Quinoa provides more protein for structure, while rice flour keeps the flavor neutral. Add a binder like xanthan gum if the recipe needs extra hold.

Can I use amaranth flour substitutes for thickening sauces?

Rice flour and tapioca flour work best for thickening. Whisk either into cold liquid before adding to hot sauces to prevent clumping. Use half the amount you would with cornstarch.

7 Best Substitutes for Amaranth Flour in Gluten-Free Baking

7 Best Substitutes for Amaranth Flour

No ratings yet
This guide helps you choose the right amaranth flour substitute based on your recipe's needs. Understand ratios and flavor profiles for baking or thickening, ensuring the best texture and taste.
Print Recipe Pin Recipe
Prep Time 7 minutes mins
Cook Time 5 minutes mins
Total Time 12 minutes mins
Servings: 6 servings
Course: Baking, Cooking
Cuisine: Gluten-Free
Ingredients Method Notes

Ingredients
  

  • 1 cup Quinoa Flour 1:1 ratio to substitute amaranth flour in baking; earthier and nutty flavor
  • 1 cup Buckwheat Flour 1:1 ratio, best for cooking; robust and slightly bitter flavor
  • 1 cup Rice Flour 1:1 ratio, suitable for both baking and thickening; mild and neutral flavor
  • 0.5 cup Tapioca Flour Use half cup tapioca flour per 1 cup amaranth; adds chewiness and crispness
  • 1 cup Chickpea Flour 1:1 ratio for savory baking; earthy and dense flavor
  • 1 cup Almond Flour 1:1 ratio for moist cakes and cookies; sweet and nutty flavor
  • 1 cup Oat Flour 1:1 ratio for baking; mildly sweet and creamy texture

Method
 

  1. Determine the primary function of amaranth flour in your recipe: baking structure, thickening, or protein content.
  2. Choose a substitute based on your recipe's needs: use quinoa or almond flour for baking with protein, rice flour for mild flavor and versatility, or tapioca for chewiness.
  3. For thickening sauces or gravies, whisk rice or tapioca flour into cold liquid before adding to hot mixtures to prevent clumping.
  4. Use a 1:1 ratio for most substitutes except tapioca flour, which should be half the amount of amaranth called for.
  5. Add liquid gradually when using chickpea or buckwheat flour as they absorb moisture quickly to avoid thick, pasty batters.
  6. Adjust baking temperature by lowering it by 25°F if you use almond flour to prevent over-browning.
  7. Taste-test and check texture during mixing; adjust liquid amounts if batter thickens too much or flavors overpower the dish.

Notes

Add liquid slowly when using chickpea flour to avoid a thick batter that can affect texture and flavor balance.

Tried this recipe?

Let us know how it was!

9 Substitutes for All-purpose Flour in Gluten-Free Baking

January 24, 2026

You're halfway through mixing pancake batter when you realize the all-purpose flour container is lighter than expected. This recipe depends on flour for structure and moisture absorption-two things that change when you swap.

9 Substitutes for All-purpose Flour in Gluten-Free Baking

The right substitute depends on what you're making, not just what's in the pantry. Baking needs flours that bind and rise predictably, while coating or thickening allows more flexibility.

Quick Substitute Reference
# Substitute Best For Ratio Key Note
1 Whole Wheat Flour ✨ Both 1:1 Denser, nuttier texture
2 Bread Flour 🥧 Baking 1:1 Chewier, higher protein
3 Cake Flour 🥧 Baking 1 cup minus 2 tbsp Lighter, softer crumb
4 Almond Flour 🥧 Baking 1:1 + binder Gluten-free, nutty
5 Oat Flour 🥧 Baking 1:1 Slightly sweet, hearty
6 Rice Flour 🍳 Cooking 1:1 in blends Neutral, slightly gritty
7 Chickpea Flour 🍳 Cooking ¾ cup Earthy, savory-focused
8 Tapioca Flour ✨ Both ½ cup Adds chew, thickens
9 GF Flour Blend ✨ Both 1:1 Neutral, balanced mix
QUICK SUMMARY

Whole wheat and bread flour are top substitutes, chosen by texture and protein content. Focus on matching the flour's binding and moisture absorption. Adjust liquid levels when using whole wheat to avoid dryness in your batter or dough.

🌾Closest match: Whole wheat adds fiber and absorbs moisture like all-purpose flour.
⚖️Ratio + fix: Swap 1:1; increase liquid slightly for whole wheat's higher absorption.
🥜Watch out: Almond flour lacks gluten, so it won't bind or rise like all-purpose.

9 All-purpose Flour Swaps That Keep Flavor Balanced

Some swaps stay close to the original, while others require small adjustments. Pick based on the dish and what you have on hand.

1 - Whole Wheat

Whole wheat flour adds more fiber and a slightly earthy flavor that works well in hearty breads and dense muffins. The bran in whole wheat absorbs more liquid than all-purpose, so batter or dough may feel drier.

Add 1-2 tablespoons of water per cup of flour to keep the texture moist. If you're short on whole wheat too, simple Whole Wheat Flour substitutes list covers options that absorb at similar rates.

Here's what to know:

  • Use 1:1 in breads - Expect a denser crumb and nuttier taste.
  • Mix half and half for muffins - Balances density with tenderness.
  • Add extra liquid - Whole wheat soaks up more moisture than white flour.

Skip if: You're making delicate pastries or layered cakes that need a light, airy crumb.

Whole Wheat

Works for: Breads, muffins, pancakes that benefit from hearty texture

Skip if: Making tender cakes or flaky pastries

All-Purpose

Works for: Universal baking and cooking, neutral flavor

Skip if: You want extra fiber or whole-grain nutrition

2 - Bread Flour

Bread flour has more protein than all-purpose, which creates stronger gluten networks. That means chewier texture in breads and pizza doughs.

Use 1:1 for yeast breads where you want structure and chew. Don't have bread flour either?

Common Bread Flour swaps ranked explains protein content differences.

  • Swap 1:1 in bread recipes - Extra protein builds more gluten.
  • Watch dough hydration - May need slightly more water.

Skip if: You're baking tender cookies or soft cakes that shouldn't be chewy.

Best Pick
For pizza dough and artisan loaves, bread flour gives the chew and structure you want. Skip it in cakes where tenderness matters.

3 - Cake Flour

Cake flour has less protein than all-purpose, producing a softer, finer crumb. It works best in recipes where you want a delicate texture.

Use 1 cup minus 2 tablespoons of cake flour for every 1 cup of all-purpose. The reduced amount accounts for cake flour's lighter weight and finer grind.

  • Sift before measuring - Cake flour clumps easily and needs aeration.
  • Use in cakes and cupcakes - The soft crumb shows best here.
  • Avoid in bread - Not enough protein for structure.
  • Swap carefully in cookies - They may spread more and lose some chew.

Skip if: You're making bread, pizza dough, or anything that needs strong gluten development.

4 - Almond Flour

Almond flour is finely ground almonds with a mildly sweet, nutty flavor. It contains no gluten, so it won't bind or rise the same way all-purpose flour does.

Use 1:1 by volume, but add a binder like xanthan gum (¼ teaspoon per cup) or an extra egg to help hold the structure. Missing almond flour as well?

Common Almonds swaps ranked covers nut-free and allergy-friendly picks.

  • Add xanthan gum or psyllium - Helps replace gluten's binding action.
  • Expect denser texture - Almond flour is heavier than wheat flour.

The final texture will be moister and more compact than with all-purpose. If you're baking something that depends on gluten stretch-like crusty bread-almond flour won't work.

Skip if: The recipe relies on gluten for rise or chew, or you have nut allergies.

Use Ratio Notes
Gluten-free cakes 1:1 + binder Add xanthan gum or extra egg
Cookies 1:1 Expect chewier, denser results
Coating for frying 1:1 Creates a crisp, nutty crust

5 - Oat Flour

Oat flour brings a slightly sweet, hearty flavor that fits well in muffins and pancakes. It has no gluten, so it won't rise or bind like all-purpose flour.

Use 1:1 in recipes that don't rely on gluten structure. For yeast breads or anything needing elasticity, oat flour falls short.

Oat flour absorbs liquid differently, so batters may thicken faster. Let the batter rest for a few minutes before cooking so the oats fully hydrate.

Skip if: You're making bread or anything that needs strong gluten networks to hold shape.

Watch Out
Oat flour turns gummy if overmixed. Stir just until combined, especially in pancakes and quick breads.

6 - Rice Flour

Rice flour has a neutral flavor and a slightly gritty texture. It works best mixed with other flours rather than used alone.

Use 1:1 in gluten-free flour blends or for coating and frying. On its own, rice flour produces crumbly baked goods that lack structure.

Short on rice flour too? Rice Flour alternatives that absorb explains moisture handling differences.

What to expect:

  • Blend with starches - Mix with tapioca or potato starch to reduce grittiness.
  • Good for frying - Creates a light, crispy crust.
  • Skip in yeast breads - No gluten means no rise.
  • Works in pancakes - Texture stays tender if mixed with other flours.

Skip if: You're baking yeast bread or need a single-flour solution without blending.

7 - Chickpea Flour

Chickpea flour has a strong, earthy flavor that fits savory dishes better than sweets. Use ¾ cup chickpea flour for every 1 cup of all-purpose.

It works well for thickening soups, making savory pancakes, or binding veggie fritters. Out of chickpea flour as well?

Replacements similar to Chickpea covers legume-based alternatives.

The taste is bold, so start with small amounts if you're testing it in a new recipe. Chickpea flour also adds protein and fiber, making it a filling choice for plant-based meals.

Skip if: You're baking delicate cakes or anything sweet where the earthy flavor won't fit.

Golden Rule
Toast chickpea flour in a dry skillet for 2-3 minutes before using to mellow the raw bean flavor.

8 - Tapioca Flour

Tapioca flour is a pure starch with a neutral taste and chewy texture. Use ½ cup tapioca flour for every 1 cup of all-purpose.

It shines in gluten-free baking when mixed with other flours, adding moisture and chew. On its own, it produces gummy, sticky results.

Missing tapioca flour too? Quick Tapioca Flour replacements to try covers starches with similar thickening power.

  • Mix with other flours - Tapioca works best in blends, not solo.
  • Great for thickening - Use in sauces, gravies, and pie fillings.
  • Adds chew to baked goods - Keeps gluten-free cookies from crumbling.
  • Use less than all-purpose - Too much creates gumminess.

Skip if: You need a standalone flour for bread or want a single-ingredient swap without blending.

Shortcut
Swap tapioca flour 1:1 for cornstarch in pie fillings. It thickens without clouding the filling.

9 - GF Flour Blend

Gluten-free all-purpose blends combine rice flour, starches, and sometimes xanthan gum to mimic the behavior of wheat flour. Use 1:1 in most baking recipes.

The blend works across different dishes because it balances structure and moisture. Short on this blend too?

All-purpose Flour replacements that work explains how starches and proteins interact.

Check the ingredient list-some blends include xanthan gum, so you won't need to add it. Others leave it out, and you'll need ¼ teaspoon per cup for binding.

The texture stays closest to all-purpose when the blend includes multiple starches and a protein source like almond or coconut flour.

Skip if: You're making bread that needs strong gluten stretch, or the blend contains ingredients you're allergic to.

Final Thoughts on Swapping All-purpose Flour

Most of these swaps work without major changes, but the best choice depends on what you're making. For breads and pizza, bread flour or whole wheat keeps structure strong.

For tender cakes, cake flour or a gluten-free blend matches the light crumb.

  • Closest match - Bread flour for yeast breads
  • Easiest grab - GF flour blend for most recipes
  • Dietary option - Almond or oat flour for gluten-free baking

Frequently Asked Questions

Can I use whole wheat flour instead of all-purpose in cookies?

Yes, but expect denser, chewier cookies with a nutty flavor. Use half whole wheat and half all-purpose to keep some tenderness.

Does bread flour make a difference in pancakes?

Bread flour makes pancakes chewier because of the extra protein. Stick with all-purpose or cake flour for softer, fluffier pancakes.

Can I substitute almond flour in banana bread?

Yes, but the texture will be denser and moister. Add an extra egg or ¼ teaspoon xanthan gum per cup to help with binding.

Do I need to adjust baking time when using gluten-free flour?

Sometimes. Gluten-free batters can take a few extra minutes to bake through. Check for doneness with a toothpick and add 2-3 minutes if needed.

Why does my rice flour batter taste gritty?

Rice flour has a naturally coarse texture. Blend it with tapioca or potato starch to smooth it out, or let the batter rest for 10 minutes to hydrate the grains.

9 Substitutes for All-purpose Flour in Gluten-Free Baking

9 Best Substitutes for All-purpose Flour

No ratings yet
This guide helps you pick the right all-purpose flour substitute based on what you're making, with practical advice on ratios and adjustments for each option.
Print Recipe Pin Recipe
Prep Time 10 minutes mins
Cook Time 8 minutes mins
Total Time 18 minutes mins
Servings: 6 servings
Course: Baking, Cooking, Substitutes
Cuisine: General
Ingredients Method Notes

Ingredients
  

  • 1 cup Whole Wheat Flour Use 1:1 in breads, add 1-2 tablespoons of water per cup to keep texture moist; denser, nuttier texture
  • 1 cup Bread Flour Use 1:1 for yeast breads; chewier texture with higher protein; may need slightly more water
  • Cake Flour Use 1 cup minus 2 tablespoons for every 1 cup all-purpose; sift before measuring; lighter, softer crumb
  • 1 cup Almond Flour Use 1:1 plus binder like ¼ teaspoon xanthan gum or extra egg; gluten-free, nutty flavor
  • 1 cup Oat Flour Use 1:1 in recipes not needing gluten structure; let batter rest a few minutes; slightly sweet and hearty
  • 1 cup Rice Flour Use 1:1 in blends for coating and frying; neutral, slightly gritty; blend with starches for best texture
  • 0.75 cup Chickpea Flour Use ¾ cup per cup all-purpose; earthy flavor; toast 2-3 minutes before using to mellow taste
  • 0.5 cup Tapioca Flour Use ½ cup per cup all-purpose; best in blends; adds chew and thickens, avoid using solo to prevent gumminess
  • 1 cup GF Flour Blend Use 1:1 in most baking; check for xanthan gum; neutral, balanced mix

Method
 

  1. Choose the substitute based on your dish and what you have available, considering whether you are baking or cooking.
  2. For flours that absorb more liquid, like whole wheat or oat flour, add extra water or let batter rest to maintain texture.
  3. Sift cake flour before measuring to aerate and reduce clumps for a lighter crumb.
  4. Add binders such as xanthan gum or extra egg when using gluten-free flours like almond or GF flour blends for structure.
  5. Toast chickpea flour in a dry skillet for 2-3 minutes before use to lessen the raw bean flavor.
  6. Mix rice flour with starches like tapioca or potato starch to reduce grittiness when using for frying or baking.
  7. Use the recommended ratio for each substitute and adjust hydration as needed, especially for bread flour and whole wheat flour.
  8. Avoid using tapioca flour alone to prevent gumminess; use it in blends for chew and thickening effects.
  9. Taste-test or check texture throughout to ensure the substitute works well in your recipe and adjust as necessary.

Notes

Add xanthan gum slowly when using almond flour as a substitute to prevent your batter from failing to bind properly.

Tried this recipe?

Let us know how it was!

7 Best Substitutes for Acini Di Pepe in Pasta Salads & Soups

January 24, 2026

You grab the pasta from the pantry and realize there's no acini di pepe left. The tiny beads were supposed to bulk up the soup, but now you need something that cooks at a similar rate and absorbs broth without turning mushy.

7 Best Substitutes for Acini Di Pepe in Pasta Salads & Soups
QUICK SUMMARY

Israeli couscous and orzo are top substitutes, focusing on texture and cooking time. Choose based on whether you want a chewier bite or a rice-like look. For soups, keep an eye on cooking times to avoid mushiness.

🍝Closest match: Israeli couscous offers similar bead shape with a chewier texture.
⚖️Ratio + fix: Swap 1:1; reduce cooking time slightly for larger pearls.
⚠️Watch out: Tapioca pearls only suit sweet dishes, not savory soups or salads.

The swap depends on salad, or a baked dish. Orzo and Israeli couscous handle broth well, while ditalini holds shape in cold preparations, and tapioca pearls work only in sweet recipes.

Quick Substitute Reference
# Substitute Best For Ratio Key Note
1 Israeli Couscous ✨ Both 1:1 Larger pearls, chewier
2 Orzo ✨ Both 1:1 Rice-shaped, mild flavor
3 Fregola 🍳 Cooking 1:1 Toasted, heartier texture
4 Ditalini ✨ Both 1:1 Smooth tubes, slightly larger
5 Tapioca Pearls 🥧 Baking ½:1 Sweet dishes only
6 Couscous 🍳 Cooking ¾:1 Softer, subtle nutty taste
7 Pearl Barley 🍳 Cooking 1:1 Chewy, nutty, longer cook

7 Simple Acini Di Pepe Swaps to Save Time

These options range from pantry basics to specialty picks. Start with the closest match, then move to bolder swaps if you want different texture or faster prep.

1 - Israeli Couscous

Israeli couscous delivers a similar bead shape but with a chewier bite. The pearls are larger than acini di pepe, so they stand out more in salads and don't disappear into broth-based soups.

Use 1 cup Israeli couscous per 1 cup acini di pepe. The cooking time stays close-about 8 to 10 minutes in boiling water-but the pearls hold their structure longer under heat.

Here's what to know:

  • Texture: Chewier and more distinct than acini di pepe
  • Flavor: Milder wheat taste with less starch release
  • Best in: Pasta salads, grain bowls, and stews where you want pearls that stay separate
  • Watch out: Larger size makes it less suitable for delicate soups or recipes needing tiny beads

If you're short on Israeli couscous too, what to use for Couscous keeps you in the same size range with grains that absorb liquid similarly.

Skip if: You need pasta that cooks in under 5 minutes or you want a texture that melts into the dish.

Israeli Couscous

Works for: Salads and stews where distinct pearls matter

Skip if: You need tiny, quick-cooking pasta

Acini Di Pepe

Works for: Soups and dishes needing fine texture

Skip if: You want more chew or a heartier grain feel

2 - Orzo

Orzo looks like rice but cooks like pasta. It absorbs broth without breaking apart, making it a go-to for soups and side dishes that need structure.

Swap 1 cup orzo for 1 cup acini di pepe. Cook time runs 8 to 9 minutes in boiling salted water, close enough that you won't need to adjust the rest of your recipe.

The rice shape changes the visual-orzo reads as grains rather than beads-but the mild wheat flavor and starch release behave the same. Out of orzo as well?

Easy Orzo swaps that work covers rice-shaped alternatives that absorb liquid at similar rates.

Skip if: You need a distinct bead shape or you're making a dessert-style dish.

3 - Fregola

Fregola brings toasted flavor and a heartier chew. The Sardinian pasta cooks into small, firm pearls that hold up in brothy dishes and risotto-style preparations.

Use 1 cup fregola per 1 cup acini di pepe, but expect a longer cooking time-12 to 15 minutes-and a nuttier taste from the toasting process. The extra chew and hearty texture make fregola ideal for dishes where pasta needs to stand up to bold ingredients.

  • Size: Slightly larger than acini di pepe
  • Flavor: Toasted, nutty, more pronounced than standard pasta
  • Texture: Firmer and chewier, even after full cooking
  • Best in: Risottos, brothy stews, and dishes with strong spices or sauces

Skip if: You're making a delicate soup or you need pasta that disappears into the background.

Best Pick
Fregola works when you want texture that stays firm and flavor that adds depth without extra seasoning.

4 - Ditalini

Ditalini pasta looks like tiny tubes and cooks at the same rate as acini di pepe. It holds shape in cold salads and soups without turning mushy.

Swap 1 cup ditalini for 1 cup acini di pepe. Boil for 8 to 10 minutes, drain, and toss with your other ingredients-the smooth surface picks up dressing and broth easily.

The tube shape changes the way liquid clings, so you may notice less starch in the cooking water compared to bead-shaped pasta. If you're out of ditalini too, tested Ditalini Pasta replacements shows small pasta options that behave the same way in soups and salads.

Skip if: You're making a baked dish that needs pasta to blend into a creamy filling.

5 - Tapioca Pearls

Small tapioca pearls work only in cold puddings and desserts. The neutral flavor and chewy texture match acini di pepe's size, but the starch behaves differently-it won't hold up in savory recipes.

Use ½ cup tapioca pearls per 1 cup acini di pepe. Soak them in cold water for 30 minutes before cooking, then simmer in milk or coconut milk until translucent.

  • Texture: Chewy and slightly bouncy when cooked
  • Flavor: Neutral, picks up whatever liquid you cook it in
  • Best in: Tapioca pudding, bubble tea, or sweet soups

Skip if: You're making a savory dish or anything that requires pasta structure.

Use Ratio Notes
Soups 1:1 Orzo or Ditalini Both absorb broth without breaking apart
Salads 1:1 Israeli Couscous Chewier texture stays distinct when cold
Desserts ½:1 Tapioca Pearls Only option for sweet dishes; needs soaking

6 - Couscous

Small-grain couscous cooks faster than acini di pepe and softens quickly, making it better for salads and quick sautés than for long-simmered soups. The texture is lighter and fluffier, and it absorbs dressing or sauce more aggressively.

Use ¾ cup couscous per 1 cup acini di pepe. Boil water, pour it over the couscous, cover, and let it steam for 5 minutes-no stirring needed.

The subtle nutty undertones come through in cold dishes, but couscous loses structure in brothy preparations. Fluff it with a fork before mixing to prevent clumping.

  • Texture: Softer and fluffier than pasta
  • Flavor: Mild with a hint of nuttiness
  • Best in: Grain salads, tabbouleh-style dishes, and quick sides

Missing couscous too? Replacements similar to Couscous shows small grains that steam and fluff the same way.

Skip if: You're making a soup where pasta needs to hold firm for hours.

Watch Out
Couscous turns mushy in hot liquid after 10 minutes. Add it at the end of cooking or serve it on the side.

7 - Pearl Barley

Pearl barley brings a chewy, nutty texture and takes longer to cook than acini di pepe. It works in hearty soups and pilafs where you want grains that stay firm after hours of simmering.

Swap 1 cup pearl barley for 1 cup acini di pepe, but plan for 25 to 30 minutes of cooking time. The texture stays distinct even when fully tender, and the nutty flavor stands up to strong broths and spices.

Barley releases starch as it cooks, thickening the liquid around it-useful in soups but less so in salads or dishes where you want grains to stay separate. If pearl barley isn't available either, simple Pearl Barley substitutes list covers grains that cook at a slower pace but deliver similar chew.

Skip if: You need pasta that cooks in under 10 minutes or you're making a dessert.

Golden Rule
Match the swap to the cooking method-quick-cooking pastas for soups, heartier grains for stews, and soft options for desserts.

Picking the Right Replacement

Most of these swaps work without changing the recipe, but the best choice depends on what you're making. For soups and side dishes, orzo and Israeli couscous come closest in cooking time and texture.

For cold salads, ditalini holds its shape better, and for desserts, tapioca pearls are the only option that makes sense.

  • Closest match - Orzo (same cooking time, similar starch)
  • Easiest grab - Ditalini (pantry staple, holds firm)
  • Bold alternative - Fregola (toasted flavor, heartier chew)

Frequently Asked Questions

Can I use orzo in place of acini di pepe in soup?

Yes, orzo works in soup at a 1:1 ratio. It absorbs broth the same way and cooks in about the same time, though the rice shape changes the look slightly.

Does Israeli couscous taste different than acini di pepe?

Israeli couscous has a milder flavor and a chewier texture. The taste is similar enough that most people won't notice the difference in a finished dish.

Can I use couscous in baked dishes that call for acini di pepe?

No, couscous turns mushy when baked in creamy or cheesy dishes. Stick to orzo or ditalini for baked preparations.

Are tapioca pearls a good substitute for savory recipes?

No, tapioca pearls only work in sweet dishes. They don't hold up in savory soups or salads and the texture feels out of place.

How do I adjust cooking time when using pearl barley instead of acini di pepe?

Add pearl barley earlier in the cooking process-it needs 25 to 30 minutes compared to acini di pepe's 8 to 10 minutes. Check for tenderness before serving.

Substitutes for Acini Di Pepe in Pasta Salads & Soups

7 Best Substitutes for Acini Di Pepe

No ratings yet
This guide offers seven substitutes for acini di pepe, tailored for soups, salads, baked, and dessert dishes. Ratios and textures vary based on cooking method for best results.
Print Recipe Pin Recipe
Prep Time 7 minutes mins
Cook Time 8 minutes mins
Total Time 15 minutes mins
Servings: 4 servings
Course: Substitute Guide
Cuisine: General
Ingredients Method Notes

Ingredients
  

  • 1 cup Israeli Couscous Use 1 cup Israeli couscous per 1 cup acini di pepe, larger pearls with chewier texture.
  • 1 cup Orzo Use 1 cup orzo per 1 cup acini di pepe, rice-shaped, mild flavor, cooks in 8-9 minutes.
  • 1 cup Fregola Use 1 cup fregola per 1 cup acini di pepe; toasted flavor, heartier texture; cook longer (12-15 minutes).
  • 1 cup Ditalini Use 1 cup ditalini per 1 cup acini di pepe, cooks 8-10 minutes; holds shape in cold and hot dishes.
  • 0.5 cup Tapioca Pearls Use ½ cup tapioca pearls per 1 cup acini di pepe; soak 30 minutes; for sweet dishes only.
  • 0.75 cup Couscous Use ¾ cup couscous per 1 cup acini di pepe; steam 5 minutes; softer and fluffier texture.
  • 1 cup Pearl Barley Use 1 cup pearl barley per 1 cup acini di pepe; cook 25-30 minutes; chewy, nutty texture.

Method
 

  1. Choose your substitute based on your dish: soups use Orzo or Ditalini, salads use Israeli Couscous, desserts use Tapioca Pearls.
  2. Prepare each substitute appropriately: soak Tapioca Pearls 30 minutes, steam Couscous 5 minutes, boil others as specified.
  3. Use the specified 1:1 or adjusted ratios for each substitute to replace acini di pepe.
  4. Cook the substitutes to their recommended times to maintain texture and avoid mushiness.
  5. Drain and toss substitutes like Ditalini in cold dishes to keep shape and prevent clumping.
  6. Adjust cooking times for heartier substitutes like Fregola and Pearl Barley for optimal texture.
  7. Taste and check consistency during cooking to ensure a well-integrated substitution.

Notes

Drain ditalini well before adding to salads to prevent watery texture.

Tried this recipe?

Let us know how it was!

7 Best Substitutes for Xanthan Gum in Gluten-Free Baking

January 24, 2026

You're testing a gluten-free bread recipe and the xanthan gum container is almost empty. It's what holds the dough together when gluten isn't there to do the job.

7 Best Substitutes for Xanthan Gum in Gluten-Free Baking
QUICK SUMMARY

Guar gum and psyllium husk are top substitutes, focusing on texture and binding strength. Flavor neutrality matters most. For baking, hydrate psyllium husk first to mimic gluten's stretch effectively.

🌿Closest feel: Psyllium husk mimics gluten's stretch and adds structure in bread.
⚖️Ratio + fix: Swap 1:1; hydrate psyllium before adding to dough for best results.
🔥Watch heat: Agar agar sets firmly but needs boiling to activate properly in recipes.

The swap needs to match that binding strength. Some substitutes work better in baking; others shine in sauces or cold applications.

Quick Substitute Reference
# Substitute Best For Ratio Key Note
1 Guar Gum ✨ Both 1:1 Neutral, slightly grainy
2 Psyllium Husk 🥧 Baking 1:1 Earthy taste, adds fiber
3 Ground Chia 🥧 Baking 1 tablespoon + 2 tablespoon water Nutty, gelatinous texture
4 Flaxseed Meal 🥧 Baking 1 tablespoon + 3 tablespoon water Mildly nutty, earthy
5 Agar Agar 🍳 Cooking 1 teaspoon per 1 tbsp Neutral, firmer gel
6 Cornstarch 🍳 Cooking 2:1 Neutral, glossy finish
7 Gelatin 🍳 Cooking 1 teaspoon per 1 tbsp Neutral, firm gel

7 Quick Xanthan Gum Substitutes That Work

Each substitute handles thickening or binding in its own way. Some hold up better in the oven; others work best on the stovetop or in cold prep.

1 - Guar Gum

Guar gum thickens fast and doesn't need heat. It works in gluten-free baking, gravies, and salad dressings without changing the taste.

Use 1 tablespoon guar gum for every tablespoon of xanthan gum. The texture runs slightly grainy, so it's best in recipes where smoothness isn't the main goal.

Guar Gum

Works for: Quick sauces, cold applications, most baked goods

Skip if: You need a perfectly smooth finish

Xanthan Gum

Works for: All recipes needing elastic structure

Skip if: You're out and need a backup now

It blends into cold liquids without clumping, making it useful for no-cook dressings. If you're also short on guar gum, tested Guar Gum replacements covers firmness-based swaps.

Skip if: you're making a clear sauce or jelly that demands a glass-smooth texture.

2 - Psyllium Husk

Psyllium husk powder absorbs water fast and creates a gel that mimics gluten's stretch. It's the go-to for gluten-free bread recipes that need structure and chew.

Use 1 tablespoon psyllium husk powder for every tablespoon of xanthan gum. The flavor runs slightly earthy, so it works better in whole-grain or savory bakes than in delicate cakes.

Best Pick
For gluten-free yeast breads, psyllium husk delivers the stretch and rise that xanthan gum can't match.

Let the dough rest for 5-10 minutes after mixing so the psyllium fully hydrates. If you're out of psyllium husk too, simple Psyllium Husk substitutes list covers binding options.

Skip if: you're baking angel food cake or other recipes needing a light, airy crumb.

3 - Ground Chia

Ground chia seeds form a thick gel when mixed with water, giving baked goods moisture and structure. They work well in muffins, quick breads, and pancakes.

Mix 1 tablespoon ground chia with 2 tablespoons water for every tablespoon of xanthan gum. Let it sit for 5 minutes until it thickens into a gel.

The flavor runs nutty, which complements oat or almond flour recipes. The texture turns slightly gelatinous, so it's not ideal for recipes needing a smooth batter.

Skip if: you're making a delicate custard or pudding where smoothness matters.

4 - Flaxseed Meal

Flaxseed meal binds and adds moisture, making it a solid pick for vegan baking. It works in cookies, brownies, and quick breads.

Here's what to know:

  • Water ratio - Mix 1 tablespoon flaxseed meal with 3 tablespoons water per tablespoon of xanthan gum.
  • Resting time - Let the mixture sit for 5 minutes until it gels.
  • Flavor note - Adds a mild nutty, earthy taste that suits whole-grain recipes.
  • Avoid in - Clear sauces, dressings, or recipes needing a neutral flavor.
Use Ratio Notes
Muffins 1 tablespoon flax + 3 tablespoon water Adds moisture and a slight nutty taste
Cookies 1 tablespoon flax + 3 tablespoon water Holds shape, slight chew
Sauces Not recommended Turns cloudy, adds earthy flavor

The gel forms faster in warm water. If you're missing flaxseed meal as well, Flaxseeds alternatives to try ranks options by binding strength.

Skip if: you need a clear sauce or a recipe where the earthy flavor would clash.

5 - Agar Agar

Agar agar sets firm and works best in recipes that need a gel structure, like jams, jellies, or panna cotta. It comes from seaweed and stays neutral in flavor.

Use 1 teaspoon agar powder for every tablespoon of xanthan gum. Heat it in liquid until it dissolves, then let it cool to set.

Watch Out
Agar agar sets firm and doesn't have the elasticity xanthan gum provides in baked goods.

It sets at room temperature, so you don't need refrigeration. If you're short on agar agar too, Agar Agar substitutes for cooking covers gelling swaps.

Skip if: you're baking bread or need the stretchy structure that gluten or xanthan gum provides.

6 - Cornstarch

Cornstarch thickens sauces and gravies without changing the flavor. It works best when heated and stirred until the sauce bubbles and thickens.

Use 2 tablespoons cornstarch for every tablespoon of xanthan gum. Mix it with a small amount of cold water first to prevent clumps.

  • Heat required - Cornstarch needs to reach a boil to thicken properly.
  • Glossy finish - Adds shine to sauces and pie fillings.

The sauce thickens in about 2-3 minutes once it starts bubbling. If you're out of cornstarch as well, what to use for Cornstarch lists options for hot applications.

Skip if: you're making a cold sauce, dressing, or gluten-free baking that needs binding without heat.

7 - Gelatin

Gelatin stabilizes liquids and works well in desserts like mousse, panna cotta, or marshmallows. It sets firm when chilled and melts when reheated.

Use 1 teaspoon gelatin powder for every tablespoon of xanthan gum. Bloom it in cold water for 5 minutes, then heat until dissolved.

Golden Rule
Gelatin loses its setting power above 212°F, so don't boil it or use it in recipes that need high-heat baking.

It adds a slight richness without changing the flavor. If you're missing gelatin too, quick Gelatin replacements to try ranks vegan-friendly and non-vegan options.

Skip if: you're vegan or need a thickener that works in high-heat baking.

Final Thoughts on Swapping Xanthan Gum

The right substitute depends on For gluten-free bread, psyllium husk or guar gum works best. For sauces, cornstarch or agar agar handles thickening without changing the flavor.

  • Closest match - Guar gum, neutral and works in most recipes
  • Easiest grab - Cornstarch, common pantry staple for sauces
  • Vegan option - Agar agar, plant-based and firm-setting

Frequently Asked Questions

Can I use cornstarch instead of xanthan gum in gluten-free baking?

Cornstarch thickens but doesn't bind like xanthan gum. Use guar gum or psyllium husk for structure in gluten-free bread or cakes.

Does flaxseed meal change the flavor of baked goods?

Yes, it adds a mild nutty, earthy taste. It works best in recipes with whole grains or bold flavors like chocolate or spices.

Can I use agar agar in hot sauces?

Agar agar works but sets firm when cooled, so it's better for jellies or desserts. For pourable sauces, use cornstarch or guar gum.

Is gelatin a good substitute for vegan recipes?

No, gelatin comes from animal collagen. Use agar agar, ground chia, or flaxseed meal for vegan-friendly binding and thickening.

Why does my sauce turn grainy when I use guar gum?

Guar gum clumps if added too fast. Mix it with a small amount of liquid first, then whisk it into the sauce slowly while stirring.

Substitutes for Xanthan Gum in Gluten-Free Baking

7 Best Substitutes for Xanthan Gum

No ratings yet
Explore practical substitutes for xanthan gum suited to both baking and cooking. Choose your swap based on the recipe type and desired texture for the best results.
Print Recipe Pin Recipe
Prep Time 8 minutes mins
Cook Time 8 minutes mins
Total Time 16 minutes mins
Servings: 6 servings
Course: Baking, Cooking, Substitutes
Ingredients Method Notes

Ingredients
  

  • 1 tablespoon Guar Gum Use 1 tablespoon guar gum per tablespoon xanthan gum; neutral flavor, slightly grainy texture, works in sauces, dressings, and baked goods.
  • 1 tablespoon Psyllium Husk Use 1 tablespoon psyllium husk powder per tablespoon xanthan gum; best for gluten-free bread, adds earthy taste and fiber.
  • Ground Chia Mix 1 tablespoon ground chia with 2 tablespoons water per tablespoon xanthan gum; nutty flavor and gelatinous texture.
  • Flaxseed Meal Mix 1 tablespoon flaxseed meal with 3 tablespoons water per tablespoon xanthan gum; mild nutty flavor, avoid in clear sauces.
  • 1 teaspoon Agar Agar Use 1 teaspoon agar powder per tablespoon xanthan gum; neutral flavor, firmer gel, best in jellies and desserts.
  • 2 tablespoons Cornstarch Use 2 tablespoons cornstarch per tablespoon xanthan gum; requires heat to thicken, glossy finish, best for sauces and gravies.
  • 1 teaspoon Gelatin Use 1 teaspoon gelatin powder per tablespoon xanthan gum; neutral flavor, firm gel, not suitable for high-heat or vegan diets.

Method
 

  1. Select the substitute based on your recipe: guar gum and psyllium husk for baking, cornstarch and agar agar for cooking, others for specific textures.
  2. Prepare the substitute as needed: mix ground chia or flaxseed meal with water and let rest for 5 minutes to form a gel.
  3. Add the substitute in the ratio recommended: 1:1 for guar gum and psyllium husk; adjust water ratios for ground chia and flaxseed meal; cornstarch ratio is 2:1.
  4. For heat-required thickeners like cornstarch and agar agar, heat until sauce bubbles or agar dissolves to activate thickening.
  5. Let mixtures like psyllium husk or flaxseed gel rest or dough rise to fully hydrate and develop structure.
  6. Avoid using baking substitutes like psyllium husk in light airy cakes and clear delicate sauces where texture is critical.
  7. When using guar gum, add it gradually by mixing with a small amount of liquid first to prevent clumping and grainy texture.
  8. For gelatin, bloom in cold water before heating gently; avoid boiling and high-heat applications to maintain setting ability.

Notes

Add guar gum slowly to avoid clumping and gritty texture. Mixing well prevents uneven texture in sauces or breads.

Tried this recipe?

Let us know how it was!

7 Best Substitutes for Shortening in Vegan Baking

January 23, 2026

We're doubling the batch and there's not enough shortening to cover it. Shortening creates flaky layers, traps air, and stays solid at room temperature-keeping pie crusts tender and biscuits light.

7 Best Substitutes for Shortening in Vegan Baking

The right substitute depends on not just fat content. Some swaps add moisture, others bring flavor, and a few change texture entirely.

Match the function first, then adjust as needed.


Quick Substitute Reference
# Substitute Best For Ratio Key Note
1 Unsalted Butter ✨ Both 1:1 Adds buttery flavor
2 Coconut Oil 🌱 Vegan ⅞ cup per cup Tropical aroma
3 Margarine ✨ Both 1:1 Softer texture
4 Lard 🍳 Cooking 1:1 Pork flavor
5 Vegetable Oil 🍳 Cooking ¾ cup per cup Liquid at room temp
6 Applesauce 🥧 Baking 1:1 No fat content
7 Greek Yogurt 🥧 Baking ¾ cup per cup Tangy flavor

QUICK SUMMARY

Butter and coconut oil are top substitutes; focus on matching texture first. Consider flavor impact and moisture changes. Adjust baking time slightly if needed for best results.

🧈Closest match: Butter creates tender layers similar to shortening with richer flavor.
⚖️Ratio + fix: Swap 1:1; reduce added liquid if using butter to balance moisture.
🥥Watch heat: Coconut oil melts quickly, so keep dough cool to maintain texture.

7 Shortening Substitutes Without Big Changes

These options cover pantry staples and specialty picks. Some match shortening's neutral flavor and solid texture, while others shift the taste or moisture level slightly.

Pick based on what you're making and what's already in your kitchen.


1 - Butter

Butter melts into dough the same way shortening does, creating tender layers in pie crusts and biscuits. The flavor runs richer and slightly more pronounced than shortening's neutral profile.

  • Use cold butter and cut it into flour for flaky pastry.
  • Add an extra tablespoon of flour per cup to offset butter's water content.
  • Expect golden-brown edges and a buttery aroma.

If you're out of butter too, easy Unsalted Butter swaps that work for similar texture in baked goods.

Skip if: You need a completely dairy-free result or want zero flavor interference.


Cold Butter

Works for: Flaky pie crusts and biscuits

Skip if: You need dairy-free baking

Room-Temp Butter

Works for: Creaming into cookies and cakes

Skip if: The recipe requires solid fat for layers


2 - Coconut Oil

Coconut oil stays solid at room temperature, behaving like shortening in dough and batters. The tropical aroma comes through in finished baked goods, adding a subtle sweetness.

Use ⅞ cup coconut oil for every cup of shortening-it's slightly denser. Measure it solid, then melt only if the recipe calls for liquid fat.

If you're also short on coconut oil, Coconut Oil replacements that work for vegan baking swaps.

Skip if: You want a completely neutral flavor or the dish clashes with coconut notes.


Best Pick
Coconut oil works best in recipes with chocolate, vanilla, or spices that mask the tropical aroma. Skip it for savory biscuits or herb-heavy pastries.

3 - Margarine

Margarine spreads like butter but holds less water, making it closer to shortening in texture. The flavor runs milder than butter, with a softer consistency that creams easily into batters.

Use a 1:1 ratio straight from the fridge. Margarine melts faster than shortening, so chill dough slightly longer before baking to prevent spreading.

If margarine's not stocked either, Margarine swaps by recipe type cover similar fat options.

Skip if: You're avoiding hydrogenated fats or processed ingredients.


Use Ratio Notes
Pie crust 1:1 Chill dough 30 minutes before rolling
Cookies 1:1 Expect slightly softer texture
Biscuits 1:1 Cut cold margarine into flour

4 - Lard

Lard creates the flakiest pastry of any fat, with a texture even lighter than shortening. The pork flavor reads subtle in sweet recipes but adds a savory depth to empanadas, tamales, and biscuits.

  • Swap 1:1 and keep it cold until mixing.
  • Cut lard into flour the same way you'd handle shortening.
  • Bake at the same temperature-no timing adjustments needed.
  • The finished product holds layers better than butter-based dough.

If you're missing lard as well, swaps when Lard runs out for pastries that need structure.

Skip if: You follow a vegetarian or vegan diet.


Watch Out
Lard from the grocery store often contains preservatives that add a slight off-taste. Look for leaf lard from a butcher for the cleanest flavor in sweet baking.

5 - Vegetable Oil

Vegetable oil stays liquid at room temperature, making it ideal for moist cakes, muffins, and quick breads where you want a tender crumb instead of flaky layers. It won't create the same structure as solid shortening in pie crusts or biscuits.

Use ¾ cup oil for every cup of shortening-liquid fat spreads differently in dough. Add it directly to wet ingredients and mix just until combined to avoid a dense texture.

Skip if: The recipe depends on cold, solid fat for lamination or layering.


Golden Rule
Vegetable oil works best in recipes that call for melted shortening. If the method says "cut in shortening," use a solid fat instead.

6 - Applesauce

Applesauce replaces shortening in low-fat baking, adding moisture without contributing any fat. The result runs softer and cake-like, with a slight sweetness that works best in muffins, quick breads, and brownies.

Use a 1:1 ratio and reduce sugar by 1-2 tablespoons per cup to balance the added sweetness. Expect a denser crumb and longer baking time-check doneness with a toothpick.

  • Choose unsweetened applesauce to control sugar levels.
  • Add an extra teaspoon of baking powder per cup for lift.

Skip if: You need flaky layers, crisp edges, or a firm texture.


Shortcut
Mashed banana swaps in at the same ratio as applesauce. It adds moisture but brings banana flavor-great for quick breads, less ideal for vanilla or chocolate cakes.

7 - Greek Yogurt

Greek yogurt mimics shortening's moisture while adding protein and tang. The acidity tenderizes gluten, creating a softer crumb in muffins, cakes, and quick breads without the richness of butter or oil.

Use ¾ cup yogurt for every cup of shortening-the extra water content changes dough consistency. Fold it gently into batters to keep the texture light.

Here's what to know:

  • Full-fat yogurt produces the richest result.
  • Reduce liquid ingredients by 2 tablespoons per cup of yogurt.
  • Bake at the same temperature but check for doneness 5 minutes early.

If you're also out of Greek yogurt, Greek Yogurt alternatives to try for moist baking picks.

Skip if: You're avoiding dairy or need a neutral flavor.


Quick Tip
Greek yogurt browns faster than shortening. Tent baked goods with foil halfway through if the tops darken too quickly.

Final Thoughts on Swapping Shortening

Most of these swaps work without adjusting the recipe much, but the best choice depends on what you're making. For flaky pie crusts, stick to butter or lard; for moist cakes, vegetable oil or Greek yogurt deliver better texture.

Try a few and see which you prefer.

  • Closest match - Butter, for flavor and texture
  • Easiest grab - Vegetable oil, already in most pantries
  • Vegan option - Coconut oil, solid at room temp

Frequently Asked Questions

Can I use butter instead of shortening in cookies?

Yes, at a 1:1 ratio. Butter adds flavor but creates thinner, crispier cookies because it melts faster. Chill the dough for 30 minutes before baking to reduce spreading.

Does coconut oil work in pie crust?

It does, but the tropical flavor comes through. Use refined coconut oil for a more neutral taste, and measure it solid before cutting it into the flour.

Can I substitute vegetable oil for shortening in biscuits?

Not recommended. Biscuits need solid fat for flaky layers, and oil stays liquid. Use butter, lard, or coconut oil instead for the right texture.

What's the best dairy-free shortening substitute?

Coconut oil works best for baking, while vegetable oil suits moist recipes like cakes and muffins. Both stay dairy-free and handle high heat well.

Can I mix butter and oil to replace shortening?

Yes. Use half butter for flavor and half oil for moisture. This works well in cakes and muffins, giving you a tender crumb with a richer taste.

7 Best Substitutes for Shortening in Vegan Baking

7 Best Substitutes for Shortening

No ratings yet
This guide helps you choose the right shortening substitute based on baking or cooking needs. It covers ratios, flavor notes, and texture effects for common pantry fats and alternatives.
Print Recipe Pin Recipe
Prep Time 7 minutes mins
Cook Time 8 minutes mins
Total Time 15 minutes mins
Servings: 6 servings
Course: Baking, Cooking
Ingredients Method Notes

Ingredients
  

  • 1 cup Unsalted Butter Adds buttery flavor; 1:1 ratio
  • 0.875 cup Coconut Oil Tropical aroma; use ⅞ cup per cup of shortening
  • 1 cup Margarine Softer texture; 1:1 ratio
  • 1 cup Lard Pork flavor; 1:1 ratio
  • 0.75 cup Vegetable Oil Liquid at room temp; use ¾ cup per cup of shortening
  • 1 cup Applesauce No fat content; 1:1 ratio
  • 0.75 cup Greek Yogurt Tangy flavor; use ¾ cup per cup of shortening

Method
 

  1. Choose your substitute based on whether you are baking or cooking and what texture or flavor you want to achieve.
  2. Prepare solid fats like butter, margarine, and lard cold and cut them into flour just like shortening for flaky textures.
  3. Measure coconut oil solid and use ⅞ cup per cup of shortening; melt only if recipe calls for liquid fat.
  4. Use vegetable oil or Greek yogurt at ¾ cup per cup of shortening when moisture is needed; add directly to wet ingredients.
  5. Use applesauce at a 1:1 ratio to replace shortening but reduce sugar slightly and check for denser crumb and longer baking time.
  6. Adjust flour or liquids depending on substitute to maintain dough consistency and bake at same temperature unless otherwise noted.
  7. Taste and check texture before final baking to ensure no flavor or texture issues with chosen substitute.

Notes

Measure coconut oil solid before use to prevent texture issues with melted fat in your dough or batter.

Tried this recipe?

Let us know how it was!

7 Best Substitutes for Lard in Cooking and Baking

January 23, 2026

Lard gives biscuits their flaky layers and pie crusts their tender snap. When you're halfway through a recipe and realize you're short, the swap you pick depends on whether you need that structure or just neutral fat for frying.

7 Best Substitutes for Lard in Cooking and Baking

Most animal fats and solid vegetable fats work in a 1:1 swap, but oils require adjustments. Shortening mimics the texture without pork flavor, while butter adds richness but lowers the smoke point.

Match the fat's job first-binding, crisping, or flavor-then adjust as needed.

QUICK SUMMARY

Vegetable shortening, butter, and ghee stand in for lard best because they deliver the same job: tender, flaky texture from solid fat in doughs. For baking, we prioritize fat structure first-shortening keeps layers, butter adds flavor, and ghee stays firm with less water. If a swap feels greasy or dense, we chill the fat and dough longer and handle it less.

🥧Flake-first swap: Use shortening when crust texture matters more than flavor.
🧈Ratio + tweak: Swap 1:1 by weight; with butter, cut other liquid slightly.
🧊Watch out: Warm fat kills flake; chill everything and stop mixing once crumbs form.

7 Lard Replacements for Better Texture

Some swaps keep the same flaky structure, while others shift texture or add their own flavor. Pick based on what you're making and what's already in your pantry.

Quick Substitute Reference
# Substitute Best For Ratio Key Note
1 Vegetable Shortening ✨ Both 1:1 Neutral flavor, no pork taste
2 Butter 🥧 Baking 1:1 Adds creamy, slightly sweet notes
3 Coconut Oil 🥧 Baking 1:1 Subtle coconut aroma
4 Olive Oil 🍳 Cooking ¾ cup per 1 cup Fruity, peppery, lighter than lard
5 Pork Fatback 🍳 Cooking 1:1 Rich pork flavor, authentic taste
6 Ghee 🍳 Cooking 1:1 Nutty, buttery, no milk solids
7 Duck Fat 🍳 Cooking 1:1 Deep savory, slightly gamey

1 - Vegetable Shortening

Vegetable shortening behaves almost identically to lard in pastry and frying. It stays solid at room temperature, creates flaky layers in biscuits, and handles high heat without smoking.

The flavor stays neutral, so you lose the subtle pork richness lard brings to tamales or refried beans. For pie crusts and biscuits where texture matters more than taste, this swap works seamlessly.

Here's what to know:

  • Use the same amount-1 cup shortening for 1 cup lard.
  • Works in both sweet and savory recipes without flavor interference.
  • Keeps dough tender and easy to handle during rolling.

If you're short on vegetable shortening too, replacements similar to Shortening cover other solid fats that crisp and flake.

Vegetable Shortening

Works for: Flaky pastry, high-heat frying, neutral flavor needs

Skip if: You want authentic pork flavor in savory dishes

Lard

Works for: Traditional tamales, refried beans, tender pie crusts

Skip if: You need a plant-based or dairy option

2 - Butter

Butter brings a creamy, slightly sweet flavor that works well in biscuits, scones, and sautéed vegetables. It melts faster than lard, so dough warms quickly during handling.

The milk solids brown at lower temperatures, giving crusts a golden color but limiting use in high-heat frying. Use cold butter and work fast to keep pastry layers distinct.

If you're out of butter as well, instead of Butter try these for swaps that melt or spread similarly.

Skip if: You're frying at temperatures above 350°F or need a dairy-free option.

3 - Coconut Oil

Coconut oil stays solid when chilled, making it a workable substitute for lard in baked goods that need structure. It adds a faint coconut aroma that pairs well with sweet recipes but can clash with savory dishes.

Use refined coconut oil if you want less coconut flavor. The oil melts cleanly and doesn't leave a greasy residue, though it won't replicate lard's subtle pork richness in tamales or beans.

  • Swap 1:1 by volume-use the same measurement.
  • Solid at room temperature, so it cuts into flour like lard.

If you're missing coconut oil too, replacements similar to Coconut Oil offer other solid and liquid fats with mild flavor.

The coconut taste fades slightly during baking but stays noticeable in uncooked applications like frostings or no-bake crusts.

Best Pick
For baking, use vegetable shortening. For sautéing and roasting, butter or ghee adds flavor without altering texture.

4 - Olive Oil

Olive oil works for sautéing and roasting but doesn't replicate lard's solid texture in baking. Use about ¾ cup olive oil for every 1 cup of lard to avoid making dough too wet.

The fruity, peppery flavor stands out in savory dishes like fried potatoes or seared vegetables. It won't create flaky layers in pastry, so reserve it for stovetop cooking rather than pie crusts.

Extra virgin olive oil has a lower smoke point, so reach for light or refined olive oil when frying at higher temperatures. Drizzle reduces greasiness while keeping food moist and browned.

If you're short on olive oil too, swaps when Olive Oil runs out lists other liquid fats that sauté and roast without overpowering.

Skip if: You're making pastry or need a fat that stays solid during mixing.

5 - Pork Fatback

Fatback renders into pure lard when melted, delivering the same rich pork flavor and high smoke point. It's the closest match for traditional dishes like tamales, carnitas, or flour tortillas.

You'll need to render it first-cut into small cubes, cook slowly over low heat, then strain. Once rendered, use it exactly like store-bought lard in a 1:1 ratio.

  • Takes 1-2 hours to render but yields authentic flavor.
  • Stores in the fridge for weeks or freezes for months.

Skip if: You want a vegetarian option or need fat that's ready to use immediately.

Use Ratio Notes
Baking (pie crust, biscuits) 1:1 Use cold fat, cut into flour for flaky layers
Frying (high heat) 1:1 Shortening, ghee, or fatback handle heat best
Sautéing (medium heat) ¾ cup oil per 1 cup lard Olive oil or coconut oil works; adjust for liquid consistency

6 - Ghee (Clarified Butter)

Ghee handles higher heat than regular butter because the milk solids are removed. It has a nutty, buttery flavor that complements both sweet and savory dishes without the slight pork richness of lard.

Use it for frying, roasting, or baking where you need a fat that stays stable above 400°F. The texture mimics lard's smoothness, and the 1:1 ratio keeps measurements simple.

What to expect:

  • Works in pie crusts but won't taste as neutral as shortening.
  • Keeps at room temperature longer than butter without going rancid.
  • Adds a toasted, caramelized note that stands out in plainer recipes.
  • Pairs well with spiced dishes where the nutty flavor blends naturally.

If you're out of ghee as well, Butter swaps by recipe type covers other dairy and non-dairy fats that fry or bake similarly.

Skip if: You need a dairy-free fat or prefer a completely neutral taste.

Watch Out
Butter and olive oil smoke at lower temperatures than lard. Use them for sautéing or medium-heat roasting, not deep frying.

7 - Duck Fat

Duck fat delivers a deeper, richer flavor than lard with a slightly gamey edge. It's prized for roasting potatoes, confit, and high-heat searing where you want extra savoriness.

The texture and smoke point match lard closely, so the 1:1 swap works without adjustments. The flavor leans heavier, which can overpower delicate dishes but enhances hearty vegetables and roasted meats.

  • Use the same amount as lard-no math needed.
  • Best for roasting root vegetables or frying potatoes.
  • Stores in the fridge for months; freezes well for longer.

If you're short on duck fat too, instead of Duck Fat try these for other animal fats with similar richness.

The gamey note works in rustic dishes like cassoulet or braised greens but might taste too assertive in mild recipes like buttermilk biscuits.

Golden Rule
For baking, stick with solid fats-shortening, butter, or coconut oil. For frying or sautéing, liquid fats like olive oil need volume adjustments.

Picking the Right Replacement

The best substitute depends on Shortening works universally, butter adds richness to baked goods, and ghee or duck fat bring depth to roasted and fried foods.

For pastry and biscuits, reach for shortening or cold butter. For stovetop cooking, olive oil or ghee handles medium to high heat without overwhelming the dish.

  • Closest match - Vegetable shortening, neutral and flaky
  • Easiest grab - Butter, works in most recipes
  • Bold alternative - Duck fat, rich and savory

Frequently Asked Questions

Can I use oil instead of lard in baking?

Yes, but use about ¾ cup oil for every 1 cup of lard. Liquid fats won't create the same flaky layers, so expect a denser texture in pie crusts and biscuits.

Does butter taste the same as lard?

No. Butter adds a creamy, slightly sweet flavor, while lard has a subtle pork richness. The texture stays similar in baking, but the taste differs noticeably in savory dishes.

What's the best plant-based lard substitute?

Vegetable shortening or coconut oil. Both stay solid at room temperature and create flaky pastry without animal fat. Coconut oil adds a faint aroma; shortening stays neutral.

Can I fry with olive oil instead of lard?

Yes, but use refined or light olive oil for higher heat. Extra virgin olive oil smokes around 375°F, while lard handles 370°F. Adjust the amount to ¾ cup oil per 1 cup lard.

How do I store rendered fatback?

Cool it completely, strain out solids, and refrigerate in an airtight container for up to 3 months. For longer storage, freeze in portions for up to a year.

Lard Substitutes for Cooking and Baking1

7 Best Substitutes for Lard

No ratings yet
These lard substitutes offer options for baking and cooking based on texture and flavor needs. Use solid fats for flaky pastries and adjusted liquid fats for frying and sautéing. Choose based on fat's role in the recipe.
Print Recipe Pin Recipe
Prep Time 7 minutes mins
Cook Time 8 minutes mins
Total Time 15 minutes mins
Servings: 4 servings
Course: Cooking, Substitutes
Cuisine: American
Ingredients Method Notes

Ingredients
  

  • 1 cup Vegetable Shortening Neutral flavor, no pork taste; 1:1 swap with lard
  • 1 cup Butter Adds creamy, slightly sweet notes; 1:1 swap with lard
  • 1 cup Coconut Oil Subtle coconut aroma; solid at room temp; 1:1 swap with lard
  • 0.75 cup Olive Oil Fruity, peppery, lighter than lard; use ¾ cup per 1 cup lard
  • 1 cup Pork Fatback Rich pork flavor, authentic taste; render before use; 1:1 swap
  • 1 cup Ghee Nutty, buttery, no milk solids; stable above 400°F; 1:1 swap
  • 1 cup Duck Fat Deep savory, slightly gamey; match 1:1 swap with lard

Method
 

  1. Select substitute based on baking or cooking needs and desired flavor profile.
  2. Render pork fatback slowly over low heat and strain before use.
  3. Use solid fats like shortening, butter, coconut oil, ghee, or duck fat in a 1:1 ratio to maintain texture.
  4. Adjust liquid fats like olive oil to ¾ cup per 1 cup lard to prevent wetter dough.
  5. Use cold butter and work quickly to keep pastry layers distinct in baking.
  6. For frying or roasting, choose fats with higher smoke points like ghee, shortening, or fatback.
  7. Taste and adjust consistency as needed to balance flavor and texture.

Notes

Add olive oil slowly to dough to prevent it becoming too wet or sticky.

Tried this recipe?

Let us know how it was!

7 Substitutes for Hemp Oil in Dressings & Finishing Oils

January 23, 2026

You reach for Hemp Oil mid-recipe and the pantry comes up empty. Skip the store run.

Hemp Oil delivers a mild, nutty flavor with a hint of earthiness that works in both cold dressings and gentle cooking. It's not neutral, but it's not overwhelming either-more of a soft background note that supports bolder ingredients without fading completely.

Hemp Oil Substitutes for Dressings and Finishing Oils

The best swap depends on what the oil is doing. For raw dishes, choose something with a similar richness; for cooking, focus on smoke point and how the flavor holds up under heat.

Each substitute below is ranked by how closely it matches Hemp Oil's profile.

QUICK SUMMARY

Extra virgin olive oil, walnut oil, and avocado oil replace hemp oil best because they keep a smooth, nutty-to-grassy profile and the same pourable texture for dressings. For cooking, we manage flavor intensity-hemp oil tastes strongest raw, so we match body first and keep heat low. If the swap tastes flat, we add a small splash of acid and salt before adding more oil.

🥗Closest vibe: Use walnut oil in vinaigrettes when you want nutty depth.
⚖️Ratio + tweak: Swap 1:1; for olive oil, add lemon to keep it bright.
🔥Watch out: Flaxseed oil turns bitter with heat; keep it raw and refrigerated.

7 Hemp Oil Substitutes Without Big Changes

These substitutes are ranked by how closely they match Hemp Oil's mild, nutty profile and low-to-medium heat tolerance. Pick based on

Quick Substitute Reference
# Substitute Best For Ratio Key Note
1 Extra Virgin Olive Oil 🍳 Cooking 1:1 Fruitier and more peppery
2 Walnut Oil 🍳 Cooking 1:1 Rich, nutty with bitter finish
3 Avocado Oil ✨ Both 1:1 Mild, buttery with grassy notes
4 Flaxseed Oil 🍳 Cooking 1:1 Earthy and slightly bitter
5 Sunflower Oil ✨ Both 1:1 Light and neutral
6 Grapeseed Oil 🍳 Cooking 1:1 Clean, slightly nutty
7 Canola Oil ✨ Both 1:1 Neutral and budget-friendly

1 - Extra Virgin Olive Oil

Olive Oil runs fruitier and more peppery than Hemp Oil, with a grassy bite that some dishes love and others don't. Use it for dressings, drizzling over roasted vegetables, or low-heat sautés where the flavor adds something rather than distracting.

Swap 1 tablespoon Olive Oil for every tablespoon of Hemp Oil. The ratio stays simple-it's the flavor that shifts.

If you're short on Olive Oil too, tested Olive Oil replacements cover neutral and fruity options that work across most recipes.

Skip if: you need a neutral base or you're cooking above medium heat-Olive Oil's smoke point sits lower than you'd want for frying.

Hemp Oil

Works for: Mild nuttiness with earthy undertones

Skip if: You want something completely neutral

Olive Oil

Works for: Fruity depth in salads and finishing dishes

Skip if: The recipe needs higher heat or zero pepper notes

2 - Walnut Oil

Walnut Oil delivers a rich, nutty flavor with a slightly bitter finish that pairs well with leafy greens and roasted root vegetables. The nuttiness runs deeper than Hemp Oil, but the earthy backbone stays similar enough that most salads won't notice the swap.

Here's what to know:

  • Use 1 tablespoon per 1 tablespoon of Hemp Oil.
  • Best reserved for cold dishes-the low smoke point makes it unsuitable for even gentle heat.

Out of Walnut Oil as well? Common Walnut Oil swaps ranked includes other nut oils and seed-based options that handle similar roles.

Skip if: you're cooking anything-heat turns Walnut Oil bitter and kills the delicate flavor you're paying for.

3 - Avocado Oil

Avocado Oil offers mild, buttery flavor with subtle grassy notes that sit close to Hemp Oil's profile without the same nutty punch. It works across a wider range of uses-drizzle it raw or use it for roasting, searing, or stir-frying at higher temperatures than Hemp Oil can handle.

  • Swap 1:1 in any recipe.
  • The high smoke point (around 520°F) makes it one of the most flexible options here.
  • Flavor stays mild enough that it won't overpower delicate dishes.
  • The buttery richness can feel heavier in cold preparations compared to Hemp Oil's lighter body.

Skip if: you want a strong nutty flavor-Avocado Oil's mildness works better when you're letting other ingredients lead.

Best Pick
For high-heat cooking, Avocado Oil handles searing and roasting without breaking down or turning bitter.

4 - Flaxseed Oil

Flaxseed Oil runs more intense than Hemp Oil-earthier, slightly bitter, with a stronger grassy note that some people love and others find too assertive. Use it in smoothies, cold dressings, or drizzled over finished dishes where the bold flavor adds dimension rather than overpowering everything else.

The swap ratio stays simple: 1 tablespoon Flaxseed Oil per 1 tablespoon of Hemp Oil. Never heat it.

  • Store it in the fridge-Flaxseed Oil oxidizes quickly and turns rancid faster than most seed oils.
  • The low smoke point makes it unsuitable for any cooking method that involves heat.
  • Flavor runs more pronounced, so taste as you go in delicate recipes.
  • Works best in dishes where you want the oil to contribute noticeable flavor, not just richness.

If you're missing Flaxseed Oil as well, tested Flaxseed Oil replacements covers other cold-use oils with similar omega-3 profiles and earthy tones.

Skip if: you're cooking anything or you prefer mild flavor-the intensity here doesn't fade.

Use Ratio Notes
Salad Dressing 1:1 Bolder earthiness, less neutral than Hemp Oil
Smoothies 1:1 Adds richness with a grassy finish
Drizzle Over Grains 1:1 Use sparingly-flavor stands out more

5 - Sunflower Oil

Sunflower Oil runs light and neutral, with no bitterness and barely any flavor at all. It won't mimic Hemp Oil's nutty character, but it works when you need something that blends into the background-good for baking, mild dressings, or cooking where other ingredients carry the flavor.

The high smoke point (around 450°F) makes it reliable for roasting and frying. Swap 1 tablespoon Sunflower Oil for every tablespoon of Hemp Oil.

  • Flavor disappears almost entirely, so it won't add the subtle nuttiness Hemp Oil brings.
  • Works well in baked goods where you want fat without any competing flavor.
  • Budget-friendly and widely available.

If you're out of Sunflower Oil too, Sunflower Oil substitutes ranked covers neutral oils that handle similar tasks without introducing new flavors.

Skip if: the nutty flavor of Hemp Oil is essential to the dish-Sunflower Oil won't deliver that.

Shortcut
For quick weeknight cooking, Sunflower Oil handles everything from sautés to roasted vegetables without adding flavor or requiring special storage.

6 - Grapeseed Oil

Grapeseed Oil delivers a clean, light flavor with a faint nuttiness that sits somewhere between neutral and present. It works in dressings, marinades, and medium-heat cooking without overpowering other ingredients.

Use 1 tablespoon per 1 tablespoon of Hemp Oil. The flavor stays subtle enough that most recipes won't notice the swap, though you'll lose some of Hemp Oil's earthy depth.

Out of Grapeseed Oil as well? Grapeseed Oil replacements that work covers other light, slightly nutty oils that fit into similar use cases.

Skip if: you need a truly nutty flavor-the hint of nuttiness here is mild and doesn't replicate Hemp Oil's fuller profile.

Watch Out
Grapeseed Oil's mild flavor makes it easy to overuse in dressings-start with less and adjust, since it doesn't carry the same richness as Hemp Oil.

7 - Canola Oil

Canola Oil runs completely neutral with no nutty character, no bitterness, and no real flavor at all. It's the most budget-friendly option here and works across baking, frying, and roasting, but it won't add anything close to Hemp Oil's subtle earthiness.

Swap 1:1 in any recipe where the oil's flavor doesn't matter. The high smoke point (around 400°F) makes it reliable for most cooking methods.

Missing Canola Oil too? Replacements similar to Canola Oil covers other neutral oils that handle the same tasks without introducing flavor.

Skip if: the dish depends on Hemp Oil's nutty, earthy notes-Canola Oil won't deliver that.

Golden Rule
Save Canola Oil for recipes where you need fat without flavor-it won't replicate Hemp Oil's character, but it won't interfere either.

How to Choose a Hemp Oil Substitute

The best substitute depends on For cold dishes where nuttiness matters, Walnut Oil or Flaxseed Oil come closest. For cooking, Avocado Oil handles higher heat without breaking down.

  • Closest match - Walnut Oil for raw dishes
  • Easiest grab - Sunflower Oil for cooking
  • High-heat option - Avocado Oil for roasting and frying

Frequently Asked Questions

Can I use Olive Oil instead of Hemp Oil in salad dressing?

Yes, but expect a fruitier, more peppery flavor. Olive Oil works well in most dressings, though it won't replicate Hemp Oil's mild nuttiness.

Which substitute works best for cooking at higher heat?

Avocado Oil handles the highest heat (around 520°F), making it the most reliable choice for searing, roasting, or stir-frying. Sunflower Oil and Canola Oil also work well above medium heat.

Does Flaxseed Oil taste the same as Hemp Oil?

No. Flaxseed Oil runs earthier and more bitter than Hemp Oil, with a stronger grassy note. Use it in cold dishes where the bold flavor adds something rather than overwhelming the dish.

Can I substitute Hemp Oil in baking recipes?

Yes. Use Sunflower Oil or Canola Oil for a neutral swap that won't add competing flavors. If you want a hint of nuttiness, Walnut Oil works in baked goods that pair well with richer, earthier notes.

What's the easiest substitute to find in most kitchens?

Olive Oil or Canola Oil. Both are widely available and work across most uses, though neither replicates Hemp Oil's nutty character.

Hemp Oil Substitutes for Dressings and Finishing Oils

7 Best Substitutes for Hemp Oil

No ratings yet
When you need a stand-in for Hemp Oil, choose based on whether the oil is for raw use or cooking. Use similar richness oils for cold dishes and higher smoke point oils for heat.
Print Recipe Pin Recipe
Prep Time 6 minutes mins
Cook Time 6 minutes mins
Total Time 12 minutes mins
Servings: 4 servings
Course: Substitutes
Cuisine: General
Ingredients Method Notes

Ingredients
  

  • 1 tablespoon Extra Virgin Olive Oil Use 1 tablespoon per 1 tablespoon of Hemp Oil. Fruitier and more peppery flavor. Good for dressings and low-heat cooking. Skip if cooking above medium heat.
  • 1 tablespoon Walnut Oil Use 1 tablespoon per 1 tablespoon of Hemp Oil. Rich, nutty with a bitter finish. Best for cold dishes only; do not heat.
  • 1 tablespoon Avocado Oil Use 1 tablespoon per 1 tablespoon of Hemp Oil. Mild, buttery with grassy notes. High smoke point around 520°F; suitable for high-heat cooking.
  • 1 tablespoon Flaxseed Oil Use 1 tablespoon per 1 tablespoon of Hemp Oil. Earthy and slightly bitter. Store in fridge, never heat, flavor is intense.
  • 1 tablespoon Sunflower Oil Use 1 tablespoon per 1 tablespoon of Hemp Oil. Light and neutral flavor with high smoke point around 450°F. Does not mimic nuttiness.
  • 1 tablespoon Grapeseed Oil Use 1 tablespoon per 1 tablespoon of Hemp Oil. Clean, slightly nutty flavor. Mild enough for dressings and medium-heat cooking.
  • 1 tablespoon Canola Oil Use 1 tablespoon per 1 tablespoon of Hemp Oil. Neutral and budget-friendly. Suitable for baking, frying, roasting; no nuttiness.

Method
 

  1. Pick your substitute based on use: raw dishes benefit from Walnut or Flaxseed Oil; cooking calls for Avocado or Sunflower Oil.
  2. Measure the substitute oil at a 1:1 ratio with the Hemp Oil called for in your recipe.
  3. For cold applications, use oils raw. For cooking, consider the smoke point and use gentle heat when appropriate.
  4. Adjust flavor by tasting as you go, especially with stronger oils like Flaxseed or Walnut Oil to avoid overpowering the dish.
  5. For cooking at higher temperatures, use Avocado Oil for its high smoke point without breaking down or bitterness.
  6. Use Sunflower or Canola Oil for a more neutral taste in baking or mild cooking.
  7. Avoid heating Walnut or Flaxseed Oils to maintain their flavor and prevent bitterness.
  8. Final check: always taste-test your dish after adding substitutes and adjust seasoning or oil amount as needed.

Notes

Taste-test Flaxseed Oil slowly to avoid overpowering the dish with its strong flavor.

Tried this recipe?

Let us know how it was!

7 Best Substitutes for Spelt Flour in Healthy Baking

January 23, 2026

You're halfway through mixing dough when you realize the spelt flour container holds maybe two tablespoons. Not enough to finish, and substituting mid-recipe means the texture depends on what you grab next.

7 Best Substitutes for Spelt Flour in Healthy Baking

Spelt behaves like whole wheat but absorbs less liquid and produces a slightly lighter crumb. The swap that works best depends on making pancakes, or working with pastry-each needs different gluten strength and moisture balance.

Quick Substitute Reference
# Substitute Best For Ratio Key Note
1 Whole Wheat Flour 🥧 Baking 1:1 Denser, earthy flavor
2 All-Purpose Flour ✨ Both 1:1 Lighter texture, neutral
3 Farro Flour 🥧 Baking 1:1 Nutty, slightly chewier
4 Barley Flour 🥧 Baking ¾ cup per 1 cup Sweet malt notes
5 Oat Flour 🥧 Baking 1:1 + binder Gluten-free option
6 Almond Flour 🥧 Baking 1:1 Moist, dense crumb
7 Rye Flour 🥧 Baking ¾ cup per 1 cup Tangy, strong flavor
QUICK SUMMARY

Whole wheat and all-purpose flour are top substitutes based on texture and flavor. Prioritize matching liquid absorption and crumb lightness. Adjust water amounts when swapping to keep dough consistency right.

🌾Closest feel: Whole wheat adds a rustic, hearty texture similar to spelt.
⚖️Ratio + fix: Swap 1:1; increase water slightly for whole wheat flour.
⚠️Watch out: Barley flour has low gluten, so yeast breads may not rise well.

7 Spelt Flour Substitutes Without Big Changes

These options range from pantry staples to specialty grains. Pick based on what the recipe needs and what's already in your kitchen.

1 - Whole Wheat

Whole wheat flour absorbs more water than spelt, so dough feels stiffer at first. The flavor runs earthier, which works well in hearty breads and muffins where you want that rustic edge.

Use a 1:1 swap but add liquid gradually-start with the recipe amount, then drizzle in more if the dough feels too dry. Texture varies between grains.

Replacing Whole Wheat Flour works best when you match cooking style, and tested Whole Wheat Flour replacements keeps you in the right range for similar absorption.

Here's what to know:

  • Add 1-2 tablespoons extra water per cup to match spelt's lighter texture.
  • Expect a denser crumb and slightly longer rise time.
  • Works best in recipes where wheat flavor complements other ingredients.
  • Grind slightly coarser for muffins, finer for sandwich bread.

Skip if: You need a mild, neutral base or the recipe calls for delicate pastry layers.

Whole Wheat Flour

Works for: Hearty breads, muffins, rustic baked goods

Skip if: Delicate cakes or pastries need lighter texture

All-Purpose Flour

Works for: Most baking, neutral flavor base

Skip if: Nutty or whole-grain taste is essential

2 - All-Purpose

All-purpose flour produces a lighter crumb and neutral taste, so it works when you don't want grain flavor competing with other ingredients. The gluten network forms easily, which means bread rises predictably and cookies spread more.

Use 1:1 for most recipes, but watch baking times-things brown faster without spelt's bran. Each substitute behaves differently.

Understanding the role of All-purpose Flour helps you pick, and tested All-purpose Flour replacements narrows it to options that match gluten strength.

  • Reduce liquid slightly if the batter looks too thin.
  • Cookies spread more; chill dough 15 minutes before baking.
  • Bread rises faster; check 10 minutes early.
  • Neutral flavor lets spices and sweeteners stand out.

Skip if: You want whole-grain texture or nutty undertones.

3 - Farro

Farro flour tastes mildly nutty and produces a slightly chewier texture than spelt, making it a good match for rustic breads and pancakes. The gluten content sits between whole wheat and all-purpose, so dough handles easily without feeling gummy.

Swap 1:1 and expect a bit more chew in the final product. Grains absorb liquid at different rates.

A Farro swap may need adjusted water ratios, so common Farro swaps ranked helps you find options that behave similarly in baking.

  • Let dough rest 10 minutes after mixing for easier shaping.
  • Works well in recipes with olive oil or butter for flavor balance.

Skip if: You're making fine-textured cakes or need a mild flavor base.

Best Pick
For rustic bread with a chewy crumb, farro flour delivers texture closest to spelt without changing hydration much.

4 - Barley

Barley flour brings a sweet, malty flavor that works well in cookies and quick breads. It contains less gluten than spelt, so yeast doughs struggle to rise properly-stick to chemically leavened recipes like biscuits or scones.

Use ¾ cup barley flour for every 1 cup of spelt. Texture varies between grains.

Replacing Barley works best when you match cooking style, so instead of Barley try these for swaps that stay firm through mixing.

  • Increase baking powder by ¼ teaspoon per cup to compensate for lower gluten.
  • Pair with honey or maple syrup to go with the malt notes.

Skip if: You're baking yeast bread or need strong gluten structure.

5 - Oat

Oat flour produces a mild, slightly sweet crumb and works as a gluten-free option if you buy certified gluten-free oats. The lack of gluten means baked goods crumble more easily, so you'll need to add a binder like xanthan gum or extra egg.

Swap 1:1 but add ½ teaspoon xanthan gum per cup to hold the structure. Results vary by dish.

A Oatmeal replacement works best when you know its purpose, and simple Oatmeal substitutes list covers picks for texture control.

What to expect:

  • Texture turns denser and slightly crumbly without added binder.
  • Works well in muffins, pancakes, and quick breads where some crumble is fine.
  • Flavor stays neutral, letting other ingredients shine.

Skip if: Gluten structure is critical for the recipe's success, like crusty bread or laminated pastry.

Use Ratio Notes
Muffins 1:1 + binder Add ½ teaspoon xanthan gum
Pancakes 1:1 Let batter rest 5 minutes
Quick breads 1:1 + binder Expect denser crumb

6 - Almond

Almond flour adds moisture and a rich, nutty flavor to baked goods, producing a dense, tender crumb. It contains no gluten, so structure comes entirely from eggs or other binders-this works well for moist cakes, brownies, and cookies where a tight crumb isn't the goal.

Use 1:1 but expect wetter batter and longer baking times. Results vary by dish.

An Almonds replacement works best when you know its purpose, so Almonds swaps that match covers options for similar moisture and richness.

Here's what to know:

  • Bake at 25°F lower to prevent over-browning on the edges.
  • Add ¼ teaspoon baking powder per cup to help lift.
  • Works perfectly in flourless chocolate cakes and macarons.

Skip if: You need strong gluten for bread or recipes requiring a light, airy structure.

Watch Out
Almond flour browns faster than wheat-based flours-reduce oven temperature by 25°F and check 5 minutes early.

7 - Rye

Rye flour delivers a tangy, earthy flavor that shines in rustic breads and crackers. The gluten structure differs from spelt-it produces less rise and a denser crumb, so yeast breads turn out compact and hearty rather than light and fluffy.

Use ¾ cup rye flour for every 1 cup of spelt and expect a stronger flavor. Each substitute behaves differently.

Understanding the role of Rye Flour helps you pick, and simple Rye Flour substitutes list narrows it to options that hold similar tang and density.

Skip if: You're making fine-textured cakes or need a mild, neutral base for other flavors to stand out.

Golden Rule
Rye flour tastes assertive-pair it with caraway, molasses, or dark honey to balance the tang instead of fighting it.

How to Choose a Spelt Flour Substitute

Most of these swaps work without changing much, but the best choice depends on what you're making. For hearty breads, whole wheat or farro come closest.

For lighter baked goods or recipes where you need a neutral base, all-purpose flour handles the job without adding extra flavor.

  • Closest match - Whole Wheat for similar texture
  • Easiest grab - All-Purpose from any pantry
  • Dietary option - Oat Flour for gluten-free needs

Frequently Asked Questions

Can I use all-purpose flour instead of spelt flour in bread?

Yes, use a 1:1 ratio and expect a lighter crumb with less nutty flavor. All-purpose flour rises faster, so check the dough 10 minutes earlier than the recipe states.

Does spelt flour need more liquid than whole wheat flour?

Spelt absorbs less liquid than whole wheat, so when swapping whole wheat for spelt, add 1-2 tablespoons extra water per cup to match the original texture.

Can I substitute spelt flour with a gluten-free option?

Oat flour or almond flour work for gluten-free baking, but both need a binder like xanthan gum or extra egg. Expect a denser crumb and adjust baking times slightly.

What happens if I use rye flour instead of spelt flour?

Rye flour produces a denser, tangier result with less rise. Use ¾ cup rye for every 1 cup spelt and pair it with bold flavors like caraway or molasses to balance the earthiness.

Can I mix different flours to replace spelt flour?

Yes, combining 50% all-purpose and 50% whole wheat mimics spelt's balance of lightness and whole-grain flavor. This blend works well in most recipes without major adjustments.

7 Best Substitutes for Spelt Flour in Healthy Baking

7 Best Substitutes for Spelt Flour

No ratings yet
This guide helps you choose the right substitute for spelt flour based on what you're making. Each option adjusts hydration and texture differently, so follow substitution tips carefully for best results.
Print Recipe Pin Recipe
Prep Time 7 minutes mins
Cook Time 8 minutes mins
Total Time 15 minutes mins
Servings: 6 servings
Course: Baking
Cuisine: International
Ingredients Method Notes

Ingredients
  

  • 1 cup Whole Wheat Flour Use 1:1 ratio; add 1-2 tablespoons more water gradually to match spelt's lighter texture.
  • 1 cup All-Purpose Flour Use 1:1 ratio; reduce liquid slightly and chill dough 15 minutes for best results.
  • 1 cup Farro Flour Use 1:1 ratio; let dough rest 10 minutes after mixing for easier shaping.
  • 0.75 cup Barley Flour Use ¾ cup barley flour per 1 cup spelt; increase baking powder by ¼ teaspoon per cup.
  • 1 cup Oat Flour Use 1:1 ratio; add ½ teaspoon xanthan gum per cup to hold structure as gluten-free option.
  • 1 cup Almond Flour Use 1:1 ratio; bake 25°F lower and add ¼ teaspoon baking powder per cup to prevent over-browning.
  • 0.75 cup Rye Flour Use ¾ cup rye flour per 1 cup spelt; pair with caraway or molasses for balanced flavor.

Method
 

  1. Choose the substitute based on your recipe type: hearty breads favor whole wheat or farro; lighter baked goods suit all-purpose.
  2. Prepare the substitute by adjusting hydration or adding binders as needed for gluten-free options.
  3. Apply the specified substitution ratio carefully, adding extra water or binders gradually where recommended.
  4. Let dough rest after mixing when using farro flour to improve texture and shaping.
  5. Lower baking temperature with almond flour to prevent over-browning, and adjust baking powder as advised.
  6. Check dough or batter consistency and adjust liquid amounts slowly to maintain the intended crumb and rise.

Notes

Add liquid slowly when substituting whole wheat flour to prevent dry dough and maintain the correct texture.

Tried this recipe?

Let us know how it was!

7 Substitutes for Semolina Flour for Italian Pasta & Baking

January 23, 2026

We're scaling up the pasta dough and there's not enough semolina flour to cover it. Semolina gives pasta that firm bite and yellow color, especially when you need the dough to hold shape through rolling and cutting.

7 Substitutes for Semolina Flour for Italian Pasta & Baking

Swaps vary based on what the semolina does in your recipe-texture, color, or gluten structure. Match the function first, then adjust liquid or kneading time if needed.

Quick Substitute Reference
# Substitute Best For Ratio Key Note
1 All-Purpose Flour ✨ Both 1:1 Milder flavor, softer texture
2 Durum Wheat Flour ✨ Both 1:1 Similar flavor, finer grind
3 Whole Wheat Flour 🍳 Cooking 1:1 Nuttier flavor, denser texture
4 Cornmeal 🥧 Baking 1:1 Sweet, gritty texture
5 Rice Flour 🥧 Baking 1:1 Neutral flavor, very fine
6 Chickpea Flour 🍳 Cooking 1:1 Earthy, slightly nutty
7 Semolina Blend ✨ Both ½ + ½ Balanced texture compromise
QUICK SUMMARY

Durum wheat flour and all-purpose flour are top substitutes, focusing on texture and gluten strength first. Adjust liquid or kneading time to compensate for differences. Choose based on whether a firmer bite or softer dough is needed.

🌾Closest texture: Durum wheat flour mimics semolina's strength and nutty flavor well.
⚖️Ratio + fix: Swap 1:1; increase kneading slightly for all-purpose flour to build gluten.
⚠️Watch out: Cornmeal lacks gluten, so dough won't stretch or hold shape like semolina.

7 Quick Semolina Flour Substitutes That Work

The following options work best in different recipe situations. Some keep the texture close, others shift flavor or color slightly.

1 - All-Purpose Flour

All-purpose flour produces softer dough because it has less protein than semolina. The pasta will cook faster and feel more tender, making it a solid choice for dishes where delicate texture matters more than chew.

Use one cup of all-purpose flour for every cup of semolina. You may need slightly less water since all-purpose absorbs differently.

If you're short on all-purpose flour too, All-purpose Flour alternatives worth trying covers options that adjust well for pasta and baking.

Skip if: You need firm pasta that holds up to heavy sauces.

All-Purpose Flour

Works for: Tender pasta, quick mixing, most baking recipes

Skip if: You want chewy texture or golden color

Durum Wheat Flour

Works for: Firm pasta, bread dough, close flavor match

Skip if: You prefer a coarse, gritty texture

2 - Durum Wheat Flour

Fine durum wheat flour behaves almost like semolina in pasta and bread, giving you similar strength and a slightly nutty flavor. The grind is finer, so the dough feels smoother and less gritty, but it still holds up well during rolling and shaping.

Swap one cup of durum wheat flour for every cup of semolina. Knead the dough a bit longer to develop the gluten fully.

3 - Whole Wheat Flour

Whole wheat flour adds a denser, nuttier profile that works well in rustic pasta or hearty breads. It absorbs more liquid than semolina, so dough can feel drier at first.

Use one cup of whole wheat flour for every cup of semolina, and add water in small amounts until the dough comes together. The texture will be heavier, which fits well with chunky sauces or baked casseroles.

If you're out of whole wheat flour as well, common Whole Wheat Flour swaps ranked covers flours that match the density.

Skip if: You're making delicate cakes or pastries.

Best Pick
For pasta, durum wheat flour keeps the closest texture and bite without needing major adjustments to the recipe.

4 - Cornmeal (fine grind)

Fine cornmeal adds crunch and a subtle sweetness that works well in pizza crusts or breads where you want a gritty bite. It doesn't build gluten, so it won't give you the same stretch or chew as semolina.

What to expect:

  • Use one cup of fine cornmeal for every cup of semolina.
  • Mix with all-purpose flour (50/50) if you need more structure.
  • The dough will feel coarser and may crumble more easily.
  • Color shifts to a golden yellow, which can look appealing in crusts.

When you need that gritty texture for dusting or added crunch, cornmeal delivers. It won't work for smooth pasta dough, but it shines in breads and flatbreads where the texture adds character.

If you're missing cornmeal too, common Cornmeal swaps ranked lists grains with similar grit.

Skip if: You're making smooth pasta or cakes.

Use Ratio Notes
Fresh pasta dough 1:1 Add extra water; dough will be softer
Bread or pizza crust 1:1 Blend with all-purpose for better rise
Dusting surfaces As needed Prevents sticking, adds slight crunch

5 - Rice Flour

Rice flour offers a very fine, powdery texture that works for gluten-free baking or as a thickener. It doesn't develop chewiness, so pasta made with rice flour alone will be fragile and soft.

Use one cup of rice flour for every cup of semolina, but blend it with a binder like xanthan gum or tapioca starch to hold the dough together. The flavor stays neutral, which lets other ingredients stand out.

If you're out of rice flour as well, instead of Rice Flour try these for gluten-free options that adjust for texture.

Skip if: You need chewy dough textures or firm pasta.

Watch Out
Rice flour dough tears easily. Roll it gently and keep extra starch on hand for dusting to prevent sticking.

6 - Chickpea Flour

Chickpea flour brings an earthy, slightly nutty flavor that fits savory flatbreads and batters. It adds protein and holds moisture well, making it a good choice for gluten-free or high-protein recipes.

  • Use one cup of chickpea flour for every cup of semolina.
  • The dough will feel denser and may need a bit more water to stay pliable.

For flatbreads like socca or savory pancakes, chickpea flour shines. It won't work in sweet cakes or delicate pastries where the flavor would clash.

If you're short on chickpea flour too, instead of Chickpea try these for other protein-rich swaps.

Skip if: You're making sweet cakes or pastries.

Golden Rule
Toast chickpea flour lightly before mixing to reduce any raw, beany flavor and bring out a nuttier taste.

7 - Semolina Blend

Mixing half semolina with half all-purpose flour gives you a middle ground-less grit than pure semolina, but more structure than all-purpose alone. This works well when you're low on semolina and want to stretch what you have.

  • Use ½ cup semolina plus ½ cup all-purpose for every 1 cup of semolina.
  • The dough will knead more easily and feel slightly softer.

The blend keeps some of the yellow color and firm bite, making it a practical choice for fresh pasta or pizza dough. You lose a bit of chew, but gain easier handling and a smoother texture.

If you're out of all-purpose flour as well, All-purpose Flour alternatives to try covers flours that blend well with semolina.

Skip if: You need pure semolina flavor and texture.

Shortcut
Keep the semolina-to-all-purpose ratio flexible. Adjust based on whether you want more bite (more semolina) or easier handling (more all-purpose).

How to Choose a Semolina Flour Substitute

Most of these swaps work without changing the recipe much, but the best choice depends on what you're making. For pasta, durum wheat flour or the semolina blend keeps texture closest.

For breads or crusts where you want crunch, fine cornmeal adds the right bite.

Start with durum wheat flour if you need the closest match. If you're baking gluten-free, rice flour or chickpea flour adjusts well when paired with binders.

  • Closest match - Durum wheat flour keeps similar bite
  • Easiest grab - All-purpose flour works in most recipes
  • Gluten-free option - Rice flour adjusts with binders

Frequently Asked Questions

Can I use all-purpose flour instead of semolina for pasta?

Yes, all-purpose flour works for pasta but produces a softer, more tender texture. Use the same amount and reduce water slightly since all-purpose absorbs less liquid than semolina.

Does semolina substitute change the flavor of bread?

Some substitutes shift flavor slightly. Whole wheat flour adds a nuttier taste, while rice flour stays neutral. Durum wheat flour keeps the closest flavor to semolina.

Can I use semolina substitutes for pizza dough?

Yes, all-purpose flour or a semolina blend works well for pizza dough. Fine cornmeal adds crunch to the crust if you want extra texture.

What's the best gluten-free semolina substitute?

Rice flour works best for gluten-free baking, but it needs a binder like xanthan gum to hold the dough together. Chickpea flour adds more protein and structure for savory recipes.

Do I need to adjust cooking time when using a semolina substitute?

Pasta made with all-purpose flour cooks faster than semolina pasta, so check a minute or two earlier. Breads and crusts usually keep the same baking time.

7 Substitutes for Semolina Flour for Italian Pasta & Baking

7 Best Substitutes for Semolina Flour

No ratings yet
Use these seven substitutes for semolina flour to adjust texture, color, and gluten structure in pasta, breads, and baking. Choose based on your recipe needs and adjust liquids or kneading accordingly.
Print Recipe Pin Recipe
Prep Time 7 minutes mins
Cook Time 6 minutes mins
Total Time 13 minutes mins
Servings: 4 servings
Course: Baking, Substitutes
Cuisine: General
Ingredients Method Notes

Ingredients
  

  • 1 cup All-Purpose Flour Milder flavor and softer texture compared to semolina, use equal amount; may need less water.
  • 1 cup Durum Wheat Flour Similar flavor with finer grind; use equal amount and knead dough longer to develop gluten.
  • 1 cup Whole Wheat Flour Nuttier flavor and denser texture; use equal amount and add water gradually until dough forms.
  • 1 cup Cornmeal Sweet, gritty texture; use fine grind and equal amount; blend with all-purpose flour 50/50 for more structure.
  • 1 cup Rice Flour Neutral flavor, very fine; use equal amount, blend with a binder like xanthan gum or tapioca starch.
  • 1 cup Chickpea Flour Earthy, slightly nutty; use equal amount; dough may be denser and require more water to stay pliable.
  • 0.5 cup Semolina Blend Use half semolina and half all-purpose flour for every cup of semolina; balanced texture with easier handling.
  • 0.5 cup Semolina Blend (see above)

Method
 

  1. Choose your substitute based on the recipe needs: pasta requires firmness and bite, breads benefit from texture, and gluten-free needs binders.
  2. For flour substitutes like all-purpose, durum wheat, whole wheat, use them at a 1:1 ratio with semolina; adjust water slightly as needed.
  3. For cornmeal, use fine grind at 1:1 ratio; blend 50/50 with all-purpose flour for better structure in breads and crusts.
  4. Rice flour requires blending with a binder such as xanthan gum or tapioca starch to hold the dough together; use 1:1 ratio.
  5. Chickpea flour needs slightly more water and benefits from toasting lightly before mixing to reduce raw flavor and enhance nuttiness; use 1:1 ratio.
  6. For semolina blend, mix half semolina with half all-purpose flour for every cup of semolina to achieve balanced texture and easier kneading.
  7. Adjust kneading time for durum wheat to fully develop gluten and water amounts for whole wheat or chickpea to ensure pliability.
  8. Taste and check the dough texture during mixing; pasta made with substitutes like all-purpose flour cooks faster so monitor closely.

Notes

Toast chickpea flour lightly before mixing to avoid raw flavor and ensure smooth texture in the dough.

Tried this recipe?

Let us know how it was!

15 Best Sides to Serve with Aioli for Easy Dipping

January 23, 2026

Creamy, garlicky, rich. Aioli brings all of that to the plate already.

What it needs is something to dip, drag, or spread it across-and ideally a mix of textures to keep each bite interesting.

15 Best Sides to Serve with Aioli for Easy Dipping
QUICK SUMMARY

Creamy and garlicky aioli goes well with crispy fingerling potatoes for crunch, lemon parmesan asparagus for brightness, and garlic herb focaccia for soft, flavorful scooping.

🥔Soak it up: Crispy Fingerling Potatoes, Garlic Herb Focaccia, Paprika Roasted Cauliflower
🥗Add freshness: Lemon Parmesan Asparagus, Apple Cider Slaw, Roasted Vegetables
⏱️Quick pick: Apple Cider Slaw ready in 10 minutes

The best pairings fall into a few categories: crispy things that scoop up that thick, tangy sauce; roasted vegetables with enough char to stand up to the richness; and fresh, crunchy sides that cut through the creaminess between bites. Bread works.

Potatoes work better. Anything with edges that crisp up becomes a vehicle worth loading.

These 15 sides cover quick weeknight dippers and hosting-worthy spreads. From golden starches to bright salads, there is something here for any occasion.

# Side Dish Best For Prep
1 Crispy Fingerling Potatoes ✨ Any ⚡ Medium
2 Lemon Parmesan Asparagus ✨ Any ✅ Easy
3 Garlic Herb Focaccia 🎉 Hosting 🔪 Involved
4 Apple Cider Slaw ✨ Any ✅ Easy
5 Paprika Roasted Cauliflower ✨ Any ⚡ Medium
6 Herb Chicken Thighs ✨ Any ⚡ Medium
7 Marinated Green Beans ✨ Any ✅ Easy
8 Olive Oil Baguette ✨ Any ✅ Easy
9 Chili Lime Corn ✨ Any ✅ Easy
10 Garlic Almond Green Beans 🌙 Weeknight ✅ Easy
11 Tomato Cucumber Salad 🌙 Weeknight ✅ Easy
12 Lemon Garlic Shrimp ✨ Any ✅ Easy
13 Spicy Roasted Chickpeas ✨ Any ⚡ Medium
14 Lemon Herb Quinoa ✨ Any ⚡ Medium
15 Red Pepper Eggplant Dip 🎉 Hosting 🔪 Involved

15 Sides That Go With Aioli

From crispy dippers to fresh vegetables that need a creamy companion, these options work for casual snacking and dinner plates alike. Build your spread with one starchy option, one vegetable, and maybe something bright to balance the richness.

1. Crispy Fingerling Potatoes

Potatoes and aioli belong together. The crispy exterior scoops up sauce while the tender insides soak it in without falling apart.

Parboil fingerlings before roasting-this guarantees creamy centers with shatteringly crisp skins. Smash them slightly with the back of a fork before they hit the oven for extra craggy edges that catch more aioli.

We keep golden fingerling potatoes on the side on rotation because they work with nearly anything.

Quick Tip
Let potatoes cool 5 minutes after parboiling-dry surfaces crisp better than wet ones.

2. Lemon Parmesan Asparagus

Char and acid cut through richness. Grilled asparagus brings both, plus a vegetal bite that keeps the plate from feeling too heavy.

  • Grill over high heat until tips char slightly-about 3 minutes per side
  • Squeeze lemon after grilling, not before, to prevent steaming

The parmesan adds salt and nuttiness without competing with the aioli's garlic punch. If you enjoy bright parmesan asparagus on the side, this method delivers every time.

Method Time Best For
Grilled 6 min Smoky char
Roasted 12 min Hands-off cooking
Blanched 3 min Bright green color

3. Garlic Herb Focaccia

Soft, pillowy bread tears into perfect aioli-scooping pieces. The olive oil in the dough echoes the richness while herbs add fragrance without overpowering.

Warm the focaccia slightly before serving-about 5 minutes at 350°F. This releases the rosemary aroma and softens the crumb for better dipping.

  • Dimple the dough deeply so pools of olive oil collect on top
  • Flaky salt added after baking stays crunchy
  • Day-old focaccia toasts into crispy dippers
  • Try this easy focaccia bread recipe for hosting

The thick slices hold up to generous aioli spreading without getting soggy. If you love warm soup bowls we love, focaccia makes an excellent bread basket companion for those meals too.

Our Pick
Focaccia torn into rough pieces-the irregular edges hold more aioli than neat slices.

4. Apple Cider Slaw

Crunch and tang in one bowl. The vinegar bite wakes up your palate between rich, creamy aioli dips.

Make this at least 30 minutes ahead. The cabbage softens slightly while staying snappy, and the flavors meld into something more cohesive than freshly dressed slaw.

Red and green cabbage mixed together adds color without extra work.

We reach for a cool side to try when building spreads that need textural contrast. The acidity resets your palate for the next bite of something creamy.

5. Paprika Roasted Cauliflower

Smoky spice and caramelized edges give cauliflower enough presence to stand next to bold aioli. The florets turn golden-brown and slightly charred-perfect for dragging through that thick, garlicky sauce.

  • Cut florets the same size for even cooking
  • Roast at 425°F until edges blacken slightly
  • Smoked paprika adds depth; sweet paprika keeps it mellow

High heat matters here. Low temperatures steam the cauliflower instead of roasting it, and you lose all that crispy surface area.

Check out fresh cauliflower florets on the side for a faster air fryer method.

The florets almost disappear into a creamy spread, which means you can load them up generously.

Golden Rule
Space florets apart on the pan-crowding creates steam and prevents browning.

6. Herb Chicken Thighs

Juicy, savory protein that begs for dipping. Chicken thighs have enough fat to stay moist, and the crispy skin becomes an aioli delivery system.

A few notes:

  • Pat skin completely dry before seasoning
  • Start skin-side down in a cold pan for crispier results
  • Rest 5 minutes before slicing to keep juices inside
  • Fresh herbs under the skin perfume the meat as it cooks

This turns aioli from condiment to centerpiece. Slice the thighs and arrange around a bowl of sauce for a quick chicken thighs side dish that doubles as an appetizer.

The herby, garlicky meat echoes the aioli's flavors while the crispy skin adds the crunch the plate needs.

Bone-In Thighs

Works for: Juicier meat, more flavor, impressive presentation

Skip if: You need dinner on the table in under 25 minutes

Boneless Thighs

Works for: Faster cooking, easier slicing, kid-friendly portions

Skip if: You want that crispy skin-on experience

7. Marinated Green Beans

Tangy, snappy, and completely different from creamy aioli. The vinegar marinade adds brightness that cuts through richness without adding more fat.

Blanch beans until they turn bright green but still snap when bent-about 2 minutes in boiling water, then straight into ice water. This keeps the color bright and the texture crisp.

The marinade does double duty. It seasons the beans and creates a light dressing that pools at the bottom of the bowl.

Consider a tangy side to try if you enjoy this style of cold vegetable salad.

If You Want Try This
More crunch Blanch for 90 seconds only
Deeper flavor Marinate overnight
Some heat Add red pepper flakes to marinade

8. Olive Oil Baguette

Classic for a reason. Crusty bread with a drizzle of good olive oil creates the simplest possible aioli vehicle-and sometimes simple wins.

Keep in mind:

  • Slice on a bias for longer pieces that scoop better
  • Toast lightly for crunch without drying out the crumb
  • Rub a raw garlic clove on warm bread before the oil hits

The crust provides crunch while the soft interior absorbs aioli like a sponge. Day-old baguette actually works better here-it is sturdier and toasts more evenly than fresh bread.

Shortcut
Supermarket baguettes crisp up nicely in a 400°F oven for 5 minutes-no homemade bread required.

9. Chili Lime Corn

Sweetness, heat, and char in every kernel. Grilled corn brings a smoky edge that holds its own against garlicky aioli, and the lime keeps things from getting too heavy.

What to know:

  • Grill husked corn directly over flames until kernels blacken in spots
  • Squeeze lime while corn is still hot so juice absorbs

The chili butter melts into the grooves between kernels. Each bite alternates between sweet, spicy, and charred-then you dip it in cool, creamy aioli for contrast.

Check out this fresh lime butter recipe for a similar flavor on rice.

If you enjoy fresh seafood dinner options, this corn works beautifully alongside shellfish and aioli spreads.

Watch Out
Corn burns fast over high heat-rotate every 2 minutes and do not walk away from the grill.

10. Garlic Almond Green Beans

Nutty crunch meets tender snap. These green beans bring texture contrast that creamy aioli desperately needs, plus the toasted almonds add a savory depth.

Sauté the beans first, then add almonds in the last minute. Earlier addition makes them soggy instead of crunchy.

The garlic goes in right before the almonds-burned garlic tastes bitter and ruins the whole dish.

  • Use slivered almonds for even toasting
  • High heat keeps beans bright green
  • A splash of soy sauce adds umami without extra salt

This dish comes together in 15 minutes flat. We often pair it with a roasted toasted almonds side dish when building bigger vegetable spreads.

11. Tomato Cucumber Salad

Cold, juicy, and refreshing. This salad does exactly what aioli needs-it provides crunch and freshness that cuts through all that creamy richness.

Use the ripest tomatoes you can find. Mealy, out-of-season tomatoes turn this dish watery and bland.

Cherry tomatoes work year-round when full-sized varieties disappoint.

Salt the cucumbers 10 minutes before assembling. This draws out excess water so the salad stays crisp instead of sitting in a puddle.

Toss with olive oil, red wine vinegar, and fresh herbs right before serving.

If you want something fresh on the side, this salad delivers without competing for attention.

Tomato Type Texture Best For
Beefsteak Meaty, thick Summer peak season
Cherry Firm, juicy Year-round reliability
Roma Dense, less watery Salads that sit longer

12. Lemon Garlic Shrimp

Tender seafood with bright citrus-and every single piece begs for an aioli dip. Shrimp cook fast, pick up garlic flavor instantly, and look impressive on a spread.

  • Pat shrimp completely dry before cooking
  • High heat for 90 seconds per side-no more
  • Add lemon juice off the heat to prevent bitterness
  • Garlic goes in last to avoid burning

Skewers make serving easier, but loose shrimp work fine for casual settings. The garlic in the shrimp echoes the aioli without doubling down too heavily.

Try this easy shrimp skewers recipe for a similar approach.

When building bigger spreads with simple fish dishes we love, these shrimp become the protein anchor.

Pan-Seared

Works for: Weeknight speed, easier cleanup, controlled browning

Skip if: You want smoky, grilled flavor

Grilled

Works for: Char marks, outdoor entertaining, bigger batches

Skip if: Weather is bad or you lack outdoor space

13. Spicy Roasted Chickpeas

Crunchy, smoky, and surprisingly addictive. These roasted chickpeas add texture and heat that creamy aioli cools down perfectly.

A few notes:

  • Drain and dry chickpeas thoroughly-wet chickpeas steam instead of crisp
  • Single layer on the pan with space between each one

Toss with smoked paprika, cumin, and cayenne after roasting so the spices stick to the hot surface. They stay crunchiest eaten within a few hours, though they soften slightly by day two.

Check out an easy chickpea crunch to try for another crispy legume snack.

Quick Tip
Shake the pan halfway through roasting to flip chickpeas without handling each one.

14. Lemon Herb Quinoa

Light, fluffy grains that soak up aioli without turning heavy. The lemon keeps things bright, and fresh herbs add color the plate might be missing.

Fluff quinoa with a fork after cooking-stirring packs it down and makes it gummy. The grains should be separate and slightly bouncy, not clumped together.

  • Toast dry quinoa before adding liquid for nuttier flavor
  • Use chicken or vegetable broth instead of water
  • Fold in herbs after cooking to keep them bright
  • Lemon zest adds more punch than juice alone

We make our favorite quinoa salad side with similar techniques. The grains absorb flavors beautifully and hold up well to rich, creamy sauces.

If You Want Try This
Nuttier flavor Toast quinoa dry for 3 minutes first
More brightness Add lemon zest and juice both
Extra protein Fold in chickpeas or white beans

15. Red Pepper Eggplant Dip

Smoky, silky, and layered with roasted vegetable depth. This spread sits beautifully next to aioli-two dips, different flavors, same bread basket.

Roast peppers and eggplant until the skins blister and char. The blackened exterior peels away to reveal soft, smoky flesh underneath.

Blend until smooth or leave chunky for more texture.

Keep in mind:

  • Broil vegetables until skin is completely blackened
  • Steam in a covered bowl to loosen skins
  • Season after blending-roasted vegetables concentrate flavor

This takes longer than other sides, but you can make it a day ahead. Check out this cool side dish recipe for another eggplant preparation that works alongside aioli spreads.

Our Pick
Serve both dips side by side with pita chips-guests can mix and match flavors.

A few common questions come up when planning sides for aioli.

Frequently Asked Questions

How much aioli do I need per person?

Plan about 2 tablespoons per person for dipping, or 3-4 tablespoons if aioli is the main sauce for the meal.

Can I make aioli ahead of time?

Aioli keeps refrigerated for up to 5 days in an airtight container, and the garlic flavor actually mellows and improves after a day.

What vegetables work best for dipping in aioli?

Sturdy raw vegetables like carrots, celery, and bell peppers work well, along with roasted options like potatoes, cauliflower, and asparagus.

Is aioli safe at room temperature during a party?

Aioli should not sit out for more than 2 hours-keep it cold by nesting the serving bowl in a larger bowl filled with ice.

Can I thin aioli if it seems too thick?

Whisk in a teaspoon of water or lemon juice at a time until you reach your desired consistency for drizzling or lighter dipping.

Sides to Serve with Aioli for Easy Dipping

What to Serve with Aioli

No ratings yet
This guide offers 15 sides that complement aioli, helping home cooks build balanced meals with varied textures and flavors. From crispy potatoes to fresh salads, it ensures a versatile and well-rounded plate.
Print Recipe Pin Recipe
Prep Time 15 minutes mins
Cook Time 15 minutes mins
Total Time 30 minutes mins
Servings: 4 servings
Course: Appetizer, Sides
Cuisine: Universal
Ingredients Method Notes

Ingredients
  

  • Crispy Fingerling Potatoes crispy exterior, tender interior, great for scooping aioli
  • Lemon Parmesan Asparagus charred and acidic, balances richness
  • Garlic Herb Focaccia pillowy bread, perfect for dipping and spreading
  • Apple Cider Slaw crunchy and tangy, palate cleanser
  • Paprika Roasted Cauliflower smoky and crispy, stands up to rich aioli
  • Herb Chicken Thighs savory protein with crispy skin for dipping
  • Marinated Green Beans tangy and snappy, cuts richness
  • Olive Oil Baguette crusty bread, simple and classic aioli vehicle
  • Chili Lime Corn sweet, spicy, and smoky contrast
  • Garlic Almond Green Beans nutty crunch and tender snap
  • Tomato Cucumber Salad cold, juicy, and refreshing for contrast
  • Lemon Garlic Shrimp tender, bright, and garlicky seafood
  • Spicy Roasted Chickpeas crunchy and smoky with heat
  • Lemon Herb Quinoa light, fluffy grains with bright flavor
  • Red Pepper Eggplant Dip smoky, silky roasted vegetable spread

Method
 

  1. Choose 2-3 sides that balance the plate including a fresh or crunchy option, a starchy side, and a vegetable for texture and flavor contrast.
  2. Start preparing the longest-cook side first, such as roasted vegetables or chicken thighs, and finish with quick and easy sides last.
  3. Serve the selected sides with aioli on the side for dipping, spreading, or drizzling as desired.

Notes

Start starchy sides first and add a fresh vegetable side to keep the plate balanced and avoid heavy or mushy textures.

Tried this recipe?

Let us know how it was!

15 Best Sides to Serve with Watermelon Gazpacho Summer Meals

January 23, 2026

Watermelon gazpacho lands somewhere between soup and salad-chilled, sweet, slightly savory, and refreshing enough to make you forget how hot it is outside. The smooth texture and fruit-forward flavor need backup.

15 Best Sides to Serve with Watermelon Gazpacho Summer Meals
QUICK SUMMARY

Watermelon gazpacho is chilled, sweet, and smooth with a subtle savory note. Toasted Garlic Herb Baguette adds warm crunch, Crispy Parmesan Crackers bring salty texture, and Grilled Chili Lime Shrimp provides smoky protein without heaviness.

🍞Soak it up: Toasted Garlic Herb Baguette, Crispy Parmesan Crackers
🥗Add freshness: Apple Cider Slaw, Grilled Parmesan Asparagus
⏱️Quick pick: Crispy Parmesan Crackers ready in 10 minutes

What goes alongside matters more than you might expect. A cold soup disappears fast without something to dip, crunch, or warm the plate.

Bread gives you something to do with your hands. A crisp salad adds texture contrast.

A small protein turns a light starter into a full meal.

These 15 sides cover bread and crackers for dipping, salads with bite, and a few warm options for when you want more than cold on cold. Some take five minutes.

Others work better when you have guests coming over and time to spare.

Pick one or two based on the occasion-weeknight lunch needs different backup than a summer dinner party spread.

# Side Dish Best For Prep
1 Toasted Garlic Herb Baguette ✨ Any ✅ Easy
2 Crispy Parmesan Crackers ✨ Any ⚡ Medium
3 Apple Cider Slaw ✨ Any ✅ Easy
4 Grilled Chili Lime Shrimp ✨ Any ⚡ Medium
5 Grilled Parmesan Asparagus ✨ Any ✅ Easy
6 Sundried Tomato Focaccia 🎉 Hosting ✅ Easy
7 Fennel Orange Salad ✨ Any ✅ Easy
8 Avocado Cilantro Dip ✨ Any ✅ Easy
9 Paprika Chicken Thighs 🌙 Weeknight ⚡ Medium
10 Cucumber Mint Dip ✨ Any ✅ Easy
11 Chili Lime Corn ✨ Any ⚡ Medium
12 Mozzarella Tomato Skewers 🎉 Hosting ✅ Easy
13 Arugula Feta Salad ✨ Any ✅ Easy
14 Spiced Roasted Chickpeas ✨ Any 🔪 Involved
15 Fontina Tomato Panini 🎉 Hosting ✅ Easy

15 Sides That Go With Watermelon Gazpacho

The list moves from bread and dips through salads and vegetables to heartier protein options. Start with what sounds good, then think about building a plate-one bread plus one salad covers most occasions.

1. Toasted Garlic Herb Baguette

Warm, crispy bread does the heavy lifting here. Cold soup needs something toasted to drag through it, and plain crackers feel like an afterthought.

Slice a baguette on the bias, brush with olive oil, and add minced garlic plus a pinch of dried herbs. Toast until golden-about four minutes under the broiler.

  • Watch closely after minute three-garlic burns fast under high heat
  • Day-old bread works better than fresh; it crisps without turning chewy

The smoky edges and garlic punch give your spoon a break while adding warmth to an otherwise all-cold meal.

Golden Rule
Brush oil on both sides of the bread-single-sided slices dry out before they crisp.

2. Crispy Parmesan Crackers

Salty, lacy cheese crackers shatter when you bite into them. That crunch is exactly what smooth gazpacho lacks.

Pile small mounds of shredded parmesan on a parchment-lined sheet and bake at 400°F until the edges turn golden and the centers bubble. They crisp as they cool.

A few notes:

  • Use freshly shredded parmesan, not the pre-grated kind-it melts cleaner
  • Add a crack of black pepper or smoked paprika before baking for extra dimension

Make these a day ahead if you want. They store well in an airtight container and taste even better the next morning.

If you enjoy warm cheese crackers on the side, these deliver without much effort.

If You Want Try This
Bigger crackers Use 2 tablespoons per mound
More flavor Mix in dried rosemary before baking
Extra crunch Bake 1-2 minutes longer until deep gold

3. Apple Cider Slaw

Tangy, snappy cabbage cuts through the sweetness of watermelon gazpacho. The crunch wakes up your palate between spoonfuls of chilled soup.

Shred cabbage and carrots thin-a mandoline helps. Toss with apple cider vinegar, a little olive oil, salt, and a pinch of sugar to balance the acid.

Dress just before serving so the vegetables stay crisp.

The slaw brings texture and brightness without competing with the gazpacho's flavor. Think of it as the crunchy reset button on your plate.

We keep this fresh side dish recipe in regular rotation for the same reason-it balances rich or sweet mains with zero fuss.

4. Grilled Chili Lime Shrimp

Smoky, charred shrimp with a citrus kick turns gazpacho from appetizer to main event. The tender protein fills out the plate without weighing it down.

Marinate shrimp in lime juice, chili powder, and a drizzle of olive oil for 15 minutes-no longer, or the acid starts to "cook" them. Grill over high heat until pink and slightly charred, about two minutes per side.

The bright lime and gentle heat play well against watermelon's sweetness. For something homemade on the side, a quick chipotle drizzle takes these over the top.

Quick Tip
Thread shrimp onto two parallel skewers-they stay flat and flip without spinning.

5. Grilled Parmesan Asparagus

Charred asparagus brings smoky depth and a slight snap. The umami from parmesan gives the vegetable enough weight to stand up to a light soup course.

Toss spears with olive oil and grill until tender with char marks-about four minutes total, turning once. Finish with lemon zest and shaved parmesan while still warm.

  • Thick spears work better on the grill; pencil-thin ones fall through grates
  • Snap off woody ends before cooking-they bend naturally at the right spot

We love bright asparagus spears prepared simply. The roasted version takes longer however the grilled method delivers faster with more flavor.

Grilled

Works for: Smoky char, fast cooking, outdoor meals

Skip if: You do not have grill access or want hands-off cooking

Roasted

Works for: Oven convenience, consistent results, larger batches

Skip if: You want char marks or deeper smokiness

6. Sundried Tomato Focaccia

Soft, airy bread with tangy tomato pockets soaks up gazpacho without falling apart. The chewy crumb and olive oil richness add substance to a light meal.

Warm store-bought focaccia briefly before serving-five minutes in a 350°F oven softens the interior and crisps the crust. Slice into wedges for easy dipping.

The sundried tomatoes echo the gazpacho's savory notes while the bread itself gives you something warm to hold. For hosting, this crusty side dish recipe offers another option when you want something heartier on the table.

Shortcut
Grab focaccia from your grocery bakery section-warming it fresh tastes nearly homemade.

7. Fennel Orange Salad

Licorice-scented fennel and bright citrus bring fragrant crunch to a plate that needs texture variety. The salad feels elegant without requiring much work.

Slice fennel paper-thin using a mandoline-thick slices turn fibrous and tough to chew. Segment oranges over a bowl to catch the juice, then combine with fennel, a drizzle of olive oil, and flaky salt.

  • Blood oranges add color drama during winter months
  • Shaved parmesan or a few olives turn this into a fuller side
  • Make the components ahead, however toss together right before serving
  • A handful of fresh mint brightens everything further

We reach for this fresh side dish recipe alongside salads like this-the creamy ricotta provides richness that crisp vegetables lack.

8. Avocado Cilantro Dip

Creamy, herby dip gives you something rich to balance all that refreshing cold soup. The smooth texture contrasts nicely with crunchy bread or crackers.

Blend ripe avocado with fresh cilantro, lime juice, a garlic clove, and enough olive oil to reach dipping consistency. Season with salt and a pinch of cumin.

Keep in mind:

  • Make this within an hour of serving-avocado browns quickly
  • Press plastic wrap directly onto the surface if you need to hold it longer
  • Thin with water rather than more oil if it gets too thick

The bright cilantro and lime keep the dip from feeling heavy. Try an easy cilantro dip when you want something with more punch-the mint version adds another layer of freshness.

Method Time Best For
Food processor 2 min Smooth, uniform texture
Fork mashed 5 min Rustic, chunky dip
Blender 1 min Silky drizzling consistency

9. Paprika Chicken Thighs

Golden, crispy-skinned chicken turns gazpacho into a full dinner rather than a starter course. The smoky paprika echoes Spanish flavors without overwhelming the soup's delicate sweetness.

Season thighs generously with smoked paprika, salt, and garlic powder. Sear skin-side down in a hot pan until the skin crisps-about six minutes-then flip and finish cooking through.

The rich, savory protein gives weeknight meals more staying power. When you want satisfying beef meals we love, the same principle applies-substantial protein alongside lighter soup or salad makes a balanced plate.

Our Pick
Bone-in, skin-on thighs stay juicier than boneless-worth the extra minute of eating around bones.

10. Cucumber Mint Dip

Cool, creamy, and herbaceous-this dip doubles down on refreshing without feeling redundant next to cold soup. The Greek yogurt base adds protein and tang.

Grate cucumber and squeeze out excess water-skip this step and the dip turns watery within an hour. Fold into thick Greek yogurt with chopped fresh mint, a minced garlic clove, and lemon juice.

A few notes:

  • English cucumbers have fewer seeds and thinner skin
  • Persian cucumbers work well too-no need to peel either variety
  • Let the dip sit 15 minutes before serving so flavors meld
  • Add a drizzle of olive oil on top for serving

We keep a quick yogurt dip side dish in the refrigerator most summer weeks. It takes ten minutes and improves everything from grilled meat to raw vegetables.

Watch Out
Do not skip squeezing the cucumber-excess water separates from the yogurt and pools at the bottom.

11. Chili Lime Corn

Sweet roasted corn with a spicy-citrus finish adds warm crunch to an otherwise cold spread. The charred kernels and zingy butter bring summer flavors to the table.

Roast ears of corn at 425°F until kernels turn golden in spots-about 20 minutes. Brush immediately with lime butter while hot so it melts into every crevice.

What to know:

  • Mix softened butter with lime zest, chili powder, and a pinch of salt ahead of time
  • Grilling works faster if you already have the grates hot
  • Cut kernels off the cob for easier eating alongside soup

For this easy lime butter recipe, make a batch and keep it in the freezer-it works on corn, bread, grilled fish, and anything that benefits from a citrus kick.

12. Mozzarella Tomato Skewers

Creamy cheese, juicy tomatoes, and fresh herbs on a stick-no utensils required. The caprese flavors complement watermelon gazpacho without competing.

Thread cherry tomatoes and small mozzarella balls onto skewers, alternating with fresh basil leaves. Drizzle with olive oil and a pinch of flaky salt before serving.

  • Marinate mozzarella in herb-infused oil for an hour for deeper flavor
  • Room temperature cheese tastes better than cold straight from the package

These look impressive with almost no effort. Check out this easy tomato skewers recipe for the full method-we make them for every summer gathering.

If You Want Try This
More flavor Add a balsamic drizzle before serving
Prettier presentation Use multicolored cherry tomatoes
Heartier bites Add cubed prosciutto between pieces

13. Arugula Feta Salad

Peppery greens and salty, crumbly cheese add bite and brightness. The sharp flavors cut through the gazpacho's sweetness and reset your palate.

Toss arugula lightly with lemon juice and olive oil-heavy dressing wilts the delicate leaves. Crumble feta over top and finish with black pepper.

The salad takes under five minutes and adds texture contrast to a smooth soup course. For bright cheese salad on the side, this combination works year-round with minimal effort.

Quick Tip
Dress arugula at the table-the leaves wilt within minutes of contact with acid.

14. Spiced Roasted Chickpeas

Crunchy, smoky, and packed with protein-roasted chickpeas add textural interest that cold soup lacks. Scatter them over salads or serve in a bowl for snacking alongside.

Drain and dry canned chickpeas thoroughly-moisture is the enemy of crispness. Toss with olive oil and smoked paprika, then roast at 400°F for 35-40 minutes, shaking the pan halfway through.

  • Pat chickpeas completely dry with paper towels before seasoning
  • Single layer on the sheet pan-crowding creates steam instead of crunch
  • They crisp further as they cool, so pull them when golden, not dark
  • Store in an open container-airtight traps moisture and softens them

The warm spices echo gazpacho's Spanish roots. For satisfying beef meals we love, chickpeas work as a crunchy garnish on heartier plates too.

Method Time Best For
Oven roasted 40 min Hands-off, large batches
Air fryer 15 min Faster crunch, small portions
Pan fried 12 min Quick option, requires stirring

15. Fontina Tomato Panini

Melted cheese and warm tomatoes inside crusty bread turns gazpacho into a more substantial meal. The temperature contrast between hot sandwich and cold soup feels intentional.

Layer fontina and sliced tomatoes between bread, brush the outside with butter, and press until golden and melty-about four minutes per side in a panini press or weighted skillet.

  • Fontina melts smoother than mozzarella with more flavor depth
  • Drain tomato slices on paper towels first to prevent soggy bread
  • A smear of pesto inside adds herby brightness
  • Slice sandwiches into strips for easier dipping

For hosting, this buttery tomato panini recipe pairs beautifully when you want fresh tomatoes without the heat-sometimes a cool salad works better alongside warm soup.

Panini Press

Works for: Even browning, perfect grill marks, hands-free cooking

Skip if: You do not own one or lack storage space

Weighted Skillet

Works for: No special equipment, good crust, easy cleanup

Skip if: You want grill marks or faster cooking

A few common questions come up when planning sides for watermelon gazpacho.

Frequently Asked Questions

How many sides should I serve with watermelon gazpacho?

For a light lunch, one bread and one salad or dip covers it; for hosting, plan three to four options so guests can mix and match.

Can I make sides ahead for a dinner party?

Dips, roasted chickpeas, and parmesan crackers hold well overnight, while salads and grilled items taste best made within a few hours of serving.

What protein goes best with watermelon gazpacho?

Grilled shrimp or pan-seared chicken thighs add substance without overwhelming the soup's delicate flavor.

Are these sides vegetarian-friendly?

Most options here are vegetarian-skip the shrimp and chicken if needed, and you still have breads, dips, salads, and vegetables to choose from.

Should sides be served cold or warm with gazpacho?

A mix works best-one warm element like toasted bread or grilled protein alongside a cool salad or dip creates satisfying contrast.

Sides to Serve with Watermelon Gazpacho Summer Meals

What to Serve with Watermelon Gazpacho

No ratings yet
Watermelon gazpacho is chilled, sweet, and refreshing but benefits from sides that add texture and substance. This list helps you create balanced plates with bread, salads, proteins, and dips for varied textures and flavors.
Print Recipe Pin Recipe
Prep Time 15 minutes mins
Cook Time 15 minutes mins
Total Time 30 minutes mins
Servings: 4 servings
Course: Dinner, Lunch, Sides
Cuisine: American, Spanish-Inspired
Ingredients Method Notes

Ingredients
  

  • Toasted Garlic Herb Baguette warm, crispy bread adds warmth to cold soup
  • Crispy Parmesan Crackers salty, crunchy texture contrasts smooth gazpacho
  • Apple Cider Slaw tangy, crunchy, palate-resetting contrast
  • Grilled Chili Lime Shrimp tender protein with smoky, citrus spice
  • Grilled Parmesan Asparagus smoky, slightly snap with umami from parmesan
  • Sundried Tomato Focaccia soft, chewy bread with tangy tomato pockets
  • Fennel Orange Salad aromatic, bright, and crunchy salad
  • Avocado Cilantro Dip creamy, herby dip balances and contrasts soup
  • Paprika Chicken Thighs rich, smoky protein makes meal substantial
  • Cucumber Mint Dip cool, creamy, herbaceous with tangy yogurt base
  • Chili Lime Corn warm, sweet roasted corn with spicy-citrus zing
  • Mozzarella Tomato Skewers fresh caprese flavors with creamy cheese and basil
  • Arugula Feta Salad peppery greens with salty cheese for brightness
  • Spiced Roasted Chickpeas crunchy, smoky, protein-packed snack or garnish
  • Fontina Tomato Panini warm, melty sandwich with rich cheese and tomatoes

Method
 

  1. Choose two to three sides that balance the main dish, combining fresh or crunchy with starchy or vegetable options, and include a sauce or dip if desired.
  2. Begin preparing sides that take the longest first, such as roasted or grilled options, and finish with quick sides like dips or salads just before serving.
  3. Serve all sides plated alongside the watermelon gazpacho, adding any sauces, dips, or garnishes included with the sides as applicable.

Notes

Add one crisp salad side and serve it separately to prevent a mushy texture and keep the plate balanced.

Tried this recipe?

Let us know how it was!

Peanut Butter Banana Breakfast Toast

January 23, 2026

Crisp toast. Creamy peanut butter. Fresh banana slices that bring just enough sweetness without turning the whole thing into dessert.

peanut-butter-banana-breakfast-toast-feature
QUICK SUMMARY

Peanut Butter Banana Breakfast Toast combines crisp medium-high heat toasted bread with smooth room temperature peanut butter and ripe banana slices. Toast at medium-high heat for 3-4 minutes to get crunch without dryness, and use room temperature peanut butter to spread cleanly without tearing the bread.

⏱️Time: 1 minute prep, 3-4 minutes cook
🔥Key Move: Toast bread at medium-high heat for 3-4 minutes for perfect crunch without dryness
⚠️Watch Out: Cold peanut butter tears bread; use room temperature for smooth spreading

This breakfast works because the textures play off each other-crunch from the toast, smoothness from the peanut butter, soft give from the banana. It takes about four minutes to make, needs no cooking beyond toasting bread, and holds up The balance between salty peanut butter and naturally sweet banana means you get satisfaction without needing syrup or jam.

For mornings when you want something simple like this, this delivers.

Quick Reference
⏱️ Prep Time 3 minutes
🔥 Cook Time 4 minutes
⏰ Total Time 7 minutes
🍽️ Servings 1
📊 Difficulty Easy
🏷️ Category Breakfast
💡 Quick Tip Toast first, spread second
🎯 Best For Rushed mornings

Why This Recipe Works

The trick is keeping the toast crispy while the peanut butter stays spreadable. You toast the bread to medium-golden, let it cool for about 30 seconds so the residual heat softens the peanut butter without melting it into mush, then layer banana slices that are ripe but firm. If you like quick rolls for breakfast variety, this follows the same fast-assembly logic.

  • Toast texture matters, medium-high heat for three to four minutes gives you crunch without dryness.
  • Room temperature peanut butter spreads cleanly, cold peanut butter tears the bread, warm peanut butter pools in spots.
  • Ripe but firm bananas slice evenly, yellow with minimal brown spots means sweetness without mushiness.
  • Even slicing prevents sliding, quarter-inch slices stay put and cover the toast edge to edge.
  • Assembly order prevents sogginess, toast first, cool briefly, spread, then top with banana immediately before eating.
Best Pick
Use whole grain bread with a dense crumb-it holds toppings better than fluffy white bread and adds a nutty flavor that goes with the peanut butter.

What You'll Need

peanut-butter-banana-breakfast-toast ingredients

Three components, minimal steps. The bread needs enough structure to hold toppings without collapsing, the peanut butter should be natural with no added sugar or oils, and the banana should be just past green-yellow skin with a few freckles signals the right balance between firm texture and sweet flavor. For more simple rice breakfast ideas, the same minimal-ingredient approach works.

🍞
Bread
  • 2 slices whole grain bread
🥜
Spread
  • 2 tablespoons peanut butter
🍌
Topping
  • 1 medium banana
  • Pinch sea salt (optional)
  • Sprinkle cinnamon (optional)

Ingredient Details

  • Whole grain bread Look for thick-cut slices around one inch-Dave's Killer Bread or Ezekiel work well for structure and fiber.
  • Peanut butter Smooth or crunchy both work; natural peanut butter with just peanuts and salt gives the cleanest flavor and spreads easier when at room temperature.
  • Banana Choose bananas that are yellow with a few brown spots-they're sweet but still firm enough to slice cleanly without turning to mush.
  • Sea salt Flaky sea salt adds a salty-sweet contrast that amplifies the peanut butter's flavor-use a light pinch over the banana slices.
  • Cinnamon A light dusting adds warmth without overpowering the peanut and banana flavors-skip if you prefer the simpler taste.

Ingredient Swaps

Almond butter swaps one-to-one with peanut butter but tastes less salty and slightly sweeter-it works if you prefer milder nut flavors or need to avoid peanuts. If you want our favorite skillet side for a heartier breakfast, the same flexibility in swaps applies.

  • Almond butter or sunflower seed butter, changes the flavor to less salty and slightly more neutral, same spreading technique applies.
  • White bread or gluten-free bread, white bread toasts softer and tears easier, gluten-free bread needs careful toasting to avoid burning the edges.
  • Honey or maple syrup, drizzle lightly over the peanut butter before adding banana for extra sweetness, about half a teaspoon per slice.
  • Strawberries or blueberries, swap banana for sliced strawberries or a handful of blueberries for tartness and different texture.

Bread Swaps

Works for: Sourdough or rye add tangy depth, gluten-free works if toasted carefully

Skip if: You use thin white bread-it tears under peanut butter and gets soggy fast

Nut Butter Swaps

Works for: Almond, cashew, or sunflower seed butter all spread the same and bring unique flavors

Skip if: You use dry or old nut butter-it won't spread evenly and clumps on the toast

Instructions

Toast the bread first so the surface is crisp enough to hold the peanut butter without absorbing it. Let the toast cool for 30 seconds before spreading-residual heat softens the peanut butter just enough for smooth application without melting it into the bread.

  1. Toast the bread slices in a toaster or toaster oven at medium-high heat for three to four minutes. Watch for even browning-the surface should be golden and crispy, not charred or pale.

  2. Let the toast cool on a plate for 30 seconds. This brief rest keeps the bread warm enough to soften the peanut butter but cool enough to prevent melting it.

  3. Spread one tablespoon of peanut butter evenly on each slice. Use a butter knife and spread from the center outward to the edges, covering the entire surface.

  4. Slice the banana into quarter-inch rounds and layer them on top of the peanut butter. Arrange slices edge to edge for full coverage and even distribution.

  5. Sprinkle with a pinch of sea salt and cinnamon if using. Serve immediately while the toast is still warm and crisp.

Shortcut
Warm peanut butter in the microwave for 10 seconds if it's too stiff to spread-this saves time and prevents tearing the toast.

What to Serve With It

A glass of cold milk or almond milk balances the richness of peanut butter and adds protein to the meal. Fresh berries or an apple sliced thin provide crunch and tartness that cuts through the creamy sweetness. For more steak nights pairing ideas, the same side-dish logic applies.

Side DishPrepWhy It WorksHow to Serve
Greek yogurt Easy Adds protein and creamy tang Small bowl with honey drizzle
Fresh berries Easy Tartness balances sweet banana Strawberries, blueberries, or raspberries on the side
Hard-boiled egg Easy Adds savory protein for staying power Peel and slice, sprinkle with salt
Apple slices Easy Crisp texture and natural sweetness Slice thin, serve with skin on
Cold milk Easy Cuts through richness, adds calcium Full glass, dairy or almond milk

Three ways to serve it:

  • With Greek yogurt, adds creaminess and protein without making the plate feel heavy.
  • Sliced into strips, easier to eat on the go and fits in a lunchbox without crumbling.
  • Topped with chia seeds, adds crunch and fiber for a nutritional boost without changing the flavor.
Watch Out
Assemble just before eating-banana slices oxidize and turn brown within 15 minutes, and the toast loses crispness if it sits too long after spreading.

Store and Reheat

Store components separately for best results. Keep leftover peanut butter in the fridge, store banana slices in an airtight container with a squeeze of lemon juice to slow browning, and toast bread fresh each time to maintain crispness. If you like quick aioli dish sides, the same fresh-assembly approach works.

MethodTimeBest For
🔥Toaster oven at 350°F2 minRe-crisping toast before adding toppings
❄️Serve cold0 minPeanut butter and banana hold up at room temp for 30 minutes
📦Microwave (not recommended)15 secSoftens peanut butter but makes toast rubbery

For best results when storing:

  • Refrigerate leftover peanut butter, keeps for up to two months in an airtight container, bring to room temperature before spreading.
  • Store banana slices with lemon juice, toss slices in a teaspoon of lemon juice and refrigerate in a sealed container for up to one day.
  • Toast bread fresh each time, pre-toasted bread loses crispness within an hour, even if stored in a sealed bag.
  • Assemble on demand, keep ingredients separate and build each serving fresh to maintain texture contrast.
  • Skip freezing assembled toast, peanut butter separates when frozen and banana turns mushy when thawed, freezing ruins both texture and flavor.

Frequently Asked Questions

Can I use almond butter instead of peanut butter?

Yes, almond butter swaps one-to-one with peanut butter. It spreads the same way but tastes slightly sweeter and less salty, so you may want to add a pinch of sea salt to balance the flavor.

What if I don't have whole grain bread?

White bread works but tears more easily under peanut butter and loses crispness faster. Toast it on the lighter side and spread the peanut butter gently to avoid tearing the surface.

Can I make this ahead of time?

Not recommended. The banana oxidizes and turns brown within 15 minutes, and the toast loses crispness once the peanut butter sits on it. Store components separately and assemble fresh each time.

Why is my peanut butter too hard to spread?

Cold peanut butter from the fridge is stiff and tears the bread. Let it sit at room temperature for 10 minutes before spreading, or microwave it for 10 seconds to soften without melting.

How do I keep the banana from turning brown?

Toss banana slices in a small amount of lemon juice before layering them on the toast. This slows oxidation for about 15 minutes, though assembling just before eating is the best method.

Peanut Butter Banana Breakfast Toast

Peanut Butter Banana Breakfast Toast

No ratings yet
Crisp toast with creamy peanut butter and fresh banana slices creates a simple, satisfying breakfast. The combination of textures and balanced flavors makes this quick toast a perfect start to rushed mornings.
Print Recipe Pin Recipe
Prep Time 3 minutes mins
Cook Time 4 minutes mins
Total Time 7 minutes mins
Servings: 1 servings
Course: Breakfast
Ingredients Equipment Method Notes

Ingredients
  

  • 2 slices whole grain bread thick-cut, about one inch slices
  • 2 tablespoons peanut butter natural, room temperature for easy spreading
  • 1 medium banana ripe but firm, sliced into quarter-inch rounds
  • sea salt pinch, optional, to sprinkle over banana slices
  • cinnamon sprinkle, optional, to add warmth

Equipment

  • Toaster or toaster oven To toast the bread
  • Butter knife To spread peanut butter evenly

Method
 

  1. Toast the bread slices in a toaster or toaster oven at medium-high heat for 3 to 4 minutes until golden and crispy.
  2. Let the toast cool on a plate for 30 seconds to stop melting the peanut butter but keep it spreadable.
  3. Spread 1 tablespoon of peanut butter evenly on each slice, covering the surface from center to edges.
  4. Slice the banana into quarter-inch rounds and layer on top of the peanut butter, covering edge to edge.
  5. Sprinkle a pinch of sea salt and cinnamon over the banana slices if using, and serve immediately while warm and crisp.

Notes

Let toast cool 30 seconds before spreading peanut butter to prevent melting and sogginess.

Tried this recipe?

Let us know how it was!

Ham and Cheese Egg Cups

January 23, 2026

Ham and cheese egg cups give you breakfast in 20 minutes with a single muffin tin. You crack eggs, toss in diced ham, add cheese, and slide the whole thing into the oven. No flipping. No babysitting a skillet.

ham-and-cheese-egg-cups-feature
QUICK SUMMARY

Ham and cheese egg cups are baked in a muffin tin with diced ham, fresh-shredded cheese, and a splash of milk. Use small dice for even flavor distribution and bake without flipping for easy, grab-and-go breakfasts that hold their shape.

⏱️Time: 5 minutes prep, 15 minutes bake at 350°F
🔥Key Move: Dice ham small to prevent sinking and ensure even flavor in each cup
⚠️Watch Out: Large ham chunks sink, causing uneven pockets and inconsistent taste

The cups hold their shape so you can grab them cold from the fridge or reheat in seconds. Make a dozen on Sunday and you're set through Thursday. If you need quick sliders for a crowd, the same ham-cheese combo works in slider form.

Silicone liners eliminate the sticking problem that ruins baked eggs. Standard muffin tins work fine if you grease them generously, but silicone lifts out clean every time.

Quick Reference
⏱️ Prep Time 10 min
🔥 Cook Time 20 min
⏰ Total Time 30 min
🍽️ Servings 12 cups
📊 Difficulty Easy
🏷️ Category Breakfast
💡 Quick Tip Fill cups only ¾ full
🎯 Best For Meal prep

Why This Recipe Works

Baking at 350°F keeps the eggs tender instead of rubbery. Higher temps dry out the edges before the centers set. For a similar approach to pork braciole meals, oven timing matters more than temperature.

  • Small dice matters. Large ham chunks sink and create uneven pockets instead of distributing flavor throughout.
  • Fresh-shredded cheese melts better. Pre-shredded cheese contains anti-caking agents that make it grainy and oily when baked.
  • Milk softens the texture. A tablespoon per six eggs makes the cups fluffier without adding noticeable liquid.
  • Generous greasing prevents sticking. Butter works better than cooking spray because it coats every crevice of the muffin tin.
  • Cooling firms the structure. Five minutes in the pan lets the eggs set fully so they release without tearing.
Quick Tip
Use room-temperature eggs so they mix smoothly and bake evenly without cold spots in the center.

What You'll Need

ham-and-cheese-egg-cups ingredients

The ingredient list stays short. Ham provides the salt, so you won't need much additional seasoning. A smoky side with bacon follows the same logic.

🍳
Eggs
  • Large eggs (12)
  • Whole milk or cream (¼ cup)
🍖
Ham
  • Deli ham or cooked ham steak (1½ cups diced)
🧀
Cheese
  • Cheddar or Swiss (1 cup shredded)
  • Butter or cooking spray for pan

Ingredient Details

  • Large eggs Room temperature eggs whisk smoother and bake more evenly than cold eggs straight from the fridge.
  • Whole milk Use 2 tablespoons per 6 eggs for tender texture without making the cups soupy.
  • Deli ham Dice into ¼-inch pieces so every bite has ham instead of large chewy chunks.
  • Cheddar cheese Sharp cheddar adds more flavor than mild, and block cheese shredded fresh melts cleaner than pre-shredded.
  • Butter for pan Brush melted butter into every crevice of the muffin tin, or use silicone liners for zero-stick release.

Ingredient Swaps

The base formula stays flexible. Try poultry dishes if you want lighter protein options in your morning rotation.

  • Ham to turkey. Smoked turkey or turkey sausage works but tastes milder and less salty.
  • Cheddar to mozzarella. Mozzarella melts stringier and adds less sharpness, better for kids who want mild flavor.
  • Milk to plant milk. Unsweetened almond or oat milk works in equal amounts without changing texture.
  • Butter to oil spray. Vegetable oil spray prevents sticking but butter adds richer flavor to the edges.

Protein Swaps

Works for: Cooked bacon crumbles or sausage add smokiness; smoked salmon gives briny contrast

Skip if: You want the classic salty-savory balance-ham delivers both without extra seasoning

Dairy-Free Options

Works for: Dairy-free cheese melts reasonably well; unsweetened plant milk keeps eggs tender

Skip if: You need smooth melt-dairy cheese melts cleaner and tastes richer

Instructions

Whisk the eggs until the yolks and whites combine completely. No streaks means even texture in every cup. Add milk, ham, and cheese, then stir just until distributed.

  1. Preheat oven to 350°F and grease a 12-cup muffin tin. Brush melted butter into each cup or use silicone liners for easier release.

  2. Whisk eggs and milk in a large bowl until smooth. Beat until no streaks remain and the mixture looks uniform in color.

  3. Stir in diced ham, shredded cheese, salt, and pepper. Fold gently so the ham and cheese stay suspended instead of sinking to the bottom.

  4. Pour mixture into muffin cups, filling each about ¾ full. Leave space at the top because eggs expand slightly as they bake.

  5. Bake for 18 to 22 minutes until centers are set. Check by gently shaking the pan-eggs should jiggle slightly but not slosh. Let cool 5 minutes before removing from tin.

Watch Out
Overbaking makes the eggs rubbery and dry. Pull them when the centers still look slightly glossy-they firm up as they cool.

What to Serve With It

Egg cups need something crisp or cool to break up the richness. Fruit works better than toast because it adds sweetness without filling you up. For more structured pairings, check out shake and bake chicken meals for similar balanced plates.

Side DishPrepWhy It WorksHow to Serve
Fresh fruit salad Easy Sweet contrast to salty ham Berries, melon, or citrus segments
Sliced avocado Easy Creamy texture balances firm eggs Halve, slice, sprinkle with salt
Whole-grain toast Easy Adds crunch and soaks up extra yolk Buttered or plain
Cherry tomatoes Easy Bright acidity cuts richness Halved with olive oil and basil
Mixed greens Easy Light and fresh without competing Simple vinaigrette, no heavy dressing

Three ways to serve them:

  • Room temperature on a platter, works for brunch buffets where guests graze over an hour.
  • With hot sauce on the side, lets everyone adjust heat without baking it in.
  • Wrapped in a tortilla, turns the cups into a portable breakfast burrito.
Best Pick
Serve warm with sliced avocado and cherry tomatoes for a balanced plate that feels complete without adding bread or potatoes.

Store and Reheat

Cool the cups completely before storing or condensation makes them soggy. Refrigerate in an airtight container and they stay good for four days. Pair leftovers with our favorite bread side for a fuller breakfast.

MethodTimeBest For
📦Microwave covered45 secQuick single servings, keeps eggs moist
🔥Toaster oven at 300°F8 minCrisps edges slightly without drying centers
❄️Serve cold0 minPortable breakfast on the go

For best results when storing:

  • Cool completely before covering, warm cups create condensation that makes the bottoms soggy.
  • Keep up to 4 days refrigerated, in an airtight container with paper towels underneath to absorb moisture.
  • Freeze for up to 2 months, wrap individually in plastic, then store in a freezer bag.
  • Thaw in the fridge overnight, microwave reheating works best after thawing rather than heating from frozen.
  • Skip the microwave if you want crispy edges, toaster oven or regular oven at 300°F brings back texture.

Frequently Asked Questions

How long do ham and cheese egg cups last in the fridge?

They last 4 days in an airtight container. Cool them completely before sealing to prevent condensation, which makes the bottoms soggy. Store with a paper towel underneath to absorb any moisture.

Can I freeze ham and cheese egg cups?

Yes, wrap each cup individually in plastic wrap, then store in a freezer bag for up to 2 months. Thaw in the fridge overnight before reheating. Microwave for 1 minute or bake at 300°F for 10 minutes.

What is the best way to reheat egg cups without drying them out?

Microwave them covered for 45 seconds to trap steam and keep them moist. For crispy edges, use a toaster oven at 300°F for 8 minutes. Avoid high heat, which makes eggs rubbery.

Can I make ham and cheese egg cups without milk or cream?

Yes, skip the milk entirely. The eggs will be slightly denser but still cook through. Add an extra tablespoon of melted butter to the mixture for richness and tender texture.

How do I prevent egg cups from sticking to the pan?

Use silicone muffin liners for zero-stick release. If you use a metal tin, brush melted butter into every crevice, not just the bottoms. Let the cups cool 5 minutes before removing so the structure firms up.

Ham and Cheese Egg Cups

Ham and Cheese Egg Cups

No ratings yet
Ham and cheese egg cups offer a quick 20-minute breakfast made in a muffin tin with eggs, diced ham, and cheese. They bake evenly with no flipping and store well for easy grab-and-go meals.
Print Recipe Pin Recipe
Prep Time 10 minutes mins
Cook Time 20 minutes mins
Total Time 30 minutes mins
Servings: 12 cups
Course: Breakfast
Ingredients Equipment Method Notes

Ingredients
  

  • 12 large eggs room temperature
  • 0.25 cup whole milk or cream
  • 1.5 cups deli ham or cooked ham steak diced into ¼-inch pieces
  • 1 cup cheddar or Swiss cheese freshly shredded
  • butter or cooking spray for greasing the pan
  • salt and pepper to taste

Equipment

  • 12-cup muffin tin Grease generously or use silicone liners for easy release
  • Mixing bowl To whisk eggs and mix ingredients
  • Whisk For beating eggs and milk

Method
 

  1. Preheat oven to 350°F and grease a 12-cup muffin tin with melted butter or use silicone liners for easier release.
  2. In a large bowl, whisk the room-temperature eggs and milk together until smooth and uniform in color with no streaks.
  3. Stir in diced ham, shredded cheese, salt, and pepper gently to keep the ham and cheese suspended in the mixture.
  4. Pour the mixture into the muffin cups, filling each about ¾ full to allow for expansion while baking.
  5. Bake for 18 to 22 minutes until the centers are set but still slightly glossy and jiggle gently when shaken.
  6. Let the egg cups cool in the pan for 5 minutes before removing to help them set and release without tearing.

Notes

Whisk eggs and milk until smooth with no streaks to ensure even texture and prevent uneven baking.

Tried this recipe?

Let us know how it was!

Berry Yogurt Breakfast Parfait Jar

January 23, 2026

Layers of creamy yogurt, fresh berries, and crunchy granola in a jar. You assemble it in 5 minutes, grab it on your way out, and eat breakfast that feels better than a drive-through.

berry-yogurt-breakfast-parfait-jar-feature
QUICK SUMMARY

Berry Yogurt Breakfast Parfait Jar layers thick Greek yogurt, fresh dry berries, and crunchy granola in a jar. Pat berries dry and use strained yogurt to keep layers firm and prevent sogginess. Assemble in 5 minutes for a portable, no-mess breakfast.

⏱️Time: 5 minutes prep, no cook
🔥Key Move: Pat berries dry to avoid soggy layers and maintain parfait texture
⚠️Watch Out: Adding wet fruit causes soggy granola and runny yogurt; always dry fruit first

The beauty of this parfait is portability. Wide-mouth mason jars seal tight, stack in the fridge, and fit into bags without leaking. No soggy granola, no watered-down yogurt. Just clean layers that hold until you're ready to dig in.

Greek yogurt provides structure-thick enough to support berries without slumping. Fresh fruit adds natural sweetness without added sugar. Granola goes on top or packed separately to stay crisp. If you want a more savory breakfast option, we have other ideas.

Morning routines move faster when breakfast is already assembled. Make four jars on Sunday, eat through Thursday, and skip the rush entirely.

Quick Reference
⏱️ Prep Time 5 min
🔥 Cook Time 0 min
⏰ Total Time 5 min
🍽️ Servings 1 jar
📊 Difficulty Easy
🏷️ Category Breakfast
💡 Quick Tip Pat berries dry to prevent watery layers
🎯 Best For Meal prep, grab-and-go mornings

Why This Recipe Works

Thick Greek yogurt creates stable layers that don't blend together or separate in the fridge. Fresh berries stay juicy without bleeding into the yogurt when you pat them dry first and layer them separately.

  • Yogurt texture matters. Greek or strained yogurt is thick enough to hold structure overnight without turning runny.
  • Dry berries prevent sogginess. Pat fruit with paper towels to remove surface moisture before layering.
  • Granola stays separate. Add crunchy toppings just before eating or pack them in a small container to avoid soft granola.
  • Natural sweetness balances tartness. Ripe berries provide enough sugar so you don't need extra syrup unless you prefer it.
  • Layering order prevents mixing. Yogurt, berries, repeat keeps each element distinct for better texture contrast.
Quick Tip
Use full-fat Greek yogurt for the creamiest texture and the most satisfying bite-low-fat versions tend to separate and feel thinner.

What You'll Need

berry-yogurt-breakfast-parfait-jar ingredients

Standard grocery ingredients make this recipe quick to assemble. For an entirely different breakfast with nuts, we have options.

🥛
Dairy
  • Greek yogurt (plain or vanilla)
  • Optional: honey or maple syrup
🍓
Fruit
  • Fresh strawberries
  • Blueberries
  • Raspberries or blackberries
🍽️
Toppings
  • Granola or muesli
  • Optional: chia seeds, nuts, coconut flakes

Ingredient Details

  • Greek yogurt Use full-fat for richness or 2% for less fat-nonfat versions are too runny and don't hold layers well.
  • Fresh strawberries Hull and slice into bite-sized pieces; oversized chunks are awkward to eat straight from the jar.
  • Blueberries Rinse and pat completely dry to prevent excess water pooling at the bottom of the jar.
  • Granola Choose lower-sugar varieties or make your own to control sweetness-store-bought can be overly sweet.
  • Honey or maple syrup Stir sweetener into yogurt for even distribution instead of drizzling on top where it pools.
  • Chia seeds Sprinkle between layers for extra fiber-soak them in yogurt for 10 minutes first if you want a pudding-like texture.

Ingredient Swaps

You can adjust this parfait based on what's in your fridge or dietary needs. Coconut yogurt or almond-based versions work for dairy-free eaters, though they're usually thinner in texture.

  • Frozen berries for fresh. Thaw and drain completely before layering to prevent excess liquid making everything watery.
  • Coconut yogurt for Greek. Thick, full-fat coconut yogurt mimics Greek texture best, but it won't hold layers quite as firmly overnight.
  • Rolled oats for granola. Toast oats with a bit of honey and cinnamon for a less sweet, chewier topping.
  • Agave or date syrup for honey. Thinner than honey but dissolves easily into yogurt for even sweetness.

Dairy Swaps

Works for: Full-fat coconut yogurt holds layers almost as well as Greek and tastes creamy without dairy

Skip if: You need the thickest texture possible-coconut yogurt tends to soften faster in the fridge

Granola Swaps

Works for: Toasted nuts, seeds, or oats give you crunch without added sugar when granola is too sweet

Skip if: You want something that clumps and clusters-loose nuts don't have the same texture as baked granola

Instructions

Layering parfaits takes 5 minutes per jar once you've prepped the fruit. Use wide-mouth 8-ounce mason jars for easier assembly and eating.

  1. Pat berries dry with paper towels. This prevents excess moisture from watering down the yogurt and keeps layers clean.

  2. Spoon 3 tablespoons of yogurt into the bottom of each jar. Spread it evenly across the base to create a stable first layer.

  3. Add a layer of mixed berries. Use about ¼ cup per jar, pressing them gently against the sides for a visual effect.

  4. Repeat yogurt and berry layers. Finish with a final yogurt layer on top, leaving about ½ inch of headspace.

  5. Seal and refrigerate for at least 30 minutes. This lets flavors meld and firms up the yogurt slightly for better texture.

Golden Rule
Keep granola separate until you're ready to eat-add it right before serving or pack it in a small container to maintain crunch.

What to Serve With It

Parfait jars are breakfast on their own, but adding a simple side rounds out the meal. Pair with whole grain toast or a hard-boiled egg when you need more protein to stay full until lunch.

Side DishPrepWhy It WorksHow to Serve
Whole grain toast Easy Adds fiber and keeps you full longer Lightly toasted with nut butter
Hard-boiled eggs Easy Extra protein balances sweet yogurt Peel and sprinkle with salt
Fresh orange slices Easy Bright citrus cuts through creamy dairy Peeled and segmented on the side
Iced coffee or tea Easy Simple drink pairing for grab-and-go Brew ahead and chill overnight
Mini muffins Medium Warm baked good adds comfort Blueberry or bran, reheated briefly

Three ways to serve it:

  • Topped with granola, add it right before eating for maximum crunch and texture contrast.
  • With a drizzle of nut butter, swirl almond or peanut butter on top for extra richness and protein.
  • Layered with banana slices, alternate berries with fresh banana for more natural sweetness and creaminess.
Best Pick
Mini mason jars stack easily in the fridge and fit into most lunch bags without tipping-look for 8-ounce wide-mouth jars with two-piece lids.

Store and Reheat

Parfait jars hold in the fridge for up to 4 days if you keep granola separate. Yogurt and berries stay fresh, but toppings turn soft if stored together. A quick dip like this pairs well with other breakfast options when you want variety.

MethodTimeBest For
❄️Serve cold from fridge0 minReady to eat, no reheating needed
🍽️Bring to room temp10 minLess tart yogurt flavor when not ice cold
🥄Stir before eating0 minBlends layers into creamy mixed texture

For best results when storing:

  • Refrigerate up to 4 days, assemble on Sunday night and grab jars through Thursday morning without quality loss.
  • Keep granola in a separate container, pack it in a small baggie or silicone cup and add right before eating to maintain crunch.
  • Pat berries dry before layering, excess moisture causes yogurt to thin and creates a watery bottom layer by day three.
  • Use airtight lids, two-piece mason jar lids seal tighter than plastic snap-on lids and prevent fridge odors from seeping in.
  • Freeze yogurt but not assembled jars, freeze plain yogurt in ice cube trays for smoothies, but don't freeze assembled parfaits since berries turn mushy when thawed.

Frequently Asked Questions

Can I use frozen berries instead of fresh?

Yes, but thaw them completely and drain off all liquid first. Frozen berries release a lot of water as they defrost, which makes the yogurt watery and the layers bleed together. Pat thawed berries with paper towels before layering to remove excess moisture.

What type of yogurt works best for thick layers?

Full-fat Greek yogurt or strained yogurt provides the thickest texture and holds layers best without separating. Regular yogurt is too thin and will settle at the bottom. If you prefer low-fat or nonfat Greek yogurt, expect slightly softer layers that may thin out after a couple days in the fridge.

How do I keep granola from getting soggy in the jar?

Pack granola separately in a small container or baggie and add it right before eating. Granola turns soft within a few hours when it sits directly on yogurt or berries. If you need everything in one jar, create a barrier by placing a small piece of parchment paper between the yogurt and granola layer, though this is awkward to eat around.

Can I make parfait jars the night before?

Yes, parfait jars hold well overnight and taste fresh the next morning. Assemble them without granola, seal tightly, and refrigerate. The 30-minute to overnight rest actually helps flavors meld and firms up the yogurt slightly. Add granola in the morning or pack it separately to maintain crunch.

Why is my parfait watery at the bottom?

Watery bottoms happen when berries release juice or yogurt separates. Pat berries completely dry before layering to remove surface moisture. Use thick Greek yogurt instead of regular yogurt, which tends to separate and pool liquid. If you used frozen berries, they likely released too much water during thawing-drain and pat them dry next time.

Berry Yogurt Breakfast Parfait Jar

Berry Yogurt Breakfast Parfait Jar

No ratings yet
A quick, balanced, and portable breakfast layered with thick Greek yogurt, fresh berries, and crunchy granola. Ideal for meal prep and grab-and-go mornings with a perfect texture contrast in every bite.
Print Recipe Pin Recipe
Prep Time 5 minutes mins
Total Time 5 minutes mins
Servings: 2 jars
Course: Breakfast
Ingredients Equipment Method Notes

Ingredients
  

  • Greek yogurt (plain or vanilla) Use whole milk or 2% for creamiest texture
  • Honey or maple syrup Drizzle for sweetness
  • 1 teaspoon Chia seeds Optional; stir into yogurt and let sit 5 minutes to thicken
  • Fresh blueberries Rinse and pat dry
  • Sliced strawberries Rinse and pat dry
  • Raspberries Rinse and pat dry
  • Granola Add right before eating to keep crunchy
  • Chopped almonds or walnuts Toast in dry skillet for 3 minutes to boost flavor
  • Coconut flakes Optional crunchy addition

Equipment

  • Jars or mason jars Wide-mouth jars recommended for easy layering and eating
  • Spoon or piping bag For layering yogurt cleanly without smudging jar sides

Method
 

  1. Spoon mixed berries (blueberries, sliced strawberries, raspberries) evenly into the bottom of each jar, filling about one-third full.
  2. Add a layer of Greek yogurt on top of the berries using a spoon or piping bag to keep layers clean.
  3. Drizzle about a teaspoon of honey or maple syrup over the yogurt layer for balanced sweetness.
  4. Repeat layering berries and Greek yogurt once more until the jars are nearly full, leaving room for granola.
  5. Cover and refrigerate jars until ready to eat, up to 3 days. Add granola and nuts right before serving to maintain crunch.

Notes

Remove excess moisture from berries before layering to prevent sogginess and keep parfait texture crisp.

Tried this recipe?

Let us know how it was!

You Might Also Like

  • Yogurt Parfait with Granola and Berries
  • Spinach and Feta Omelet
  • Peanut Butter Banana Breakfast Toast

Chocolate Coconut Energy Bites

January 23, 2026

Chocolate-covered dates stuffed with almond butter don't need a label to work. Mix in some oats, shredded coconut, and cocoa powder, roll everything into bite-sized rounds, and you have an energy snack that holds up in a lunch bag or gym tote. No oven, no stovetop, and the whole batch takes about 20 minutes start to finish.

chocolate-coconut-energy-bites-feature
QUICK SUMMARY

Chocolate Coconut Energy Bites are no-bake snacks made by blending Medjool dates, oats, almond butter, shredded coconut, and cocoa powder, then rolling into bite-sized rounds. Using sticky dates to bind the mixture and coating oats with nut butter ensures a creamy texture that holds together without baking.

⏱️Time: 20 minutes total, no cooking required
🔥Key Move: Pulse dates and nuts until sticky to bind ingredients firmly
⚠️Watch Out: Using dry dates causes crumbly bites; always use soft Medjool dates

These bites rely on sticky Medjool dates to hold everything together. They're naturally sweet, so you skip the refined sugar without sacrificing flavor. The coconut adds chew, the oats add texture, and the cocoa gives you just enough chocolate to feel like a treat instead of a duty. For something different, quick chicken dish pairs well with a lighter snack like this.

The recipe works because the fat from nut butter coats the oats, the dates bind everything without being gummy, and the chocolate flavor stays balanced instead of bitter. You can make them ahead, freeze them, or eat one straight from the fridge at 3pm when willpower runs low.

Pair these with something warm like this for contrast on a cold afternoon.

Quick Reference
⏱️ Prep Time 15 min
🔥 Cook Time 0 min
⏰ Total Time 45 min (includes chill)
🍽️ Servings 18 bites
📊 Difficulty Easy
🏷️ Category Snacks
💡 Quick Tip Chill 30+ min before rolling
🎯 Best For Meal prep, grab-and-go

Why This Recipe Works

The dates act like glue without needing eggs or syrup. When you pulse them in a food processor, they break down into a sticky paste that holds the oats and coconut together. Nut butter adds fat that coats the oats and makes each bite feel rich instead of dry, while the cocoa powder gives you chocolate flavor without adding moisture that would make the mixture too soft.

  • Dates provide natural sweetness. Medjool dates contain enough natural sugar to sweeten the bites without adding honey or maple syrup.
  • Nut butter binds and adds fat. Peanut or almond butter coats the oats and creates a creamy texture that prevents crumbling.
  • Oats add texture and fiber. Rolled oats give the bites structure and a slight chew that keeps them from feeling dense.
  • Coconut brings flavor and moisture. Unsweetened shredded coconut adds a subtle tropical note and keeps the bites from drying out.
  • Cocoa powder balances the sweetness. Unsweetened cocoa tempers the date sweetness and gives you chocolate flavor without extra sugar.
Golden Rule
Chill the mixture for at least 30 minutes before rolling-it firms up the dates and nut butter so the bites hold their shape without sticking to your hands.

What You'll Need

chocolate-coconut-energy-bites ingredients

The ingredient list is short, and most of it already lives in your pantry. Medjool dates are softer and stickier than other varieties, so they work better than Deglet Noor or dried figs. If you want a different spin on easy snacks, another snack option uses a completely different technique but delivers the same grab-and-go convenience.

🍓
Base
  • Medjool dates, pitted
  • Rolled oats
  • Natural nut butter
🧈
Flavor
  • Unsweetened cocoa powder
  • Unsweetened shredded coconut
  • Vanilla extract
🍽️
Optional
  • Chia seeds
  • Sea salt
  • Mini chocolate chips

Ingredient Details

  • Medjool dates Soft and sticky; remove pits first and tear into smaller pieces for easier blending.
  • Rolled oats Old-fashioned oats work best; quick oats make the texture softer and less chewy.
  • Natural nut butter Use peanut or almond butter without added sugar; the oil should be mixed in, not separated on top.
  • Cocoa powder Unsweetened only; Dutch-process or natural both work, but Dutch-process is less acidic.
  • Shredded coconut Unsweetened keeps the sugar in check; sweetened coconut makes the bites too sugary.
  • Vanilla extract Pure vanilla balances the chocolate and coconut; skip imitation if you can.
  • Chia seeds Add texture and omega-3s; they don't change the flavor but give a slight crunch.

Ingredient Swaps

You can make these bites work with whatever you have on hand. If you're out of nut butter, sunflower seed butter gives you the same creamy texture without the allergens. This recipe uses completely different ingredients but follows the same no-cook philosophy.

  • Swap dates for figs or raisins. Both add stickiness, though figs are slightly less sweet and raisins need a few extra to match the binding power.
  • Use quick oats instead of rolled oats. Quick oats blend faster and make the texture softer, but they won't hold up as long in the fridge.
  • Replace nut butter with sunflower seed butter. This keeps the bites nut-free and gives you the same creamy fat without changing the flavor much.
  • Try gluten-free oats. Certified gluten-free oats work the same way; check the label if cross-contamination matters to you.

Binder Swaps

Works for: Sunflower seed butter or tahini give similar fat content and creaminess without nuts

Skip if: You want exact flavor-peanut and almond butter have stronger taste that defines the bite

Sweetener Adjustments

Works for: Maple syrup or honey add extra sweetness and make the mixture stickier if dates alone aren't enough

Skip if: You're keeping sugar low-dates provide all the sweetness most people need

Instructions

The trick is processing the dates until they're smooth before adding the dry ingredients. If you add everything at once, the oats turn to powder and the mixture gets gummy. Pulse the dates first, then add the rest and pulse just until everything sticks together.

  1. Pulse the dates in a food processor until they form a sticky paste. Stop once or twice to scrape down the sides so all the pieces blend evenly.

  2. Add the oats, cocoa powder, coconut, nut butter, and vanilla to the processor. Pulse in short bursts until the mixture clumps together when you pinch it-about 10 to 15 pulses.

  3. Transfer the mixture to a bowl and chill in the fridge for 30 minutes. This step firms up the dates and nut butter so the bites hold their shape.

  4. Roll the mixture into 1-inch balls using slightly damp hands. If it sticks, dampen your palms again or lightly oil them with coconut oil.

  5. Arrange the bites on a parchment-lined plate and chill for another 15 minutes before eating or storing. This final chill sets the texture and makes them easier to handle.

Shortcut
Skip the second chill if you're eating them right away-they'll be softer but still hold together. For firmer bites, freeze them for 10 minutes instead of refrigerating.

What to Serve With It

These bites work as a snack on their own, but they also pair well with lighter foods that won't compete with the chocolate and coconut. A smoothie or a piece of fresh fruit keeps things balanced, and a glass of cold milk (dairy or plant-based) offsets the richness. For more pairing ideas, check out Burgers pairing ideas for snack-friendly sides that round out a casual meal.

Side DishPrepWhy It WorksHow to Serve
Fresh berries Easy Tart fruit cuts the sweetness Small bowl on the side
Cold milk Easy Balances richness and aids digestion Glass with ice
Apple slices Easy Crisp texture contrasts chewy bites Sprinkle with cinnamon
Greek yogurt Easy Adds protein and creaminess Small cup with honey drizzle
Green tea Easy Light, slightly bitter balance Serve hot or iced

Three ways to serve it:

  • On a snack platter, arrange with nuts, dried fruit, and dark chocolate chunks for a shareable spread.
  • With coffee or tea, the slight bitterness offsets the date sweetness and makes them feel like a dessert substitute.
  • In a lunch box, pack two or three alongside fresh veggies and hummus for a balanced midday meal.
Best Pick
Pair these with sliced oranges for a snack that feels light but still satisfying-the citrus brightens the chocolate and coconut without adding heaviness.

Store and Reheat

These bites don't need reheating, but they do need proper storage to stay fresh. Refrigerate them in an airtight container to keep the coconut from drying out and the dates from hardening. They'll last up to a week in the fridge or up to three months in the freezer. If you're serving them as part of a larger spread, simple fish recipe makes a good savory contrast to the sweet, chewy texture.

MethodTimeBest For
❄️Serve cold from fridge0 minQuick grab-and-go snack
❄️Thaw from freezer5 minSofter texture without melting
❄️Room temp rest10 minSlightly softer chew

For best results when storing:

  • Refrigerate in an airtight container, keeps them firm and prevents the coconut from absorbing fridge odors for up to one week.
  • Layer parchment between bites, stops them from sticking together if they soften slightly.
  • Freeze individually first, arrange on a tray, freeze for 30 minutes, then transfer to a freezer bag to prevent clumping.
  • Thaw in the fridge, move frozen bites to the fridge the night before so they soften evenly without getting mushy.
  • Avoid room temperature for long periods, nut butter and dates soften in warm kitchens, making the bites too sticky to handle cleanly.

Frequently Asked Questions

Can I use store-bought chocolate chips instead of cocoa powder?

Yes, but mini chocolate chips add texture instead of blending into the mixture. If you want chocolate throughout, stick with cocoa powder. If you want bursts of chocolate in each bite, fold in a quarter cup of mini chips after processing.

Why are my energy bites too crumbly?

Not enough binder. Add one or two more dates or another tablespoon of nut butter, then pulse again until the mixture holds together when you pinch it. If it still crumbles, drizzle in a teaspoon of water or maple syrup and pulse once more.

How long do these last in the freezer?

Up to three months in a freezer-safe container or bag. Freeze them individually on a tray first so they don't stick together, then transfer to a bag once solid. Thaw in the fridge overnight or let them sit at room temperature for five minutes before eating.

Can I make these without a food processor?

Yes, but it takes more effort. Chop the dates finely with a knife, then mash them with the back of a fork until they form a paste. Mix the rest of the ingredients in a bowl by hand until everything sticks together. The texture will be less uniform, but the bites will still hold.

What if I want a stronger chocolate flavor?

Add an extra tablespoon of cocoa powder or fold in a tablespoon of melted dark chocolate after processing. Too much cocoa powder makes the bites dry, so balance it with a bit more nut butter or a teaspoon of maple syrup if needed.

Chocolate Coconut Energy Bites

Chocolate Coconut Energy Bites

No ratings yet
These no-bake energy bites combine sweet Medjool dates, nut butter, oats, shredded coconut, and cocoa powder for a wholesome, grab-and-go snack that feels like a treat without refined sugar. Chill before rolling for perfect texture.
Print Recipe Pin Recipe
Prep Time 15 minutes mins
Total Time 45 minutes mins
Servings: 18 bites
Course: Snack
Cuisine: Global
Ingredients Equipment Method Notes

Ingredients
  

  • 16 Medjool dates pitted, torn into smaller pieces
  • 1 cup rolled oats old-fashioned preferred
  • ½ cup natural nut butter peanut or almond butter, mixed oil
  • ¼ cup unsweetened shredded coconut
  • ¼ cup unsweetened cocoa powder
  • 1 teaspoon vanilla extract pure vanilla preferred
  • 1 tablespoon chia seeds optional
  • ¼ teaspoon sea salt optional
  • ¼ cup mini chocolate chips optional, fold in after processing

Equipment

  • Food processor To blend dates and mix ingredients
  • Bowl To chill the mixture
  • Plate Parchment-lined for rolling bites

Method
 

  1. Pulse the Medjool dates in a food processor until they form a sticky paste, stopping once or twice to scrape down the sides for even blending.
  2. Add rolled oats, unsweetened cocoa powder, shredded coconut, natural nut butter, and vanilla extract to the processor.
  3. Pulse in short bursts about 10 to 15 times until the mixture clumps together when pinched.
  4. Transfer the mixture to a bowl and chill in the fridge for 30 minutes to firm up the dates and nut butter.
  5. Roll the chilled mixture into 1-inch balls using slightly damp hands. If the mixture sticks, dampen palms or lightly oil with coconut oil.
  6. Arrange the bites on a parchment-lined plate and chill for an additional 15 minutes before eating or storing.

Notes

Chill the mixture for 30 minutes before rolling to ensure bites hold shape and do not stick to your hands.

Tried this recipe?

Let us know how it was!

You Might Also Like

  • Maple Pecan Granola Clusters
  • Honey Sriracha Snack Mix

Maple Pecan Granola Clusters

January 23, 2026

Crispy clusters stick together when maple syrup hits hot oats. The edges caramelize, the pecans toast, and everything binds into bite-sized chunks instead of loose granola dust.

maple-pecan-granola-clusters-feature
QUICK SUMMARY

Maple Pecan Granola Clusters are crispy, bite-sized oat clusters bound by caramelized maple syrup and toasted pecans. Press the mixture firmly before baking and let it cool completely without stirring to form sturdy clusters that hold up in yogurt or milk.

⏱️Time: 10 minutes prep, 30 minutes bake
🔥Key Move: Press granola firmly into pan to ensure clusters form during baking
⚠️Watch Out: Stirring too soon breaks clusters; cool fully before breaking apart

This isn't the kind of granola that pours like cereal. It clumps. That's the point. You want pieces big enough to grab, with enough structure to hold up in yogurt or milk without dissolving instantly. The difference comes down to how you press the mixture before baking and how long you leave it alone afterward.

Pecans bring a buttery richness that pairs with maple better than most nuts. Oil helps the oats crisp instead of steam. A light hand with stirring keeps the clusters intact. If you like quick biscuits, this follows the same low-and-slow baking logic-patience gets you crunch.

Quick Reference
⏱️ Prep Time 10 min
🔥 Cook Time 40 min
⏰ Total Time 50 min
🍽️ Servings 8 cups
📊 Difficulty Easy
🏷️ Category Snacks
💡 Quick Tip Press mixture firmly before baking
🎯 Best For Meal prep, breakfast topping

Why This Recipe Works

Low oven temperature dries the oats without burning the nuts or caramelizing the sugars too fast. The clusters form because the maple syrup and oil coat every surface, then harden as moisture evaporates. For a filling breakfast pairing, tender pork side adds savory balance to a sweet morning spread.

  • Rolled oats provide structure. Quick oats turn powdery and don't cluster as well.
  • Maple syrup acts as binder. The natural sugars caramelize slightly and glue the oats together.
  • Oil creates crispness. Without fat, the granola bakes up chewy instead of crunchy.
  • Brown sugar boosts caramelization. A small amount deepens the color and helps clusters hold.
  • Pecans toast as they bake. Their oils release and coat the oats, adding richness.
Quick Tip
Press the oat mixture into a thin, even layer before baking to encourage larger clusters instead of loose grains.

What You'll Need

maple-pecan-granola-clusters ingredients

The ingredients fall into three categories: oats for texture, maple-pecan flavor, and binders to hold it all together. If you want roasted veggies on the side for a brunch spread, prep those first so both finish around the same time.

🍚
Base
  • Rolled oats
  • Chopped pecans
🥢
Binder
  • Maple syrup
  • Vegetable oil
  • Brown sugar
🌶️
Flavor
  • Vanilla extract
  • Cinnamon
  • Sea salt

Ingredient Details

  • Rolled oats Use old-fashioned oats, not instant or quick-cooking, for the right texture.
  • Chopped pecans Rough chop them to about the size of the oats so they toast evenly.
  • Maple syrup Pure maple syrup works best; pancake syrup has different sugars and won't caramelize the same way.
  • Vegetable oil Light-flavored oils like grapeseed or canola work best; olive oil can taste too strong.
  • Brown sugar Use packed light brown sugar for deeper caramel notes without overpowering the maple.
  • Cinnamon A half teaspoon adds warmth without dominating; increase to a full teaspoon if you like spice-forward granola.
  • Sea salt Balances the sweetness and brings out the maple and pecan flavors.

Ingredient Swaps

You can adjust the nuts, sweeteners, and fats without losing the cluster structure. This easy recipe uses similar low-temperature techniques for drying fruit into concentrated snacks.

  • Honey instead of maple syrup. Swap 1:1 but expect a floral sweetness and slightly stickier clusters.
  • Walnuts or almonds instead of pecans. Use the same amount; walnuts taste earthier, almonds add more crunch.
  • Coconut oil instead of vegetable oil. Adds subtle coconut flavor and makes the granola slightly firmer when cooled.
  • Coconut sugar instead of brown sugar. Swaps 1:1 with a hint of caramel and lower glycemic index.

Nut Swaps

Works for: Almonds, walnuts, or cashews in equal amounts for different flavors

Skip if: You want the buttery richness only pecans provide

Sweetener Swaps

Works for: Honey or agave in place of maple syrup for similar binding power

Skip if: You're after the specific maple flavor that defines this recipe

Instructions

Coat the oats thoroughly, press them into a single layer, and resist stirring too often. The clusters form when the mixture stays undisturbed long enough for the sugars to set.

  1. Preheat oven to 300°F and line a large baking sheet with parchment paper. The low temperature prevents burning and allows the oats to dry slowly, which creates crispness.

  2. Mix oats, pecans, cinnamon, and salt in a large bowl. Stir until the dry ingredients are evenly distributed so the spices don't clump in one spot.

  3. Whisk maple syrup, oil, brown sugar, and vanilla in a small bowl until smooth. Pour over the oat mixture and stir thoroughly until every oat and nut is coated-this step determines how well the clusters hold together.

  4. Spread the mixture onto the prepared baking sheet and press firmly into an even layer. Use the back of a spatula or your hands to compact it; the more you press, the bigger the clusters.

  5. Bake for 40 minutes, stirring gently once at the halfway point. After baking, let the granola cool completely on the sheet without breaking it apart-this is when the clusters harden.

Golden Rule
Do not stir the granola after it comes out of the oven. Let it cool completely on the pan so the maple syrup hardens into solid clusters instead of breaking into crumbs.

What to Serve With It

Granola clusters work as breakfast toppings, snack mixes, or crunchy additions to desserts. If you're building a brunch menu, check out Pulled Beef serving suggestions for savory side ideas that balance sweet dishes.

Side DishPrepWhy It WorksHow to Serve
Greek yogurt Easy Tangy contrast to maple sweetness Layer in a bowl with fresh berries
Smoothie bowl Easy Adds crunch to creamy base Sprinkle on top just before serving
Warm oatmeal Easy Textural contrast to soft grains Stir in or use as topping
Ice cream Easy Maple-pecan flavor complements vanilla Crumble over scoops as topping
Trail mix Easy Adds sweet clusters to savory nuts Mix with dried fruit and dark chocolate

Three ways to serve it:

  • Over yogurt with fruit. The clusters add crunch while yogurt keeps them from feeling dry.
  • Mixed into trail mix. Combine with dried cranberries, chocolate chips, and extra nuts for a portable snack.
  • As a dessert topping. Crumble over vanilla ice cream or apple crisp for added texture.
Best Pick
Store granola clusters in mason jars as grab-and-go breakfast portions or pack them in small bags for work snacks.

Store and Reheat

Granola stays crisp for weeks when stored properly. Keep it in an airtight container at room temperature to prevent moisture from softening the clusters. Pair leftovers with rich beef side dishes to balance sweet and savory elements on a brunch buffet.

MethodTimeBest For
🔥Oven refresh at 300°F5 minRestoring crispness to softened clusters
❄️Serve cold0 minTopping yogurt or ice cream straight from storage
🌀Air fryer at 275°F3 minQuick crispness boost for small portions

For best results when storing:

  • Cool completely before sealing. Warm granola creates condensation that softens clusters within hours.
  • Use airtight containers. Mason jars or sealed bags keep moisture out for up to 3 weeks at room temperature.
  • Freeze for longer storage. Clusters stay crisp in freezer bags for up to 3 months; thaw at room temperature before serving.
  • Avoid refrigeration. Cold storage introduces moisture that turns crispy granola soggy.
  • Refresh in the oven if softened. Spread on a baking sheet and bake at 300°F for 5 minutes to restore crunch.

Frequently Asked Questions

Why did my granola turn out soggy instead of crispy?

Granola stays soggy when it doesn't bake long enough to evaporate all the moisture from the maple syrup and oil. Return it to a 300°F oven for another 10 minutes, checking every few minutes until the edges turn golden. Let it cool completely on the pan before breaking it apart-cooling hardens the clusters.

Can I make this granola without oil?

You can skip the oil, but the granola won't crisp as well and the clusters will be smaller and more fragile. The oil coats the oats and helps them brown evenly. If you prefer oil-free, increase the maple syrup by 2 tablespoons and add a tablespoon of nut butter for fat content, but expect a chewier texture.

How do I get bigger clusters instead of loose granola?

Press the oat mixture firmly into a thin, even layer on the baking sheet before it goes into the oven. The more you compact it, the larger the clusters. Stir only once halfway through baking, and resist breaking it apart until it cools completely-the sugars need time to harden into solid chunks.

Can I use quick oats instead of rolled oats?

Quick oats break down into a powdery texture and don't cluster well because they absorb moisture too fast. Rolled oats hold their shape during baking and create the structure needed for chunky clusters. If you only have quick oats, use them but expect smaller, more fragile pieces.

How long does homemade granola last?

Store granola in an airtight container at room temperature for up to 3 weeks. It stays crisp as long as moisture doesn't get in. For longer storage, freeze it in sealed bags for up to 3 months-thaw at room temperature before serving. Refrigeration introduces moisture that softens the clusters, so avoid it unless your kitchen is very humid.

Maple Pecan Granola Clusters

Maple Pecan Granola Clusters

No ratings yet
Crispy clusters stick together when maple syrup hits hot oats. The edges caramelize, the pecans toast, and everything binds into bite-sized chunks instead of loose granola dust. This granola clumps for a perfect texture in yogurt or milk with a buttery maple-pecan flavor.
Print Recipe Pin Recipe
Prep Time 10 minutes mins
Cook Time 40 minutes mins
Total Time 50 minutes mins
Servings: 8 cups
Course: Snacks
Ingredients Equipment Method Notes

Ingredients
  

  • rolled oats use old-fashioned oats, not instant or quick-cooking
  • chopped pecans rough chopped to about the size of the oats
  • maple syrup pure for best caramelization
  • vegetable oil light-flavored like grapeseed or canola
  • brown sugar packed light brown sugar
  • vanilla extract
  • 0.5 teaspoon cinnamon adds warmth without dominating
  • sea salt balances sweetness and brings out flavors

Equipment

  • Large baking sheet lined with parchment paper
  • Large mixing bowl to combine dry ingredients
  • Small mixing bowl to whisk wet ingredients
  • Spatula or hands for pressing granola mixture

Method
 

  1. Preheat oven to 300°F and line a large baking sheet with parchment paper. The low temperature prevents burning and allows the oats to dry slowly, which creates crispness.
  2. Mix oats, pecans, cinnamon, and salt in a large bowl. Stir until the dry ingredients are evenly distributed so the spices don't clump in one spot.
  3. Whisk maple syrup, oil, brown sugar, and vanilla in a small bowl until smooth. Pour over the oat mixture and stir thoroughly until every oat and nut is coated-this step determines how well the clusters hold together.
  4. Spread the mixture onto the prepared baking sheet and press firmly into an even layer. Use the back of a spatula or your hands to compact it; the more you press, the bigger the clusters.
  5. Bake for 40 minutes, stirring gently once at the halfway point. After baking, let the granola cool completely on the sheet without breaking it apart-this is when the clusters harden.

Notes

Pressing the oat mixture firmly before baking helps create large clusters and prevents grainy, loose granola pieces.

Tried this recipe?

Let us know how it was!
« Previous Page
Next Page »

Primary Sidebar

ForkliftKitchen recipe developer

Welcome!

Recipe Developer · 12+ Yr Kitchen Veteran

I'm the recipe developer behind this site, focused on practical, well-tested dishes and smart ingredient swaps. Every recipe is written to be clear, reliable, and easy to make at home.

650+ Recipes
12+ Yrs Exp.
3x Tested
Our Story →

As Featured In

Allrecipes

TASTE OF HOME

Food52

HUFFPOST

Yahoo! Life

Our Editorial Standards

  • ✓ Every recipe tested at least 3 times before publishing
  • ✓ Substitutes verified by real kitchen trials, not guesswork
  • ✓ Reviewed for accuracy by our editorial team
  • ✓ Updated regularly with seasonal info and reader feedback

Most Popular

  • Creamy Lemon Shrimp Linguine
    Creamy Lemon Shrimp Linguine
  • Creamy Garlic Mushroom Chicken
    Creamy Garlic Mushroom Chicken
  • Sesame Ginger Chicken Noodle Bowls
    Sesame Ginger Chicken Noodle Bowls
  • Baked Lemon Herb Fish Fillets
    Baked Lemon Herb Fish Fillets
  • Veggie Loaded Fried Rice
    Veggie Loaded Fried Rice
  • Spicy Garlic Shrimp Stir Fry
    Spicy Garlic Shrimp Stir Fry

Join 8,000+ Home Cooks

Weekly Kitchen Tips

Easy recipes, smart substitutes, and real cooking shortcuts — every Thursday.

Subscribe Free →


Side Dishes

  • What to Serve With Asian Salmon? 15 Best Side Dishes
    What to Serve With Asian Salmon? 15 Best Side Dishes
  • Side Dishes for Strawberry Spinach Salad
    15 Best Side Dishes for Strawberry Spinach Salad
  • Sides for Grilled Cauliflower Steaks to Complete the Meal
    15 Sides for Grilled Cauliflower Steaks to Complete the Meal
  • 15 Sides To Serve With Calabacitas
    15 Best Sides for Calabacitas – Mexican-Inspired Favorites


Substitutes

  • 7 Best Substitutes for Hot Sauce in Marinades & Stir-Fries
    7 Best Substitutes for Hot Sauce in Marinades & Stir-Fries
  • 9 Best Substitutes for Butter in Baking and Cooking
  • 7 Best Substitutes for Tagliatelle for Italian Pasta Dishes
    7 Best Substitutes for Tagliatelle for Italian Pasta Dishes
  • 7 Best Substitutes for Udon Noodles in Asian Stir-Fries
    7 Best Substitutes for Udon Noodles in Asian Stir-Fries


Browse by Topic

  • Side Dishes320
  • Substitutes785
  • Dinner163
  • Air Fryer77
  • Taste Profiles484
  • Food Storage123


Reader Reviews

★★★★★

"Finally a food blog that tells you exactly why a substitute works instead of just listing options."

— Sarah M., via email

★★★★★

"The side dish recommendations are so specific — saved my dinner party twice this month."

— James R., Pinterest comment

★★★★★

"I trust this site more than most because they actually test everything. You can tell."

— Priya K., blog comment

Footer

↑ Back to Top

Forklift Kitchen

We do the heavy lifting so you can enjoy the cooking. Tested recipes, smart substitutes, and perfect pairings—built for real home cooks.

Content

  • Recipes
  • Substitutes
  • What to Serve With
  • Blog

Company

  • About Us
  • Contact
  • Subscribe

Legal

  • Privacy Policy
  • Terms of Service

As an Amazon Associate I earn from qualifying purchases.

© 2026 Forklift Kitchen.

Rate This Recipe

Your vote:


A rating is required
A name is required
An email is required