Crispy clusters stick together when maple syrup hits hot oats. The edges caramelize, the pecans toast, and everything binds into bite-sized chunks instead of loose granola dust.

Maple Pecan Granola Clusters are crispy, bite-sized oat clusters bound by caramelized maple syrup and toasted pecans. Press the mixture firmly before baking and let it cool completely without stirring to form sturdy clusters that hold up in yogurt or milk.
This isn't the kind of granola that pours like cereal. It clumps. That's the point. You want pieces big enough to grab, with enough structure to hold up in yogurt or milk without dissolving instantly. The difference comes down to how you press the mixture before baking and how long you leave it alone afterward.
Pecans bring a buttery richness that pairs with maple better than most nuts. Oil helps the oats crisp instead of steam. A light hand with stirring keeps the clusters intact. If you like quick biscuits, this follows the same low-and-slow baking logic-patience gets you crunch.
Why This Recipe Works
Low oven temperature dries the oats without burning the nuts or caramelizing the sugars too fast. The clusters form because the maple syrup and oil coat every surface, then harden as moisture evaporates. For a filling breakfast pairing, tender pork side adds savory balance to a sweet morning spread.
Remember it later
Planning to try this recipe soon? Save it for a quick find later!
- Rolled oats provide structure. Quick oats turn powdery and don't cluster as well.
- Maple syrup acts as binder. The natural sugars caramelize slightly and glue the oats together.
- Oil creates crispness. Without fat, the granola bakes up chewy instead of crunchy.
- Brown sugar boosts caramelization. A small amount deepens the color and helps clusters hold.
- Pecans toast as they bake. Their oils release and coat the oats, adding richness.
What You'll Need
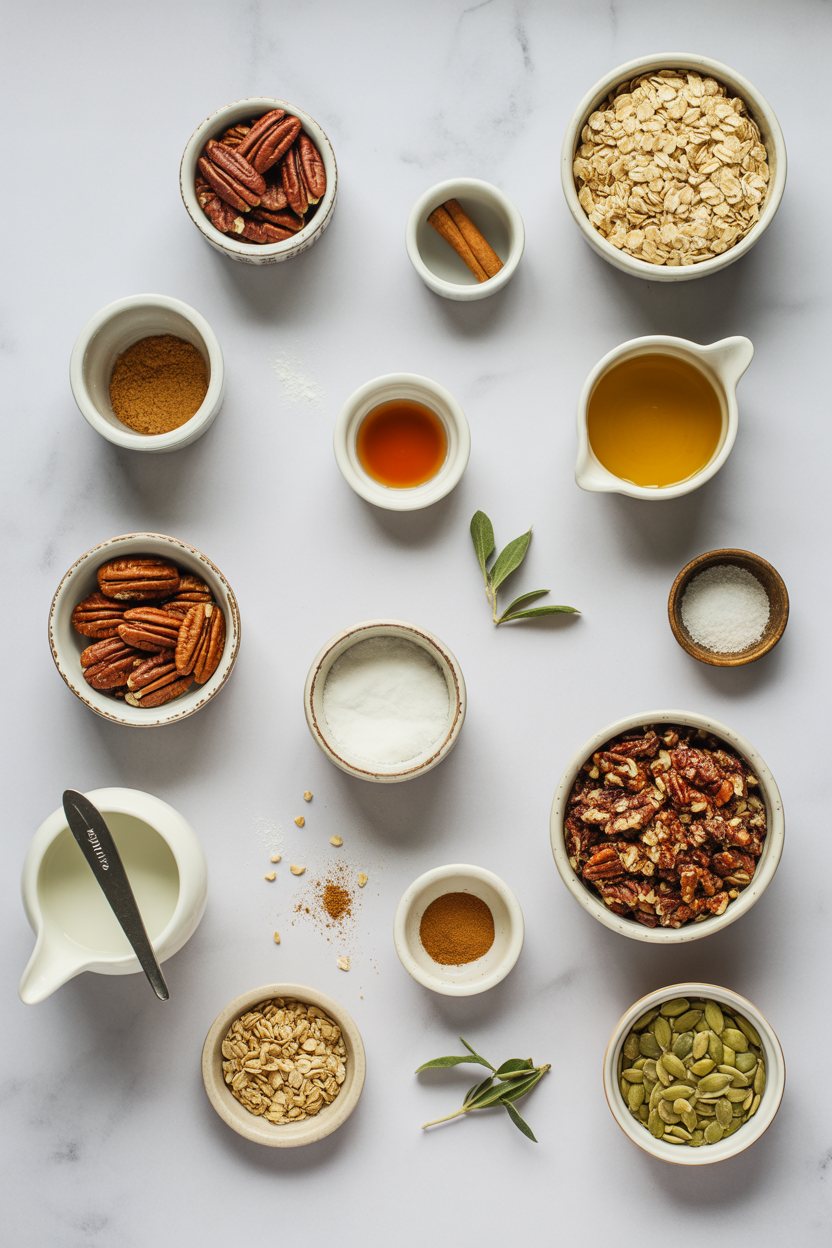
The ingredients fall into three categories: oats for texture, maple-pecan flavor, and binders to hold it all together. If you want roasted veggies on the side for a brunch spread, prep those first so both finish around the same time.
- Rolled oats
- Chopped pecans
- Maple syrup
- Vegetable oil
- Brown sugar
- Vanilla extract
- Cinnamon
- Sea salt
Ingredient Details
- Rolled oats Use old-fashioned oats, not instant or quick-cooking, for the right texture.
- Chopped pecans Rough chop them to about the size of the oats so they toast evenly.
- Maple syrup Pure maple syrup works best; pancake syrup has different sugars and won't caramelize the same way.
- Vegetable oil Light-flavored oils like grapeseed or canola work best; olive oil can taste too strong.
- Brown sugar Use packed light brown sugar for deeper caramel notes without overpowering the maple.
- Cinnamon A half teaspoon adds warmth without dominating; increase to a full teaspoon if you like spice-forward granola.
- Sea salt Balances the sweetness and brings out the maple and pecan flavors.
Ingredient Swaps
You can adjust the nuts, sweeteners, and fats without losing the cluster structure. This easy recipe uses similar low-temperature techniques for drying fruit into concentrated snacks.
- Honey instead of maple syrup. Swap 1:1 but expect a floral sweetness and slightly stickier clusters.
- Walnuts or almonds instead of pecans. Use the same amount; walnuts taste earthier, almonds add more crunch.
- Coconut oil instead of vegetable oil. Adds subtle coconut flavor and makes the granola slightly firmer when cooled.
- Coconut sugar instead of brown sugar. Swaps 1:1 with a hint of caramel and lower glycemic index.
Nut Swaps
Works for: Almonds, walnuts, or cashews in equal amounts for different flavors
Skip if: You want the buttery richness only pecans provide
Sweetener Swaps
Works for: Honey or agave in place of maple syrup for similar binding power
Skip if: You're after the specific maple flavor that defines this recipe
Instructions
Coat the oats thoroughly, press them into a single layer, and resist stirring too often. The clusters form when the mixture stays undisturbed long enough for the sugars to set.
Preheat oven to 300°F and line a large baking sheet with parchment paper. The low temperature prevents burning and allows the oats to dry slowly, which creates crispness.
Mix oats, pecans, cinnamon, and salt in a large bowl. Stir until the dry ingredients are evenly distributed so the spices don't clump in one spot.
Whisk maple syrup, oil, brown sugar, and vanilla in a small bowl until smooth. Pour over the oat mixture and stir thoroughly until every oat and nut is coated-this step determines how well the clusters hold together.
Spread the mixture onto the prepared baking sheet and press firmly into an even layer. Use the back of a spatula or your hands to compact it; the more you press, the bigger the clusters.
Bake for 40 minutes, stirring gently once at the halfway point. After baking, let the granola cool completely on the sheet without breaking it apart-this is when the clusters harden.
What to Serve With It
Granola clusters work as breakfast toppings, snack mixes, or crunchy additions to desserts. If you're building a brunch menu, check out Pulled Beef serving suggestions for savory side ideas that balance sweet dishes.
| Side Dish | Prep | Why It Works | How to Serve |
|---|---|---|---|
| Greek yogurt | Easy | Tangy contrast to maple sweetness | Layer in a bowl with fresh berries |
| Smoothie bowl | Easy | Adds crunch to creamy base | Sprinkle on top just before serving |
| Warm oatmeal | Easy | Textural contrast to soft grains | Stir in or use as topping |
| Ice cream | Easy | Maple-pecan flavor complements vanilla | Crumble over scoops as topping |
| Trail mix | Easy | Adds sweet clusters to savory nuts | Mix with dried fruit and dark chocolate |
Three ways to serve it:
- Over yogurt with fruit. The clusters add crunch while yogurt keeps them from feeling dry.
- Mixed into trail mix. Combine with dried cranberries, chocolate chips, and extra nuts for a portable snack.
- As a dessert topping. Crumble over vanilla ice cream or apple crisp for added texture.
Store and Reheat
Granola stays crisp for weeks when stored properly. Keep it in an airtight container at room temperature to prevent moisture from softening the clusters. Pair leftovers with rich beef side dishes to balance sweet and savory elements on a brunch buffet.
| Method | Time | Best For |
|---|---|---|
| Oven refresh at 300°F | 5 min | Restoring crispness to softened clusters |
| Serve cold | 0 min | Topping yogurt or ice cream straight from storage |
| Air fryer at 275°F | 3 min | Quick crispness boost for small portions |
For best results when storing:
- Cool completely before sealing. Warm granola creates condensation that softens clusters within hours.
- Use airtight containers. Mason jars or sealed bags keep moisture out for up to 3 weeks at room temperature.
- Freeze for longer storage. Clusters stay crisp in freezer bags for up to 3 months; thaw at room temperature before serving.
- Avoid refrigeration. Cold storage introduces moisture that turns crispy granola soggy.
- Refresh in the oven if softened. Spread on a baking sheet and bake at 300°F for 5 minutes to restore crunch.
Frequently Asked Questions
Granola stays soggy when it doesn't bake long enough to evaporate all the moisture from the maple syrup and oil. Return it to a 300°F oven for another 10 minutes, checking every few minutes until the edges turn golden. Let it cool completely on the pan before breaking it apart-cooling hardens the clusters.
You can skip the oil, but the granola won't crisp as well and the clusters will be smaller and more fragile. The oil coats the oats and helps them brown evenly. If you prefer oil-free, increase the maple syrup by 2 tablespoons and add a tablespoon of nut butter for fat content, but expect a chewier texture.
Press the oat mixture firmly into a thin, even layer on the baking sheet before it goes into the oven. The more you compact it, the larger the clusters. Stir only once halfway through baking, and resist breaking it apart until it cools completely-the sugars need time to harden into solid chunks.
Quick oats break down into a powdery texture and don't cluster well because they absorb moisture too fast. Rolled oats hold their shape during baking and create the structure needed for chunky clusters. If you only have quick oats, use them but expect smaller, more fragile pieces.
Store granola in an airtight container at room temperature for up to 3 weeks. It stays crisp as long as moisture doesn't get in. For longer storage, freeze it in sealed bags for up to 3 months-thaw at room temperature before serving. Refrigeration introduces moisture that softens the clusters, so avoid it unless your kitchen is very humid.
Maple Pecan Granola Clusters
Ingredients
Equipment
Method
- Preheat oven to 300°F and line a large baking sheet with parchment paper. The low temperature prevents burning and allows the oats to dry slowly, which creates crispness.
- Mix oats, pecans, cinnamon, and salt in a large bowl. Stir until the dry ingredients are evenly distributed so the spices don't clump in one spot.
- Whisk maple syrup, oil, brown sugar, and vanilla in a small bowl until smooth. Pour over the oat mixture and stir thoroughly until every oat and nut is coated-this step determines how well the clusters hold together.
- Spread the mixture onto the prepared baking sheet and press firmly into an even layer. Use the back of a spatula or your hands to compact it; the more you press, the bigger the clusters.
- Bake for 40 minutes, stirring gently once at the halfway point. After baking, let the granola cool completely on the sheet without breaking it apart-this is when the clusters harden.