• Skip to primary navigation
  • Skip to main content
  • Skip to primary sidebar
  • Recipe Index
    • Air Fryer
  • Side Dishes
  • Substitutes
  • About
  • Contact
  • Subscribe

ForkLiftKitchen

menu icon
go to homepage
  • Recipe Index
    • Air Fryer
  • Side Dishes
  • Substitutes
  • About
  • Contact
  • Subscribe
subscribe
search icon
Homepage link
  • Recipe Index
    • Air Fryer
  • Side Dishes
  • Substitutes
  • About
  • Contact
  • Subscribe
×

Blog

5 Best Substitutes for Asian Pear in Korean BBQ Marinades

February 1, 2026

You're prepping bulgogi and realize the Asian pear you bought last week turned to mush. The recipe calls for grated pear to tenderize the beef and add a hint of sweetness.

5 Best Substitutes for Asian Pear in Korean BBQ Marinades

Asian pears bring crisp texture and natural enzymes that break down meat fibers while adding mild floral sweetness. They work raw in salads or grated into marinades.

A few pantry swaps replicate those qualities without the specialty produce run.

QUICK SUMMARY

For marinades and tenderizing meat, we swap Asian pear with Bosc pear or Fuji apple at a 1:1 ratio. Both bring natural enzymes and moisture. Watch out for slight texture differences-pears soften faster, apples stay firmer. In fresh salads needing crunch, grated jicama replicates the crisp bite without the tenderizing effect.

🥩For marinades: Bosc pear or Fuji apple tenderize meat just like Asian pear
🥗For fresh crunch: Jicama matches the texture without adding sweetness
⚠️Watch texture: Pears soften in heat, apples hold shape better
Quick Substitute Reference
# Substitute Best For Ratio Key Note
1 Bosc Pear ✨ Both 1:1 Softer than Asian pear
2 Fuji Apple 🍳 Cooking 1:1 More tart, firmer texture
3 Korean Melon 🥗 Raw 1:1 Won't tenderize meat
4 Pineapple Juice 🍳 Cooking 1:2 Strong tropical flavor
5 Grated Jicama 🥗 Raw 1:1 Crisp with mild sweetness

1. Bosc Pear 🍐

Bosc pears step in when you need similar juiciness and mild sweetness. They grate easily and release moisture that tenderizes meat in marinades.

Use 1:1 by weight-if your recipe calls for 1 cup grated Asian pear, use 1 cup grated Bosc. The texture runs slightly softer once cooked.

  • ✅ Nearly identical sweetness and moisture content
  • ⚠️ Less crisp than Asian pear in raw applications

Bosc pears work in bulgogi marinades, kalbi sauces, and fresh pear salads. They break down faster in heat, so add them toward the end if you want some texture left.

2. Fuji or Gala Apple 🍎

Fuji and Gala apples contain the same tenderizing enzymes as Asian pears. They bring crisp texture and natural sweetness to marinades and sauces.

Use 1:1 by weight for Asian pear. Apples lean more tart and less floral, but the enzyme action stays consistent.

Grate them fresh and add to Korean BBQ marinades right away. The acidity cuts through rich meats without overpowering the dish.

Apples hold their shape better than pears in cooked applications. That firmness helps in stir-fries or braised dishes where you want some bite left.

Don't use apples raw in salads expecting Asian pear's subtle flavor-the tartness stands out more. instead of Braeburn Apple try these depending on what's in season.

Best Pick
For meat marinades, Fuji apples match Asian pear's tenderizing power without needing specialty produce.

3. White-Fleshed Korean Melon 🍈

Korean melon brings high water content and gentle sweetness without the tenderizing enzymes. It works in fresh applications where you need moisture and mild flavor.

Use 1:1 by weight for Asian pear in salads, fruit plates, or cold noodle dishes. The texture stays crisp but softer than Asian pear.

Korean melon won't break down meat fibers in marinades. Save it for dishes where texture and hydration matter more than enzymatic action.

The flavor runs more neutral than Asian pear-less floral, more watery. It disappears into the background rather than adding complexity.

4. Juiced Pineapple 🍹

Pineapple juice contains bromelain enzymes that tenderize meat aggressively. It works in marinades where you need breakdown power more than texture.

Use ½ cup pineapple juice per 1 cup grated Asian pear. The liquid form means you're trading texture for enzymatic punch.

  • ⚠️ Don't marinate longer than 30 minutes-bromelain works fast and can turn meat mushy
  • ✅ Works in Korean BBQ marinades if you adjust for tropical flavor

The flavor shifts tropical and tangy. Balance it with extra soy sauce or sesame oil to keep the profile savory.

Pineapple juice changes the dish's character more than other swaps. If you're already working with pineapple in your pantry, check out tested Pineapple Juice replacements for broader use.

5. Grated Jicama 🥕

Jicama replicates Asian pear's crisp, watery crunch in raw dishes. It adds light sweetness without the tenderizing enzymes.

Use 1:1 by weight for Asian pear in fresh salads, slaws, or spring rolls. Grate it just before serving to keep the texture snappy.

  • ✅ Closest texture match for raw applications
  • ✅ Stays crisp longer than pears or apples after cutting
  • ⚠️ Won't tenderize meat in marinades

Jicama tastes milder and less sweet than Asian pear. Bump up other flavors in the dish-citrus, herbs, or chili-to compensate.

It holds up in Vietnamese-style salads or Korean banchan where crunch matters more than enzymatic action. For more ways to work with this root vegetable, we've got Jicama alternatives to try in other contexts.

Choose by What You're Cooking

  • For meat marinades: Bosc pear or Fuji apple-both tenderize at 1:1 ratio
  • For fresh salads: Jicama if you want crunch without sweetness, Korean melon if you need mild flavor
  • For quick tenderizing: Pineapple juice at ½ ratio, but watch the timer-30 minutes max
  • For cooked dishes: Apples hold texture better than pears in stir-fries or braises

Frequently Asked Questions

Can I use regular pears instead of Asian pears in bulgogi?

Yes-Bosc or Bartlett pears work at a 1:1 ratio. They tenderize meat with similar enzymes and add sweetness. The texture runs softer than Asian pear, so the marinade may be slightly thicker after grating.

Why does Asian pear tenderize meat?

Asian pears contain natural enzymes that break down protein fibers in meat. The enzymes work similarly to papain in papaya or bromelain in pineapple. Grating the pear releases more enzymes and distributes them evenly through the marinade.

What's the best Asian pear substitute for salads?

Jicama replicates the crisp texture without adding much sweetness. Use it 1:1 by weight and cut it into matchsticks or thin slices. Korean melon works too if you want a slightly sweeter, softer option.

Can I swap Asian pear with applesauce?

Not directly-applesauce adds moisture but lacks the tenderizing enzymes and fresh texture. Use fresh grated apple instead at a 1:1 ratio. If you only have applesauce, add a pinch of meat tenderizer or a splash of pineapple juice to compensate.

How long should I marinate meat with Asian pear substitute?

With Bosc pear or apple, marinate 2-4 hours for beef or pork. Pineapple juice works faster-30 minutes max or the meat turns mushy. Korean melon and jicama don't tenderize, so marinating time depends on other ingredients in the mix.

Substitutes for Asian Pear in Korean BBQ Marinades

5 Best Substitutes for Asian Pear

No ratings yet
Asian pear substitutes vary depending on your cooking needs-whether tenderizing meat or adding crunch to salads. Bosc pear and Fuji apple work well in marinades at a 1:1 ratio, while grated jicama offers crisp texture without enzymatic effects for raw dishes. Pineapple juice provides strong tenderizing enzymes but with a tropical flavor and shorter marinating time.
Print Recipe Pin Recipe
Prep Time 10 minutes mins
Cook Time 8 minutes mins
Total Time 18 minutes mins
Servings: 4 servings
Course: Kitchen Tips, Substitutes
Cuisine: Various
Ingredients Method Notes

Ingredients
  

  • 1 cup Bosc Pear Use 1:1 ratio by weight; softer than Asian pear
  • 1 cup Fuji Apple Use 1:1 ratio by weight; firmer texture and more tart
  • 1 cup White-Fleshed Korean Melon Use 1:1 ratio by weight; won't tenderize meat
  • 0.5 cup Pineapple Juice Use half the volume; strong tropical flavor; marinate max 30 minutes
  • 1 cup Grated Jicama Use 1:1 ratio by weight; crisp texture without enzymes

Method
 

  1. Choose your substitute based on the dish: Bosc pear or Fuji apple for marinades; jicama or Korean melon for fresh salads; pineapple juice for quick tenderizing.
  2. Grate or prepare the substitute as needed, matching the texture when possible (e.g., grate pears and apples, grate jicama just before serving).
  3. Apply the substitute at the recommended ratio: typically 1:1 by weight except pineapple juice at half the amount.
  4. Adjust marinating or serving times accordingly: pineapple juice needs only 30 minutes max; pears and apples require 2-4 hours for tenderizing.
  5. Check texture and taste after integrating the substitute and season to balance any flavor differences.

Notes

  • Use fresh grated produce for best enzymatic effects.
  • Be cautious with pineapple juice to avoid over-tenderizing meat.
  • Jicama and Korean melon do not tenderize meat but add moisture and crunch in raw dishes.

Tried this recipe?

Let us know how it was!

5 Best Substitutes for Artichoke Heart

February 1, 2026

You're assembling a pasta dish and realize the artichoke hearts didn't make it into the cart. The recipe counts on that tender bite and mild vegetal flavor to fill out the sauce.

5 Best Substitutes for Artichoke Heart

Artichoke hearts aren't just filler-they absorb dressing, hold their shape through cooking, and add a subtle nuttiness that keeps dishes from tasting flat. Losing them shifts the texture and balance.

A few swaps step in without forcing you back to the store.

QUICK SUMMARY

For cold salads and dips, we reach for hearts of palm or canned asparagus tips-both match the tender texture and mild flavor. In cooked dishes like pastas, frozen artichoke hearts work best since they hold up under heat. Watch texture when swapping into warm recipes, as some options soften faster than fresh hearts.

🥗Closest match: Hearts of palm for salads-similar bite and mild taste
🍝For cooking: Frozen artichoke hearts perform best in pastas and casseroles
⚠️Watch out: Jerusalem artichokes taste earthier-adjust seasonings to compensate
Quick Substitute Reference
# Substitute Best For Ratio Key Note
1 Hearts of Palm 🥗 Raw 1:1 Similar texture, less nutty
2 Frozen/Canned Artichoke 🍳 Cooking 1:1 Slightly saltier from preservation
3 Baby Artichokes 🍳 Cooking 1:1 volume Fresher flavor, needs quartering
4 Jerusalem Artichoke 🍳 Cooking 1:1 Earthy, less mild taste
5 Asparagus Tips 🥗 Raw 1:1 Grassy, more vegetal

1. Marinated Hearts of Palm 🥗

Hearts of palm come close to artichoke hearts in both texture and mild flavor. They're tender yet slightly firm, and they soak up dressings without turning mushy.

Use 1:1 by volume anywhere you'd use artichoke hearts cold. Drain and slice them if the recipe calls for smaller pieces.

They shine in Mediterranean salads, grain bowls, and cold dips. Hearts of palm don't hold up as well under prolonged heat, so save them for dishes that stay cool or barely warm.

  • ✅ Closest texture match for cold dishes
  • ✅ Absorbs marinade and dressing well
  • ⚠️ Soften quickly when cooked too long

If hearts of palm run out too, replacements similar to Hearts Of Palm cover most pantry gaps.

2. Frozen/Canned Artichoke Hearts 🧊

When fresh artichoke hearts aren't available, frozen or canned versions step in without changing the dish. They're still artichokes-just preserved differently.

Use 1:1 by volume in any recipe calling for fresh hearts. Rinse canned ones to cut back on extra salt.

Frozen hearts work best in cooked dishes like pastas, casseroles, and baked dips where heat softens them further. Canned ones sometimes taste slightly saltier, so adjust your seasoning after you've stirred them in.

Best Pick
Frozen artichoke hearts stay closer to fresh texture than canned-they're our first reach for cooked recipes.

3. Baby Artichokes 🌿

Baby artichokes are younger versions of the same plant. They're more tender and don't have the tough inner choke that full-grown artichokes develop.

Clean them, trim the outer leaves, and quarter them lengthwise. Use the same volume your recipe calls for.

They work best steamed, sautéed, or roasted-dishes where you want whole or large pieces of artichoke. The flavor is fresher and slightly more vegetal than jarred hearts.

  • ✅ Fresher, brighter flavor
  • ✅ No tough choke to remove
  • ⚠️ Takes more prep time than canned
  • ⚠️ Less uniform than pre-cut hearts

They won't blend into dips as smoothly, but they shine in rustic dishes where texture matters.

4. Jerusalem Artichoke (Sunchoke) 🥔

Jerusalem artichokes aren't true artichokes-they're tubers. But their texture when cooked lands close enough to work in savory dishes.

Slice them thin and use 1:1 by volume. They soften under heat and absorb sauce well.

The flavor is earthier and nuttier than artichoke hearts, so they fit best in roasted vegetable medleys, purees, and hearty soups. They won't work in dishes where you need artichoke's subtle tang.

  • ✅ Similar texture when cooked
  • ⚠️ Earthier, less mild flavor

If you need other options, replacements similar to Jerusalem Artichoke cover broader ground.

5. Canned Asparagus Tips 🌾

Canned asparagus tips share artichoke hearts' tender bite and mild vegetal taste. They're softer and more delicate, but they don't throw off cold dishes.

Use 1:1 by volume in salads, dips, and chilled appetizers. Drain and pat them dry before mixing them in.

The flavor is grassier and slightly sweeter than artichoke hearts. They work best when mixed with other ingredients that mask the difference-think creamy dips or heavily dressed salads.

They won't absorb as much liquid as artichoke hearts do, so expect a lighter coating of dressing. Skip them in cooked dishes where you need firmer texture.

For broader coverage, tested Asparagus replacements list other vegetal swaps.

Picking Your Artichoke Heart Swap

  • For cold salads and dips: Hearts of palm or asparagus tips-both stay tender and mild
  • For pastas and casseroles: Frozen artichoke hearts hold up best under heat
  • For roasted dishes: Baby artichokes or Jerusalem artichokes add fresh or earthy notes

Frequently Asked Questions

Can I use hearts of palm in hot dishes like baked dips?

You can, but they soften quickly under heat. Stir them in near the end of baking or use frozen artichoke hearts instead for dishes that stay in the oven longer.

Do Jerusalem artichokes taste like regular artichoke hearts?

No-they're earthier and nuttier, more like a potato crossed with a sunflower seed. They work in cooked dishes where seasoning can adjust the flavor, but they won't mimic artichoke's subtle tang.

Should I rinse canned artichoke hearts before using them?

Yes-rinse them to remove excess salt and any metallic taste from the brine. Pat them dry if you're adding them to dishes where extra liquid would thin out the sauce.

Can I swap baby artichokes into a dip recipe?

You can if you chop them finely after cooking. They're less uniform than jarred hearts, so expect a chunkier texture unless you puree them smooth.

Are marinated artichoke hearts different from plain ones?

Marinated ones come packed in oil with herbs and spices. They add more flavor than plain water-packed or frozen hearts, but they also add extra oil-drain them if you don't want that richness.

Substitutes for Artichoke Heart in Mediterranean Dishes

5 Best Substitutes for Artichoke Heart

No ratings yet
Artichoke hearts bring a tender bite and mild vegetal flavor to many dishes. These substitutes cover both raw and cooked applications, offering similar textures and tastes so you can keep your recipe on track without a last-minute store run.
Print Recipe Pin Recipe
Prep Time 9 minutes mins
Cook Time 6 minutes mins
Total Time 15 minutes mins
Servings: 4 servings
Course: Kitchen Tips, Substitutes
Cuisine: Various
Ingredients Method Notes

Ingredients
  

  • 1 cup Hearts of Palm Use 1:1 by volume for cold dishes; drain and slice if needed.
  • 1 cup Frozen or Canned Artichoke Hearts Use 1:1 by volume; rinse canned to remove excess salt.
  • 1 cup Baby Artichokes Use 1:1 volume; clean, trim leaves, quarter before cooking.
  • 1 cup Jerusalem Artichoke (Sunchoke) Use 1:1 by volume; slice thin before cooking.
  • 1 cup Canned Asparagus Tips Use 1:1 by volume for cold dishes; drain and pat dry before use.

Method
 

  1. Select the substitute based on your dish type-raw (salads/dips) or cooked (pastas/casseroles).
  2. Prep the substitute by draining, slicing, trimming, or rinsing to match desired texture.
  3. Replace artichoke hearts with your chosen substitute using a 1:1 volume ratio, adjusting seasoning as needed.
  4. Taste and check the texture before serving, especially if using earthier or softer options.

Notes

  • Hearts of palm are best for cold dishes as they soften quickly with heat.
  • Rinse canned artichokes and asparagus tips to remove excess salt and liquid.
  • Jerusalem artichokes add earthier flavor; adjust seasoning accordingly.

Tried this recipe?

Let us know how it was!

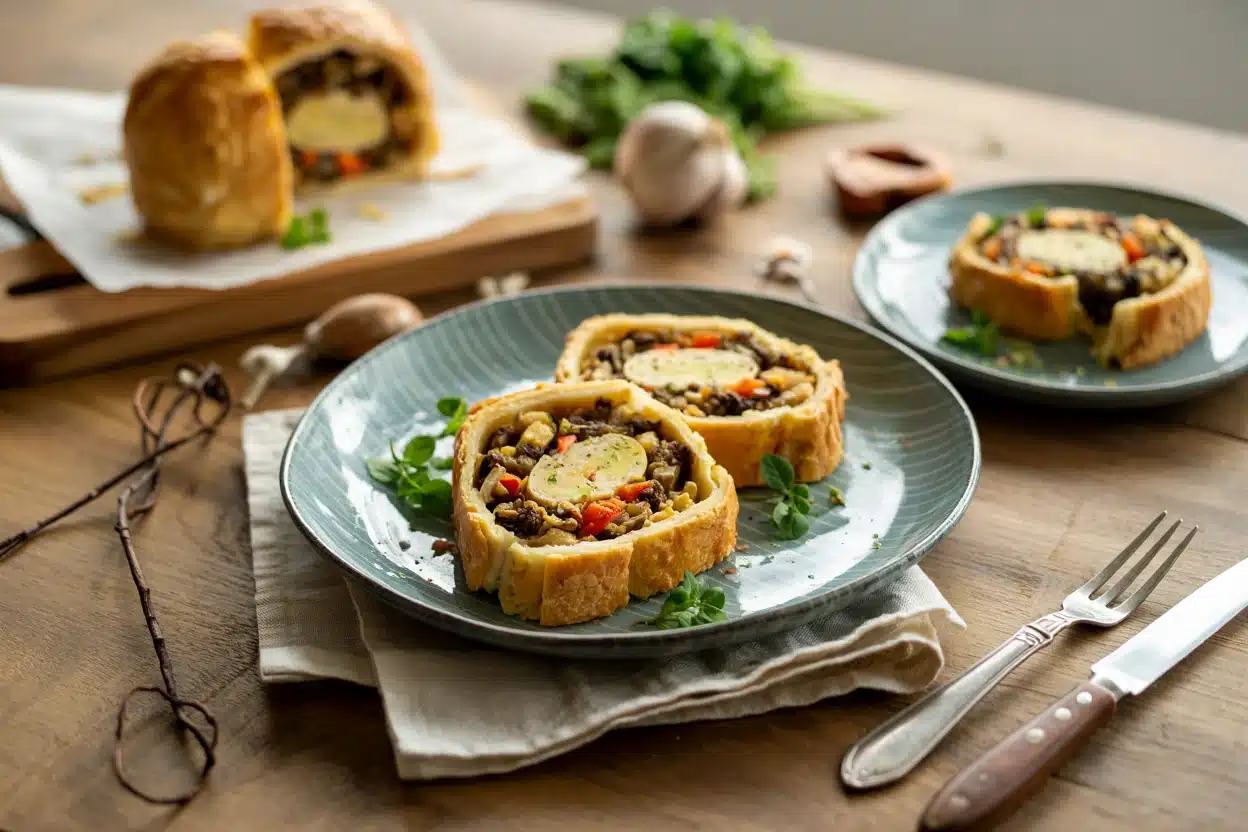
Vegetable Wellington en Croûte

February 1, 2026

You need 65 minutes from start to finish. That includes prep, assembly, and baking-no hidden steps or overnight chilling required.

Vegetable Wellington en Croûte

The puff pastry crisps while the vegetables stay tender inside. High heat sets the glaze on the pastry without drying out the mushroom filling.

This works for weeknight dinners when you want something that looks impressive but doesn't require advanced technique.

QUICK SUMMARY

Vegetable Wellington wraps sautéed mushrooms, spinach, and cheese in puff pastry, then bakes until golden. The key is draining vegetables thoroughly so the pastry stays crisp instead of soggy. Chilling the assembled Wellington before baking prevents shrinkage and promotes even browning.

⏱️Time: 30 min prep, 35-40 min baking-no marinating or overnight rest
🔪Critical Step: Sauté vegetables until completely dry, then cool and press in sieve 15 minutes
⚠️Watch Out: Wet filling turns pastry soggy-drain vegetables well and use breadcrumbs layer

Why This Recipe Works

Most people skip chicken, but it balances the meal. For a version that comes together quickly, try classic chicken dish and keep the timing tight.

Quick Reference
⏱️
Prep Time
30 min
🔥
Cook Time
35-40 min
⏰
Total Time
65-70 min
🍽️
Servings
6 servings
📊
Difficulty
Medium
🏷️
Category
Main Dish
💡
Quick Tip
Drain vegetables well to avoid pastry sogginess
🎯
Best For
Weeknight | Entertaining | Meal prep

Success comes down to moisture control. Sautéing mushrooms and spinach until completely dry prevents the filling from soaking through the pastry during baking.

  • Puff pastry crisp, vegetables tender not watery - the pastry stays flaky when the filling drains properly and bakes at 400°F
  • Herbaceous with caramelized mushroom richness - thyme and rosemary amplify the earthy mushroom base without overpowering the cheese
  • Pastry golden brown, filling heated through - egg wash creates a glossy, evenly browned surface that signals doneness
  • Evenly browned, puffed pastry with defined edges - chilling before baking prevents shrinkage and sets the shape
  • Roll pastry to ⅛ inch thickness - uniform thickness ensures even baking without raw spots or burnt edges
Golden Rule
Keep puff pastry cold until assembly-warm pastry shrinks in the oven and loses its flaky layers.

What You'll Need

Thai brings the color this plate needs. For a version that comes together quickly, try a tender thai on the side and keep the timing tight.

🥐
Pastry
  • 1 sheet puff pastry (thawed)
  • 1 egg (for wash)
🍄
Vegetables
  • 12 oz mushrooms (chopped)
  • 4 cups fresh spinach
  • 1 medium onion (diced)
  • 3 cloves garlic (minced)
🧀
Cheese & Binders
  • 4 oz goat cheese or cream cheese
  • 3 tablespoon breadcrumbs
🌿
Seasonings
  • 2 teaspoon fresh thyme
  • 1 teaspoon fresh rosemary
  • 2 tablespoon olive oil
  • Salt and pepper

Ingredient Details

  • Puff Pastry
    Provides flaky, crisp crust that encases filling-keep chilled until assembly to prevent shrinking
  • Mushrooms
    Adds umami depth and moisture balance-dry thoroughly before cooking to prevent sogginess
  • Spinach
    Light, tender green layer preventing sogginess-squeeze out excess water after wilting
  • Onion
    Adds sweetness and aroma when caramelized-cook until golden and moisture evaporates
  • Egg Wash
    Gives pastry golden, shiny finish-brush one even layer before baking
  • Goat Cheese or Cream Cheese
    Adds creamy texture and mild tang-spread evenly to prevent pockets
  • Breadcrumbs
    Helps absorb moisture under filling-use plain or panko for best results

Ingredient Swaps

Rolls adds the contrast this plate needs, but timing matters. For a version that comes together quickly, try a creamy rolls on the side and keep the timing tight.

  • Puff pastry → gluten-free pastry - slightly less rise and flakiness; adjust baking time and watch for browning
  • Goat cheese → dairy-free cream cheese - minor flavor difference, maintains creaminess without dairy
  • Spinach → kale or Swiss chard - firmer texture, longer cooking time needed to wilt properly
  • Breadcrumbs → ground oats or crushed crackers - similar moisture absorption, slight texture change

Phyllo Dough

Works for: Ultra-crisp texture, layered presentation

Skip if: You want thick flaky pastry-phyllo is paper-thin and requires butter between each layer

Eggplant Instead of Mushrooms

Works for: Milder flavor, softer texture

Skip if: You want umami depth-eggplant lacks the earthy richness mushrooms provide

Instructions

A good lobster thermidor can make or break the plate. For a version that comes together quickly, try homemade lobster thermidor recipe and keep the timing tight.

  1. Heat 2 tablespoon olive oil in a large skillet over medium-high heat. Add diced onion and cook 5 minutes until softened and golden. Add minced garlic and chopped mushrooms, cook 8-10 minutes until mushrooms release moisture and liquid evaporates completely. Stir in fresh spinach and cook 2-3 minutes until wilted. Season with thyme, rosemary, salt, and pepper. Transfer to a fine sieve, press down, and cool 15 minutes to drain excess liquid.
  2. Roll puff pastry on parchment paper to ⅛ inch thick (about 12x10 inches). Spread breadcrumbs in a 3-inch strip down the center, leaving 2 inches on each side. Spread goat cheese evenly over breadcrumbs, then top with cooled vegetable mixture, pressing gently into an even layer.
  3. Fold one side of pastry over filling, then fold the other side to overlap slightly. Press edges firmly to seal. Flip seam-side down onto parchment-lined baking sheet. Tuck ends under and press to seal completely.
  4. Beat 1 egg with 1 tablespoon water. Brush egg wash evenly over entire pastry surface. Score diagonal lines across the top with a sharp knife (shallow cuts, don't pierce through). Chill in fridge 10-15 minutes while oven preheats to 400°F (205°C).
  5. Bake on center-lower rack 35-40 minutes until pastry is deeply golden brown and puffed. Check at 25 minutes-if edges brown too fast, tent with foil. Remove from oven, rest 10 minutes before slicing. Pastry should be crisp, filling heated through, and cheese melted.
Shortcut
Sauté vegetables in batches to maintain caramelization-overcrowding the pan steams instead of browns.

What to Serve With It

Rich mains need something to cut through, and beef does exactly that. When planning your sides, check out crab stuffed mushrooms meal planning ideas for tested combinations that balance this meal.

Side Dish Prep Why It Works How to Serve
Simple Mixed Green Salad Easy Light balance to rich Wellington Toss greens with lemon vinaigrette, serve alongside
Roasted Baby Potatoes Easy Complements texture and flavor Roast with olive oil and herbs until golden
Steamed Green Beans Easy Fresh contrast and quick prep Steam 5 minutes, toss with butter and salt
Garlic Butter Mushrooms Easy Echoes mushroom flavor inside Wellington Sauté in garlic butter until caramelized
Classic Ratatouille Medium Colorful, elegant vegetable accompaniment Serve warm in shallow bowl next to Wellington slice

Three ways to serve it:

  • Weeknight plate: Wellington slice, roasted baby potatoes, steamed green beans
  • Entertaining spread: Wellington centerpiece, ratatouille, creamy polenta, roasted asparagus with lemon
  • Quick meal prep: Wellington slices portioned with simple mixed green salad
Best Pick
Red wine reduction or mushroom gravy adds warmth and moisture-drizzle over sliced Wellington for extra richness.

Store and Reheat

Beef adds the contrast this plate needs, but timing matters. For a version that comes together quickly, try simple homemade beef and keep the timing tight.

Method Time Best For
🔥 Oven 15-20 min at 350°F (175°C) Restores pastry crisp, heats filling evenly
🍳 Stovetop 5-7 min covered low heat Reheats small slices without drying
📦 Microwave 1-2 min low power Quick reheat only-pastry softens

For best results when storing:

  • Store in airtight, shallow container in fridge up to 3-4 days-pastry loses some crisp but filling stays fresh
  • Wrap individual slices in foil for freezer storage up to 1 month-thaw in fridge overnight before reheating
  • Reheat in oven on lower rack to crisp bottom pastry without burning top
  • Avoid microwave unless rushed-pastry turns rubbery instead of flaky
  • Serve reheated slices with fresh sauce or gravy to restore moisture

Frequently Asked Questions

Can I use phyllo dough instead of puff pastry for Vegetable Wellington?

Yes, but phyllo creates a thinner, crispier texture that requires brushing melted butter between each layer. You'll need 8-10 sheets and it won't have the same thick flaky structure as puff pastry.

How should I store and reheat leftover Vegetable Wellington?

Store in an airtight container in the fridge for 3-4 days or freeze up to 1 month. Reheat in a 350°F oven for 15-20 minutes to restore crisp pastry-microwave works for speed but softens the crust.

How do I know when the Vegetable Wellington filling is fully cooked?

The pastry should be deeply golden brown and puffed after 35-40 minutes at 400°F. If you insert a knife into the center, it should come out hot-the filling needs to reach at least 165°F internally.

What causes soggy pastry and how can I fix it?

Excess moisture in the vegetable filling soaks through the pastry. Sauté vegetables until completely dry, press them in a sieve for 15 minutes, and use a breadcrumb layer under the filling to absorb any remaining liquid.

What side dishes pair best with Vegetable Wellington for a party?

Classic ratatouille, creamy polenta, and roasted asparagus with lemon make an elegant spread. For simpler options, serve with roasted baby potatoes and a mixed green salad with lemon vinaigrette.

Vegetable Wellington en Croûte

Vegetable Wellington en Croûte

No ratings yet
Vegetable Wellington en Croûte features sautéed mushrooms, spinach, and cheese wrapped in crisp puff pastry. Key techniques include thorough draining of vegetables and chilling the assembled Wellington to ensure a flaky, golden crust without sogginess.
Print Recipe Pin Recipe
Prep Time 30 minutes mins
Cook Time 37 minutes mins
Total Time 1 hour hr 7 minutes mins
Servings: 6 servings
Course: Main Dish
Cuisine: European, Vegetarian
Ingredients Equipment Method Notes

Ingredients
  

  • 1 sheet puff pastry thawed
  • 1 egg egg for egg wash
  • 12 oz mushrooms chopped
  • 4 cups spinach fresh
  • 1 medium onion diced
  • 3 cloves garlic minced
  • 4 oz goat cheese or cream cheese
  • 3 tablespoon breadcrumbs
  • 2 teaspoon fresh thyme
  • 1 teaspoon fresh rosemary
  • 2 tablespoon olive oil
  • to taste salt
  • to taste black pepper

Equipment

  • Large skillet Used for sautéing vegetables
  • Fine sieve Used to press and drain excess liquid from vegetables
  • Parchment paper Used for rolling pastry and baking
  • Baking sheet For baking the Wellington
  • Brush For applying egg wash

Method
 

  1. Heat olive oil in a large skillet over medium-high heat. Add diced onion and cook 5 minutes until softened and golden. Add minced garlic and chopped mushrooms, cook 8-10 minutes until mushrooms release moisture and liquid evaporates completely. Stir in fresh spinach and cook 2-3 minutes until wilted. Season with thyme, rosemary, salt, and pepper. Transfer mixture to a fine sieve, press down to drain excess liquid, and cool for 15 minutes.
    12 oz mushrooms, 1 medium onion, 3 cloves garlic, 4 cups spinach, 2 tsp fresh thyme, 1 tsp fresh rosemary, 2 tbsp olive oil, to taste salt, to taste black pepper
  2. Roll puff pastry on parchment paper to ⅛ inch thickness (about 12x10 inches). Spread breadcrumbs in a 3-inch strip down the center, leaving 2 inches on each side.
    1 sheet puff pastry, 3 tbsp breadcrumbs
  3. Spread goat cheese evenly over breadcrumbs, then top with the cooled vegetable mixture, pressing gently to an even layer.
    4 oz goat cheese
  4. Fold one side of pastry over the filling, then fold the other side to overlap slightly. Press edges firmly to seal the Wellington. Flip seam-side down onto a parchment-lined baking sheet. Tuck ends under and press to seal completely.
    1 sheet puff pastry
  5. Beat the egg with 1 tablespoon water and brush the egg wash evenly over the entire pastry surface. Score diagonal shallow lines across the top with a sharp knife without piercing through. Chill in the fridge for 10-15 minutes while preheating oven to 400°F (205°C).
    1 egg egg
  6. Bake on the center-lower rack for 35-40 minutes until the pastry is deeply golden brown and puffed. Check at 25 minutes; if edges brown too fast, tent with foil. Remove from oven and let rest 10 minutes before slicing. Pastry should be crisp with filling heated through and cheese melted.

Notes

  • Drain vegetables thoroughly after cooking to avoid soggy pastry.
  • Keep puff pastry cold until assembly to prevent shrinking and maintain flakiness.
  • Chill assembled Wellington before baking for even browning and defined edges.

Tried this recipe?

Let us know how it was!

5 Best Substitutes for Ancho Chile Pepper in Mexican Dishes

February 1, 2026

You're mid-enchilada prep and the recipe calls for ancho chile powder-but your spice drawer comes up empty. The dish needs that mild, fruity heat for a reason.

5 Best Substitutes for Ancho Chile Pepper in Mexican Dishes

Ancho chiles bring sweet smokiness with gentle warmth, not just generic heat. Without them, sauces taste flat or one-dimensional.

A few dried chiles and spice blends can close the gap.

QUICK SUMMARY

For mole and braised dishes, we reach for guajillo peppers or pasilla negro chiles first-both match ancho's mild heat and work 1:1. In dry rubs or quick marinades, mild paprika with cayenne gets close enough without hunting down dried chiles. Watch the smokiness level-chipotle overpowers delicate recipes.

🌶️Closest match: Guajillo peppers work 1:1 in sauces and stews
⚖️Easy pantry fix: Paprika + cayenne mimics heat and color
⚠️Heat check: Chipotle brings stronger smoke-use half the amount
Quick Substitute Reference
# Substitute Best For Ratio Key Note
1 Guajillo Pepper 🍳 Cooking 1:1 Sharper heat, less sweet
2 New Mexico Chile 🍳 Cooking 1:1 Lighter color, earthier tone
3 Chipotle Powder 🍳 Cooking ½ amount Stronger smoke, use less
4 Paprika + Cayenne ✨ Both 1 tbsp:⅛ tsp Less authentic, more accessible
5 Pasilla Negro 🍳 Cooking 1:1 Earthier, less fruity sweet

1. Guajillo Chile Pepper 🌶️

Guajillo peppers step in when you need ancho's mild heat and smoky sweetness. They lean slightly sharper and bring a cranberry-like tartness instead of ancho's raisin notes.

Use 1:1 in sauces, stews, and braises. The flavor sits close enough that most dishes won't suffer.

  • ✅ Similar heat level and color
  • ⚠️ Less fruity sweetness-tastes brighter

Guajillo works best in recipes where smokiness matters more than sweetness. If you're making mole or enchilada sauce, it blends right in.

Skip it when the recipe depends on ancho's deep, sweet undertones-like chocolate-based moles or dessert sauces. If guajillo doesn't cut it, simple Guajillo Pepper substitutes list covers more options.

2. New Mexico Chile Powder 🌾

New Mexico chile powder brings mild heat and earthy tones without the fruity complexity ancho offers. The color runs lighter and the smoke stays subtle.

Use 1 tablespoon per 1 tablespoon ancho. It fits dry rubs, chili pots, and spice blends without rewriting the recipe.

The grassy, earthy notes work in Southwestern dishes where you want background warmth, not front-and-center chile flavor. It won't mimic ancho's sweetness, but it won't clash either.

Skip it in recipes where strong smoky depth is non-negotiable-like barbacoa or deeply flavored mole. The lighter profile won't hold up.

If you need more depth, New Mexico Chile alternatives to try has swaps that push smokiness further.

3. Chipotle Chile Powder 🔥

Chipotle powder shares ancho's smokiness but cranks it up. The heat runs hotter and the smoke tastes more pungent.

Use ½ tablespoon chipotle per 1 tablespoon ancho. Start small-you can always add more.

Watch Out
Chipotle overpowers delicate dishes. Use it in bold recipes like barbecue or marinades where intense smoke fits.

It shines in barbecue rubs, grilled meats, and hearty stews. The smokiness punches through fatty cuts and high heat.

Skip it when you're making light soups, delicate sauces, or anything with subtle flavors. Chipotle will dominate the plate.

If chipotle feels too strong, Chipotle Powder swaps by recipe type walks through gentler alternatives.

4. Paprika + Cayenne 🌶️

Mixing mild paprika with a pinch of cayenne rebuilds ancho's balance at home. Paprika brings sweetness and color, cayenne adds the heat.

Use 1 tablespoon paprika plus ⅛ teaspoon cayenne per 1 tablespoon ancho. Adjust cayenne if you want more kick.

  • 🍳 In cooking: Works in dry rubs, finishing spice blends, and quick marinades
  • 🥗 Raw: Sprinkle over roasted vegetables or beans
  • ⚠️ Less authentic: Won't match ancho's depth in traditional recipes
  • ✅ Accessible: Most kitchens already have both spices

This combo fits everyday cooking where you need heat and color without tracking down specialty chiles. It won't fool anyone in mole, but it works in chili, tacos, and spice rubs.

If paprika needs a swap too, common Paprika swaps ranked covers what works.

5. Pasilla Negro Chile 🖤

Pasilla negro brings mild heat and smoky earthiness with less sweetness than ancho. The flavor runs deeper and earthier, not fruity.

Use 1:1 in mole sauces, braises, and slow-cooked dishes. It blends into complex recipes without standing out.

  • ✅ Complementary heat level
  • ⚠️ Less sweet-tastes more earthy than fruity

Pasilla negro works best in layered dishes where multiple chiles combine-like mole negro or beef birria. The earthiness supports other flavors instead of leading them.

Skip it when you need fruity sweetness-like in chocolate-based desserts or sauces where ancho's raisin notes matter.

Match the Chile to Your Dish

  • For mole and braised dishes: Guajillo or pasilla negro work 1:1
  • For dry rubs and quick fixes: Paprika + cayenne gets close enough
  • For bold barbecue or marinades: Chipotle adds smoke-use half the amount

Frequently Asked Questions

Can I use regular chili powder instead of ancho chile powder?

Regular chili powder works but tastes different-it's a blend with cumin, garlic, and other spices. Use it when you need generic heat, not ancho's specific fruity smokiness. Start with half the amount and adjust.

What's the difference between ancho and poblano peppers?

Ancho chiles are dried poblanos. Fresh poblanos taste grassy and mild; dried anchos develop sweetness, smokiness, and concentrated flavor. You can't swap fresh poblanos for dried anchos in most recipes without adjusting liquid and cooking time.

How do I make ancho chile powder from whole dried anchos?

Toast whole dried anchos in a dry skillet until fragrant, about 30 seconds per side. Remove stems and seeds, tear into pieces, then grind in a spice grinder or blender until powdered. Store in an airtight container.

Can I substitute cayenne pepper for ancho chile powder?

Cayenne alone won't work-it's much hotter and has no smokiness or sweetness. Mix it with paprika to mimic ancho's profile: 1 tablespoon paprika plus ⅛ teaspoon cayenne per tablespoon ancho.

Is smoked paprika a good substitute for ancho chile?

Smoked paprika brings smokiness and color but lacks ancho's heat. Use it with a pinch of cayenne: 1 tablespoon smoked paprika plus ⅛ teaspoon cayenne per tablespoon ancho. It works best in dry rubs and finishing spice blends.

Substitutes for Ancho Chile Pepper in Mexican Dishes

5 Best Substitutes for Ancho Chile Pepper

No ratings yet
Ancho chile pepper adds sweet smokiness with gentle warmth to dishes. When missing, substitutes like guajillo pepper and pasilla negro closely match its flavor, while blends like paprika with cayenne offer accessible alternatives.
Print Recipe Pin Recipe
Prep Time 7 minutes mins
Cook Time 6 minutes mins
Total Time 13 minutes mins
Servings: 4 servings
Course: Kitchen Tips, Substitutes
Cuisine: Various
Ingredients Method Notes

Ingredients
  

  • 1 cup Guajillo Pepper Use 1:1 in sauces and stews; sharper heat, less sweet
  • 1 tablespoon New Mexico Chile Powder Use 1:1 for dry rubs and chili pots; lighter color, earthy tone
  • 0.5 tablespoon Chipotle Powder Use half the amount of ancho; stronger smoke, hotter heat
  • Paprika + Cayenne Use 1 tablespoon paprika plus ⅛ teaspoon cayenne per 1 tablespoon ancho;
  • 1 cup Pasilla Negro Use 1:1 in mole and braises; earthier and less fruity sweet

Method
 

  1. Select your substitute based on the dish type and desired flavor profile.
  2. If needed, blend or mix spices (e.g., paprika and cayenne) to match ancho flavor.
  3. Apply the substitute using recommended ratio to ancho chile pepper.
  4. Adjust seasoning to taste and consider the intensity of smokiness or heat.
  5. Use substitutes primarily in sauces, stews, rubs, or marinades as appropriate.

Notes

  • Guajillo and pasilla negro peppers work well in recipes where smokiness and earthiness are key.
  • Chipotle powder is strong; use cautiously to avoid overpowering flavors.
  • Mixing paprika with cayenne provides an accessible, mild heat substitute when dried chiles are unavailable.

Tried this recipe?

Let us know how it was!

6 Best Substitutes for Acai Berries in Smoothies & Bowls

February 1, 2026

You're blending a smoothie bowl and realize the acai packet is gone. The recipe needs that tart-sweet base that makes the whole thing work.

6 Best Substitutes for Acai Berries in Smoothies & Bowls

Acai berries bring thick texture, antioxidant punch, and a deep purple hue to bowls and smoothies. Without them, you're left with something that looks and tastes flat.

A few berries from your freezer can step in and rebuild that creamy, colorful base.

QUICK SUMMARY

For smoothie bowls and blended drinks, we reach for frozen blueberries or blackberries first-they match acai's thick texture and tart flavor. Both blend smooth and add antioxidants, though color shifts lighter with blueberries. In bowls where purple matters, blackberries hold their hue better.

🏆Closest match: Blackberries for tartness, color, and creamy texture in bowls
⚡Fastest fix: Frozen blueberries-use 1:1, blend until smooth
🎨Color guard: Black currants deliver deeper purple than blueberries
Quick Substitute Reference
# Substitute Best For Ratio Key Note
1 Blackberries ✨ Both 1:1 Closest tartness and color
2 Frozen Blueberries ✨ Both 1:1 Lighter purple hue
3 Black Currants ✨ Both 1:1 Intensely tart profile
4 Pomegranate Seeds 🥗 Raw 1:1 Crunchy texture, less creamy
5 Beet & Blueberry Mix ✨ Both See notes Earthy-sweet hybrid
6 Raspberry Puree ✨ Both 1:1 Brighter, more floral

1. Blackberries 🫐

Blackberries replicate acai's tartness and thick texture better than most swaps. They blend into a creamy base that holds together in bowls.

The purple color is darker than blueberries but still lighter than acai. Flavor-wise, blackberries run slightly sweeter with less earthiness.

Use equal volume-if your recipe calls for 1 cup acai, use 1 cup blackberries. Frozen works best for smooth blending.

  • ✅ Closest match for tartness and texture
  • ✅ Holds color in smoothie bowls
  • ⚠️ Slightly sweeter than acai

They shine in bowls and smoothies where you need that thick, spoonable consistency. If you're also low on blackberries, Blackberries replacements that work cover the gap.

2. Frozen Blueberries 🧊

Frozen blueberries give you smooth texture and mild tartness without the earthy notes. The color shifts lighter-more blue-purple than deep purple.

Use 1:1 by volume. Blend them straight from the freezer for best results.

  • ✅ Readily available in most freezers
  • ⚠️ Lighter hue than acai

They work in smoothies and desserts where exact color isn't critical. The flavor stays fruity without acai's subtle bitterness.

Blueberries thicken blends naturally and keep the texture creamy. For more berry swaps, check out tested Blueberries replacements.

Best Pick
Frozen blueberries are the easiest swap when you don't need deep purple.

3. Black Currants 🍇

Black currants bring more tartness than acai-they're intensely sour with a slight astringency. The color is deeper and darker.

Use equal volume in juices, smoothies, and sauces. Add a touch of honey or maple syrup if the tartness is too strong.

Black currants aren't always easy to find fresh, but frozen or dried work. Flavor-wise, they're closer to acai's earthy profile than blueberries are.

They're best in savory-leaning dishes or drinks where bold tartness fits. other tart berries fill in.

4. Pomegranate Seeds 🌰

Pomegranate seeds give you tartness and antioxidants but skip the creamy texture. They're crunchy, not smooth.

Use equal volume as a fresh garnish or juice base. Blend the seeds with liquid if you need something pourable.

  • 🥗 Raw use: Scatter on top of bowls for color and crunch
  • 🧃 In juice: Blend with water or milk for tart liquid
  • ⚠️ Texture: Won't thicken blends like acai does
  • ⚠️ Skip if: You need that spoonable, thick consistency

Pomegranate works best as a topping or juice component-not as the main base. For more swaps, see easy Pomegranate swaps that work.

5. Beet & Blueberry Mix 🎨

Combining beetroot powder with blueberry puree rebuilds acai's color and texture in one shot. Beetroot brings the purple, blueberries bring the sweetness and body.

Use 1 tablespoon beetroot powder + 2 tablespoons blueberry puree per 1 cup of acai berries. Mix them into your smoothie or bowl base.

  • 🎨 Color: Deep purple matches acai's hue
  • 🍇 Flavor: Earthier from the beet, sweeter from the blueberry
  • ⚠️ Taste shift: More root-vegetable notes than pure fruit

This combo works when you need that signature purple and don't mind a slightly different flavor. Beetroot powder is potent-start with less and add more as needed.

For more beet ideas, check out Beet alternatives worth trying.

6. Raspberry Puree 🍓

Raspberry puree delivers tart flavor and thick texture but runs brighter and more floral than acai. The color skews red-pink instead of deep purple.

Replace with equal volume. Blend frozen raspberries with a splash of liquid until smooth.

  • 🥤 In smoothies: Adds tartness and natural sweetness
  • 🍨 In desserts: Works in parfaits and layered bowls
  • ⚠️ Color: Lighter and redder than acai
  • ⚠️ Skip if: Deep purple is essential

Raspberries blend smooth and hold their body in cold dishes. They're best when you care more about flavor than exact color.

Matching Your Acai Berry Swap

  • For smoothie bowls: Blackberries or frozen blueberries keep texture thick
  • For juice or drinks: Black currants or pomegranate juice add tart punch
  • For color and texture: Beet powder + blueberry puree mimics acai's look

Frequently Asked Questions

Can I use fresh berries instead of frozen?

Fresh berries work but won't thicken as much. Add ice or freeze them first for better texture in smoothie bowls.

Why does my swap taste sweeter than acai?

Blueberries and raspberries run sweeter naturally. Add a squeeze of lemon or lime to bring back some tartness.

Can I mix multiple substitutes together?

Yes. Combining blackberries and blueberries gives you balanced flavor and color. Start with half of each and adjust to taste.

Do these swaps have the same antioxidants as acai?

They're all antioxidant-rich but different types. Blackberries, blueberries, and pomegranate offer benefits-just not identical to acai's profile.

How do I prevent my smoothie from turning too light?

Use blackberries or add a pinch of beetroot powder. Avoid mixing in too much milk or yogurt, which lightens color fast.

Substitutes for Acai Berries in Smoothies & Bowls

6 Best Substitutes for Acai Berries

No ratings yet
When you're out of acai berries, these six substitutes provide tartness, texture, and color to keep your smoothie bowls and drinks delicious and vibrant. From blackberries to raspberry puree, find the best alternative according to your flavor and color needs.
Print Recipe Pin Recipe
Prep Time 8 minutes mins
Cook Time 5 minutes mins
Total Time 13 minutes mins
Servings: 4 servings
Course: Kitchen Tips, Substitutes
Cuisine: Various
Ingredients Method Notes

Ingredients
  

  • 1 cup Blackberries Use equal volume 1:1 to acai; frozen preferred for creamy texture
  • 1 cup Frozen Blueberries Use equal volume 1:1; blend straight from freezer for best results
  • 1 cup Black Currants Use equal volume 1:1; add sweetener if tartness is strong
  • 1 cup Pomegranate Seeds Use equal volume 1:1; crunchy texture, blend with liquid if pourable base needed
  • Beet & Blueberry Mix Mix 1 tablespoon beetroot powder + 2 tablespoon blueberry puree per 1 cup acai;
  • 1 cup Raspberry Puree Use equal volume 1:1; blend frozen raspberries with liquid until smooth

Method
 

  1. Choose a substitute based on your desired flavor, color, and texture.
  2. Prepare the substitute by blending frozen berries or mixing beetroot powder with blueberry puree as needed.
  3. Use a 1:1 volume ratio to replace acai, adjusting sweetness or tartness if necessary.
  4. Check the final taste and consistency, adding sweeteners or liquids for desired thickness.

Notes

  • Frozen berries work best to replicate acai's creamy texture.
  • Adjust sweetness with honey or citrus to balance tartness if needed.
  • For color fidelity, blackberries or beet & blueberry mix are preferred.

Tried this recipe?

Let us know how it was!

5 Best Substitutes for Tempeh in Plant-Based Cooking

February 1, 2026

You're halfway through dinner prep and the tempeh is missing from the fridge. The recipe calls for that dense, protein-rich texture and mild nuttiness tempeh brings to the plate.

5 Best Substitutes for Tempeh in Plant-Based Cooking

Tempeh works as a protein anchor in plant-based meals-it holds its shape under heat, soaks up marinades, and adds substantial chew. Without it, dishes can feel lighter or lack structure.

A few swaps from the pantry or produce aisle can step in.

QUICK SUMMARY

For stir-fries and sautés, we lean on firm tofu, seitan, or mushrooms. All three hold up to heat and grab onto seasonings. Watch texture: tofu needs pressing to avoid sogginess, seitan won't work for gluten-free diets, and mushrooms won't hit the same protein count.

🏆Closest match: Firm tofu pressed dry, marinated 20+ minutes before cooking
⚖️Ratio rule: Use equal weight for tofu, seitan, mushrooms-scale up chickpeas
⚠️Protein check: Mushrooms and lentils run lower-pair with nuts or seeds
Quick Substitute Reference
# Substitute Best For Ratio Key Note
1 Firm Tofu 🍳 Cooking 1:1 press first, less nutty
2 Seitan 🍳 Cooking 1:1 chewier, skip if gluten-free
3 Chickpeas 🥗 Raw 1.25:1 grainy texture, less chew
4 Mushrooms 🍳 Cooking 1:1 umami rich, lower protein
5 Lentils 🍳 Cooking 1:1 softer bite, no chew

1. Firm Tofu 🥢

Firm tofu delivers the same protein density and absorbs marinades just as well as tempeh. The texture leans slightly softer, but pressing out moisture before cooking tightens it up.

Use equal weight (1:1) in any recipe calling for tempeh. Press the block for 15-20 minutes, cube or slice, then marinate or season.

Tofu won't bring that slight nuttiness tempeh has-it tastes milder and blander raw. Season boldly or let sauces do the work.

  • ✅ Matches protein count nearly 1:1
  • ✅ Holds shape in stir-fries and grilled dishes
  • ⚠️ Needs pressing or it stays spongy
  • ⚠️ Less nutty flavor than tempeh

If you're swapping tofu often, check out our full Tofu swaps by recipe type for more guidance on texture and prep.

2. Seitan (Wheat Gluten) 💪

Seitan steps in when you want that meaty chew and high protein. It's denser than tempeh and holds up to grilling, roasting, or pan-searing without falling apart.

Use equal volume by weight (1:1) in any dish. Slice, cube, or tear it depending on the recipe.

Seitan skips the soy base entirely-it's pure wheat gluten. The flavor runs more savory and less nutty, so adjust seasonings to match.

  • ✅ Chewiest texture of all swaps
  • ✅ High protein content
  • ⚠️ Not gluten-free-skip if that's a concern
Best Pick
For grilled or roasted dishes needing firm bite, seitan is the swap we grab first.

Running low on seitan itself? We've tested Seitan swaps that match for plant-based protein dishes.

3. Cooked Chickpeas 🫘

Cooked chickpeas bring plant protein and mild flavor without the chew. They work best in cold salads, grain bowls, or mashed into patties where texture flexibility is fine.

Use 1.25 cups cooked chickpeas per 1 cup tempeh. The extra volume makes up for their lighter bite.

Chickpeas don't have that fermented depth or chewy density. They stay grainy and soft even after roasting.

Don't expect them to hold up like tempeh in a stir-fry-they'll break apart under high heat.

If you're swapping chickpeas often, Chickpea alternatives worth trying covers protein-rich legume swaps.

4. Portobello or Cremini Mushrooms 🍄

Mushrooms (portobello or cremini) deliver umami and chewy texture without the protein punch. They soak up marinades and stand up to sautéing or grilling.

Use equal volume by weight (1:1) for tempeh. Slice thick or leave whole depending on the dish.

Mushrooms taste earthy and savory-not nutty. They won't match tempeh's protein content, so pair them with beans, nuts, or seeds if protein matters.

They shrink as they cook, so start with more volume than you think you need.

Mushrooms shine in sandwiches, tacos, and pasta where texture and umami drive the dish. For more swaps with similar savory depth, see our Bell Pepper alternatives worth trying.

5. Cooked Lentils (Firm) 🌾

Cooked lentils add plant protein and absorb spices well, but they don't bring tempeh's chew. They work best in baked dishes, stews, or anywhere a softer texture fits.

Use 1 cup cooked lentils per 1 cup tempeh. Pick brown or green lentils-they hold shape better than red.

Lentils taste earthy and mild with no nuttiness. They break down under stirring, so add them late in cooking or fold them in gently.

  • ✅ High in plant protein and fiber
  • ✅ Budget-friendly and shelf-stable
  • ⚠️ Soft texture-won't mimic tempeh's chew

For more legume swaps that work in stews and bakes, check out easy Lentil swaps that work.

Picking Your Tempeh Swap

  • For stir-fries and grilling: Firm tofu (pressed) or seitan hold up best under heat
  • For salads and bowls: Chickpeas or mushrooms work without cooking
  • For stews and bakes: Lentils or mushrooms blend in without needing chew

Frequently Asked Questions

Can I use extra-firm tofu instead of firm tofu?

Yes, extra-firm tofu works even better-it holds its shape with less pressing. Use the same 1:1 ratio and cut back on pressing time to 10 minutes. It won't crumble as easily in stir-fries or on the grill.

Does seitan need marinating like tempeh?

Seitan absorbs marinades faster than tempeh-15-20 minutes is enough. It's already dense and flavorful, so you can skip marinating entirely and season as you cook. Longer marinating won't hurt, but it's not required.

Can I roast chickpeas to make them chewier?

Roasting chickpeas at 400°F for 20-30 minutes adds crunch but not chew-they'll stay grainy inside. They work great as a crispy topping but won't mimic tempeh's dense bite. Pat them dry before roasting for best results.

Which mushroom works best for tempeh swaps?

Portobello mushrooms give the meatiest texture and hold up to grilling or roasting. Cremini (baby bellas) work well sliced in stir-fries or sautés. Both absorb marinades better than white button mushrooms.

Do lentils work in tempeh bacon recipes?

No, lentils are too soft for tempeh bacon-they won't crisp up the same way. Stick with firm tofu, seitan, or thinly sliced mushrooms for recipes needing crispy, bacon-like texture. Lentils work better in crumbled or mashed applications.

Substitutes for Tempeh in Plant-Based Cooking

5 Best Substitutes for Tempeh

No ratings yet
Tempeh's protein-rich, chewy texture is essential in many plant-based dishes. These five substitutes provide options that replicate its firmness, protein content, and ability to soak up marinades, suitable for stir-fries, salads, and stews.
Print Recipe Pin Recipe
Prep Time 15 minutes mins
Cook Time 8 minutes mins
Total Time 23 minutes mins
Servings: 4 servings
Course: Kitchen Tips, Substitutes
Cuisine: Various
Ingredients Method Notes

Ingredients
  

  • 1 cup Firm Tofu Use 1:1 weight ratio; press 15-20 minutes before marinating.
  • 1 cup Seitan Use 1:1 weight ratio; chewier texture, not gluten-free.
  • 1.25 cup Cooked Chickpeas Use 1.25:1 volume ratio; grainy texture, less chew.
  • 1 cup Portobello or Cremini Mushrooms Use 1:1 weight ratio; umami rich but lower protein.
  • 1 cup Cooked Lentils Use 1:1 volume ratio; softer texture, no chew.

Method
 

  1. Choose a substitute based on your recipe: tofu or seitan for cooking, chickpeas or mushrooms for salads, lentils for stews.
  2. Press firm tofu for 15-20 minutes to reduce moisture; slice mushrooms thick or cube seitan as needed.
  3. Use equal weight for tofu, seitan, and mushrooms; scale chickpeas up by 1.25 times to match volume.
  4. Marinate tofu or seitan for 15-20 minutes before cooking; season mushrooms and lentils during or after cooking.
  5. Taste and adjust seasoning or texture to suit your dish for best results.

Notes

  • Press tofu to avoid sogginess and improve texture.
  • Seitan is not suitable for gluten-free diets.
  • Pair mushrooms or lentils with nuts or seeds to boost protein content.

Tried this recipe?

Let us know how it was!

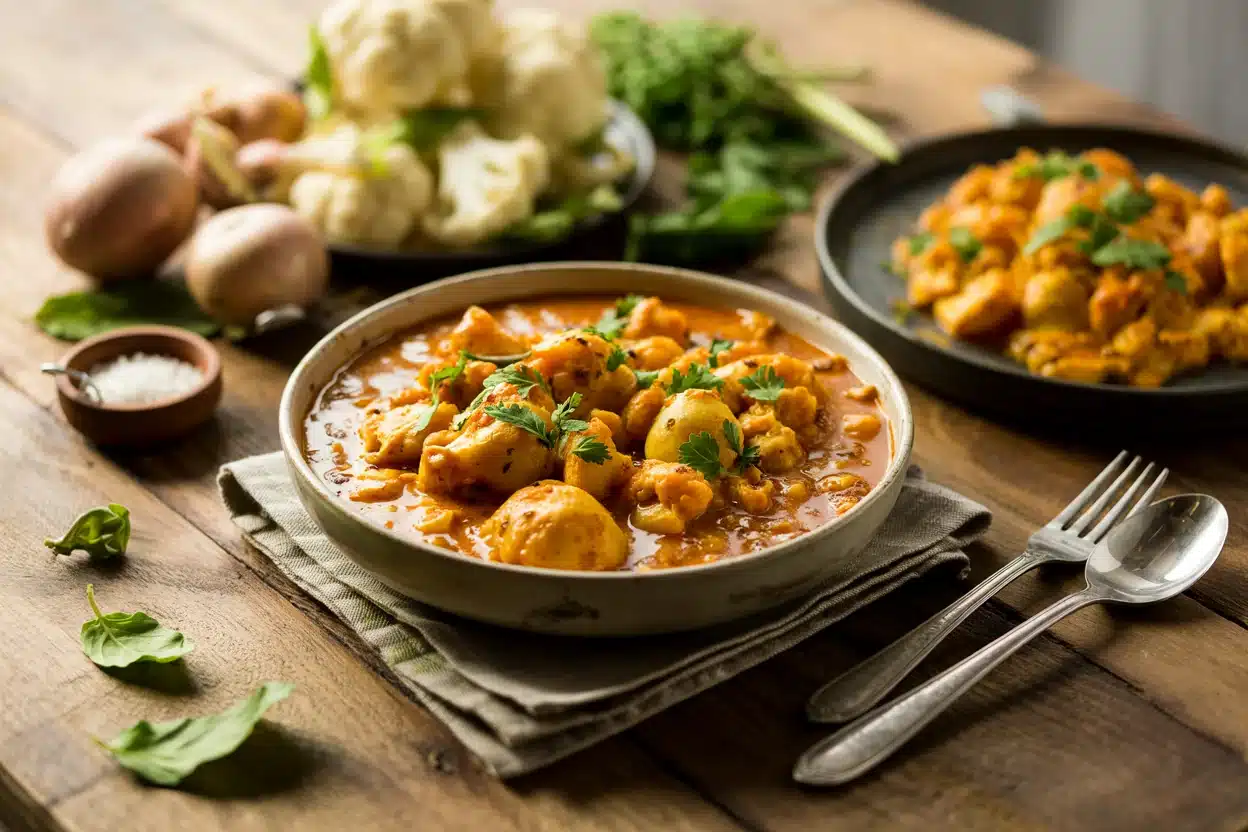
Aloo Gobi Potato Cauliflower Curry

February 1, 2026

Golden turmeric-stained potatoes with charred cauliflower florets that still hold their shape. That's what happens when you cook them separately first, then toss them together with toasted spices.

Aloo Gobi Potato Cauliflower Curry

The tempering step does the heavy lifting. Cumin seeds crack in hot oil and release their oils before anything else hits the pan.

This works for budget meals when you need something filling that tastes like you know what you're doing. Make it for weeknight dinners or meal prep batches that reheat without turning to mush.

QUICK SUMMARY

Aloo Gobi is a dry Indian curry where potatoes and cauliflower cook with toasted whole spices until tender but not mushy. The key is cooking vegetables separately before mixing them with the spice base. Works for weeknight dinners and meal prep because it reheats well without losing texture.

⏱️Time Reality: 45 minutes total; 10 min prep then hands-off cooking
🔥Critical Move: Temper cumin seeds in hot oil first for maximum flavor
⚠️Watch Out: Overcrowding makes vegetables steam and turn soggy; cook in batches if needed

Why This Recipe Works

Most people skip beef, but it balances the meal. For a version that comes together quickly, this simple beef recipe works well alongside spiced vegetables.

Quick Reference
⏱️
Prep Time
15 min
🔥
Cook Time
30 min
⏰
Total Time
45 min
🍽️
Servings
4 servings
📊
Difficulty
Medium
🏷️
Category
Main Dish
💡
Quick Tip
Cook potatoes and cauliflower separately for even doneness
🎯
Best For
Weeknight | Meal prep

Five reasons this method delivers:

  • Tempering cumin seeds in hot oil for 1-2 minutes releases their oils before other ingredients go in, creating a fragrant base that coats every piece
  • Sautéing potatoes for 10 minutes before adding cauliflower ensures both vegetables finish cooking at the same time without one turning to mush
  • Cooking onions until translucent (about 5 minutes) develops sweetness that balances the earthy turmeric and prevents raw onion flavor
  • Simmering uncovered for 10-15 minutes evaporates excess moisture and thickens the curry without adding flour or cream
  • Resting the curry off heat for 5 minutes lets the spices meld and the vegetables absorb the remaining sauce
Quick Tip
Cut all vegetables into 1-inch chunks so they cook at the same rate and you don't end up with raw potatoes and mushy cauliflower.

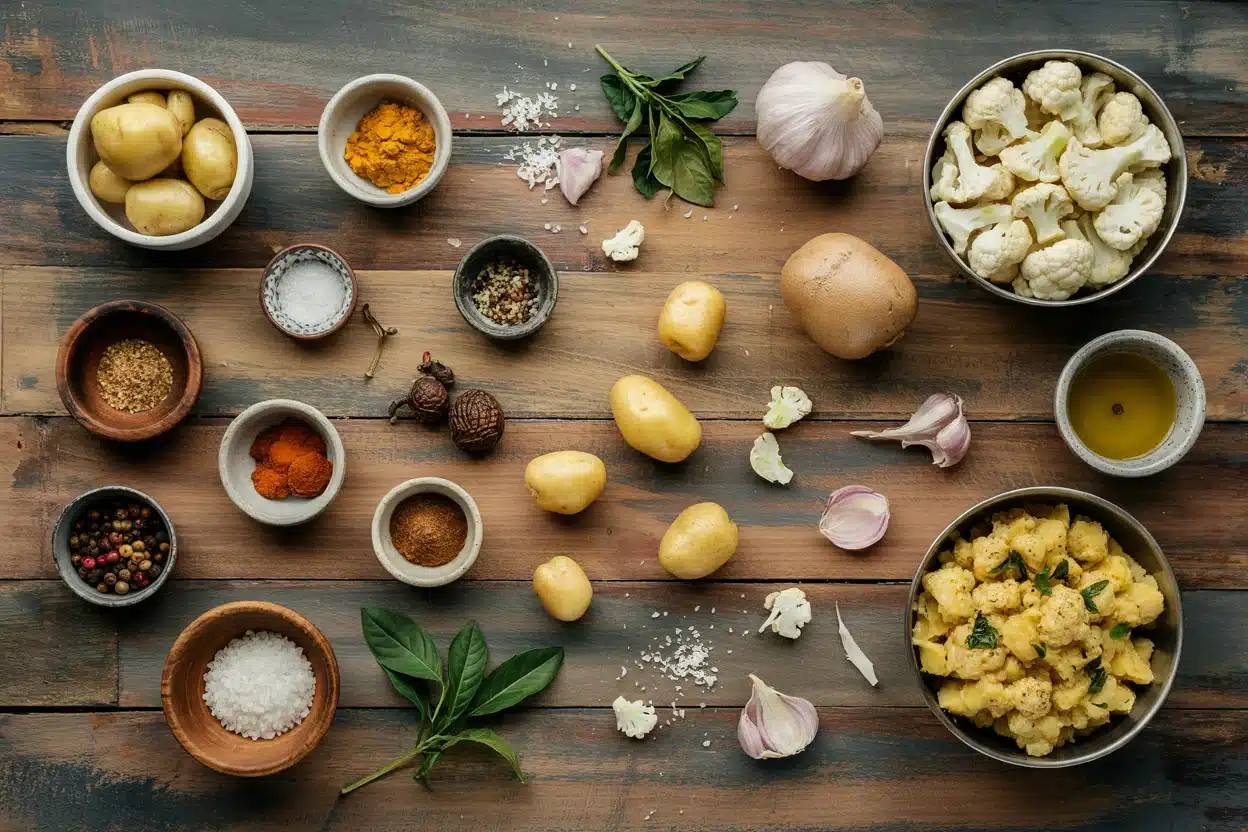
What You'll Need

Aloo Gobi Potato Cauliflower Curry - Aloo Gobi Potato Cauliflower Curry

Potato soaks up every drop of sauce on the plate. For a version that comes together quickly, this classic potato dish uses similar starchy vegetables that hold up to spices.

🥔
Base Vegetables
  • 2 medium potatoes, cut into 1-inch pieces
  • 1 small head cauliflower, cut into florets
  • 1 medium onion, diced
  • 1 large tomato, chopped
🧄
Aromatics
  • 1 tablespoon fresh ginger, grated
  • 1 tablespoon garlic, minced
  • 1 green chili, slit lengthwise (optional)
🌶️
Spices
  • 1 teaspoon cumin seeds
  • 1 teaspoon turmeric powder
  • 1 teaspoon coriander powder
  • ½ teaspoon chili powder
  • Salt to taste
🫙
Cooking Base
  • 3 tablespoon vegetable oil
  • 2 tablespoon fresh cilantro, chopped (garnish)

Ingredient Details

  • Potatoes
    Use firm waxy or starchy potatoes like Yukon Gold or russets; they hold their shape better than new potatoes and don't turn mushy when simmered
  • Cauliflower
    Fresh cauliflower works best; frozen florets release too much water and turn soggy, though they'll work in a pinch if you thaw and drain them thoroughly
  • Cumin Seeds
    Whole cumin seeds create more flavor than ground cumin because tempering releases their oils; if using ground, add it with other powdered spices after onions cook
  • Turmeric
    This gives the curry its signature golden color; use fresh turmeric if available (1 teaspoon grated = ½ teaspoon powder) for brighter flavor
  • Tomato
    Fresh tomatoes add moisture and acidity; if using canned, drain excess liquid first or the curry becomes too wet
  • Ginger-Garlic
    Fresh grated ginger and minced garlic create sharper flavor than paste versions; grate ginger against the grain to avoid stringy bits
  • Oil
    Vegetable or mustard oil works; avoid olive oil which has too strong a flavor for Indian spices

Ingredient Swaps

The korma works best when it hits the table at the same time as the main. For a version that comes together quickly, this homemade korma recipe uses a similar spice base with a creamier finish.

Four practical swaps:

  • Sweet potatoes instead of regular potatoes: Sweeter flavor and softer texture; they cook 5 minutes faster so add them after onions to avoid mush
  • Broccoli florets instead of cauliflower: Firmer texture with slightly different flavor; use same cooking time but expect brighter green color
  • Shallots instead of onion: Milder, sweeter taste that cooks in 3-4 minutes instead of 5; use 3 large shallots for 1 medium onion
  • Paprika instead of chili powder: Gives smoky flavor with no heat; use same amount or increase slightly for more color

Ground Cumin

Works for: Quick cooking; easier to mix; no tempering needed

Skip if: You want maximum flavor; whole seeds create more aroma when tempered

Tomato Puree

Works for: Smoother texture; no chopping; consistent moisture level

Skip if: You prefer chunky texture; fresh tomatoes give brighter acidity

Ghee

Works for: Richer, nuttier flavor; traditional taste; higher smoke point

Skip if: Keeping it vegan; ghee adds dairy and slightly different mouthfeel

Instructions

Rich mains need something to cut through, and chicken does exactly that. For a version that comes together quickly, this simple homemade chicken uses similar spices and roasts while vegetables simmer.

  1. Heat 3 tablespoon oil in a deep skillet over medium heat for 1-2 minutes until shimmering. Add 1 teaspoon cumin seeds and cook 30 seconds until they sizzle and pop but don't burn. Add diced onion and cook 5 minutes, stirring occasionally, until edges turn translucent and soft.

  2. Stir in 1 tablespoon grated ginger, 1 tablespoon minced garlic, and slit green chili (if using). Cook 1 minute until fragrant but not browned. Add chopped tomato and cook 3-4 minutes, mashing with the back of your spoon, until tomato breaks down and releases moisture.

  3. Add 1 teaspoon turmeric, 1 teaspoon coriander powder, ½ teaspoon chili powder, and salt. Stir for 30 seconds to toast spices. Add potato chunks and stir to coat with spice mixture. Cook 10 minutes, stirring every 2-3 minutes, until potatoes develop slight golden edges.

  4. Add cauliflower florets and stir to combine. Add 2-3 tablespoon water if the pan looks dry. Cover and cook 12-15 minutes, stirring halfway through, until both vegetables are fork-tender but still hold their shape. Cauliflower should have slightly crisp edges and potatoes should pierce easily with a fork.

  5. Remove from heat and let rest uncovered for 5 minutes. Taste and adjust salt if needed. Garnish with chopped fresh cilantro right before serving.

Golden Rule
Don't skip the resting time after cooking-those 5 minutes let the vegetables absorb remaining moisture and the spices blend into a cohesive flavor instead of tasting like separate elements.

What to Serve With It

Rich mains need something to cut through, and broccoli does exactly that. If you're planning fresh vegetable dinner ideas, this curry fits the same meal structure with similar cooking times.

Side Dish Prep Why It Works How to Serve
Basmati Rice Easy Neutral flavor soaks up curry sauce; fluffy texture contrasts tender vegetables Cook rice while curry simmers; serve warm alongside or underneath curry
Chapati/Roti Medium Traditional flatbread for scooping; adds chew and substance to the meal Make fresh or warm store-bought; stack on plate next to curry
Cucumber Raita Easy Cool, creamy yogurt balances warm spices; adds refreshing crunch Mix while curry cooks; serve in small bowl on the side
Simple Green Salad Easy Fresh lettuce and tomatoes add crisp contrast; lightens the plate Toss with lemon juice and salt; serve before or alongside curry
Jeera Rice Easy Cumin-spiced rice complements curry spices; more flavorful than plain Temper cumin seeds in ghee before adding cooked rice; serve hot

Three ways to serve it:

  • As a main dish: Serve over basmati rice with cucumber raita and papadum on the side for a complete vegetarian meal
  • For meal prep: Pack curry and rice separately in containers; reheat curry with a splash of water to loosen
  • For entertaining: Pair with jeera rice, mint-cilantro chutney, and mango chutney for a full spread that looks intentional
Best Pick
Serve with chapati and cucumber raita for the most authentic experience-the flatbread lets you scoop every bite and the raita cools the spices without overwhelming them.

Store and Reheat

The broccoli works best when it hits the table at the same time as the main. For a version that comes together quickly, this quick broccoli dish reheats just as well and holds its texture for days.

Method Time Best For
🍳 Stovetop 5-7 min over medium heat Retains texture; add 1-2 tablespoon water to prevent sticking
📦 Microwave 2-3 min, stir halfway Quick single servings; cover with damp paper towel
🔥 Oven 10 min at 350°F (175°C) Larger portions; cover with foil to maintain moisture

For best results when storing:

  • Cool curry completely before refrigerating; hot food creates condensation that makes vegetables soggy
  • Store in shallow airtight containers for up to 3-4 days; deeper containers trap heat and speed up spoilage
  • Freeze in portion-sized containers for up to 2 months; thaw overnight in fridge before reheating
  • Add a splash of water when reheating because vegetables absorb liquid as they sit
  • Garnish with fresh cilantro after reheating, not before storing, to keep it bright green and fresh-tasting

Frequently Asked Questions

Can I use frozen cauliflower in Aloo Gobi?

Yes, but thaw it completely and squeeze out excess water first. Frozen cauliflower releases more moisture than fresh, which makes the curry watery and the florets mushy if you add it straight from the freezer.

What is the best way to store and reheat Aloo Gobi?

Store in airtight containers in the fridge for 3-4 days or freeze for up to 2 months. Reheat on the stovetop with 1-2 tablespoon water over medium heat for 5-7 minutes, stirring occasionally, to keep vegetables from drying out.

How do I know when the potatoes and cauliflower are properly cooked?

Pierce a potato chunk with a fork-it should slide in easily but the potato should still hold its shape, not crumble. Cauliflower florets should be tender with slightly crisp edges, not mushy or falling apart.

Why does my Aloo Gobi sometimes turn out mushy?

You're either overcooking the vegetables or adding too much water. Cook potatoes and cauliflower just until fork-tender, then remove from heat immediately-they'll continue softening as they rest.

How can I scale this recipe for larger groups?

Double or triple the ingredients but cook in batches to avoid overcrowding the pan, which causes vegetables to steam instead of sauté. Use a larger skillet or two separate pans, keeping cooking times the same.

Aloo Gobi Potato Cauliflower Curry

Aloo Gobi Potato Cauliflower Curry

No ratings yet
Aloo Gobi is a dry Indian curry featuring golden turmeric-stained potatoes and charred cauliflower cooked separately, then combined with toasted whole spices. This method ensures tender vegetables that hold their shape, making it great for weeknight dinners or meal prep. The key is tempering cumin seeds in hot oil for maximum flavor and cooking the vegetables patiently.
Print Recipe Pin Recipe
Prep Time 15 minutes mins
Cook Time 30 minutes mins
Total Time 45 minutes mins
Servings: 4 servings
Course: Main Dish
Cuisine: Indian
Ingredients Method Notes

Ingredients
  

  • 2 medium potatoes cut into 1-inch pieces
  • 1 small head cauliflower cut into florets
  • 1 medium onion diced
  • 1 large tomato chopped
  • 1 tablespoon fresh ginger grated
  • 1 tablespoon garlic minced
  • 1 green chili green chili slit lengthwise; optional
  • 1 teaspoon cumin seeds
  • 1 teaspoon turmeric powder
  • 1 teaspoon coriander powder
  • 0.5 teaspoon chili powder
  • salt to taste
  • 3 tablespoon vegetable oil
  • 2 tablespoon fresh cilantro chopped, for garnish

Method
 

  1. Heat 3 tablespoon vegetable oil in a deep skillet over medium heat for 1-2 minutes until shimmering. Add 1 teaspoon cumin seeds and cook for 30 seconds until they sizzle and pop but do not burn. Then add the diced onion and cook for 5 minutes, stirring occasionally, until edges turn translucent and soft.
    3 tbsp vegetable oil, 1 tsp cumin seeds, 1 medium onion
  2. Stir in 1 tablespoon grated fresh ginger, 1 tablespoon minced garlic, and the slit green chili if using. Cook for 1 minute until fragrant but not browned. Add the chopped tomato and cook for 3-4 minutes, mashing it with the back of your spoon until the tomato breaks down and releases moisture.
    1 tbsp fresh ginger, 1 tbsp garlic, 1 green chili green chili, 1 large tomato
  3. Add 1 teaspoon turmeric powder, 1 teaspoon coriander powder, ½ teaspoon chili powder, and salt to taste. Stir for 30 seconds to toast the spices. Add the potato chunks and stir to coat them with the spice mixture. Cook the potatoes for 10 minutes, stirring every 2-3 minutes, until they develop slight golden edges.
    1 tsp turmeric powder, 1 tsp coriander powder, 0.5 tsp chili powder, salt, 2 medium potatoes
  4. Add the cauliflower florets to the pan and stir to combine. Add 2-3 tablespoon water if the pan looks dry. Cover and cook for 12-15 minutes, stirring halfway through, until both vegetables are fork-tender but still hold their shape with slightly crisp edges on the cauliflower.
    1 small head cauliflower
  5. Remove the curry from heat and let it rest uncovered for 5 minutes, allowing the vegetables to absorb moisture and the flavors to meld. Taste and adjust salt if needed. Garnish with chopped fresh cilantro before serving.
    2 tbsp fresh cilantro, salt

Notes

  • Temper cumin seeds first to extract maximum flavor before adding other ingredients.
  • Cook potatoes and cauliflower separately to avoid mushy vegetables.
  • Rest the curry off heat to let flavors meld and vegetables absorb sauce without overcooking.

Tried this recipe?

Let us know how it was!

5 Best Substitutes for Celery Seed in Dressings & Marinades

February 1, 2026

You're mixing spice rubs for homemade coleslaw dressing and realize the celery seed jar is empty. The recipe counts on that herbal, slightly bitter edge that rounds out the tang.

5 Best Substitutes for Celery Seed in Dressings & Marinades

Celery seed brings subtle bitterness, grassy aroma, and a faint celery flavor to dressings, pickles, and dry rubs. Standard herbs won't replicate that exact profile.

QUICK SUMMARY

Celery salt replaces celery seed at 1:1 but adds saltiness-reduce added salt by half. Ground celery seed works identically in flavor but loses the textural crunch. Dill seed brings similar herbal notes with a brighter, grassier profile that works in pickles and dressings.

🏆Closest match: Ground celery seed for same flavor, smoother texture
⚡Fastest swap: Celery salt-use 1:1, cut added salt in half
⚠️Watch out: Fennel seed adds licorice notes that shift flavor

5 Alternatives to Replace Celery Seed

Celery seed's bitter-herbal quality doesn't translate directly to common pantry spices. The swaps below cover dressings, pickling brines, and spice rubs with specific adjustments.

Quick Substitute Reference
# Substitute Best For Ratio Key Note
1 Celery Salt 🍳 Cooking 1:1 Reduce added salt by half
2 Ground Celery Seed ✨ Both 1:1 Loses textural crunch
3 Dill Seed ✨ Both 1:1 Brighter, less bitter
4 Fennel Seed 🍳 Cooking 1:1 Sweet anise flavor
5 DIY Spice Blend 🥗 Raw ½ + ½ tsp Mild heat, herbal

1. Celery Salt 🧂

Celery salt contains ground celery seed blended with salt. It preserves the herbal flavor but adds saltiness that changes the seasoning balance.

Use 1 teaspoon celery salt to replace 1 teaspoon celery seed. Cut your recipe's added salt by half to compensate.

It works in marinades and salad dressings where you can control the salt level. Avoid it in baking or low-sodium recipes where extra salt throws off the formula.

  • ✅ Same herbal aroma as celery seed
  • ✅ Widely available in most spice aisles
  • ⚠️ Adds significant sodium-adjust recipe salt
  • ⚠️ Less pronounced bitterness than pure seed

If you're out of what to use for Celery Salt, you can often reverse-engineer it with ground seed and salt.

2. Ground Celery Seed 🌿

Ground celery seed delivers identical flavor to whole seeds. Grinding releases the essential oils but removes the slight crunch texture.

Use 1:1 ground celery seed for whole celery seed. It blends seamlessly into spice rubs and baked goods.

  • ✅ Exact flavor match-no adjustments needed
  • ✅ Dissolves faster in liquids
  • ⚠️ Loses textural element in pickling brines

You can grind whole seeds yourself in a spice grinder or mortar. One teaspoon whole seeds yields about ¾ teaspoon ground.

3. Dill Seed 🥒

Dill seed brings a similar herbal aroma but shifts toward a brighter, grassier note. It works in pickling and dressings where the flavor complements tangy ingredients.

Use 1:1 dill seed for celery seed. Add it to cucumber salads, coleslaw dressing, and quick-pickled vegetables.

It won't replicate celery seed's bitter edge. Skip it in recipes where that bitterness is key to the flavor balance.

4. Fennel Seed 🌟

Fennel seed adds aromatic notes but brings a sweet, licorice-like flavor that changes the dish's direction. It works in soups and stews where the sweetness enhances savory depth.

Use 1:1 fennel seed for celery seed in cooked applications. The heat mellows the anise intensity.

  • ⚠️ Sweet licorice flavor shifts the profile
  • ⚠️ Skip in light dressings and salads

Fennel seed lacks celery seed's bitterness-it brings brightness instead. That difference works in hearty dishes but clashes in delicate applications like potato salad dressing.

For more on replacing anise-flavored seeds, check easy Fennel Seed swaps that work.

5. DIY Spice Blend 🔧

Mixing equal parts mustard seed and dried parsley flakes creates a herbal-pungent blend that mimics celery seed's complexity. Mustard seed adds mild heat while parsley brings green, fresh notes.

Use ½ teaspoon mustard seed + ½ teaspoon dried parsley per 1 teaspoon celery seed. Combine them in raw dressings and finishing spice mixes.

  • ✅ Fresh herbaceous aroma close to celery
  • ✅ Mustard adds subtle bite
  • ⚠️ Loses celery seed's crunch texture

This blend works best in applications where you're not relying on seed texture. It won't hold up in pickling brines the same way whole seeds do.

The mustard component brings warmth-what to use for Mustard Seed covers other options if you're short on that too.

Picking Your Celery Seed Swap

  • For pickling brines: Dill seed or whole celery salt if texture matters
  • For coleslaw dressing: Ground celery seed or dill seed work equally well
  • For spice rubs: Celery salt or ground celery seed blend smoothly

Match the swap to the recipe's cooking method-cooked dishes handle stronger flavors like fennel, while raw applications need closer matches like dill or ground celery seed.

Frequently Asked Questions

Can I use fresh celery instead of celery seed?

Fresh celery won't work as a direct substitute-it adds water content and lacks the concentrated flavor of seeds. Celery leaves have a closer herbal profile but still miss the bitterness and aroma. Stick to seed-based swaps like dill seed or ground celery seed for accurate results.

Does celery seed taste like celery?

Celery seed has a concentrated herbal, slightly bitter flavor reminiscent of celery stalks but much stronger. The seeds come from wild celery, not the cultivated vegetable, so the taste is earthier and more intense. They add aromatic depth without the watery texture of fresh celery.

Can I substitute caraway seed for celery seed?

Caraway seed brings a sharp, anise-like flavor that doesn't match celery seed's herbal bitterness. It works in rye bread and some European dishes but shifts the flavor significantly in coleslaw or pickling. Use dill seed or fennel seed instead for closer matches.

How long does celery seed stay fresh?

Whole celery seeds stay potent for 3-4 years when stored in a cool, dark place in an airtight container. Ground celery seed loses flavor faster-use it within 2-3 years. Test older seeds by crushing a few-if the aroma is faint, they've lost potency.

What dishes use celery seed most often?

Celery seed appears frequently in coleslaw dressing, potato salad, pickling brines, and dry rubs for meat. It's a key ingredient in Old Bay seasoning and shows up in tomato-based sauces and soups where it adds herbal complexity. European recipes use it in breads and sausages.

Substitutes for Celery Seed in Dressings & Marinades

5 Best Substitutes for Celery Seed

No ratings yet
When you run out of celery seed, several alternatives can provide a similar herbal flavor or aroma. This guide covers the best substitutes like celery salt, ground celery seed, dill seed, fennel seed, and a DIY spice blend, with usage tips for dressings, pickles, and spice rubs.
Print Recipe Pin Recipe
Prep Time 8 minutes mins
Cook Time 5 minutes mins
Total Time 13 minutes mins
Servings: 4 servings
Course: Kitchen Tips, Substitutes
Cuisine: Various
Ingredients Method Notes

Ingredients
  

  • 1 teaspoon Celery Salt Use 1 teaspoon celery salt to replace 1 teaspoon celery seed;
  • 1 teaspoon Ground Celery Seed Use 1:1 ratio; provides same flavor but loses textural crunch.
  • 1 teaspoon Dill Seed Use 1:1 ratio; brighter and less bitter herbal notes.
  • 1 teaspoon Fennel Seed Use 1:1 ratio in cooked dishes; adds sweet, licorice flavor.
  • DIY Spice Blend Mix ½ teaspoon mustard seed and ½ teaspoon dried parsley as substitute for 1 tsp

Method
 

  1. Select the substitute based on your recipe's cooking method and flavor needs.
  2. Prepare the substitute by grinding or mixing if needed (e.g., blend spice blend or grind seeds).
  3. Use the substitute at the specified 1:1 ratio or mix ratios as noted, adjusting salt if using celery salt.
  4. Incorporate the substitute into your dish and taste to adjust seasoning and texture.
  5. Be mindful of flavor changes, especially with fennel seed's licorice notes or celery salt's saltiness.

Notes

  • Celery salt adds saltiness; always reduce added salt in recipe accordingly.
  • Ground celery seed provides an exact flavor match but lacks the crunch of whole seeds.
  • Fennel seed changes the flavor profile with sweet, anise-like notes; best for cooked dishes.

Tried this recipe?

Let us know how it was!

Quesito Puerto Rican Cheese Pastry

February 1, 2026

You're staring down a mid-morning coffee break or an afternoon slump, and store-bought pastries aren't cutting it anymore.

Quesito Puerto Rican Cheese Pastry fixes that - flaky puff pastry wrapped around sweetened cream cheese, baked until golden and crispy.

Quesito Puerto Rican Cheese Pastry

The filling stays creamy while the pastry puffs into layers. You don't need special equipment or advanced baking skills.

This works for breakfast, snack time, or when you need something to bring to a potluck that looks harder than it is.

QUICK SUMMARY

Quesito Puerto Rican Cheese Pastry combines flaky puff pastry with sweetened cream cheese for a bakery-style treat you can make at home. The trick is keeping the dough cold and not overfilling the center so the pastry puffs without leaking. Bake at 375°F until golden brown and let them cool on a wire rack for the best texture.

⏱️Time Reality: 35-40 minutes total, most of it hands-off baking time
🔑Success Move: Chill shaped pastries 10 minutes before baking for maximum puff
⚠️Watch Out: Warm dough won't puff - keep it cold until it hits the oven

Why This Recipe Works

Puff pastry creates hundreds of flaky layers when baked at the right temperature, and the cream cheese filling sets without drying out. Most people skip bars, but it balances the meal. For a version that comes together quickly, this homemade bars recipe keeps a batch ready for nights like this.

Quick Reference
⏱️
Prep Time
15 min
🔥
Cook Time
20-25 min
⏰
Total Time
35-40 min
🍽️
Servings
6-8 pastries
📊
Difficulty
Easy
🏷️
Category
Breakfast | Snack | Dessert
💡
Quick Tip
Bake until golden and puffed, cool before serving
🎯
Best For
Weeknight | Entertaining | Holiday brunch

Five things that make this work:

  • Cold puff pastry puffs higher - Warm dough loses its layering and stays flat instead of rising into crispy sheets
  • Egg wash applied twice - First coat before baking, second coat at 10 minutes for a glossy, deeply golden finish
  • 2 tablespoons filling per pastry - Any more and it leaks out the sides, any less and the ratio tastes off
  • 375°F for 20-25 minutes - Lower temps make soggy pastries, higher temps burn the edges before the center cooks
  • Wire rack cooling for 15 minutes - Traps steam underneath if you skip this step, turning crispy bottoms soft
Best Pick
Use store-bought puff pastry from the freezer aisle - homemade takes hours and the texture difference isn't worth it for this recipe.

What You'll Need

Quesito Puerto Rican Cheese Pastry - Quesito Puerto Rican Cheese Pastry

A good potato can make or break the plate. Potato soaks up every drop of sauce on the plate. For a version that comes together quickly, this quick potato dish keeps a batch ready for nights like this.

🥐
Pastry
  • Puff pastry (1 sheet, thawed)
  • Egg (1, for wash)
🧀
Filling
  • Cream cheese (8 oz, softened)
  • Granulated sugar (¼ cup)
  • Vanilla extract (1 tsp)
🫙
Optional
  • Butter (1 tbsp, melted)
  • Cinnamon (½ tsp)
  • Brown sugar (for topping)

Ingredient Details

  • Puff pastry
    Thaw in the fridge overnight, not on the counter - slow thawing keeps the butter layers intact for better puff.
  • Cream cheese
    Must be softened at room temp for 30 minutes so it mixes smooth without lumps - cold cream cheese won't blend.
  • Sugar
    Granulated sugar dissolves cleanest, but swapping 2 tablespoons for brown sugar adds caramel notes without changing texture.
  • Egg wash
    Beat 1 egg with 1 teaspoon water until no streaks remain - watery wash makes pale pastries, thick wash clumps.
  • Vanilla extract
    Pure vanilla tastes cleaner than imitation, but either works - skip it entirely if you prefer plain cheese flavor.
  • Butter
    Brush melted butter on hot pastries right out of the oven for extra richness and shine.
  • Cinnamon
    Mix ½ teaspoon into the filling or dust on top before baking for warming spice without overpowering the cream cheese.

Ingredient Swaps

Puff pastry and cream cheese form the core of quesitos, but you can adjust based on what's in your fridge or dietary needs. Four swaps that work:

  • Puff pastry → Phyllo dough - Bakes crispier and thinner with less puff, shorten bake time to 15-18 minutes to avoid burning
  • Cream cheese → Dairy-free cream cheese - Slightly less tangy and softer texture, but the flaky pastry still carries the recipe
  • Granulated sugar → Coconut sugar - Darker color and deeper caramel taste, takes a few extra minutes to caramelize
  • Egg wash → Milk or cream wash - Less shine and paler color, but the pastry still browns and tastes right

Phyllo Dough

Works for: Crispier texture, faster bake time, easier to find gluten-free versions

Skip if: You want thick, puffy layers or don't want to brush each sheet with butter

Dairy-Free Cream Cheese

Works for: Lactose-free diets, vegan eating, similar creamy texture

Skip if: You want the classic tangy bite or firmer filling that slices clean

Coconut Sugar

Works for: Deeper flavor, less processed sweetener, caramel undertones

Skip if: You want pure white filling or faster dissolving sweetness

Milk Wash

Works for: Egg-free baking, softer crust, less glossy finish

Skip if: You want the signature golden shine and deeply browned surface

Instructions

Rich mains need something to cut through, and chicken does exactly that. The crust works best when it hits the table at the same time as the main. For a version that comes together quickly, this classic chicken dish keeps a batch ready for nights like this.

  1. Mix the filling: Beat softened cream cheese with sugar and vanilla until smooth with no lumps - 1-2 minutes with a hand mixer or 3 minutes by hand with a whisk. The mixture should look creamy and hold soft peaks when you lift the whisk.

  2. Roll and portion the dough: Unroll thawed puff pastry on parchment paper and cut into 6-8 rectangles (roughly 3x4 inches each). Space them 2 inches apart on a parchment-lined baking sheet so air circulates evenly during baking.

  3. Fill and seal: Spoon 2 tablespoons of cream cheese filling onto the center of each rectangle, leaving a ½-inch border. Fold the dough over the filling to form a triangle or rectangle, press edges with a fork to seal completely, and poke 2-3 small vent holes on top with a knife tip.

  4. Apply egg wash: Beat 1 egg with 1 teaspoon water and brush evenly over each pastry - don't skip the edges or they'll stay pale. Chill the shaped pastries in the fridge for 10 minutes while the oven preheats to 375°F.

  5. Bake and cool: Bake 10 minutes, brush with a second coat of egg wash, then bake another 10-15 minutes until deeply golden and fully puffed. Transfer to a wire rack and cool 15 minutes before serving - hot filling burns mouths and soft pastry needs time to crisp.

Shortcut
Skip shaping individual pastries - spread all the filling down the center of one sheet, fold it in half lengthwise, seal the edges, cut into strips, and bake as one long slab.

What to Serve With It

Rich mains need something to cut through, and stew does exactly that. Stew adds the contrast this plate needs, but timing matters. When you're building a complete meal around quesitos, think about light seafood dish planning that balances richness with bright, fresh sides.

Side Dish Prep Why It Works How to Serve
Fresh fruit slices Easy Natural sweetness cuts through rich cream cheese without competing Arrange mango, pineapple, or berries on the side - cold contrast to warm pastry
Coffee or café con leche Easy Classic Puerto Rican pairing, bitter coffee balances sweet pastry Serve hot in a mug alongside warm quesitos for breakfast or snack time
Yogurt Easy Tangy creaminess mirrors the filling texture while adding protein Spoon plain or vanilla yogurt into a small bowl for dipping or dolloping
Simple green salad Easy Crisp greens and light vinaigrette offset buttery, flaky pastry Toss mixed greens with lemon juice and olive oil - keeps it light
Guava paste slices Easy Traditional sweet-salty combo that's iconic in Puerto Rican baking Cut into thin slices and serve on the side or sandwich inside the pastry

Three ways to serve it:

  • For breakfast: Pair with café con leche and fresh fruit - the coffee cuts the sweetness and fruit adds brightness
  • For entertaining: Arrange on a platter with mini fruit skewers and a bowl of honey for drizzling - guests can customize
  • For snack time: Serve warm with cold yogurt on the side - the temperature contrast and tangy creaminess balance each bite
Quick Tip
Dust warm quesitos with cinnamon sugar right out of the oven for extra sweetness and a bakery-style finish that sticks to the buttery surface.

Store and Reheat

Beef adds the contrast this plate needs, but timing matters. Most people skip beef, but it balances the meal. For a version that comes together quickly, this classic beef dish keeps a batch ready for nights like this.

Method Time Best For
🔥 Oven 10 min at 350°F Restoring crisp texture after refrigeration - tastes closest to fresh-baked
🍳 Stovetop 5 min low heat in covered pan Quick warm-up with temperature control - prevents burning but won't crisp the bottom
📦 Microwave 30-45 seconds Fast reheating when you're in a hurry - softens the crust but warms the filling evenly

For best results when storing:

  • Refrigerate in an airtight container: Stack cooled quesitos with parchment paper between layers to prevent sticking, keeps 3-4 days
  • Freeze for longer storage: Wrap each pastry individually in plastic wrap, then place in a freezer bag - stays good up to 2 months
  • Thaw frozen pastries overnight: Move from freezer to fridge the night before, then reheat in the oven for best texture
  • Reheat in the oven, not the microwave: 10 minutes at 350°F brings back the crispy exterior without drying out the filling
  • Cool completely before storing: Hot pastries release steam that turns the crust soggy when trapped in a sealed container

Frequently Asked Questions

Can I make quesitos ahead and freeze them?

Yes - assemble and freeze unbaked quesitos on a baking sheet until solid, then transfer to a freezer bag for up to 2 months. Bake from frozen, adding 5-7 minutes to the original bake time until golden and puffed.

What is the best way to store and reheat quesitos?

Store cooled quesitos in an airtight container in the fridge for 3-4 days. Reheat in a 350°F oven for 10 minutes to restore the crispy texture - microwaving works in a pinch but softens the crust.

How do I know when quesitos are fully baked?

Look for deep golden-brown color on all surfaces and visible puffing with crispy edges. The pastry should sound hollow when tapped and the bottom should be firm and golden, not pale or soft.

What causes quesitos to be soggy and how to fix it?

Soggy quesitos come from overfilling, wet cream cheese, or skipping the cooling step. Use exactly 2 tablespoons of firm filling per pastry, bake until fully golden, and cool on a wire rack for 15 minutes before storing.

Can I use other cheeses besides cream cheese in quesitos?

Ricotta works but creates a grainier, less tangy filling that's more delicate. Rich mains need something to cut through, and stew does exactly that. For a version that comes together quickly, this [classic stew dish](https://forkliftkitchen.com/kare-kare-oxtail-peanut-stew/) delivers the richness you need with less prep.

Quesito Puerto Rican Cheese Pastry

Quesito Puerto Rican Cheese Pastry

No ratings yet
Quesito Puerto Rican Cheese Pastry features flaky puff pastry wrapped around a sweetened cream cheese filling that stays creamy while the dough puffs perfectly. This easy recipe requires no special equipment and yields golden, crispy pastries ideal for breakfast, snacks, or potlucks.
Print Recipe Pin Recipe
Prep Time 15 minutes mins
Cook Time 25 minutes mins
Total Time 40 minutes mins
Servings: 8 pastries
Course: Breakfast, Dessert, Snack
Cuisine: Puerto Rican
Ingredients Method Notes

Ingredients
  

  • 1 sheet puff pastry thawed, thaw overnight in fridge for best puff
  • 1 large egg beaten with 1 teaspoon water for egg wash
  • 8 oz cream cheese softened to room temperature for 30 minutes
  • 0.25 cup granulated sugar can substitute 2 tablespoon brown sugar for caramel notes
  • 1 teaspoon vanilla extract pure or imitation, optional
  • 1 tablespoon butter melted, for brushing on hot pastries
  • 0.5 teaspoon cinnamon optional, mix into filling or dust on top
  • brown sugar optional for topping

Method
 

  1. Beat softened cream cheese with granulated sugar and vanilla extract until smooth and creamy with no lumps, about 1-2 minutes with a hand mixer or 3 minutes by hand.
    8 oz cream cheese, 0.25 cup granulated sugar, 1 tsp vanilla extract
  2. Unroll thawed puff pastry on parchment paper and cut into 6 to 8 rectangles about 3x4 inches each. Space them about 2 inches apart on a parchment-lined baking sheet.
    1 sheet puff pastry
  3. Place 2 tablespoons of cream cheese filling in the center of each rectangle, leaving a ½-inch border. Fold dough over filling to form a triangle or rectangle, press edges with a fork to seal completely, and poke 2-3 small vent holes on top with a knife tip.
    8 oz cream cheese
  4. Beat 1 egg with 1 teaspoon water and brush evenly over each pastry, including the edges. Chill shaped pastries in the refrigerator for 10 minutes while preheating the oven to 375°F.
    1 large egg
  5. Bake pastries for 10 minutes, brush with a second coat of egg wash, then bake an additional 10 to 15 minutes until deeply golden, fully puffed, and crispy.
    1 large egg
  6. Transfer pastries to a wire rack and cool for 15 minutes before serving. Optionally brush with melted butter for extra shine and richness and dust with cinnamon sugar while warm.
    1 tbsp butter, 0.5 tsp cinnamon, brown sugar

Notes

  • Keep the puff pastry cold and chill shaped pastries before baking to ensure maximum puff.
  • Use exactly 2 tablespoons of filling per pastry to avoid leaking and sogginess.
  • Cooling on a wire rack is essential to keep bottoms crisp and avoid soggy pastry.

Tried this recipe?

Let us know how it was!

Crispy Baked Pita Chips

February 1, 2026

When you need a quick appetizer for unexpected guests or a healthy snack alternative to chips, pita triangles tossed in olive oil and baked crisp deliver.

One stack of pita bread becomes 40-50 crunchy triangles in 20 minutes.

Crispy Baked Pita Chips

The oven does all the work once you cut and season. No frying, no complicated steps, no special equipment beyond a baking sheet.

This works for weeknight snacking, party appetizers, or meal prep when you want something shelf-stable that actually tastes homemade.

QUICK SUMMARY

Pita bread cut into triangles, tossed with olive oil and seasonings, then baked at high heat until crispy. Single-layer spacing and a halfway flip create uniform golden chips with no soggy spots. Use dry, day-old pita for the crispest results.

⏱️Time Reality: 5 minutes prep, 12-15 minutes baking, no marinating or waiting
✂️First Move: Cut pita into 1.5-2 inch triangles for even baking and consistent crisp
⚠️Watch Out: Overcrowding causes steam and soggy chips - leave half-inch gaps between pieces

Why This Recipe Works

High heat renders the moisture from pita bread while olive oil promotes browning and crispness. Most people skip this quick dip dish, but it balances the meal.

Quick Reference
⏱️
Prep Time
5 min
🔥
Cook Time
12-15 min
⏰
Total Time
20 min
🍽️
Servings
4 servings
📊
Difficulty
Easy
🏷️
Category
Appetizer
💡
Quick Tip
Cut even, single layer, flip halfway
🎯
Best For
Weeknight | Meal prep | Entertaining

Five things that ensure crispy chips:

  • 375°F baking temperature creates rapid moisture evaporation without burning edges
  • Even triangle sizing ensures all pieces finish baking at the same time without burnt or soft spots
  • Light oil coating promotes browning while preventing greasiness from excess fat
  • Single-layer spacing allows hot air circulation around each piece for uniform crispness
  • Halfway flip exposes both sides to direct heat for consistent golden color
Quick Tip
Day-old pita bread works better than fresh - it has less internal moisture to evaporate during baking

What You'll Need

Crispy Baked Pita Chips - Crispy Baked Pita Chips

Pita bread forms the base, while olive oil and salt create the foundational flavor. For a version that comes together quickly, simple buddies recipe keeps pantry ingredients ready.

🍜
Base
  • Pita bread (4-5 pockets)
🥢
Fat & Seasoning
  • Olive oil (3-4 tbsp)
  • Salt (1 tsp)
🌶️
Spices
  • Garlic powder (1 tsp)
  • Paprika (1 tsp)
  • Black pepper (½ tsp, optional)
🫙
Optional Add-Ins
  • Parmesan cheese (¼ cup, grated)
  • Za'atar seasoning (1 tbsp)

Ingredient Details

  • Pita bread
    Use white or whole wheat pockets - avoid pita rounds that are too thick to crisp properly
  • Olive oil
    Extra virgin adds flavor, but regular olive oil works fine for high-heat baking
  • Salt
    Kosher or sea salt distributes more evenly than table salt on dry surfaces
  • Garlic powder
    Granulated garlic powder works better than garlic salt which oversalts the chips
  • Paprika
    Sweet paprika adds color without heat - swap for smoked if you want deeper flavor
  • Black pepper
    Freshly ground pepper tastes sharper than pre-ground, but either works
  • Parmesan cheese
    Grate fresh rather than using pre-grated for better melting and adherence to chips

Ingredient Swaps

Different oils change the flavor slightly without affecting crispness. A good homemade beef recipe can make or break the plate.

Four swaps that work:

  • Avocado oil instead of olive oil - neutral flavor with higher smoke point for less risk of burnt taste
  • Gluten-free pita bread instead of regular pita - texture may be slightly less crisp but still works for dietary needs
  • Nutritional yeast instead of parmesan - adds cheesy, umami flavor while keeping the chips vegan
  • Smoked paprika instead of sweet paprika - creates deeper, smokier flavor with the same color and texture

Fresh Pita Bread

Works for: soft texture preference, immediate use without drying time

Skip if: you want maximum crispness or have time to let pita dry overnight

Day-Old Pita Bread

Works for: crispest texture, less internal moisture to evaporate during baking

Skip if: pita is stale beyond one day or shows signs of mold

Instructions

Cut pita into triangles first, then toss everything together before spreading on the pan. The this flaky lobster works best when it hits the table at the same time as the main.

  1. Preheat oven to 375°F. Stack pita pockets and cut each pocket into 8 triangular wedges using a sharp knife - aim for 1.5-2 inch pieces for consistent baking.

  2. Toss pita with oil and seasonings. Place triangles in a large mixing bowl, drizzle with olive oil (about 1 tablespoon per pita pocket), then add salt, garlic powder, paprika, and black pepper. Toss with hands until every piece is lightly coated.

  3. Arrange in single layer on baking sheet. Spread triangles across two baking sheets if needed, leaving half-inch gaps between pieces so hot air circulates. Overcrowding causes steaming instead of crisping.

  4. Bake 7 minutes, then flip. Use a spatula to turn each triangle over so both sides get direct oven heat. Rearrange any pieces that look darker to cooler spots on the pan.

  5. Bake 5-8 more minutes until golden. Edges should be light golden brown and centers firm when you press gently. Cool on wire rack 10 minutes before serving - chips crisp further as they cool.

Golden Rule
Judge doneness by color and texture - chips should feel firm and snap cleanly when bent, not bend softly

What to Serve With It

Crispy chips need something creamy or tangy to balance the crunch. Most people skip pita chips meal planning ideas, but it balances the meal.

Side Dish Prep Why It Works How to Serve
Hummus Easy Creamy chickpea dip provides rich contrast to crispy chips Serve in shallow bowl with drizzle of olive oil on top
Tzatziki sauce Easy Cool cucumber yogurt cuts through salty, herby chips Chill 30 minutes before serving for best texture
Guacamole Easy Creamy avocado adds richness and balances crisp texture Make fresh just before serving to prevent browning
Salsa Easy Tangy tomato acidity complements mild pita flavor Use chunky salsa for texture contrast with smooth chips
Olive tapenade Easy Briny, salty spread enhances Mediterranean chip seasonings Spread thin on chips or serve in small dish for dipping

Three ways to serve it:

  • Weeknight snack: Pair with store-bought hummus and sliced vegetables for quick, healthy plate
  • Party appetizer: Arrange chips around baba ganoush or spinach-artichoke dip on large platter
  • Meal prep component: Store chips separately from dips and pack for work lunches with individual containers
Best Pick
Classic hummus remains the most versatile pairing - it complements any seasoning variation you add to the chips

Store and Reheat

Moisture ruins crispy chips faster than anything else. For a version that comes together quickly, juicy chicken side dish keeps batch cooking simple when you need extras on hand.

Method Time Best For
🔥 Oven 5 min at 300°F Restoring crisp texture to softened chips from storage
💨 Air Fryer 3 min at 320°F Small batches needing quick refresh without heating full oven
📦 Microwave 30 sec Fast warming when you don't mind slightly softer texture

For best results when storing:

  • Cool completely before storing - any residual warmth creates condensation that softens chips within hours
  • Use airtight containers with tight lids - exposure to humid air turns crispy chips soft overnight
  • Layer with parchment between stacks - prevents chips from sticking together or transferring moisture
  • Store at room temperature up to 4 days - refrigeration adds moisture and makes chips soggy faster
  • Freeze for longer storage up to 1 month - thaw at room temperature, then refresh in 300°F oven for 5 minutes

Frequently Asked Questions

Can I use gluten-free pita bread to make crispy pita chips?

Yes, gluten-free pita works but may crisp less than wheat pita. The texture tends to be slightly denser and may require 2-3 extra minutes of baking time to reach full crispness.

How should I store baked pita chips to keep them crispy?

Store completely cooled chips in an airtight container at room temperature for up to 4 days. Avoid refrigeration since it adds moisture that softens the chips.

What is the best way to know when pita chips are done baking?

Look for light golden edges and firm centers that snap cleanly when bent. Chips continue crisping as they cool, so slight softness out of the oven is normal.

Why are my pita chips soggy and how can I fix them?

Soggy chips result from overcrowding the pan, using too-moist pita, or uneven oil distribution. Fix by rebaking at 350°F for 3-5 minutes and ensure single-layer spacing next time.

Can I double or halve this pita chip recipe easily?

Yes, scale ingredients proportionally and use additional baking sheets as needed to maintain single-layer spacing. Baking time remains the same regardless of batch size.

Crispy Baked Pita Chips

Crispy Baked Pita Chips

No ratings yet
Crispy baked pita chips are a quick and healthy snack made by cutting pita bread into triangles, tossing with olive oil and seasonings, then baking at high heat until golden and crisp. This easy method requires no frying and yields perfectly crunchy chips with minimal effort.
Print Recipe Pin Recipe
Prep Time 5 minutes mins
Cook Time 15 minutes mins
Total Time 20 minutes mins
Servings: 4 servings
Course: Appetizer
Cuisine: Mediterranean
Ingredients Equipment Method Notes

Ingredients
  

  • 4 pockets pita bread white or whole wheat, day-old preferred for best crispness
  • 3 tablespoons olive oil extra virgin or regular, for tossing
  • 1 teaspoon salt kosher or sea salt preferred
  • 1 teaspoon garlic powder granulated garlic powder
  • 1 teaspoon paprika sweet or smoked as preferred
  • 0.5 teaspoon black pepper freshly ground, optional
  • 0.25 cup parmesan cheese grated, optional
  • 1 tablespoon za'atar seasoning optional

Equipment

  • Baking sheet Used for baking pita chips in a single layer
  • Mixing bowl For tossing pita triangles with oil and seasonings
  • Sharp knife To cut pita bread into triangles
  • Spatula To flip pita chips halfway through baking

Method
 

  1. Preheat the oven to 375°F (190°C). Stack pita pockets and cut each into 8 triangular wedges about 1.5-2 inches in size for even baking.
    4 pockets pita bread
  2. Place the pita triangles in a large mixing bowl. Drizzle with olive oil and sprinkle with salt, garlic powder, paprika, and black pepper. Toss with your hands until every piece is lightly coated.
    3 tablespoons olive oil, 1 teaspoon salt, 1 teaspoon garlic powder, 1 teaspoon paprika, 0.5 teaspoon black pepper
  3. Arrange the triangles in a single layer on one or two baking sheets, leaving about half an inch of space between pieces to allow hot air circulation and prevent sogginess.
  4. Bake for 7 minutes, then use a spatula to flip each triangle over to expose both sides to direct heat. Rearrange any darker pieces to cooler spots on the pan.
  5. Bake for an additional 5 to 8 minutes until edges are light golden brown and centers feel firm when pressed. Remove from oven and cool on a wire rack for 10 minutes before serving to let chips crisp further.

Notes

  • Use day-old pita bread for the crispiest chips with less internal moisture.
  • Leave space between triangles on the baking sheet to avoid steaming and soggy chips.
  • Flip the chips halfway through baking for even browning and texture.

Tried this recipe?

Let us know how it was!

5 Best Substitutes for Carom Seed in Indian Cooking

February 1, 2026

You're assembling a spice blend for Indian flatbread when you realize the jar labeled "ajwain" is empty. The recipe depends on carom seed's sharp, pungent bite and digestive warmth.

5 Best Substitutes for Carom Seed in Indian Cooking

Carom seed brings a thyme-like aroma with bitter edges that cut through rich curries and fried breads. It's not just flavor-it aids digestion and adds a distinctive sharpness.

Most Western pantries don't stock it. A few common herbs and seeds can replicate that pungency in different ways.

QUICK SUMMARY

Thyme matches carom seed's pungent, herbaceous sharpness better than anything else-use it 1:1 by volume in vegetable curries and breads. Cumin seed or fennel seed work when you need aromatic warmth but don't require exact bitterness. For balanced complexity, mix 3 parts thyme with 1 part fennel seed to simulate both the sharpness and mild sweetness.

🏆Closest match: Thyme replicates the pungent, bitter bite in cooked dishes
⚡Pantry pick: Cumin seed works 1:1 but lacks sharpness
⚠️Watch out: Celery seed tastes stronger-start with half the amount

5 Substitutes for Carom Seed: Sharp Aroma and Digestive Warmth

Carom seed's role goes beyond adding flavor-it cuts through richness and aids digestion in fried and spiced dishes. The swaps below match different aspects of that profile.

Quick Substitute Reference
# Substitute Best For Ratio Key Note
1 Thyme 🍳 Cooking 1:1 Closest pungent match
2 Cumin Seed 🍳 Cooking 1:1 Earthy, less sharp
3 Fennel Seed 🍳 Cooking 1:1 Sweeter, digestive aid
4 Celery Seed 🍳 Cooking 1:1 Strong herbal bite
5 Thyme + Fennel Blend ✨ Both 1:1 Balanced complexity

1. Thyme 🌿

Thyme delivers the sharpest match for carom seed's pungent, herbaceous bite. It carries a similar warm aroma with mild bitterness that works in curries and breads.

Use 1:1 by volume in any recipe calling for carom seed. Add it early so the oils release fully.

  • ✅ Replicates pungent sharpness better than other herbs
  • ✅ Works in vegetable curries, lentil dishes, and flatbreads
  • ✅ Easy to find in most kitchens
  • ⚠️ Lacks the digestive properties carom seed brings

Thyme shines in savory breads and cooked vegetable dishes where you need aromatic punch. It won't work as well in raw applications or pickles where carom seed's crunch matters.

2. Cumin Seed 🍛

Cumin seed steps in when you need warm, aromatic depth but don't require carom seed's sharp bitterness. It adds earthy notes that complement Indian spice blends naturally.

Use 1:1 by volume in curries, dal, and spice mixes. Toast it lightly before adding to cooked dishes for fuller flavor.

  • ✅ Familiar warmth fits Indian cooking
  • ✅ Works in most savory dishes
  • ⚠️ Less pungent and bitter than carom seed

Cumin works best in heavily spiced dishes where its earthy profile blends with other aromatics. Skip it in recipes where carom seed's sharpness is the main flavor-you'll lose that bite.

If you're low on cumin too, check Cumin Seed substitutes ranked for backups.

3. Fennel Seed 🌾

Fennel seed brings digestive benefits similar to carom seed but leans sweeter with licorice-like notes. It adds aromatic warmth without the sharp bitterness.

Use 1:1 by volume in dal, pickles, and brothy dishes. Crush lightly before adding to release the oils.

  • ✅ Aids digestion like carom seed
  • ⚠️ Sweeter and less bitter

Fennel works in dishes where mild sweetness won't clash-think lentil soups and pickled vegetables. Avoid it in savory breads or curries where bitter sharpness defines the dish.

For more ways to use it, Fennel Seed substitutes ranked covers different applications.

4. Celery Seed 🥬

Celery seed delivers strong herbal bitterness close to carom seed's intensity. It adds pungency and a sharp edge in savory breads and spice blends.

Use 1:1 by volume, but start with half if you're unsure-celery seed tastes stronger than carom seed in most recipes.

It works in cooked dishes where bold flavors dominate. The herbal bite complements savory flatbreads and vegetable curries.

Skip it in delicate recipes or anywhere you need mild warmth-celery seed overpowers subtle flavors quickly. If celery seed doesn't fit, quick Celery Seed replacements to try covers gentler swaps.

5. Thyme + Fennel Blend 🔀

Mixing 3 parts thyme with 1 part fennel seed rebuilds carom seed's balance-thyme brings the pungency, fennel adds digestive warmth and mild sweetness. Use 1 teaspoon of the blend per 1 teaspoon carom seed in curries, breads, and spice mixes.

The combination mimics carom seed's complexity better than single substitutes. Grind the blend lightly if your recipe calls for ground spices.

It works across most Indian dishes where carom seed plays a supporting role rather than the lead flavor.

Match Your Carom Seed Swap by Dish

  • For curries and dal: Thyme or cumin seed work best
  • For breads and pakoras: Use the thyme + fennel blend
  • For pickles: Fennel seed or the DIY blend
  • For spice blends: Cumin or celery seed depending on intensity needed

Frequently Asked Questions

Can I use oregano instead of carom seed?

Oregano won't work-it lacks carom seed's pungent sharpness and brings Mediterranean flavors that clash with Indian spices. Thyme gets closer because of its warm, slightly bitter profile. If you only have oregano, skip it and use cumin seed or plain salt instead.

What's the difference between carom seed and caraway?

Carom seed tastes sharper and more pungent with thyme-like notes, while caraway leans earthy with anise undertones. They're not interchangeable-caraway works in rye bread and sauerkraut, but it won't replicate carom seed's role in Indian cooking. Stick with thyme or cumin for Indian dishes.

Does carom seed help with digestion like fennel?

Yes-carom seed aids digestion and reduces bloating, similar to fennel seed. Fennel makes a decent substitute if digestive benefits matter more than exact flavor. It won't match carom seed's sharpness, but it brings the same soothing properties to heavy or fried foods.

Can I skip carom seed entirely in a recipe?

You can skip it, but you'll lose the pungent sharpness and aromatic complexity. The dish won't fail, but it'll taste flatter. If the recipe uses carom seed as a main flavor-like in certain breads or spice blends-a substitute works better than leaving it out completely.

Should I toast carom seed substitutes before using them?

Toast whole seed substitutes like cumin or fennel in a dry pan for 30-60 seconds until fragrant. It deepens the flavor and mimics what carom seed does when heated. Don't toast dried herbs like thyme-they burn quickly and turn bitter.

Substitutes for Carom Seed in Indian Cooking

5 Best Substitutes for Carom Seed

No ratings yet
Carom seed adds sharp pungency and digestive warmth to Indian dishes. This guide explores five top substitutes offering similar herbaceous sharpness, aromatic warmth, or balanced complexity depending on your recipe needs.
Print Recipe Pin Recipe
Prep Time 8 minutes mins
Cook Time 5 minutes mins
Total Time 13 minutes mins
Servings: 4 servings
Course: Kitchen Tips, Substitutes
Cuisine: Various
Ingredients Method Notes

Ingredients
  

  • 1 cup Thyme Use 1:1 by volume; closest pungent match to carom seed
  • 1 cup Cumin Seed Use 1:1 by volume; earthy warmth but less pungent
  • 1 cup Fennel Seed Use 1:1 by volume; sweeter with digestive benefits
  • 1 cup Celery Seed Use 1:1 by volume; start at half amount due to strong flavor
  • Thyme + Fennel Blend Mix 3 parts thyme with 1 part fennel seed, use 1:1 by volume

Method
 

  1. Select the substitute based on your recipe: thyme for sharpness, cumin for warmth, fennel for sweetness, celery for strong bite, or thyme + fennel blend for complexity.
  2. Toast whole seed substitutes lightly in a dry pan for 30-60 seconds to enhance flavor; avoid toasting thyme as it burns easily.
  3. Measure and use substitutes in a 1:1 volume ratio in place of carom seed; start with half the quantity for celery seed if unsure.
  4. Add substitutes early when cooking to release essential oils and flavor, especially in curries, breads, and spice blends.
  5. Taste and adjust seasoning as needed to balance pungency and aroma in your dish.

Notes

  • If digestive benefits are important, fennel seed or the thyme + fennel blend are preferred substitutes.
  • Celery seed has a stronger herbal bite; reduce the quantity if you are unfamiliar with this flavor.
  • Oregano is not recommended as a substitute because it lacks carom seed's sharpness and clashes with Indian flavors.

Tried this recipe?

Let us know how it was!

Pão de Queijo Brazilian Cheese Bread

February 1, 2026

Crispy edges with a chewy, airy center that pulls apart in your hands. That's what happens when you bake Brazilian cheese bread with tapioca flour and sharp Parmesan.

Pão de Queijo Brazilian Cheese Bread

The hot liquid activates the starch before the eggs go in. You get puffed, golden rolls without kneading or rising time.

This works for breakfast spreads, party snacks, or weeknight sides when you need something that looks impressive but uses one bowl and 40 minutes.

QUICK SUMMARY

Pão de queijo delivers crispy-chewy texture using tapioca flour, boiled liquids, and grated Parmesan. Boil the milk and oil fully before mixing with the starch to gelatinize it properly. Mix until completely smooth to avoid dense, flat rolls that don't puff.

⏱️Time Reality: 15 min prep, 25 min baking - no rising or resting required
🔥Critical Move: Bring liquids to full boil before adding tapioca flour
⚠️Watch Out: Add eggs gradually to prevent lumps - stir vigorously 2-3 min

Why This Recipe Works

The boiling liquid gelatinizes the tapioca starch before you add eggs, creating dough that puffs instead of staying flat. High oven heat sets the crispy shell while the interior stays tender and slightly gooey.

Quick Reference
⏱️
Prep Time
15 min
🔥
Cook Time
20-25 min
⏰
Total Time
40 min
🍽️
Servings
12-16 pieces
📊
Difficulty
Medium
🏷️
Category
Appetizer
💡
Quick Tip
Use tapioca flour for chewy texture
🎯
Best For
Weeknight | Entertaining

Five things that make this work:

  • Tapioca flour creates stretch - The starch gelatinizes when hot liquid hits it, forming elastic dough that puffs during baking instead of staying dense
  • Boiled liquids activate starch - Heating milk and oil to full boil before mixing hydrates the tapioca completely and starts the gelatinization process
  • Eggs bind the dough - Adding eggs gradually after the starch cools creates structure without scrambling, giving rolls their signature airy interior
  • High heat sets the shell - Baking at 375-400°F crisps the exterior quickly while steam inside creates hollow pockets
  • Aged Parmesan adds salt - Sharp, salty cheese balances the mild tapioca and provides savory depth without overwhelming the chewy texture
Shortcut
Use an ice cream scoop to portion 1.5 tablespoon dough per ball - uniform size means even baking in 20-25 min

What You'll Need

Pão de Queijo Brazilian Cheese Bread - Pão de Queijo Brazilian Cheese Bread

Most ingredients sit in your pantry already. The tapioca flour and aged Parmesan do the heavy lifting - everything else supports texture and structure.

🍜
Starches
  • Tapioca flour (2 cups)
🧀
Dairy
  • Milk (½ cup)
  • Parmesan cheese (1 cup grated)
  • Eggs (2 large)
🫙
Liquids & Fats
  • Oil (¼ cup)
  • Water (¼ cup)
  • Salt (1 tsp)

Ingredient Details

  • Tapioca Flour
    Also called tapioca starch - same product, different label; buy fresh for best puff and chew
  • Parmesan Cheese
    Use aged, block Parmesan you grate yourself; pre-grated loses moisture and doesn't melt as smoothly
  • Milk
    Whole milk works best for richness; 2% works but creates slightly less tender interior
  • Oil
    Neutral oil like vegetable or canola keeps flavor clean; olive oil adds slight bitterness
  • Eggs
    Room temperature eggs mix smoother; cold eggs need extra stirring to incorporate fully
  • Water
    Thins the dough slightly for easier scooping; skip if you prefer thicker, denser rolls
  • Salt
    Balances the sharp cheese; 1 teaspoon is base - taste dough and add ¼ teaspoon more if needed

Ingredient Swaps

You can adjust cheese type or swap dairy without losing the chewy texture. If you need a simple peas side dish, it pairs well with Brazilian spreads or brunch plates.

Four swaps that work:

  • Parmesan → Pecorino Romano - Saltier, sharper flavor with same melt; use ¾ cup instead of 1 cup to avoid oversalting
  • Milk → unsweetened almond milk - Slightly different flavor but keeps dairy-free; texture stays mostly the same
  • Oil → melted butter - Richer flavor with slight texture change; rolls brown faster so watch bake time
  • Parmesan → aged cheddar - More bold flavor with different melt; shred finely for smooth mixing

Cassava Flour

Works for: Gluten-free swaps when tapioca is unavailable

Skip if: You want traditional chew - cassava creates heavier, less airy texture

Nutritional Yeast

Works for: Vegan versions needing cheesy flavor without dairy

Skip if: You expect melty texture - nutritional yeast adds flavor but no gooeyness

Flax Egg

Works for: Dairy-free or egg-free diets

Skip if: You want airy interior - flax creates denser, heavier rolls

Instructions

The entire process takes 40 minutes with no rising or kneading. Boil the liquids first, mix until smooth, shape into balls, and bake until puffed and golden.

  1. Boil the liquids. Combine milk, water, oil, and salt in a saucepan over medium-high heat. Bring to a full rolling boil, 3-4 min. Pour immediately over tapioca flour in a large mixing bowl. Stir vigorously with a wooden spoon until dough forms and no dry flour remains, 2-3 min.

  2. Let dough cool slightly. Rest the dough 10 min at room temp so eggs don't scramble. Stir occasionally to release steam. Dough should feel warm but not hot when you touch it - around 120-130°F if using a thermometer.

  3. Add eggs and cheese. Crack eggs one at a time into the dough, stirring after each addition until fully smooth. Add grated Parmesan and mix 1-2 min until completely incorporated. Dough should be thick, sticky, and uniform with no lumps.

  4. Shape into balls. Preheat oven to 375°F. Use a 1.5 tablespoon ice cream scoop or spoon to portion dough onto a parchment-lined baking sheet. Space balls 2 inches apart to allow expansion. Wet hands lightly if dough sticks, but avoid adding extra flour.

  5. Bake until puffed and golden. Bake 20-25 min until rolls puff up, develop lightly golden tops, and feel firm when tapped. Bake at the lower rack for crispier bottoms. Let cool on a wire rack 10 min before serving. Rolls deflate slightly as they cool but stay chewy inside.

Golden Rule
Bring liquids to a full rolling boil before pouring over tapioca - incomplete boiling prevents proper starch gelatinization and creates flat, dense rolls

What to Serve With It

These work for breakfast spreads, party snacks, or alongside dinner when you need a simple bread side. Rich mains need something to cut through, and a warm bread on the side does exactly that.

Side Dish Prep Why It Works How to Serve
Scrambled Eggs Easy Simple protein complements cheese bread richness Serve warm alongside eggs for breakfast or brunch
Mixed Greens Salad Easy Adds freshness and balances heaviness Toss greens with vinaigrette, serve on the side
Fresh Fruit Slices Easy Light contrast to savory bread Arrange melon, berries, or citrus on a plate
Avocado Slices Easy Adds creamy texture and healthy fats Slice ripe avocado, sprinkle with salt and lime
Charcuterie Board Medium Pairs well with meats and cheeses for variety Arrange cured meats, cheeses, olives around bread

Three ways to serve it:

  • With chimichurri sauce - Herbaceous, zesty sauce cuts through cheese richness; drizzle or dip warm rolls
  • Alongside Brazilian fish stew - The bread soaks up broth from a tender fish recipe; serve in bowls with stew spooned over
  • With garlic aioli - Creamy, mild garlic complements cheesy flavor; serve aioli in small bowl for dipping
Best Pick
Pair with Brazilian guava paste (goiabada) for sweet-savory contrast - traditional pairing that balances the salty cheese

Store and Reheat

Cheese bread loses its crisp exterior within hours at room temp. Store in an airtight container in the fridge for 3-4 days or freeze up to 2 months.

Method Time Best For
🔥 Oven 5-7 min at 350°F Restoring crisp exterior and soft interior
📦 Microwave 30-45 seconds Quick reheating but may soften crust
🍞 Toaster Oven 4-6 min at 350°F Small batches with crisp outside

For best results when storing:

  • Cool completely before storing - Hot rolls create condensation in containers, making them soggy when reheated
  • Freeze in single layer first - Lay baked rolls on a sheet pan, freeze 1 hour, then transfer to freezer bag to prevent sticking
  • Reheat from frozen - Bake frozen rolls at 350°F for 8-10 min; no need to thaw first
  • Skip room temp storage - Rolls turn gummy within 2-3 hours at room temp; refrigerate or freeze immediately after cooling
  • Wrap individually for meal prep - Wrap each roll in plastic wrap before freezing for grab-and-go portions

Frequently Asked Questions

How long to cook Pão de Queijo at 375°F?

Bake 20-25 min until rolls puff up and develop lightly golden tops. They should feel firm when tapped and show slight cracks on the surface.

Can I make Pão de Queijo dough ahead and refrigerate?

Yes - refrigerate mixed dough in an airtight container up to 24 hours. Let sit at room temp 10 min before scooping and baking.

What cheese is best for Pão de Queijo?

Aged Parmesan creates the sharpest, saltiest flavor. Pecorino Romano works for stronger taste, while aged cheddar adds bolder notes with different melt.

Why did my Pão de Queijo turn out dense and not puffy?

Insufficient eggs or incomplete mixing causes dense rolls. Add eggs gradually as directed and stir vigorously 2-3 min until dough is completely smooth with no lumps.

Can I freeze baked Pão de Queijo and how to reheat?

Freeze baked rolls in airtight bag up to 2 months. Reheat from frozen at 350°F for 8-10 min until warmed through and crisp outside.

Pão de Queijo Brazilian Cheese Bread

Pão de Queijo Brazilian Cheese Bread

No ratings yet
Pão de Queijo is a Brazilian cheese bread known for its crispy edges and chewy, airy center created by tapioca flour and sharp Parmesan. The boiling of milk, water, and oil activates the starch, producing puffed, golden rolls with no kneading or rising time. This one-bowl recipe is perfect for breakfasts, snacks, or sides that impress without fuss.
Print Recipe Pin Recipe
Prep Time 15 minutes mins
Cook Time 25 minutes mins
Total Time 40 minutes mins
Servings: 16 pieces
Course: Appetizer
Cuisine: Brazilian
Ingredients Equipment Method Notes

Ingredients
  

  • 2 cups tapioca flour also called tapioca starch
  • 0.5 cup milk whole milk preferred
  • 0.25 cup water adds thinness for easier scooping
  • 0.25 cup oil neutral oil like vegetable or canola
  • 1 teaspoon salt balances the sharp cheese
  • 2 large eggs room temperature preferred
  • 1 cup Parmesan cheese aged, grated

Equipment

  • Saucepan To boil milk, water, oil, and salt
  • Large mixing bowl For combining flour and liquid
  • Wooden spoon For vigorous stirring of dough
  • Ice cream scoop To portion dough balls uniformly
  • Baking sheet To bake shaped dough balls
  • Wire rack To cool rolls after baking

Method
 

  1. Combine milk, water, oil, and salt in a saucepan over medium-high heat. Bring to a full rolling boil, about 3-4 minutes.
    0.5 cup milk, 0.25 cup water, 0.25 cup oil, 1 tsp salt
  2. Pour the boiling liquid immediately over the tapioca flour in a large mixing bowl. Stir vigorously with a wooden spoon for 2-3 minutes until dough forms and no dry flour remains.
    2 cups tapioca flour
  3. Let dough rest 10 minutes at room temperature, stirring occasionally to release steam. Dough should be warm but not hot (around 120-130°F).
  4. Add eggs one at a time, stirring after each addition until smooth. Then add grated Parmesan and mix 1-2 minutes until completely incorporated and uniform with no lumps.
    2 large eggs, 1 cup Parmesan cheese
  5. Preheat oven to 375°F. Use a 1.5 tablespoon ice cream scoop to portion dough onto a parchment-lined baking sheet, spacing balls 2 inches apart. Wet hands lightly if dough sticks.
  6. Bake 20-25 minutes on the lower oven rack until rolls puff, become lightly golden, and feel firm to touch. Let cool on a wire rack 10 minutes before serving.

Notes

  • Bring liquids to a full rolling boil before adding tapioca flour to ensure proper gelatinization.
  • Add eggs gradually and stir vigorously to avoid lumps and achieve a smooth dough.
  • Use aged Parmesan freshly grated for best melting and flavor.

Tried this recipe?

Let us know how it was!

Taralli Italian Ring Crackers

February 1, 2026

Crispy rings of dough coated with fennel and olive oil, baked until they snap when you bite down. That's what happens when you boil Italian taralli before roasting them at moderate heat.

Taralli Italian Ring Crackers

The two-step cooking method does all the work. You get dry, crunchy crackers with just enough chew inside without any babysitting or flipping.

This works for entertaining guests or weekend baking when you want something homemade that actually looks intentional. The dough comes together in under 20 minutes.

QUICK SUMMARY

Taralli are Southern Italian ring crackers made by boiling shaped dough rings before baking them until golden and crisp. The boiling step sets the shape and creates the signature texture: dry crunch with a slightly chewy center. Perfect for appetizer spreads, holiday gatherings, or meal-prep snacking.

⏱️Time Reality: 50 minutes total - 20 minutes hands-on shaping, 30 minutes baking
🔥Critical First Step: Boil each ring for 30 seconds until it floats before baking
⚠️Watch Out: Overbaking makes them crumbly - pull when golden with no pale spots

Why This Recipe Works

The boiling step before baking creates the signature texture you can't get from oven-only methods. Boiled rings develop a thin exterior shell that crisps in the oven while the inside stays slightly chewy. Rich mains need something to cut through, and this seafood does exactly that. For a version that comes together quickly, this homemade sauce recipe keeps everything on schedule.

Quick Reference
⏱️
Prep Time
20 min
🔥
Cook Time
30 min
⏰
Total Time
50 min
🍽️
Servings
12-16 pieces
📊
Difficulty
Medium
🏷️
Category
Appetizer
💡
Quick Tip
Boil before baking for crisp rings
🎯
Best For
Entertaining | Weeknight

Five things that make this work:

  • White wine in the dough adds subtle acidity and helps tenderize the crackers without making them soft
  • Fennel seeds give the traditional Southern Italian flavor that balances the olive oil richness
  • 350°F baking temperature dries the rings evenly without burning the exterior before the inside crisps
  • Minimal kneading prevents tough, dense crackers - stop as soon as the dough comes together
  • Wire rack cooling lets air circulate so the crackers stay dry and crunchy instead of steaming
Best Pick
Form rings about 3 inches in diameter - smaller rings overcook, larger ones stay doughy in the center

What You'll Need

Taralli Italian Ring Crackers - Taralli Italian Ring Crackers

All-purpose flour forms the base while white wine and olive oil keep the dough pliable without adding dairy or eggs. Most people skip corn, but it balances the meal. For a version that comes together quickly, this quick corn dish adds another snack option to your spread.

🍜
Base
  • All-purpose flour (2½ cups)
  • Baking powder (½ tsp)
  • Salt (1 tsp)
🥢
Liquid
  • White wine (½ cup)
  • Olive oil (⅓ cup)
  • Water (2-3 tbsp)
🌶️
Flavor
  • Fennel seeds (1 tbsp)
  • Black pepper (½ tsp, optional)

Ingredient Details

  • All-purpose flour
    Use standard all-purpose - bread flour makes them too chewy, cake flour makes them crumbly
  • White wine
    Dry white wine works best - the acidity tenderizes without adding sweetness
  • Olive oil
    Extra virgin adds more flavor, but regular olive oil works if you want a milder taste
  • Fennel seeds
    Crush them lightly with the back of a spoon to release more aroma before mixing
  • Water
    Add water 1 tablespoon at a time - dough should be smooth but not sticky
  • Baking powder
    Optional but adds a slight lift - skip it for denser, traditional-style crackers
  • Black pepper
    Use freshly ground for sharper flavor or skip entirely if serving to kids

Ingredient Swaps

White wine gives the traditional flavor, but you can swap it for juice or water if you're avoiding alcohol. The biscuits works best when it hits the table at the same time as the main. For a version that comes together quickly, something warm like biscuits uses similar shaping techniques with different flavors.

Four swaps that work:

  • White wine → white grape juice or water - Loses the wine tang but keeps the dough workable, use 1:1 ratio
  • Olive oil → vegetable or sunflower oil - Makes them milder with less fruity aroma, same amount
  • Fennel seeds → anise or caraway seeds - Changes the flavor profile but keeps the aromatic warmth, 1:1 swap
  • All-purpose flour → gluten-free flour mix - Slightly more brittle texture, add 1 extra tablespoon of olive oil

White Grape Juice

Works for: Alcohol-free households, kid-friendly snacks, milder flavor preference

Skip if: You want the traditional tangy wine flavor, richer cracker taste

Gluten-Free Flour Mix

Works for: Gluten intolerance, dietary restrictions, similar crunch with care

Skip if: You want the exact chewy interior texture, worry about crumbly results

Anise Seeds

Works for: Licorice lovers, Mediterranean flavor swaps, similar aromatic profile

Skip if: You dislike licorice notes, prefer traditional fennel taste

Instructions

You need 50 minutes total with most of that time hands-off in the oven. A good pasta can make or break the plate. For a version that comes together quickly, something creamy like pasta makes a light meal when served alongside these crackers.

  1. Mix the dough: Combine flour, salt, fennel seeds, and baking powder in a large bowl. Add white wine and olive oil, then stir until it forms shaggy clumps. Add water 1 tablespoon at a time until the dough comes together but isn't sticky. Knead 2-3 minutes just until smooth.

  2. Shape the rings: Roll dough into a rope about ½ inch thick on a lightly floured surface. Cut into 4-inch pieces, then form each piece into a ring by overlapping the ends and pressing to seal. Make sure the rings are about 3 inches in diameter for even cooking.

  3. Boil the rings: Bring a large pot of water to a boil. Drop 5-6 rings at a time into the boiling water. When they float to the surface after 30 seconds, remove them with a slotted spoon and place on a clean kitchen towel to drain.

  4. Bake until golden: Preheat oven to 350°F. Place boiled rings on a parchment-lined baking sheet, leaving 1 inch between each. Bake 25-30 minutes until uniformly golden with no pale spots. Rotate the pan halfway through for even browning.

  5. Cool completely: Transfer taralli to a wire rack immediately after baking. Let them cool at least 15 minutes before serving - they crisp as they cool. They'll sound hollow when tapped if done correctly.

Golden Rule
Don't skip the boiling step - it's what creates the signature texture and prevents doughy centers

What to Serve With It

Taralli work best on appetizer spreads where you need something crunchy to balance soft cheeses and dips. Beef adds the contrast this plate needs, but timing matters. For a version that comes together quickly, this quick beef dish rounds out the meal when you're serving these as part of a larger spread. If you're planning a complete vegetable-forward dinner, check out these fresh vegetable dinner ideas for more pairing options.

Side Dish Prep Why It Works How to Serve
Olive tapenade Easy Adds savory richness and moisture contrast to dry crackers Spoon into small bowl, let guests dip or spread on rings
Sharp Pecorino cheese Easy Salty, creamy texture balances crunchy rings with no cooking needed Cut into small wedges or shave thin slices, serve on board
Marinated olives Easy Briny, herbal flavors complement fennel in the crackers Drain marinade, serve in small bowl alongside taralli
Sliced cured meats Easy Salty prosciutto or salami adds protein without heavy prep Arrange slices on platter, let guests wrap around rings
Garlic herb olive oil Easy Warm, aromatic dip adds moisture and enhances olive oil flavor Heat oil with garlic and herbs, pour into shallow dish for dipping

Three ways to serve it:

  • Appetizer spread with mixed nuts, olives, and cheese for holiday gatherings or weekend entertaining
  • Picnic snack paired with wine or sparkling water when you need portable finger food
  • Meal-prep batch stored in airtight containers for quick weekday snacks at home or work
Shortcut
Make a double batch and freeze half the boiled rings before baking - bake from frozen when you need fresh crackers

Store and Reheat

Store completely cooled taralli in an airtight container at room temperature for up to 2 weeks. They absorb moisture if stored warm, which makes them soft instead of crisp. The chicken works best when it hits the table at the same time as the main. For a version that comes together quickly, this quick chicken dish uses similar Mediterranean flavors when you want a full meal.

Method Time Best For
🔥 Oven 5-8 min at 350°F Restoring crispness after storage or if they've softened
🍳 Stovetop 1-2 min in dry pan on medium Small batches when you need quick crisping without heating the oven
📦 Microwave 15-20 seconds Quick warming only - softens texture, avoid if you want crunch

For best results when storing:

  • Cool taralli completely on a wire rack for at least 30 minutes before storing to prevent condensation
  • Use airtight containers with tight-sealing lids to keep moisture out and maintain crunch
  • Add a small packet of food-safe desiccant to the container if storing in humid climates
  • Freeze baked taralli in freezer bags for up to 2 months, then refresh in a 350°F oven for 5 minutes
  • Avoid refrigerator storage - the humidity softens the crackers and ruins the texture

Frequently Asked Questions

Can I use gluten-free flour to make Taralli?

Yes, but use a 1:1 gluten-free flour blend designed for baking and add 1 extra tablespoon of olive oil. The texture will be slightly more brittle and less chewy than traditional taralli made with all-purpose flour.

How long can I store Taralli and how should I reheat them?

Store completely cooled taralli in an airtight container at room temperature for up to 2 weeks. Reheat in a 350°F oven for 5-8 minutes to restore crispness if they've softened.

What is the purpose of boiling Taralli dough before baking?

Boiling sets the shape of the rings and creates a thin exterior shell that crisps in the oven while keeping the interior slightly chewy. Skipping this step results in dense, bread-like crackers without the signature texture.

Why are my Taralli too hard or too soft?

Too hard means you overbaked them or used too much flour - watch for golden color with no dark spots and measure flour by weight if possible. Too soft means underbaking or insufficient boiling time - make sure each ring floats for 30 seconds and bake the full 25-30 minutes.

Can I scale up the Taralli dough without affecting texture?

Yes, double or triple the recipe but work in batches when boiling and baking to maintain even cooking. Keep uncooked rings covered with a damp towel while working so they don't dry out before boiling.

Taralli Italian Ring Crackers

Taralli Italian Ring Crackers

No ratings yet
Taralli are traditional Southern Italian ring-shaped crackers with a unique texture achieved by boiling the dough before baking. The process creates crispy, crunchy rings with a slightly chewy center, perfect for appetizer spreads or snacking. This recipe combines fennel seeds, white wine, and olive oil for authentic flavor in under an hour.
Print Recipe Pin Recipe
Prep Time 20 minutes mins
Cook Time 30 minutes mins
Total Time 50 minutes mins
Servings: 16 pieces
Course: Appetizer
Cuisine: Italian
Ingredients Method Notes

Ingredients
  

  • 2.5 cups all-purpose flour Use standard all-purpose flour for best texture
  • 0.5 teaspoon baking powder Optional but adds slight lift
  • 1 teaspoon salt
  • 0.5 cup white wine Use dry white wine for best acidity
  • 0.33 cup olive oil Extra virgin preferred for flavor
  • 2-3 tablespoons water Add 1 tablespoon at a time until dough is smooth but not sticky
  • 1 tablespoon fennel seeds Lightly crush for more aroma
  • 0.5 teaspoon black pepper Optional, freshly ground

Method
 

  1. In a large bowl, combine flour, salt, fennel seeds, baking powder, and black pepper if using. Add white wine and olive oil. Stir until mixture forms shaggy clumps.
    2.5 cups all-purpose flour, 0.5 teaspoon baking powder, 1 teaspoon salt, 1 tablespoon fennel seeds, 0.5 teaspoon black pepper, 0.5 cup white wine, 0.33 cup olive oil
  2. Add water one tablespoon at a time, mixing until the dough comes together but is not sticky. Knead the dough on a lightly floured surface for 2-3 minutes just until smooth.
    2-3 tablespoons water
  3. Roll the dough into a rope about ½ inch thick. Cut into 4-inch pieces and form each into a ring about 3 inches in diameter by overlapping and pressing the ends to seal.
    2.5 cups all-purpose flour, 0.5 cup white wine, 0.33 cup olive oil, 2-3 tablespoons water, 1 tablespoon fennel seeds
  4. Bring a large pot of water to a boil. Boil 5-6 rings at a time for 30 seconds until they float to the surface. Remove with a slotted spoon and drain on a clean kitchen towel.
  5. Preheat oven to 350°F. Place boiled rings on a parchment-lined baking sheet with 1-inch space between each. Bake for 25-30 minutes, rotating halfway, until golden with no pale spots.
  6. Transfer the taralli to a wire rack and cool completely for at least 15 minutes. They will crisp as they cool and sound hollow when tapped.

Notes

  • Don't skip boiling - it sets the shape and creates the signature texture.
  • Use a wire rack to cool to prevent soggy crackers by allowing air circulation.
  • Form rings about 3 inches in diameter for even cooking and proper texture.

Tried this recipe?

Let us know how it was!

7 Best Substitutes for Tilapia in Light White Fish Recipes

February 1, 2026

You're prepping fish tacos and the tilapia fillets you grabbed last week aren't in the freezer. The recipe counts on that mild white fish flavor and flaky texture that doesn't overpower toppings or sauces.

7 Best Substitutes for Tilapia in Light White Fish Recipes

Tilapia works in so many dishes because it stays neutral-it absorbs marinades, holds up to baking and frying, and doesn't taste too fishy. Most white fish can fill that role with small adjustments.

QUICK SUMMARY

Cod and basa replace tilapia 1:1 in most cooked dishes-both offer mild flavor and flaky texture. Pollock works for baking and light frying but runs slightly softer. For plant-based swaps, firm tofu mimics the texture in stir-fries and bakes, while young jackfruit brings flaky structure to vegan tacos.

🐟Closest match: Cod matches tilapia's mild flavor and holds shape better
⚡Fastest swap: Basa works 1:1 with no recipe changes needed
🌱Vegan pick: Firm tofu absorbs marinades and holds up to high heat

7 Substitutes for Tilapia: Mild Flavor and Flaky Texture 🐟

Each option below matches different aspects-some bring firmer texture, others stay ultra-mild.

Quick Substitute Reference
# Substitute Best For Ratio Key Note
1 Cod Fillets 🍳 Cooking 1:1 firmer with more flavor
2 Basa Fillets 🍳 Cooking 1:1 softer, very mild
3 Halibut Steaks 🍳 Cooking 1:1 denser texture
4 Catfish Fillets 🍳 Cooking 1:1 earthier flavor
5 Pollock Fillets 🍳 Cooking 1:1 slightly watery
6 Firm Tofu 🌱 Vegan 1:1 no fish flavor
7 Jackfruit 🌱 Vegan 1:1 fibrous, flaky texture

1. Cod Fillets 🐟

Cod delivers a mild white fish flavor with slightly more depth than tilapia. The texture runs firmer and holds its shape better during grilling or baking.

Use 1:1 anywhere you'd use tilapia. Cod works great in fish tacos, baked dishes, and pan-fried recipes where you want the fish to stay intact.

  • ✅ Firmer texture holds up to flipping and stirring
  • ✅ Mild flavor won't overpower sauces or marinades

Cod costs more per pound in most markets, but it's reliable when you need structure. If you're switching from tilapia regularly, these common Cod swaps ranked cover what to reach for when cod's out too.

2. Basa Fillets 🐟

Basa stays ultra-mild with a slightly sweet edge and softer flake than tilapia. It's one of the closest texture matches you'll find.

Swap 1:1 in any recipe calling for tilapia. Basa works best in light pan-frying and baking where gentle handling keeps it intact.

  • ✅ Very mild flavor similar to tilapia
  • ⚠️ More delicate-won't hold up to aggressive stirring

Skip basa in recipes that need firm fish-it breaks apart faster under heat.

3. Halibut Steaks 🐟

Halibut brings clean, mild flavor with a denser, meatier texture than tilapia. The flesh holds its shape through grilling and high-heat baking.

Use 1:1 by weight in any cooked dish. Halibut excels in grilled preparations and recipes where you want the fish to stay firm.

  • ✅ Stays intact through flipping and turning
  • ✅ Mild taste works with most seasonings
  • ⚠️ Less flaky-expect a firmer bite
Quick Tip
Halibut costs more but won't fall apart in stir-fries or high-heat cooking.

If halibut runs out, try tested Halibut replacements that match the firm texture in different price ranges.

4. Catfish Fillets 🐟

Catfish provides a flaky texture similar to tilapia but carries a slightly earthier, richer flavor. It holds up well to pan-frying and grilling.

Swap 1:1 in any tilapia recipe. Catfish works great in Southern-style fried fish, blackened dishes, and grilled preparations where bold seasoning balances the stronger taste.

  • ✅ Flaky texture like tilapia
  • ✅ Holds shape when cooked
  • ⚠️ More pronounced flavor
  • ⚠️ Skip when you need very mild fish

The earthier taste stands out in delicate sauces or recipes with minimal seasoning. For more options with similar structure, check easy Catfish swaps that work in different cooking methods.

5. Pollock Fillets 🐟

Pollock offers mild, slightly sweet flavor with a soft, flaky texture. It's one of the most affordable white fish options.

Use 1:1 in place of tilapia for baking and light frying. Pollock works in fish tacos, baked casseroles, and breaded preparations where the fish gets support from breading or sauce.

  • ✅ Very mild and sweet
  • ✅ Budget-friendly
  • ⚠️ Softer texture
  • ⚠️ Can release moisture during cooking

Pat pollock dry before cooking to reduce excess water. It breaks apart faster than tilapia, so handle gently when flipping or stirring.

When pollock's not available, these common Pollock swaps ranked by price and texture can fill in.

6. Firm Tofu 🌱

Firm tofu mimics tilapia's texture in vegan cooking without bringing any fish flavor. It holds its shape through pan-frying, baking, and stir-frying.

Use 1:1 by weight in place of tilapia. Press the tofu first to remove excess moisture, then marinate it to absorb surrounding flavors.

  • ✅ Holds shape like fish
  • ✅ Absorbs marinades well
  • ⚠️ No fish flavor-season aggressively

Tofu works great in vegan fish tacos, stir-fries, and baked dishes where you'd normally use white fish. If you're out of firm tofu, try Tofu substitutes ranked by texture and protein content.

7. Jackfruit (Young, Unripe) 🌱

Young jackfruit brings a fibrous, flaky texture that mimics shredded fish in vegan dishes. The neutral flavor absorbs seasonings like fish would.

Swap 1:1 by volume in recipes where tilapia gets shredded or flaked. Jackfruit works great in vegan fish tacos, fish cakes, and dishes where the fish breaks down during cooking.

  • ✅ Flaky, fibrous texture
  • ⚠️ No fish flavor-needs bold seasoning

Skip jackfruit in dishes needing whole fish fillets-it won't hold together like firm tofu does. For more plant-based options with similar texture, check instead of Jackfruit try these ranked by versatility.

Match Your Dish to the Right Tilapia Swap

  • For tacos and fried fish: Cod or basa work best with mild flavor
  • For grilling and high heat: Halibut holds shape better than softer options
  • For vegan dishes: Firm tofu in whole fillets, jackfruit for shredded preparations
  • Budget-friendly pick: Pollock costs less but needs gentle handling

Frequently Asked Questions

Can I use frozen fish instead of fresh tilapia?

Yes-frozen cod, basa, or pollock work just as well as fresh. Thaw the fish completely in the fridge overnight, then pat it dry before cooking. Frozen fish can release more moisture during cooking, so drain any liquid that pools in the pan.

What's the best substitute for tilapia in fish tacos?

Cod and basa are the top picks for fish tacos-both stay mild and flake easily after cooking. Basa runs slightly softer, so it won't hold up to aggressive flipping. Cod gives you more structure if you're grilling the fish instead of frying it.

Can I substitute salmon for tilapia?

Salmon brings a much stronger flavor and higher fat content than tilapia, so it won't work in recipes that need mild white fish. Use salmon only when you want that pronounced fish taste and richer texture-it'll change the dish completely.

How do I keep white fish from falling apart during cooking?

Pat the fish completely dry before seasoning or cooking-excess moisture makes it steam instead of sear. Use a hot pan with enough oil to prevent sticking, and flip the fish only once. Softer options like basa and pollock need gentler handling than firmer fish like cod or halibut.

What vegan substitute tastes most like fish?

Neither tofu nor jackfruit tastes like fish on its own-they both need aggressive seasoning with kelp, nori, or Old Bay to mimic seafood flavor. Firm tofu holds together better for whole fillets, while jackfruit works best in shredded or flaked fish dishes like tacos and cakes.

Substitutes for Tilapia in Light White Fish Recipes

7 Best Substitutes for Tilapia

No ratings yet
Tilapia's mild flavor and flaky texture make it a versatile ingredient in many dishes, especially fish tacos. These 7 substitutes offer similar mildness or texture, including both seafood and vegan options, to match various recipes and dietary needs.
Print Recipe Pin Recipe
Prep Time 7 minutes mins
Cook Time 8 minutes mins
Total Time 15 minutes mins
Servings: 4 servings
Course: Kitchen Tips, Substitutes
Cuisine: Various
Ingredients Method Notes

Ingredients
  

  • 1 cup Cod Fillets Use 1:1 by weight for most cooked dishes; firmer texture and mild flavor
  • 1 cup Basa Fillets Use 1:1 by weight; softer flake and very mild, best for gentle cooking
  • 1 cup Halibut Steaks Use 1:1 by weight; denser texture, holds up well to grilling and baking
  • 1 cup Catfish Fillets Use 1:1 by weight; flaky texture but earthier flavor, good for bold seasonings
  • 1 cup Pollock Fillets Use 1:1 by weight; mild sweet flavor, softer texture, drain excess moisture before cooking
  • 1 cup Firm Tofu Use 1:1 by weight; press to remove moisture and marinate to add flavor
  • 1 cup Jackfruit Use 1:1 by volume; fibrous, flaky texture ideal for shredded fish dishes

Method
 

  1. Choose the substitute matching your dish and dietary preference.
  2. Prep the substitute by draining, pressing, or draining excess moisture as needed.
  3. Use a 1:1 substitution ratio by weight or volume depending on the ingredient.
  4. Adjust seasonings and marinade to compensate for flavor differences.
  5. Cook carefully to maintain texture; handle softer substitutes gently.

Notes

  • Pat fish fillets dry before cooking to prevent steaming and ensure proper sear.
  • Press firm tofu to remove moisture and marinate for better flavor absorption.
  • Use bold seasoning with vegan substitutes like jackfruit or tofu to mimic fishy flavor.

Tried this recipe?

Let us know how it was!

Serving Chicken Fried Rice? 15 Easy Sides That Go Great

February 1, 2026

Chicken fried rice already packs protein, starch, and mixed vegetables into one pan. The texture runs soft with occasional crispy bits from the edges.

Serving Chicken Fried Rice? 15 Easy Sides That Go Great

What the plate needs is contrast-something crisp, cool, or bright to cut through the savory richness. Fresh vegetables add crunch, light soups provide warmth without heaviness, and tangy sauces wake up the palate between bites.

QUICK SUMMARY

Chicken fried rice is savory, soft, and complete on its own, so sides should add what's missing. Cucumber salad brings cool crunch, roasted green beans add crisp edges, and egg drop soup offers light warmth. Starches feel redundant-stick with vegetables, bright salads, and simple sauces.

🥗Add crunch: Cucumber salad, slaw, edamame
🌿Go fresh: Bok choy, green beans, broccoli
⏱️Quick pick: Steamed edamame with sea salt (10 minutes)

What to Serve With Chicken Fried Rice: 15 Sides That Work

We focus on sides that bring texture and brightness without duplicating what's already in the rice. Vegetables, salads, and simple sauces round out the meal.

# Side Dish Best For Prep
1 Garlic Butter Roasted Green Beans 🌙 Weeknight ✅ Easy
2 Ginger-Sesame Sautéed Bok Choy 🌙 Weeknight ✅ Easy
3 Tangy Cucumber Salad with Rice Vinegar ✨ Any Time ✅ Easy
4 Roasted Garlic Mashed Potatoes 🎉 Hosting ⚡ Medium
5 Crispy Sesame Naan Bread ✨ Any Time ✅ Easy
6 Classic Egg Drop Soup 🌙 Weeknight ✅ Easy
7 Spicy Sriracha Mayo Sauce ✨ Any Time ✅ Easy
8 Pickled Ginger Relish ✨ Any Time ✅ Easy
9 Honey Soy Glazed Carrots 🎉 Hosting ⚡ Medium
10 Simple Steamed Edamame with Sea Salt 🌙 Weeknight ✅ Easy
11 Bright Mango and Jicama Slaw 🎉 Hosting ✅ Easy
12 Crispy Sesame Garlic Noodles 🌙 Weeknight ⚡ Medium
13 Zesty Lemon Cilantro Quinoa ✨ Any Time ⚡ Medium
14 Asian-Spiced Roasted Broccoli 🌙 Weeknight ⚡ Medium
15 Sweet Chili Dipping Sauce ✨ Any Time ✅ Easy

1. Garlic Butter Roasted Green Beans

Crisp edges and buttery garlic flavor add contrast to the soft rice. The beans hold their snap when roasted at high heat.

Toss trimmed beans with minced garlic and melted butter before spreading on a sheet pan. If you need this roasted green beans recipe for weeknight meals, it comes together in 15 minutes.

Quick Tip
Roast at 425°F for 12-15 minutes to get charred edges without turning mushy.

2. Ginger-Sesame Sautéed Bok Choy

Tender greens with a slight bitter edge balance the savory rice. The ginger and sesame oil echo the Asian flavors without overpowering.

  • Cook over high heat - Bok choy wilts fast and turns soggy if the pan is crowded.
  • Separate stems from leaves - Add stems first, then leaves 30 seconds later.
  • Use toasted sesame oil - Regular sesame oil lacks the nutty depth.

3. Tangy Cucumber Salad with Rice Vinegar

Cool, crisp slices cut through richness with bright acidity. The vinegar dressing feels lighter than creamy options.

A few notes:

  • Slice cucumbers thin - Use a mandoline for even pieces that soak up dressing.
  • Salt and drain first - Sprinkle salt on sliced cucumbers, let sit 10 minutes, then pat dry to avoid watery salad.

Rice vinegar adds mild tang without the sharpness of white vinegar. A pinch of sugar balances the acidity.

If You Want Try This
Extra crunch Add thinly sliced red onion or radish
Herbaceous notes Toss with fresh cilantro or mint
Spicy kick Stir in chili flakes or sliced jalapeño

4. Roasted Garlic Mashed Potatoes

Creamy, garlicky comfort adds a Western twist to the meal. The potatoes soak up any extra soy sauce from the rice.

Roast whole garlic cloves until soft and sweet, then mash into hot potatoes with butter and cream. When you want this creamy mashed potatoes recipe for family dinners, it delivers rich flavor without overpowering the main dish.

Our Pick
Yukon Gold potatoes offer the best balance of creaminess and buttery flavor.

5. Crispy Sesame Naan Bread

Chewy texture and subtle nuttiness provide a vehicle for scooping rice. Warming the naan in a skillet adds slight char.

Brush naan with melted butter and sprinkle with sesame seeds before heating. For a buttery naan bread side dish that works with Asian-inspired meals, skip the oven and use a dry skillet over medium-high heat.

Store-Bought Naan

Works for: Quick weeknight meals, minimal effort

Skip if: You have time and want fresh-baked texture

Homemade Naan

Works for: Weekend cooking, impressive presentation

Skip if: You need dinner on the table in 20 minutes

6. Classic Egg Drop Soup

Light broth with silky egg ribbons adds warmth without heaviness. The subtle ginger and scallion flavors go with the fried rice.

  • Drizzle eggs slowly - Pour beaten eggs in a thin stream while stirring the broth to create ribbons instead of clumps.
  • Use cornstarch slurry - Thicken the broth slightly before adding eggs so they float instead of sinking.
  • Simmer gently - Boiling breaks the egg ribbons into tiny bits.
  • Finish with white pepper - Black pepper looks speckled and harsh.

If you need this hearty drop soup recipe for busy nights, it takes 15 minutes from start to finish. The key is maintaining a gentle simmer so the eggs set properly.

Method Time Best For
Stovetop 15 minutes Quick weeknight dinners
Slow cooker 2 hours Hands-off cooking
Instant Pot 10 minutes Pressure-cooked depth

7. Spicy Sriracha Mayo Sauce

Creamy heat wakes up mild flavors without overwhelming the palate. The sauce works as a dip or drizzle.

Shortcut
Mix 3 parts mayo to 1 part sriracha, then adjust to taste.

Mix mayonnaise with sriracha in small increments until you reach your preferred heat level. Adding creamy mayo sauce on the side gives everyone control over spice intensity.

8. Pickled Ginger Relish

Bright, zingy tang cuts through savory richness with every bite. The pink color adds visual contrast to the plate.

Keep in mind:

  • Use young ginger - Mature ginger turns too fibrous and pungent when pickled.
  • Slice paper-thin - A mandoline or vegetable peeler works better than a knife.

Store-bought pickled ginger works in a pinch. For homemade, slice fresh ginger thin, blanch briefly, then marinate in rice vinegar with sugar and salt for at least 2 hours.

Watch Out
Do not skip the blanching step-it removes harsh bite and softens the texture.

9. Honey Soy Glazed Carrots

Sweet and savory glaze mirrors the flavors in the fried rice without duplicating them. Roasting concentrates the natural sweetness.

A few notes:

  • Cut carrots evenly - Uniform pieces cook at the same rate.
  • Toss halfway through - Turning the carrots ensures even caramelization.
  • Add glaze near the end - Honey burns easily, so coat carrots in the last 5 minutes of roasting.
  • Use fresh ginger - Powdered ginger lacks the bright punch.

When you want this bright side dish recipe for hosting, the glossy glaze looks impressive on the plate. The carrots hold their shape and develop golden edges.

If You Want Try This
Deeper color Roast at 425°F instead of 400°F
More garlic flavor Add minced garlic to the glaze
Spicy kick Stir in chili flakes or sriracha

10. Simple Steamed Edamame with Sea Salt

Snappy pods with a satisfying pop add protein and texture. The mild flavor does not compete with the rice.

Steam edamame until just tender, then toss with coarse sea salt. If you need a fresh sea salt side dish that takes 10 minutes, this delivers.

  • Use frozen edamame - Fresh is hard to find and no better than frozen.
  • Do not overcook - Mushy edamame loses its appeal.
Golden Rule
Steam for 5 minutes max-edamame should feel firm with slight give.

11. Bright Mango and Jicama Slaw

Sweet crunch with citrus brightness provides a tropical contrast. The jicama stays crisp even after sitting in dressing.

  • Peel jicama completely - The skin is tough and fibrous.
  • Julienne thin - Matchstick pieces mix better with mango.
  • Dress just before serving - The lime juice can soften the jicama if it sits too long.

Try our favorite jicama slaw side when you want something unexpected that feels light and refreshing. Cilantro and lime juice tie the flavors together.

Mango

Works for: Sweet contrast, tropical flavor

Skip if: Mangoes are out of season or too expensive

Pineapple

Works for: Tangy sweetness, year-round availability

Skip if: You want milder fruit flavor

12. Crispy Sesame Garlic Noodles

Chewy noodles with garlicky sesame coating add another layer of comfort. The texture contrasts with the rice.

  • Cook noodles al dente - They continue softening in the warm sauce.
  • Toast sesame seeds - Raw seeds taste flat and lack crunch.
  • Use toasted sesame oil - Regular sesame oil does not deliver the nutty depth.
  • Toss while warm - Cold noodles clump and resist coating.

When you need a fluffy side to try for casual gatherings, these noodles work at room temperature or warm.

Quick Tip
Reserve pasta water before draining-it loosens the sauce if noodles get sticky.

13. Zesty Lemon Cilantro Quinoa

Light grain with bright citrus notes feels healthier than more rice. The cilantro adds herbaceous freshness.

A few notes:

  • Rinse quinoa first - Skipping this step leaves a bitter coating.
  • Cook in broth - Water makes bland quinoa.

Cook quinoa in vegetable broth, then toss with lemon juice, zest, and chopped cilantro while still warm. For this easy cilantro quinoa recipe that works year-round, the lemon zest matters more than the juice.

Method Time Best For
Stovetop 20 minutes Traditional texture, easy monitoring
Rice cooker 25 minutes Hands-off cooking
Instant Pot 15 minutes Faster results, fluffy grains

14. Asian-Spiced Roasted Broccoli

Charred edges with smoky depth add textural contrast. The chili flakes bring gentle heat without overwhelming.

Toss broccoli florets with oil, chili flakes, and a pinch of garlic powder before roasting at 425°F. Adding something tender on the side that takes 20 minutes rounds out the meal with vegetables.

Our Pick
Cut florets into uniform pieces so everything roasts evenly-no burnt tips or raw stems.

15. Sweet Chili Dipping Sauce

Sweet and spicy flavor boost works as a drizzle or dip. The sauce adds complexity without requiring extra cooking.

Mix store-bought sweet chili sauce with a squeeze of lime juice for brightness. When you need this zesty side dish recipe that stores well, it lasts a week in the fridge.

  • Start with less sauce - You can always add more.
  • Thin with water - Thick sauce overwhelms delicate vegetables.
  • Add fresh herbs - Cilantro or Thai basil brighten the flavor.
Shortcut
Buy jarred sweet chili sauce and doctor it with lime juice and fresh garlic.

We cover a few common questions about rounding out chicken fried rice meals with the right sides.

Frequently Asked Questions

What vegetables go with chicken fried rice?

Roasted green beans, sautéed bok choy, steamed edamame, and roasted broccoli all add crunch and freshness without duplicating the mixed vegetables already in the rice.

What are the best sauces for fried rice?

Spicy sriracha mayo, sweet chili sauce, and pickled ginger relish work well-they add heat, sweetness, or tang without overpowering the savory rice.

What are easy side dishes for fried rice?

Cucumber salad, steamed edamame, and egg drop soup all take 15 minutes or less and add contrast without complicated prep.

Should I serve bread with chicken fried rice?

Naan or flatbread works if you want something to scoop with, however the rice already provides starch so bread feels redundant unless guests specifically request it.

Can I make sides ahead for fried rice meals?

Cucumber salad, pickled ginger, and slaw components can be prepped hours ahead-just dress salads right before serving to keep them crisp.

Serving Chicken Fried Rice? 15 Easy Sides That Go Great

Serving Chicken Fried Rice? 15 Easy Sides That Go Great

No ratings yet
We provide a list of 15 sides that complement chicken fried rice by adding fresh vegetables, bright salads, and simple sauces. These options offer a variety of textures and temperatures with easy to medium prep, ensuring a balanced and thoughtful meal.
Print Recipe Pin Recipe
Prep Time 15 minutes mins
Cook Time 10 minutes mins
Total Time 25 minutes mins
Servings: 4 servings
Course: Dinner, Side Dish
Cuisine: Asian
Ingredients Equipment Method Notes

Ingredients
  

  • Garlic Butter Roasted Green Beans crunchy
  • Ginger-Sesame Sautéed Bok Choy tender
  • Tangy Cucumber Salad with Rice Vinegar crisp
  • Roasted Garlic Mashed Potatoes creamy
  • Crispy Sesame Naan Bread chewy
  • Classic Egg Drop Soup silky
  • Spicy Sriracha Mayo Sauce creamy
  • Pickled Ginger Relish zingy
  • Honey Soy Glazed Carrots glazed
  • Simple Steamed Edamame with Sea Salt snappy
  • Bright Mango and Jicama Slaw crisp
  • Crispy Sesame Garlic Noodles chewy
  • Zesty Lemon Cilantro Quinoa bright
  • Asian-Spiced Roasted Broccoli smoky
  • Sweet Chili Dipping Sauce spicy

Equipment

  • Sheet pan For roasting green beans, carrots, broccoli
  • Mixing bowl For salads and dressings
  • Cutting board For chopping vegetables and herbs
  • Skillet For sautéing bok choy and warming naan

Method
 

  1. Assess what the main dish already provides-if it has starch, focus on vegetables and fresh sides.
  2. Choose 2-3 sides that fill different gaps: one vegetable, one starch or bread, one sauce or dip.
  3. Start the longest-cooking side first. Prep quick items like salads while the oven works.
  4. Balance temperatures-pair hot roasted vegetables with a cold slaw or chilled dip.
  5. Plate the main dish with sides arranged around it. Drizzle sauce or add garnish last.

Notes

Add a crisp cucumber salad or bright slaw and keep it chilled until serving. This prevents the meal from feeling too heavy or monotonous alongside the soft chicken fried rice.

Tried this recipe?

Let us know how it was!

You Might Also Like

  • Serving Beef Stroganoff? 15 Best Side Dishes to Try
  • Making Tortellini Tonight? 15 Best Side Ideas
  • What to Serve With Osso Buco: 15 Best Side Dishes

Best Sides for Mozzarella Sticks: 15 Quick Picks

February 1, 2026

Crispy breaded cheese with molten centers needs something fresh or tangy to balance the plate. The richness wants a counterpoint.

Best Sides for Mozzarella Sticks: 15 Quick Picks

We look for sides that bring vegetables, acid, or cool creamy elements. Bright marinara cuts through fat, zesty dips add tang, and protein-packed appetizers round out the spread.

Hot fried sticks work best when paired with cool dips, crunchy vegetables, and other finger foods that keep the shareable vibe going. Some sides dunk alongside the cheese, others add protein to turn appetizers into a meal, and a few bring palate-cleansing freshness between bites.

QUICK SUMMARY

Mozzarella sticks are rich, crispy, and cheesy-they need cool dips and fresh sides to balance the plate. Marinara sauce cuts through richness, ranch dip adds creamy tang, and cucumber sticks bring crisp refreshment. Starches soak up flavor. Vegetables lighten the spread. Protein appetizers complete the meal.

🥫For dipping: Marinara, ranch, honey mustard
🥗Add freshness: Slaw, pickles, veggie sticks
⏱️Quick pick: Ranch dip ready in 5 minutes

What to Serve With Mozzarella Sticks: 15 Quick Picks

We organized these sides by what they bring to the table-dipping sauces for dunking, appetizers for variety, and fresh sides that cut the richness.

# Side Dish Best For Prep
1 Tangy Marinara Dipping Sauce ✨ Any Occasion ✅ Easy
2 Creamy Garlic Ranch Dip ✨ Any Occasion ✅ Easy
3 Zesty Buffalo Chicken Wings ✨ Any Occasion ⚡ Medium
4 Crispy Sweet Potato Fries ✨ Any Occasion ⚡ Medium
5 Bright Apple Cider Slaw ✨ Any Occasion ✅ Easy
6 Garlic Parmesan Soft Pretzel Bites 🎉 Hosting ⚡ Medium
7 Herb-Roasted Baby Carrots ✨ Any Occasion ⚡ Medium
8 Classic Caesar Salad Cups ✨ Any Occasion ✅ Easy
9 Spicy Jalapeño Poppers ✨ Any Occasion ⚡ Medium
10 Tangy Pickled Cucumbers ✨ Any Occasion ✅ Easy
11 Smoky BBQ Pulled Pork Sliders 🎉 Hosting 🔪 Involved
12 Crunchy Tortilla Chips with Guacamole ✨ Any Occasion ✅ Easy
13 Sweet and Tangy Honey Mustard Sauce ✨ Any Occasion ✅ Easy
14 Crisp Celery and Carrot Sticks ✨ Any Occasion ✅ Easy
15 Classic Tomato Basil Soup Cup ✨ Any Occasion ⚡ Medium

1. Tangy Marinara Dipping Sauce

Bright tomato acidity cuts through cheese richness with every dunk. The sauce feels lighter than mayo-based options and adds Italian-American flavor that feels natural next to breaded mozzarella.

Warm the sauce slightly before serving-cold marinara dulls the flavor. Try zesty dipping sauce we love when you want something with bold tomato notes.

Quick Tip
Stir in fresh basil and a pinch of red pepper flakes for extra brightness.

2. Creamy Garlic Ranch Dip

Cool, creamy tang provides a smooth counterpoint to crispy breading. Fresh herbs brighten the dip beyond standard bottled versions.

A few notes:

  • Use buttermilk base - The tanginess pairs better with fried foods than sour cream alone.
  • Add minced garlic - Fresh garlic punches up flavor without overpowering cheese.

Check out this creamy ranch dip recipe when you want something that comes together in under 10 minutes.

Our Pick
Mix equal parts mayo and buttermilk for the ideal texture-thick enough to cling but not gloppy.

3. Zesty Buffalo Chicken Wings

Spicy protein balances cheesy sticks without competing for attention. The heat level adds variety to the appetizer spread and keeps guests reaching for different flavors.

  • Bake wings until crispy - Soggy skin disappoints next to crunchy mozzarella sticks.
  • Toss in sauce last minute - Coating too early makes breading limp.
  • Serve celery sticks - Cool crunch refreshes the palate between bites.
  • Offer blue cheese dip - Creamy tang cools the buffalo heat.

If you love homemade chicken wings we love, this delivers bold flavor without turning on the deep fryer.

If You Want Try This
Mild heat Mix buffalo sauce with melted butter
Extra tang Add splash of apple cider vinegar
Sticky glaze Toss wings twice in sauce

4. Crispy Sweet Potato Fries

Golden edges and tender centers add sweet crunch with a healthier profile than regular fries. The natural sweetness complements salty breaded cheese without overwhelming the plate.

Soak sliced sweet potatoes in cold water for 30 minutes before baking-this removes excess starch and helps achieve crispy edges. When you want this easy potato fries recipe to turn out right, dry the fries completely after soaking.

5. Bright Apple Cider Slaw

Crisp cabbage with tangy dressing delivers palate-cleansing freshness between rich bites. The acidity from apple cider vinegar cuts through fried coating better than creamy slaws.

Chill the slaw for at least one hour before serving to let flavors meld and cabbage soften slightly. If you want an easy cider slaw to try that stays crunchy, drain excess liquid before plating.

Shortcut
Use pre-shredded coleslaw mix and toss with bottled apple cider vinaigrette to save 10 minutes.

6. Garlic Parmesan Soft Pretzel Bites

Soft, salty dough provides textural contrast to crispy cheese sticks without adding more fried food to the spread. The garlic butter coating adds savory richness that feels indulgent but not heavy.

Keep in mind:

  • Brush with butter immediately - The coating sticks better to hot pretzels.
  • Serve with mustard - Sharp tang balances buttery garlic flavor.

Try our favorite pretzel bites side when you want bread that feels like part of the appetizer lineup rather than an afterthought.

Baked Pretzel Bites

Works for: Large batches, make-ahead hosting

Skip if: You need them ready in under 20 minutes

Store-Bought Pretzels

Works for: Quick game day spreads, minimal effort

Skip if: You want fresh-baked flavor

7. Herb-Roasted Baby Carrots

Tender sweetness and bright color add visual contrast to golden fried sticks. Fresh thyme and a honey drizzle bring out natural carrot sugars without turning cloying.

  • Roast at high heat - 425°F caramelizes edges without drying centers.
  • Use fresh thyme - Dried herbs taste dusty next to sweet carrots.
  • Drizzle honey last - Adding it before roasting burns the glaze.

When you need our favorite baby carrots side to feel like more than an obligatory vegetable, roasting transforms texture and flavor.

Golden Rule
Toss carrots in olive oil and salt before roasting-dry vegetables won't caramelize properly.

8. Classic Caesar Salad Cups

Crisp romaine with tangy dressing offers refreshing greens that cut through cheese richness. Serving in small cups keeps the presentation shareable and mess-free for casual gatherings.

Method Time Best For
Individual cups 15 min Party platters, easy serving
Large bowl 10 min Family-style meals, fewer dishes
Wedge style 5 min Quick prep, dramatic presentation

Try a fresh side to try when you want greens that feel intentional rather than obligatory. If you are exploring easy meatless meal ideas, salads add substance without heaviness.

Quick Tip
Toss romaine in dressing just before serving to keep leaves crisp-wilted greens ruin the texture.

9. Spicy Jalapeño Poppers

Smoky heat and creamy cheese filling create bold flavor contrast that keeps the appetizer spread interesting. The dual cheese profile pairs naturally with mozzarella sticks without feeling repetitive.

A few notes:

  • Remove seeds for milder heat - Membranes hold most of the capsaicin.
  • Wrap in bacon - The smokiness deepens flavor and adds crispy texture.

If you want something simple on the side, these deliver party-ready appeal with minimal fuss.

10. Tangy Pickled Cucumbers

Bright acidity and cool crunch cut through fried richness like nothing else. The vinegar brine refreshes the palate and keeps guests from feeling weighed down.

  • Use quick-pickle method - No need to wait days for flavor.
  • Slice thin - Fat cucumber rounds taste watery and bland.
  • Add dill and garlic - Herbs brighten the brine beyond plain vinegar.

When you need something easy on the side that comes together in 20 minutes, pickles deliver maximum impact with minimal effort.

If You Want Try This
Sweeter pickles Add sugar to brine
Spicy kick Toss in red pepper flakes
Extra crunch Refrigerate brine before pouring

11. Smoky BBQ Pulled Pork Sliders

Hearty protein balances fried cheese sticks and turns appetizers into a full meal. The smoky sauce adds depth that complements salty breading without competing.

  • Top with coleslaw - Tangy crunch refreshes between rich bites.
  • Use soft buns - Crispy rolls overpower tender pork.
  • Keep sauce on the side - Letting guests control sauce prevents soggy sliders.

Try an easy pork sliders to try when you want to feed a crowd without firing up the grill.

Watch Out
Do not skip the resting time after slow cooking-dry pork shreds poorly and tastes stringy.

12. Crunchy Tortilla Chips with Guacamole

Fresh, creamy avocado texture provides cool contrast to hot cheese sticks. The lime zest and cilantro brighten the spread without adding more cooked food.

Serve guacamole chilled with a squeeze of fresh lime zest on top-the citrus keeps avocado from browning and adds brightness. When you need a quick chips guacamole side dish that feels fresh, this delivers restaurant-quality flavor at home.

Homemade Guacamole

Works for: Fresh flavor, customizable spice level

Skip if: Avocados are out of season or overpriced

Store-Bought Guac

Works for: Last-minute gatherings, minimal prep

Skip if: You want bold lime and cilantro flavor

13. Sweet and Tangy Honey Mustard Sauce

Balanced sweetness and sharp mustard bite provide flavor contrast that works with fried cheese. The sauce clings to breading better than thin marinara.

Balance honey with Dijon mustard in equal parts-too much honey turns cloying, too much mustard overwhelms cheese. If you want this easy mustard sauce recipe to turn out right, whisk ingredients together cold and let rest for 10 minutes before serving.

Our Pick
Add a splash of apple cider vinegar for extra tang that cuts through richness.

14. Crisp Celery and Carrot Sticks

Light crunch and fresh snap refresh the palate between rich bites. The neutral flavor does not compete with cheese or dipping sauces.

Keep in mind:

  • Serve chilled - Warm vegetables taste limp and unappealing.
  • Cut uniform sticks - Even sizes make dipping easier.

When you want something fresh on the side that requires zero cooking, raw vegetables deliver instant contrast. For those who love quick chicken dinner ideas, veggie sticks balance heavier proteins without extra work.

Quick Tip
Soak cut vegetables in ice water for 20 minutes to maximize crispness.

15. Classic Tomato Basil Soup Cup

Warm, comforting soup provides cozy balance to crispy fried sticks. Serving in small cups lets guests dip cheese directly into the soup for a deconstructed grilled cheese experience.

  • Serve hot - Lukewarm soup tastes flat and unappealing.
  • Add fresh basil - Dried herbs lack the brightness tomato soup needs.
  • Keep portions small - Large bowls overwhelm the appetizer spread.

If you need a quick soup cup side dish that feels nostalgic, this delivers childhood comfort with grown-up flavor. When planning satisfying plant-based dishes, soup adds warmth without meat.

Method Time Best For
Homemade soup 30 min Fresh tomato flavor, control over salt
Canned soup 10 min Quick weeknight spreads, minimal effort
Slow cooker 4 hours Hands-off prep, hosting large groups

These sides round out a mozzarella stick spread with dips, protein, and fresh contrast that keeps the meal interesting from first bite to last.

Frequently Asked Questions

What are the best dips for mozzarella sticks?

Marinara sauce cuts richness with bright acidity, ranch dip adds creamy tang, and honey mustard provides sweet spice contrast.

How do I make crispy mozzarella sticks at home?

Freeze breaded sticks for 30 minutes before frying, use vegetable oil heated to 350°F, and fry in small batches to maintain temperature.

What easy appetizers pair well with mozzarella sticks?

Buffalo wings add spicy protein, jalapeño poppers bring smoky heat, and pretzel bites offer soft salty contrast to crispy cheese sticks.

Can I bake mozzarella sticks instead of frying them?

Bake at 425°F for 10 minutes on a greased sheet pan, flipping halfway through, however the coating turns less crispy than deep frying.

What fresh sides balance fried mozzarella sticks?

Apple cider slaw adds tangy crunch, pickled cucumbers provide bright acidity, and celery sticks offer cool crisp refreshment between rich bites.

Best Sides for Mozzarella Sticks: 15 Quick Picks

Best Sides for Mozzarella Sticks: 15 Quick Picks

No ratings yet
We provide a list of 15 sides that balance mozzarella sticks by adding fresh vegetables, tangy sauces, and protein-packed appetizers. These options offer variety in texture and temperature and include quick and involved preparations to suit any occasion.
Print Recipe Pin Recipe
Prep Time 15 minutes mins
Cook Time 10 minutes mins
Total Time 25 minutes mins
Servings: 4 servings
Course: Dinner, Side Dish
Cuisine: American
Ingredients Equipment Method Notes

Ingredients
  

  • Tangy Marinara Dipping Sauce bright
  • Creamy Garlic Ranch Dip creamy
  • Zesty Buffalo Chicken Wings spicy
  • Crispy Sweet Potato Fries crunchy
  • Bright Apple Cider Slaw tangy
  • Garlic Parmesan Soft Pretzel Bites savory
  • Herb-Roasted Baby Carrots bright
  • Classic Caesar Salad Cups fresh
  • Spicy Jalapeño Poppers smoky
  • Tangy Pickled Cucumbers tangy
  • Smoky BBQ Pulled Pork Sliders smoky
  • Crunchy Tortilla Chips with Guacamole creamy
  • Sweet and Tangy Honey Mustard Sauce tangy
  • Crisp Celery and Carrot Sticks crunchy
  • Classic Tomato Basil Soup Cup warm

Equipment

  • Sheet pan for roasting vegetables
  • Mixing bowl for salads and dips
  • Cutting board
  • Serving platter for decorating sides

Method
 

  1. Assess what the main dish already provides-if it has starch, focus on vegetables and fresh sides.
  2. Choose 2-3 sides that fill different gaps: one vegetable, one starch or bread, one sauce or dip.
  3. Start the longest-cooking side first. Prep quick items like salads while the oven works.
  4. Balance temperatures-pair hot roasted vegetables with a cold slaw or chilled dip.
  5. Plate the main dish with sides arranged around it. Drizzle sauce or add garnish last.

Notes

Add fresh salad or tangy slaw and keep it chilled until serving. This prevents the plate from feeling too heavy when paired with rich fried mains.

Tried this recipe?

Let us know how it was!

7 Best Substitutes for Sea Bass in Pan-Seared Dishes

February 1, 2026

You're prepping pan-seared fillets for dinner and realize the sea bass at the market is $35 per pound. The recipe counts on that mild, sweet flavor and firm-yet-flaky texture that holds together without drying out.

7 Best Substitutes for Sea Bass in Pan-Seared Dishes

Sea bass brings clean seafood taste without fishiness. Several white fish replicate that profile at lower cost-or handle specific cooking methods even better.

QUICK SUMMARY

Cod and halibut replace sea bass 1:1 in most recipes-cod runs slightly softer, halibut firmer. Rockfish matches sea bass's texture most closely. For budget-friendly options, tilapia or mixing equal parts cod and tilapia works in pan-frying and baking.

🎯Closest match: Rockfish for firm flaky texture and clean taste
💰Budget pick: Tilapia costs less but softer texture needs careful cooking
⚠️Watch out: Halibut runs meatier-dial back cooking time by 20%

7 Substitutes for Sea Bass: Mild Flavor and Firm Texture 🐟

Each swap below matches different aspects-some nail the texture, others focus on clean flavor or budget availability.

Quick Substitute Reference
# Substitute Best For Ratio Key Note
1 Cod ✨ Both 1:1 Slightly softer texture
2 Halibut 🍳 Cooking 1:1 Firmer, meatier bite
3 Snapper ✨ Both 1:1 More pronounced flavor
4 Mahi-Mahi 🍳 Cooking 1:1 Great for grilling
5 Tilapia ✨ Both 1:1 Budget-friendly, softer
6 Rockfish ✨ Both 1:1 Closest texture match
7 DIY Blend ✨ Both Equal parts Balances firmness + mildness

1. Cod for Clean Flavor 🐟

Cod delivers mild seafood flavor and flaky texture close to sea bass. The fillets hold shape well during cooking without turning rubbery.

Use 1:1 by weight in any recipe calling for sea bass. Pan-searing and baking work best.

  • ✅ Nearly identical mild flavor
  • ✅ Widely available year-round
  • ⚠️ Slightly softer texture when fully cooked

The slightly softer bite means it won't stand up to aggressive flipping. Cod shines in gentle pan-searing, oven roasting, or poaching where you're not moving the fillets constantly.

If cod runs out too, swaps when Cod runs out can point you toward other firm white fish.

2. Halibut for Grilling 🔥

Halibut brings firmer, meatier texture than sea bass. It holds up to high-heat grilling and doesn't fall apart on the grill grates.

Use 1:1 by weight. Reduce cooking time by 20% since halibut's denser structure cooks faster.

  • 🍳 For grilling: Stays intact on grates better than sea bass
  • ⚠️ Less sweet: Flavor runs cleaner but less complex

The meaty bite works great for fish tacos or skewers. Skip it if you want delicate flaky texture in baked dishes-it'll feel too firm.

Halibut's density makes it ideal when you need fish that won't break mid-flip. Check out easy Halibut swaps that work if you're working with halibut instead.

3. Snapper for Baking 🥘

Snapper offers flaky texture and mild sweetness similar to sea bass. The fillets maintain moisture during baking without drying out.

Use 1:1 by weight in baked or grilled preparations. Snapper's slightly more pronounced fish flavor comes through in simple preparations with minimal seasoning.

It works well whole-roasted or as fillets in Mediterranean-style dishes with lemon and herbs. The texture stays delicate, so avoid aggressive handling.

If you're exploring snapper options, tested Red Snapper replacements cover similar ground.

4. Mahi-Mahi for Fish Tacos 🌮

Mahi-Mahi holds its shape on the grill and brings subtle sweetness. The firm texture makes it ideal for fish tacos or skewers where you need the fish to stay together.

Use 1:1 by weight. The firmer bite means it won't flake as lightly as sea bass.

  • 🍳 For grilling: Holds up to high direct heat
  • ⚠️ Stronger flavor: More pronounced than sea bass

Mahi-Mahi's density shines in recipes where you're handling the fish frequently-flipping, turning, or threading onto skewers. Skip it for delicate pan-seared preparations where you want soft flakes.

The slightly sweeter profile works in Latin and Caribbean dishes. For more options, tested Mahi-mahi replacements expand the possibilities.

5. Tilapia for Budget Cooking 💵

Tilapia costs significantly less than sea bass and offers mild flavor that won't overpower sauces. The texture runs softer, so it needs gentler handling.

Use 1:1 by weight in pan-frying and baking. Tilapia works best in recipes with sauce or coating-breaded fillets, fish in tomato sauce, or coconut curry.

The softer texture means it breaks apart more easily than sea bass, so avoid flipping more than once. It won't hold up to grilling as well as firmer options.

The very mild flavor makes it kid-friendly and works when you want the sauce or seasoning to dominate. If you're cooking with tilapia regularly, Tilapia swaps by recipe type gives you backup options.

Budget Pick
Tilapia delivers sea bass's mildness at one-third the price-just handle it gently.

6. Rockfish for Texture Match 🎯

Rockfish nails sea bass's firm-yet-flaky texture better than any other swap. The mild, slightly earthy flavor stays clean without fishiness.

Use 1:1 by weight in pan-seared fillets, stews, or baked preparations. Rockfish holds moisture well during cooking.

  • ✅ Closest texture match to sea bass
  • ✅ Holds shape in stews and braises
  • ✅ Clean flavor that takes seasoning well
  • ⚠️ Regional availability varies by coast

The firm texture means you can flip it confidently without worrying about breakage. Rockfish works in virtually any sea bass recipe-the slight earthiness adds depth without overpowering delicate seasonings.

Availability depends on region, but West Coast markets usually stock it year-round.

7. DIY White Fish Blend 🔬

Mixing equal parts cod and tilapia replicates sea bass's balance of firmness and mild sweetness. Cod brings structure, tilapia adds softness and subtle sweetness.

Use equal weights of each fish-if the recipe calls for 1 lb sea bass, use ½ lb cod and ½ lb tilapia. Cut both to similar thickness so they cook evenly.

The blend works in baked casseroles, fish pies, or pan-seared preparations where you're cooking multiple pieces together. The combined texture falls between cod's firmness and tilapia's softness-closer to sea bass than either fish alone.

Skip this for presentations where uniform appearance matters, since the two fish look different. For backup options, Tilapia swaps that match can help if you're short on either component.

Choosing Your Sea Bass Swap by Cooking Method

  • For pan-searing: Cod or rockfish-both flip easily without breaking
  • For grilling: Halibut or mahi-mahi hold up to high direct heat
  • For baking: Snapper or DIY blend work in casseroles and roasts
  • For budget meals: Tilapia cuts costs by 60-70% with gentle handling

Frequently Asked Questions

Can I substitute salmon for sea bass?

Salmon's stronger flavor and oily texture differ significantly from sea bass's mild, lean profile. It works if you're okay with a completely different taste-the cooking methods transfer, but the dish will taste like salmon, not a sea bass substitute.

What's the closest texture match to Chilean sea bass?

Rockfish and halibut come closest to Chilean sea bass's firm, buttery texture. Rockfish matches the flakiness better, while halibut nails the firm bite. Both lack the high fat content that makes Chilean sea bass so rich.

Why does my tilapia fall apart when sea bass doesn't?

Tilapia has softer muscle structure and less connective tissue than sea bass. Cook it at slightly lower heat and flip only once-two flips often cause breakage. Pat fillets completely dry before cooking to help them hold together.

Can I use frozen fish as a sea bass substitute?

Yes-frozen cod, halibut, and rockfish all work fine once properly thawed. Thaw in the fridge overnight, then pat completely dry before cooking. Frozen fish releases more moisture during cooking, so expect slightly longer pan-searing times.

Does cooking time change when substituting for sea bass?

Halibut and mahi-mahi cook 15-20% faster due to denser texture-reduce time slightly and check internal temp at 130°F. Tilapia cooks faster because it's thinner-watch it closely. Cod and rockfish match sea bass timing almost exactly at the same thickness.

Substitutes for Sea Bass in Pan-Seared Dishes

7 Best Substitutes for Sea Bass

No ratings yet
Discover seven great alternatives to sea bass, each matching different cooking methods, textures, or budgets. From firm and flaky rockfish to budget-friendly tilapia, these substitutes maintain the mild, sweet flavor crucial to sea bass recipes.
Print Recipe Pin Recipe
Prep Time 8 minutes mins
Cook Time 5 minutes mins
Total Time 13 minutes mins
Servings: 4 servings
Course: Kitchen Tips, Substitutes
Cuisine: Various
Ingredients Method Notes

Ingredients
  

  • 1 cup Cod Use 1:1 by weight as a direct substitute.
  • 1 cup Halibut Use 1:1 by weight but reduce cooking time by 20%.
  • 1 cup Snapper Use 1:1 by weight for baking or grilling.
  • 1 cup Mahi-Mahi Use 1:1 by weight; great for grilling tasks.
  • 1 cup Tilapia Use 1:1 by weight; handle gently due to softer texture.
  • 1 cup Rockfish Use 1:1 by weight; closest texture to sea bass.
  • DIY Blend Mix equal parts cod and tilapia by weight to balance firmness and mildness.

Method
 

  1. Select substitute based on desired texture and cooking method.
  2. If needed, drain or pat fish dry to improve cooking performance.
  3. Apply the recommended 1:1 weight ratio or prepare the DIY blend accordingly.
  4. Adjust cooking times especially for denser fish like halibut and mahi-mahi.
  5. Taste and check the texture after cooking; adjust seasoning as needed.

Notes

  • Rockfish offers the closest texture match for pan-searing.
  • Halibut and mahi-mahi cook faster-reduce cook time slightly.
  • Tilapia is budget-friendly but requires gentle handling to prevent breaking.

Tried this recipe?

Let us know how it was!

15 Best Sides to Serve With Spaghetti and Meatballs

February 1, 2026

Spaghetti and meatballs covers the protein, starch, and sauce in one hearty dish. What it needs is freshness, vegetables, and something to soak up every bit of that tomato sauce.

15 Best Sides to Serve With Spaghetti and Meatballs

The best sides add crunch, bright acidity, or garlicky bread to complete the plate. Crisp salads cut through richness, roasted vegetables bring caramelized edges, and warm focaccia mops up sauce between bites.

QUICK SUMMARY

Spaghetti and meatballs brings rich tomato sauce, tender protein, and pasta-but needs vegetables and bread. Caesar salad adds crisp freshness, garlic breadsticks soak up sauce, and roasted broccoli brings smoky contrast. Starches extend the meal, greens balance richness, and breads handle every drop of sauce.

🍞Soak it up: Garlic breadsticks, focaccia, crusty Italian bread
🥗Add freshness: Caesar salad, arugula, mixed greens
⏱️Quick pick: Sautéed garlic green beans (15 minutes)

What to Serve With Spaghetti and Meatballs: 15 Sides That Deliver

These sides bring vegetables, bread, and fresh contrast to balance the rich tomato sauce and tender meatballs.

# Side Dish Best For Prep
1 Garlic Parmesan Roasted Potatoes ✨ Any ✅ Easy
2 Classic Caesar Salad with Creamy Dressing ✨ Any ✅ Easy
3 Sautéed Garlic Green Beans with Lemon Zest 🌙 Weeknight ✅ Easy
4 Soft Italian Garlic Breadsticks ✨ Any ✅ Easy
5 Tangy Arugula and Cherry Tomato Salad ✨ Any ✅ Easy
6 Creamy Polenta with Parmesan Cheese ✨ Any ⚡ Medium
7 Oven-Roasted Broccoli with Lemon and Chili Flakes ✨ Any ✅ Easy
8 Mixed Olives with Herbs and Citrus Peel 🎉 Hosting ✅ Easy
9 Fresh Mozzarella and Basil Caprese Plate 🎉 Hosting ✅ Easy
10 Balsamic Glazed Roasted Carrots ✨ Any ⚡ Medium
11 Herbed Focaccia Bread with Sea Salt 🎉 Hosting 🔪 Involved
12 Roasted Garlic Mashed Potatoes ✨ Any ⚡ Medium
13 Zesty Italian Marinated Artichoke Hearts ✨ Any ✅ Easy
14 Simple Mixed Green Salad with Red Wine Vinaigrette 🌙 Weeknight ✅ Easy
15 Spicy Arrabbiata Sauce for Extra Heat ✨ Any ✅ Easy

1. Garlic Parmesan Roasted Potatoes

Golden edges, creamy centers, and garlicky Parmesan crust make these potatoes hard to resist. They add another layer of savory richness without competing with the meatballs.

  • Toss in oil first - Coat potatoes thoroughly before adding Parmesan to prevent clumping.
  • Use parchment paper - Prevents sticking and makes cleanup easier.
  • Flip halfway through - Brown edges evenly on both sides.
  • Season after roasting - Salt draws moisture out during cooking.

Try a tender side to try when you want something beyond basic roasted potatoes.

Quick Tip
Cut potatoes into similar sizes so they roast evenly in 30 minutes.

2. Classic Caesar Salad with Creamy Dressing

Crisp romaine, tangy dressing, and crunchy croutons bring fresh contrast to the rich tomato sauce. The anchovy notes in the dressing echo the savory meatballs.

Homemade croutons hold up better than store-bought and add real garlic flavor. Use thick-cut bread cubes tossed in olive oil and baked until golden.

If You Want Try This
Classic Caesar Romaine, Parmesan, anchovy dressing
Lighter version Greek yogurt-based dressing
Extra crunch Double the croutons, add toasted pine nuts

3. Sautéed Garlic Green Beans with Lemon Zest

Bright, snappy green beans bring citrusy contrast that cuts through the richness. The garlic ties into the Italian flavors without overwhelming the plate.

Keep in mind:

  • Blanch first - Drop beans in boiling water for 2 minutes, then shock in ice water.
  • High heat sauté - Cook fast to keep beans crisp and bright green.

Lemon zest adds fragrance without adding moisture. If you enjoy this roasted side dish recipe, the same technique works here.

Our Pick
This comes together in 15 minutes and works for weeknight dinners or casual gatherings.

4. Soft Italian Garlic Breadsticks

Warm, pillowy breadsticks brushed with garlic butter handle sauce duty better than sliced bread. They feel more substantial and soak up every drop.

What to know:

  • Brush while warm - Butter melts into the breadsticks instead of sitting on top.
  • Use fresh garlic - Garlic powder turns bitter when brushed on hot bread.
  • Serve immediately - Breadsticks lose softness as they cool.

Add something crusty on the side when you need bread that handles thick tomato sauce.

Soft Breadsticks

Works for: Soaking up sauce, casual dinners

Skip if: You prefer crunchy bread

Crusty Baguette

Works for: Texture contrast, hosting

Skip if: You need something to hold more sauce

5. Tangy Arugula and Cherry Tomato Salad

Peppery arugula and sweet cherry tomatoes bring bright acidity that refreshes the palate. The simple lemon vinaigrette keeps the focus on freshness.

Slice cherry tomatoes in half so the juices mix with the dressing. Add shaved Parmesan for a salty bite that echoes the cheese on the spaghetti.

A few notes:

  • Dress just before serving - Arugula wilts fast once dressed.
  • Use baby arugula - Tender leaves work better than mature, spicy greens.
  • Add red onion sparingly - Thin slices add bite without overpowering.
  • Toss gently - Arugula bruises easily and turns dark.

Consider our favorite tomato salad side when you want something equally fresh but sweeter.

Shortcut
Buy pre-washed arugula to skip washing and drying steps.

6. Creamy Polenta with Parmesan Cheese

Smooth, buttery polenta adds comforting texture that pairs well with meatballs. The Parmesan enriches the cornmeal without competing with the tomato sauce.

  • Stir constantly - Prevents lumps and scorching on the bottom.
  • Use medium heat - High heat causes spattering and uneven cooking.

Polenta thickens as it cools, so serve it warm. Add a quick parmesan cheese side dish when you want another cheesy option on the table.

Method Time Best For
Stovetop polenta 25 minutes Creamy texture, immediate serving
Instant polenta 5 minutes Weeknight speed
Baked polenta 40 minutes Hands-off cooking, firmer texture

7. Oven-Roasted Broccoli with Lemon and Chili Flakes

Charred edges, smoky flavor, and a hint of heat bring contrast the pasta cannot provide. The lemon brightens the whole plate.

Roast broccoli at high heat until the florets turn golden and crispy. The chili flakes add warmth without making the dish spicy.

Watch Out
Overcrowding the baking sheet steams the broccoli instead of roasting it.

8. Mixed Olives with Herbs and Citrus Peel

Briny, herby olives add salty tang that wakes up the palate between bites. The citrus peel brings aromatic oils that go with the tomato sauce.

Marinate olives overnight to let the herbs and citrus infuse. Use a mix of green and black olives for variety in flavor and texture.

  • Warm gently - Heat olives in olive oil with herbs before serving.
  • Add orange peel - Works better than lemon for a sweeter note.
  • Use fresh herbs - Dried herbs turn dusty in the marinade.
  • Drain before serving - Too much oil makes olives slippery.
Golden Rule
Let olives sit at room temperature for 30 minutes before serving to release flavors.

9. Fresh Mozzarella and Basil Caprese Plate

Creamy mozzarella, ripe tomatoes, and fragrant basil bring classic Italian flavors to the table. The balsamic glaze ties everything together with sweet acidity.

Keep in mind:

  • Use fresh mozzarella - Low-moisture mozzarella feels rubbery in this dish.
  • Slice tomatoes thick - Thin slices fall apart and release too much juice.
  • Tear basil by hand - Cutting bruises the leaves and turns them dark.

Serve this easy caprese plate recipe when you want something that feels special but comes together in minutes.

If You Want Try This
Traditional Caprese Thick tomato slices, whole basil leaves
Skewer version Cherry tomatoes, mozzarella balls, basil on sticks
Deconstructed Chopped salad with same ingredients

10. Balsamic Glazed Roasted Carrots

Sweet, caramelized carrots with tangy balsamic glaze add earthy richness. The glaze thickens as the carrots roast, coating each piece.

A few notes:

  • Toss mid-roast - Add glaze halfway through so it caramelizes without burning.
  • Cut evenly - Uniform pieces roast at the same rate.
  • Use young carrots - Tender and sweeter than thick, mature carrots.

Carrots hold their shape and absorb the glaze without turning mushy. Try this roasted balsamic carrots recipe when you need a vegetable side that feels slightly fancy.

Roasted Carrots

Works for: Caramelized edges, deeper flavor

Skip if: You need something faster

Steamed Carrots

Works for: Quick prep, tender texture

Skip if: You want char and sweetness

11. Herbed Focaccia Bread with Sea Salt

Soft, dimpled focaccia with aromatic herbs soaks up tomato sauce better than any other bread. The olive oil in the dough adds richness without feeling heavy.

What to know:

  • Poke dimples deep - Creates pockets for olive oil and herbs to settle.
  • Use coarse sea salt - Flaky salt adds texture and bursts of salinity.
  • Let dough rise twice - First rise develops flavor, second rise creates airy crumb.

Focaccia works warm or at room temperature. If you enjoy an easy sea salt to try, the same flaky salt works beautifully here.

Quick Tip
Brush olive oil on top before and after baking for maximum flavor.

12. Roasted Garlic Mashed Potatoes

Creamy, buttery mashed potatoes with roasted garlic add comforting texture. The garlic mellows during roasting and turns sweet instead of sharp.

Warm milk and butter blend smoothly into hot potatoes without turning them gluey. Use a potato ricer for the silkiest texture.

  • Roast garlic first - Whole heads roasted until soft and caramelized.
  • Mash while hot - Cold potatoes turn gummy when mashed.
  • Add liquid gradually - Stop before potatoes turn soupy.

These potatoes balance the acidity of the tomato sauce. Try this easy mashed potatoes recipe when you need a side that feels like a hug.

Method Time Best For
Potato ricer 5 minutes Silkiest texture, no lumps
Masher 8 minutes Rustic texture, faster cleanup
Stand mixer 3 minutes Large batches, risk of gummy texture

13. Zesty Italian Marinated Artichoke Hearts

Tangy, herbaceous artichoke hearts bring briny richness that cuts through the meatballs. The marinade adds garlic, lemon, and oregano.

Marinate artichoke hearts several hours ahead to let flavors develop. Drain before serving so the oil does not pool on the plate.

A few notes:

  • Use quartered hearts - Easier to eat than whole artichokes.
  • Add red pepper flakes - A pinch adds warmth without heat.

Artichokes hold up well at room temperature. If you love this fresh side dish recipe, the same ingredient works beautifully marinated.

Our Pick
This works as a make-ahead side that gets better as it sits.

14. Simple Mixed Green Salad with Red Wine Vinaigrette

Crisp greens with tangy red wine vinaigrette refresh the palate without adding heaviness. The simple dressing lets the salad greens shine.

Use a mix of baby lettuces for varied textures. Thin slices of red onion add sharpness, and shaved Parmesan ties into the Italian theme.

Toss the salad just before serving to keep greens crisp. Consider this easy wine vinaigrette recipe when you want homemade dressing that stores well.

Shortcut
Buy pre-washed mixed greens and bottled vinaigrette for a 5-minute side.

15. Spicy Arrabbiata Sauce for Extra Heat

Bold, fiery arrabbiata sauce adds heat for those who want more kick. The garlic and red chili flakes bring warmth without masking the tomato flavor.

  • Simmer gently - High heat turns garlic bitter and burns chili flakes.
  • Start with less heat - Add chili flakes gradually and taste as you go.
  • Use quality tomatoes - San Marzano tomatoes bring sweetness that balances heat.
  • Finish with basil - Fresh herbs cool the palate slightly.

Arrabbiata sauce stores well and reheats beautifully. Serve it on the side so everyone controls their heat level.

If You Want Try This
Mild heat ½ teaspoon chili flakes
Medium heat 1 teaspoon chili flakes
Bold heat 2 teaspoons chili flakes plus fresh chili

A few common questions come up when planning sides for spaghetti and meatballs.

Frequently Asked Questions

What are the best sides to serve with spaghetti and meatballs?

Garlic bread, Caesar salad, and roasted vegetables bring bread, freshness, and contrast that balance the rich tomato sauce and tender meatballs.

Can I make sides ahead for spaghetti and meatballs?

Marinated artichokes, herbed olives, and focaccia dough prep ahead beautifully, while salads and roasted vegetables work best fresh.

What easy Italian side dishes work with spaghetti and meatballs?

Caprese salad, garlic breadsticks, and arugula salad deliver authentic Italian flavors in 15 minutes or less.

How do I balance the richness of spaghetti and meatballs?

Serve crisp salads, roasted vegetables with lemon, or tangy marinated artichokes to cut through the tomato sauce and add freshness.

What bread works best with spaghetti and meatballs?

Soft garlic breadsticks and herbed focaccia soak up sauce better than sliced bread, while crusty baguettes add textural contrast.

Sides to Serve With Spaghetti and Meatballs

15 Best Sides to Serve With Spaghetti and Meatballs

No ratings yet
We provide a list of 15 sides that balance spaghetti and meatballs by adding fresh vegetables, savory breads, and flavorful sauces. These options offer varied textures and temperatures, with easy and involved prep levels to help complete your meal.
Print Recipe Pin Recipe
Prep Time 15 minutes mins
Cook Time 10 minutes mins
Total Time 25 minutes mins
Servings: 4 servings
Course: Dinner, Side Dish
Cuisine: Italian
Ingredients Equipment Method Notes

Ingredients
  

  • Garlic Parmesan Roasted Potatoes rich
  • Classic Caesar Salad with Creamy Dressing crunchy
  • Sautéed Garlic Green Beans with Lemon Zest bright
  • Soft Italian Garlic Breadsticks garlicky
  • Tangy Arugula and Cherry Tomato Salad tangy
  • Creamy Polenta with Parmesan Cheese creamy
  • Oven-Roasted Broccoli with Lemon and Chili Flakes smoky
  • Mixed Olives with Herbs and Citrus Peel salty
  • Fresh Mozzarella and Basil Caprese Plate creamy
  • Balsamic Glazed Roasted Carrots tangy
  • Herbed Focaccia Bread with Sea Salt soft
  • Roasted Garlic Mashed Potatoes creamy
  • Zesty Italian Marinated Artichoke Hearts tangy
  • Simple Mixed Green Salad with Red Wine Vinaigrette crisp
  • Spicy Arrabbiata Sauce for Extra Heat fiery

Equipment

  • Sheet pan For roasting vegetables
  • Mixing bowl For salads and dips
  • Cutting board For chopping ingredients
  • Serving platter To arrange sides and main

Method
 

  1. Assess what the main dish already provides-if it has starch, focus on vegetables and fresh sides.
  2. Choose 2-3 sides that fill different gaps: one vegetable, one starch or bread, one sauce or dip.
  3. Start the longest-cooking side first. Prep quick items like salads while the oven works.
  4. Balance temperatures-pair hot roasted vegetables with a cold slaw or chilled dip.
  5. Plate the main dish with sides arranged around it. Drizzle sauce or add garnish last.

Notes

Add a fresh salad or tangy vegetable and keep it chilled until serving to prevent the plate from feeling too heavy or bland with the rich main dish.

Tried this recipe?

Let us know how it was!

You Might Also Like

  • What to Serve With Broccoli? 15 Easy Side Dishes
  • Serving Chicken Satay? Try These 15 Easy Sides
  • What to Eat With Pasties: 15 Best Side Dishes

7 Best Substitutes for Mackerel in Cooking and Marinades

February 1, 2026

You're checking the fishmonger's case for mackerel and find only salmon fillets and a few sardines in cans. The oily texture and bold flavor of mackerel drive the richness in smoked fish spreads, grilled platters, and Mediterranean salads.

7 Best Substitutes for Mackerel in Cooking and Marinades

Mackerel isn't about delicate fish flavor-it's about omega-3 richness and the way it holds up to high heat and strong seasonings. A few oily fish and plant-based options can step in depending on the dish.

QUICK SUMMARY

Sardines and herring replace mackerel 1:1 with similar oily texture and strong flavor-they work in grilled dishes, smoked preparations, and salads. Salmon offers a milder option for grilling at the same ratio. For vegan swaps, jackfruit cooked with seaweed mimics flaky texture, or marinate firm tofu in seaweed broth for umami depth.

🐟Closest match: Sardines bring identical oily richness and bold fish flavor
🌱For vegan: Jackfruit with seaweed gets the flaky texture right
⚠️Watch out: Salmon's milder flavor won't match mackerel's intensity in smoked dishes

7 Alternatives to Replace Mackerel

Mackerel's oily flesh and strong flavor don't translate directly to mild white fish. The swaps below cover grilled dishes, smoked preparations, and plant-based options.

Quick Substitute Reference
# Substitute Best For Ratio Key Note
1 Sardines ✨ Both 1:1 Intense oily finish
2 Herring 🍳 Cooking 1:1 Saltier than mackerel
3 Salmon 🍳 Cooking 1:1 Milder and sweeter
4 Canned Tuna 🥗 Raw 1:1 Less flaky texture
5 Jackfruit 🌱 Vegan 1:1 Needs seaweed for umami
6 Smoked Trout 🍳 Cooking 1:1 Different smoky profile
7 Tofu Marinated 🌱 Vegan 1 cup tofu + ¼ cup broth Lacks oily mouthfeel

1. Sardines 🐟

Sardines deliver the same oily richness and bold fish flavor that mackerel brings to grilled dishes and spreads. They're smaller, but the texture and fat content match almost exactly.

Use 1:1 by weight anywhere you'd use mackerel. Grill them whole, flake them into salads, or mash them into spreads.

  • ✅ Identical oily texture and omega-3 fats
  • ✅ Works in both fresh and canned forms
  • ⚠️ Slightly more intense fishiness
  • ⚠️ Smaller flakes in canned versions

Fresh sardines grill beautifully with lemon and herbs. Canned sardines packed in oil work great in pasta dishes and on toast-if you're working with canned options often, tested Sardine replacements cover similar swaps.

2. Herring 🐟

Herring shares mackerel's oily flesh and strong flavor. The texture is tender and flaky, with a saltier, more pronounced taste than mackerel.

Use 1:1 by weight in smoked preparations, pickled dishes, or grilled applications. Herring shines in northern European recipes that call for assertive fish.

  • ✅ Oily and tender like mackerel
  • ✅ Holds up well to smoking and pickling
  • ⚠️ More pronounced saltiness-adjust seasoning
  • ⚠️ Different flake size and structure

Smoked herring works in spreads and salads where you'd use smoked mackerel. Fresh herring grills faster than mackerel because of its smaller size-watch the timing.

3. Salmon 🍳

Salmon steps in when you need firm, oily fish for grilling or pan-searing but don't want mackerel's intensity. It's richer and milder with a sweeter finish.

Use 1:1 by weight for high-heat cooking. Salmon handles marinades and glazes well without overpowering the dish.

  • ✅ Similar firm, flaky texture
  • ⚠️ Less oily than mackerel

Salmon works better in dishes where mackerel's boldness might clash with delicate ingredients. It won't match the strong fish flavor in smoked preparations-replacements similar to Salmon show how other fish compare when you're building flavor layers.

Quick Tip
Salmon's milder profile makes it a better match for recipes with cream sauces or butter-based glazes.

4. Canned Tuna in Oil 🥫

Canned tuna in oil mimics mackerel's oily moisture and umami in cold preparations like salads and sandwiches. The texture is firmer and less flaky than fresh mackerel.

Use 1:1 by volume in recipes that call for canned mackerel. Tuna packed in olive oil works best-it adds richness similar to mackerel's natural oils.

  • ✅ Convenient pantry option
  • ⚠️ Firmer, less delicate texture

Tuna works in Niçoise salads, pasta dishes, and grain bowls where you'd flake in mackerel. It won't hold up to grilling or smoking-Tuna substitutes ranked cover what works when you need more texture variety in cold dishes.

5. Jackfruit with Seaweed 🌱

Jackfruit cooked with seaweed gives you flaky texture that mimics fish without the actual seafood. Young green jackfruit shreds into strands that look convincingly like cooked fish.

Use 1:1 by volume after draining and cooking with kombu or nori for umami depth. This works in vegan fish salads, sandwiches, and tacos.

  • ✅ Flaky texture that looks like cooked fish
  • ✅ Absorbs marinades and seasonings well
  • ⚠️ Needs seaweed for savory fish flavor

Cook jackfruit with soy sauce, liquid smoke, and crumbled nori to build complexity. It won't replicate mackerel's oily mouthfeel, but the texture holds up in cold and warm dishes-Jackfruit replacements that work show how it performs across different plant-based applications.

6. Smoked Trout 🔥

Smoked trout brings oily texture and smoky depth that works in dishes calling for smoked mackerel. The flavor is slightly milder with a different smoky profile-less intense but still rich.

Use 1:1 by weight in salads, spreads, and pâtés. Smoked trout flakes easily and holds its structure in cold preparations.

  • ✅ Rich and smoky like smoked mackerel
  • ✅ Firm flakes hold up well in salads
  • ⚠️ Less oily than mackerel

Smoked trout works in dips and on bagels where you'd use smoked mackerel. It won't match the bold flavor in hot dishes-stick to cold applications.

7. Tofu Marinated in Seaweed Broth 🌱

Firm tofu marinated in seaweed broth absorbs umami flavor that mimics mild fish taste without the oily texture. Press the tofu first to help it soak up more liquid.

Use 1 cup firm tofu plus ¼ cup seaweed broth per 1 cup mackerel. Marinate for at least 2 hours or overnight for deeper flavor.

  • ✅ Absorbs savory seaweed flavor
  • ⚠️ Lacks mackerel's natural oils

This works in vegan grain bowls, salads, and cooked dishes where you'd flake in mackerel. Add a drizzle of sesame oil or olive oil to compensate for missing fat-Tofu substitutes ranked cover how different tofu preparations compare across various recipes.

Choose by What You're Grilling or Mixing

  • For grilling: Sardines or salmon match mackerel's firmness on the grill
  • For smoked dishes: Herring or smoked trout bring similar richness
  • For cold salads: Canned tuna in oil or sardines work 1:1
  • For vegan options: Jackfruit with seaweed mimics flaky texture best

Frequently Asked Questions

Can I use salmon instead of mackerel in smoked fish recipes?

Salmon works but delivers a milder, sweeter flavor than mackerel's bold intensity. It's a better match for dishes where you don't want the fish to dominate-smoked mackerel spreads and salads taste different with salmon because they lose that characteristic assertive edge.

What's the closest texture match to mackerel for grilling?

Sardines match mackerel's oily, flaky texture almost exactly when grilled. They're smaller, so they cook faster, but the flesh has the same richness and holds up to high heat without drying out.

Can I substitute canned tuna for canned mackerel in pasta?

Yes, use tuna packed in oil 1:1 by volume. The texture is firmer and the flavor milder, but it works in pasta dishes, grain bowls, and salads where canned mackerel would flake in.

How do I make jackfruit taste like fish for vegan mackerel salad?

Cook shredded jackfruit with kombu or crumbled nori to add umami depth. Add a splash of soy sauce and a pinch of dulse flakes for more seafood flavor-the texture mimics flaked fish once it's cooked and cooled.

Is herring more or less oily than mackerel?

Herring has a similar oil content to mackerel-both are rich in omega-3 fats. The main difference is flavor-herring is usually saltier with a more pronounced taste, especially in pickled or smoked forms.

Substitutes for Mackerel in Cooking and Marinades

7 Best Substitutes for Mackerel

No ratings yet
Mackerel's oily texture and bold flavor can be replaced by several fish and vegan options depending on the dish. Sardines and herring offer similar oily richness, while salmon provides a milder profile. For vegan alternatives, jackfruit with seaweed or tofu marinated in seaweed broth provide flaky texture and umami depth.
Print Recipe Pin Recipe
Prep Time 10 minutes mins
Cook Time 5 minutes mins
Total Time 15 minutes mins
Servings: 4 servings
Course: Kitchen Tips, Substitutes
Cuisine: Various
Ingredients Method Notes

Ingredients
  

  • 1 cup Sardines Use 1:1 by weight as a direct substitute.
  • 1 cup Herring Use 1:1 by weight; saltier than mackerel.
  • 1 cup Salmon Use 1:1 by weight; milder and less oily flavor.
  • 1 cup Canned Tuna in Oil Use 1:1 by volume for cold preparations.
  • 1 cup Jackfruit cooked with seaweed Use 1:1 by volume after draining and cooking with seaweed for umami.
  • 1 cup Smoked Trout Use 1:1 by weight; milder smoky flavor.
  • 1 cup Tofu marinated in seaweed broth 1 cup firm tofu plus ¼ cup seaweed broth; marinate at least 2 hours.

Method
 

  1. Choose the substitute based on dish type: sardines or salmon for grilling, herring or smoked trout for smoked dishes, canned tuna for cold salads, jackfruit or tofu for vegan options.
  2. Prepare the substitute: drain canned fish or jackfruit; marinate tofu in seaweed broth for best flavor.
  3. Use the substitute in a 1:1 ratio by weight or volume according to the substitute's notes.
  4. Adjust seasoning to compensate for differences in saltiness or oiliness, especially with herring or tofu.
  5. Taste final dish and ensure desired texture and flavor balance; add oils if needed for mouthfeel.

Notes

  • Use sardines for the closest oily and fishy intensity match.
  • Marinate tofu and cook jackfruit with seaweed for better umami depth in vegan dishes.
  • Adjust seasoning especially with saltier herring or milder salmon to preserve flavor balance.

Tried this recipe?

Let us know how it was!

15 Best Side Dishes to Serve With Garlic Butter Shrimp

February 1, 2026

Garlic butter shrimp brings tender seafood coated in rich garlicky sauce. The protein and fat hit hard-what's missing is starch to soak up the butter, vegetables for contrast, and something fresh to balance richness.

15 Best Side Dishes to Serve With Garlic Butter Shrimp

We need sides that absorb sauce without competing with the shrimp. Starches like rice or pasta catch every drop of buttery garlic goodness.

Crisp vegetables and bright salads cut through the richness. Sauces add tang or coolness to refresh the palate between bites.

QUICK SUMMARY

Garlic butter shrimp is rich, tender, and intensely garlicky-it needs starches to catch the sauce and fresh sides to balance the butter. Jasmine rice or angel hair pasta soak up every drop. Arugula salad and steamed asparagus add brightness and crunch.

🍚Soak it up: Rice, pasta, or crusty bread catch buttery sauce
🥗Add freshness: Crisp salads and roasted vegetables balance richness
⏱️Quick pick: Jasmine rice ready in 20 minutes

What to Serve With Garlic Butter Shrimp: 15 Sides

These sides bring starch, vegetables, brightness, and texture to round out a plate centered on tender buttery shrimp.

# Side Dish Best For Prep
1 Roasted Lemon Garlic Baby Potatoes ✨ Any Occasion ✅ Easy
2 Garlic Parmesan Angel Hair Pasta 🌙 Weeknight ✅ Easy
3 Steamed Asparagus with Lemon Zest 🎉 Hosting ✅ Easy
4 Crisp Arugula & Cherry Tomato Salad ✨ Any Occasion ✅ Easy
5 Buttery Garlic Breadsticks 🎉 Hosting ✅ Easy
6 Sauteed Green Beans with Almonds 🌙 Weeknight ✅ Easy
7 Herb-Infused Jasmine Rice ✨ Any Occasion ✅ Easy
8 Creamy Avocado Cilantro Salad 🌙 Weeknight ✅ Easy
9 Charred Corn and Red Pepper Salad 🎉 Hosting ✅ Easy
10 Classic Tartar Sauce ✨ Any Occasion ✅ Easy
11 Spicy Roasted Cauliflower Florets 🌙 Weeknight ⚡ Medium
12 Zesty Cucumber Dill Salad ✨ Any Occasion ✅ Easy
13 Cheesy Garlic Mashed Cauliflower 🌙 Weeknight ✅ Easy
14 Warm Whole Wheat Baguette ✨ Any Occasion ✅ Easy
15 Classic Mediterranean Tzatziki Sauce 🎉 Hosting ✅ Easy

1. Roasted Lemon Garlic Baby Potatoes

Golden crispy edges meet fluffy centers infused with lemon and garlic. The citrus brightens the buttery shrimp without overpowering the seafood.

Roast baby potatoes at 425°F until the skins crisp up and the insides turn tender-about 30 minutes. Toss with lemon zest in the last 5 minutes so the citrus oils stay fragrant.

If you want a quick baby potatoes side dish that soaks up sauce, this delivers.

Quick Tip
Cut potatoes into even halves so they roast at the same rate-no raw centers or burnt edges.

2. Garlic Parmesan Angel Hair Pasta

Silky strands catch buttery sauce better than thicker noodles. The Parmesan adds salty richness that goes with the shrimp without competing.

What to know:

  • Use fresh Parmesan - Pre-grated cheese turns gummy and does not melt smoothly.
  • Reserve pasta water - A few tablespoons help the sauce cling to noodles.
  • Toss immediately - Angel hair cools fast and clumps if it sits too long.
  • Add parsley last - Stir in chopped fresh parsley right before serving for bright color.

Pair with our favorite hair pasta side when you need something that comes together in 15 minutes.

If You Want Try This
More garlic punch Toast minced garlic in butter before tossing pasta
Extra creaminess Add a splash of heavy cream to the pasta water
Lighter option Use olive oil instead of butter for tossing

3. Steamed Asparagus with Lemon Zest

Tender-crisp stalks bring green freshness to the plate. The lemon zest echoes citrus notes in the shrimp without adding more butter.

Steam asparagus spears for 4 to 6 minutes until they turn bright green however still snap when you bend them. Drain immediately and toss with fresh lemon zest-the heat releases the citrus oils.

Try something crisp on the side when you want vegetables ready in under 10 minutes.

Our Pick
Choose medium-thick stalks-thin ones turn mushy and thick ones stay woody even when steamed.

4. Crisp Arugula & Cherry Tomato Salad

Peppery greens and juicy tomatoes cut through buttery richness. The salad adds crunch and brightness that shrimp alone cannot provide.

Toss fresh arugula with halved cherry tomatoes and dress lightly with lemon vinaigrette-about 2 tablespoons per 4 cups of greens. The acid in the dressing balances the fat from the butter.

If you need an easy tomato salad to try, this works for weeknights or hosting friends who expect more than just protein on the plate.

Method Time Best For
Lemon vinaigrette 5 minutes Bright, tangy contrast
Balsamic drizzle 2 minutes Sweet-tart depth
Olive oil + salt 1 minute Simple, clean flavor

5. Buttery Garlic Breadsticks

Soft, warm bread soaks up every drop of sauce left on the plate. The garlic echoes the shrimp seasoning without feeling repetitive.

A few notes:

  • Brush while hot - Melted butter soaks into warm breadsticks better than cold ones.
  • Use fresh garlic - Minced fresh garlic delivers more punch than garlic powder.
  • Toast lightly - A quick broil adds golden color and a slight crunch to the crust.

Serve with a soft side to try when you want something that feels indulgent however comes together fast.

Shortcut
Use store-bought breadstick dough and brush with homemade garlic butter-saves 30 minutes without losing flavor.

6. Sauteed Green Beans with Almonds

Snappy beans and crunchy toasted almonds add texture contrast to tender shrimp. The nutty flavor brings depth without adding more garlic or butter.

Saute trimmed green beans in olive oil over medium-high heat until they blister slightly-about 8 minutes. Toast sliced almonds in a dry skillet until golden and fragrant.

Toss the beans with the almonds right before plating. Pair with a side that pairs well when you need vegetables that feel more special than steamed broccoli.

Watch Out
Do not overcook green beans-they turn gray and lose their snap if they steam too long in the pan.

7. Herb-Infused Jasmine Rice

Fluffy grains absorb buttery sauce and carry fresh herb flavors that go with the shrimp. The rice feels lighter than pasta however still satisfies.

  • Rinse first - Cold water removes excess starch so the rice stays fluffy.
  • Use stock - Chicken or vegetable stock adds more flavor than plain water.
  • Fluff with a fork - Stirring rice with a spoon smashes the grains and makes them gummy.
  • Add herbs last - Stir in chopped cilantro or parsley after cooking to keep the color bright.

If you want a side that pairs well with coastal cuisine or seafood nights, this works every time.

If You Want Try This
More aroma Add a bay leaf to the cooking water
Citrus notes Stir in lemon zest after fluffing
Richer flavor Cook rice in half stock, half coconut milk

8. Creamy Avocado Cilantro Salad

Silky avocado and bright cilantro bring cool creaminess that balances hot buttery shrimp. The lime juice adds tang without overpowering the seafood.

Keep in mind:

  • Use ripe avocados - Firm avocados do not mash smoothly and taste bland.
  • Add lime gradually - Start with half a lime and taste before adding more.
  • Chop cilantro fine - Large cilantro pieces overpower the creamy avocado.
  • Serve immediately - Avocado browns fast once you cut it open.

Try cool cilantro salad we love when you need something fresh that comes together in minutes.

Golden Rule
Salt avocado right before serving-early salting draws out water and turns the salad watery.

Avocado Salad

Works for: Weeknight dinners, pescatarian meals, casual entertaining

Skip if: You need make-ahead sides or low-fat options

Cucumber Salad

Works for: Make-ahead prep, lighter options, summer meals

Skip if: You want creamy sides or rich flavors

9. Charred Corn and Red Pepper Salad

Smoky sweet corn and roasted peppers add complexity without competing with the shrimp. The charred edges bring depth to a simple meal.

Grill fresh corn until the kernels develop dark spots and smoky aroma-about 10 minutes over medium-high heat. Cut the kernels off the cob and mix with diced roasted red peppers.

Dress lightly with lime juice and olive oil. Serve with fresh pepper salad on the side when hosting friends who appreciate easy seafood recipes we make often.

Quick Tip
Skip the grill and char corn in a cast-iron skillet-same smoky flavor without firing up outdoor equipment.

10. Classic Tartar Sauce

Tangy creamy dip with chopped pickles and capers cuts through butter and adds briny notes. The sauce feels familiar however still improves the meal.

  • Chop pickles fine - Large chunks sink to the bottom and taste too strong.
  • Drain capers first - Excess brine makes the sauce watery and too salty.
  • Use mayo as base - Greek yogurt works however tastes tangier and less creamy.
  • Chill before serving - Cold sauce contrasts better with hot shrimp.

Pair with our favorite tartar sauce side when you want something that feels like a restaurant meal however comes together at home.

Method Time Best For
Homemade tartar sauce 10 minutes Fresh flavor, control over ingredients
Store-bought base 2 minutes Quick weeknight meals, less prep
Yogurt version 8 minutes Lower fat, tangier taste

11. Spicy Roasted Cauliflower Florets

Tender florets with crispy edges and smoky spice add heat that contrasts with buttery shrimp. The cauliflower brings vegetables to the plate without feeling heavy.

Toss cauliflower florets with olive oil, smoked paprika, and a pinch of cayenne. Roast at 425°F for 25 minutes until the edges turn golden brown and slightly charred.

If you want a roasted cauliflower florets side dish that works with simple chicken dishes we love or seafood nights, this delivers.

Watch Out
Do not crowd the pan-overcrowded cauliflower steams instead of roasting and never gets crispy edges.

12. Zesty Cucumber Dill Salad

Cool crunchy cucumbers with bright dill aroma refresh the palate between bites. The yogurt dressing feels lighter than mayo-based sides.

A few notes:

  • Salt cucumbers first - Drain sliced cucumbers on paper towels for 10 minutes to avoid watery salad.
  • Use Greek yogurt - Regular yogurt turns thin and runny after you mix it with cucumbers.
  • Add garlic sparingly - Too much raw garlic overpowers the fresh dill.

Try this easy dill salad recipe when you need something cold that comes together fast.

Shortcut
Use English cucumbers-they have fewer seeds and less water so you can skip the draining step.

Cucumber Dill Salad

Works for: Summer meals, make-ahead prep, lighter options

Skip if: You want warm sides or richer flavors

Arugula Tomato Salad

Works for: Quick assembly, peppery contrast, weeknight dinners

Skip if: You need make-ahead sides or creamy textures

13. Cheesy Garlic Mashed Cauliflower

Creamy low-carb starch alternative with garlic punch and melted cheese. The cauliflower soaks up buttery sauce like mashed potatoes however feels lighter.

  • Steam until soft - Undercooked cauliflower leaves lumps that do not mash smoothly.
  • Drain thoroughly - Excess water makes the mash watery and bland.
  • Mash while hot - Cold cauliflower does not blend as smoothly and cheese clumps instead of melting.

Serve with this tender mashed cauliflower recipe when you want something comforting that works for hearty veggie dinners we love or gluten-free options.

If You Want Try This
Extra creaminess Add cream cheese or sour cream while mashing
More garlic flavor Roast whole garlic cloves with the cauliflower
Sharper taste Use aged white cheddar instead of mild cheese

14. Warm Whole Wheat Baguette

Nutty bread with crusty exterior and soft interior soaks up every drop of sauce. The whole wheat adds heartiness without feeling heavy.

What to know:

  • Warm before serving - Cold bread tastes dense and the crust turns chewy.
  • Slice thick - Thin slices break apart when you dip them in sauce.
  • Brush with butter - A light brush of melted butter adds richness and helps bread soak up more sauce.

Pair with garlic butter shrimp when you need something simple that turns dinner into a complete meal.

Our Pick
Buy bakery-fresh baguette the day you serve it-day-old bread tastes stale and does not warm up as well.

15. Classic Mediterranean Tzatziki Sauce

Cool yogurt and cucumber with fresh mint and garlic cuts buttery richness. The sauce adds tang without overpowering the shrimp.

Use strained Greek yogurt so the sauce stays thick and creamy. Grate cucumber fine and squeeze out excess water before mixing.

Add minced garlic gradually-start with one clove and taste before adding more. Try smooth tzatziki sauce we love when you want a dip that works for weeknight dinners or casual entertaining.

Golden Rule
Let tzatziki chill for at least 30 minutes before serving-the flavors meld and the sauce thickens as it rests.

These sides bring starch, vegetables, and freshness to garlic butter shrimp so every plate feels complete.

Frequently Asked Questions

What to serve with garlic shrimp pasta?

Serve a crisp green salad with lemon vinaigrette or steamed asparagus to add vegetables and brightness to the rich pasta.

What are the best sides for seafood dishes?

Starches like rice or pasta soak up sauce, roasted vegetables add contrast, and fresh salads provide brightness to balance rich seafood.

What are easy vegetable sides for shrimp?

Steamed asparagus, sauteed green beans, or roasted cauliflower all cook fast and pair well with buttery shrimp.

How do you balance rich seafood dishes?

Add bright acidic sides like lemon-dressed salads, tangy sauces like tzatziki, or crisp vegetables to cut through butter and fat.

Can you serve garlic butter shrimp on a weeknight?

Yes-shrimp cooks in minutes and pairs with quick sides like jasmine rice, steamed asparagus, or arugula salad for easy weeknight meals.

Side Dishes to Serve With Garlic Butter Shrimp

15 Best Side Dishes to Serve With Garlic Butter Shrimp

No ratings yet
We provide a list of 15 sides that balance garlic butter shrimp by adding starches, fresh vegetables, bright salads, and cooling sauces. These options offer a variety of textures, temperatures, and easy-to-intermediate preparation levels to create a well-rounded meal.
Print Recipe Pin Recipe
Prep Time 15 minutes mins
Cook Time 10 minutes mins
Total Time 25 minutes mins
Servings: 4 servings
Course: Dinner, Side Dish
Cuisine: Seafood
Ingredients Equipment Method Notes

Ingredients
  

  • Roasted Lemon Garlic Baby Potatoes bright
  • Garlic Parmesan Angel Hair Pasta rich
  • Steamed Asparagus with Lemon Zest crisp
  • Crisp Arugula & Cherry Tomato Salad crunchy
  • Buttery Garlic Breadsticks rich
  • Sauteed Green Beans with Almonds crunchy
  • Herb-Infused Jasmine Rice bright
  • Creamy Avocado Cilantro Salad creamy
  • Charred Corn and Red Pepper Salad smoky
  • Classic Tartar Sauce tangy
  • Spicy Roasted Cauliflower Florets crispy
  • Zesty Cucumber Dill Salad bright
  • Cheesy Garlic Mashed Cauliflower creamy
  • Warm Whole Wheat Baguette crusty
  • Classic Mediterranean Tzatziki Sauce cool

Equipment

  • Sheet pan for roasting vegetables
  • Mixing bowl for salads and dips
  • Cutting board for prep and chopping
  • Serving platter for plating the meal

Method
 

  1. Assess what the main dish already provides-if it has starch, focus on vegetables and fresh sides.
  2. Choose 2-3 sides that fill different gaps: one vegetable, one starch or bread, one sauce or dip.
  3. Start the longest-cooking side first. Prep quick items like salads while the oven works.
  4. Balance temperatures-pair hot roasted vegetables with a cold slaw or chilled dip.
  5. Plate the main dish with sides arranged around it. Drizzle sauce or add garnish last.

Notes

Add a bright or crisp salad and keep it chilled until serving to balance richness. This prevents the plate from feeling too heavy and keeps flavors fresh.

Tried this recipe?

Let us know how it was!

You Might Also Like

  • What to Serve With BLTs? 15 Quick & Easy Sides
  • What to Make With Biryani: 16 Easy Side Dishes
  • 15 Best Sides to Serve with Honey Garlic Meatballs This Weeknight
« Previous Page
Next Page »

Primary Sidebar

ForkliftKitchen recipe developer

Welcome!

Recipe Developer · 12+ Yr Kitchen Veteran

I'm the recipe developer behind this site, focused on practical, well-tested dishes and smart ingredient swaps. Every recipe is written to be clear, reliable, and easy to make at home.

650+ Recipes
12+ Yrs Exp.
3x Tested
Our Story →

As Featured In

Allrecipes

TASTE OF HOME

Food52

HUFFPOST

Yahoo! Life

Our Editorial Standards

  • ✓ Every recipe tested at least 3 times before publishing
  • ✓ Substitutes verified by real kitchen trials, not guesswork
  • ✓ Reviewed for accuracy by our editorial team
  • ✓ Updated regularly with seasonal info and reader feedback

Most Popular

  • Creamy Lemon Shrimp Linguine
    Creamy Lemon Shrimp Linguine
  • Creamy Garlic Mushroom Chicken
    Creamy Garlic Mushroom Chicken
  • Sesame Ginger Chicken Noodle Bowls
    Sesame Ginger Chicken Noodle Bowls
  • Baked Lemon Herb Fish Fillets
    Baked Lemon Herb Fish Fillets
  • Veggie Loaded Fried Rice
    Veggie Loaded Fried Rice
  • Spicy Garlic Shrimp Stir Fry
    Spicy Garlic Shrimp Stir Fry

Join 8,000+ Home Cooks

Weekly Kitchen Tips

Easy recipes, smart substitutes, and real cooking shortcuts — every Thursday.

Subscribe Free →


Side Dishes

  • What to Serve With Asian Salmon? 15 Best Side Dishes
    What to Serve With Asian Salmon? 15 Best Side Dishes
  • Side Dishes for Strawberry Spinach Salad
    15 Best Side Dishes for Strawberry Spinach Salad
  • Sides for Grilled Cauliflower Steaks to Complete the Meal
    15 Sides for Grilled Cauliflower Steaks to Complete the Meal
  • 15 Sides To Serve With Calabacitas
    15 Best Sides for Calabacitas – Mexican-Inspired Favorites


Substitutes

  • 7 Best Substitutes for Hot Sauce in Marinades & Stir-Fries
    7 Best Substitutes for Hot Sauce in Marinades & Stir-Fries
  • 9 Best Substitutes for Butter in Baking and Cooking
  • 7 Best Substitutes for Tagliatelle for Italian Pasta Dishes
    7 Best Substitutes for Tagliatelle for Italian Pasta Dishes
  • 7 Best Substitutes for Udon Noodles in Asian Stir-Fries
    7 Best Substitutes for Udon Noodles in Asian Stir-Fries


Browse by Topic

  • Side Dishes320
  • Substitutes785
  • Dinner163
  • Air Fryer77
  • Taste Profiles484
  • Food Storage123


Reader Reviews

★★★★★

"Finally a food blog that tells you exactly why a substitute works instead of just listing options."

— Sarah M., via email

★★★★★

"The side dish recommendations are so specific — saved my dinner party twice this month."

— James R., Pinterest comment

★★★★★

"I trust this site more than most because they actually test everything. You can tell."

— Priya K., blog comment

Footer

↑ Back to Top

Forklift Kitchen

We do the heavy lifting so you can enjoy the cooking. Tested recipes, smart substitutes, and perfect pairings—built for real home cooks.

Content

  • Recipes
  • Substitutes
  • What to Serve With
  • Blog

Company

  • About Us
  • Contact
  • Subscribe

Legal

  • Privacy Policy
  • Terms of Service

As an Amazon Associate I earn from qualifying purchases.

© 2026 Forklift Kitchen.

Rate This Recipe

Your vote:


A rating is required
A name is required
An email is required