• Skip to primary navigation
  • Skip to main content
  • Skip to primary sidebar
  • Recipe Index
    • Air Fryer
  • Side Dishes
  • Substitutes
  • About
  • Contact
  • Subscribe

ForkLiftKitchen

menu icon
go to homepage
  • Recipe Index
    • Air Fryer
  • Side Dishes
  • Substitutes
  • About
  • Contact
  • Subscribe
subscribe
search icon
Homepage link
  • Recipe Index
    • Air Fryer
  • Side Dishes
  • Substitutes
  • About
  • Contact
  • Subscribe
×

Blog

Serving Manchego Cheese Tonight? 15 Best Side Ideas

February 5, 2026

Manchego cheese delivers nutty, salty, firm texture that anchors any appetizer spread. That richness wants bright contrast and crisp elements to keep the palate engaged.

what-to-serve-with-manchego-cheese

We build around sides that bring sweetness, fresh acidity, or crunchy texture. Quince paste offers fruity sweetness, fresh apple slices add brightness, and toasted baguette provides neutral crunch. Cured meats echo the saltiness while marinated vegetables refresh between bites.

QUICK SUMMARY

Manchego cheese is nutty, salty, and firm-perfect for tapas boards and appetizer spreads. It needs bright fruits, crisp bread, and savory charcuterie to create balance. Quince paste adds sweet contrast, toasted baguette provides neutral crunch, and jamón ibérico echoes the saltiness. Mix sweet, savory, and fresh elements for a complete board.

🍯Sweet contrast: Quince paste, fig jam, honey drizzle
🥖Crisp base: Toasted baguette, herb flatbread
⏱️Quick pick: Marcona almonds with sea salt

What to Serve With Manchego Cheese: 15 Side Ideas

These sides bring the textures and flavors that make manchego shine on any appetizer board.

#Side DishBest ForPrep
1Sweet Membrillo Quince Paste✨ Any Occasion✅ Easy
2Toasted Crusty Baguette Slices✨ Any Occasion✅ Easy
3Marcona Almonds with Sea Salt✨ Any Occasion✅ Easy
4Cured Jamón Ibérico Slices🎉 Hosting✅ Easy
5Fresh Green Apple Slices✨ Any Occasion✅ Easy
6Marinated Spanish Olives✨ Any Occasion✅ Easy
7Fig Jam Spread✨ Any Occasion✅ Easy
8Roasted Red Peppers with Olive Oil✨ Any Occasion⚡ Medium
9Crisp Endive Leaves for Scooping🎉 Hosting✅ Easy
10Sweet Grapes on the Stem✨ Any Occasion✅ Easy
11Smoky Spanish Chorizo Slices🎉 Hosting✅ Easy
12Classic Spanish Gazpacho Shot🎉 Hosting✅ Easy
13Honey Drizzle with Black Pepper✨ Any Occasion✅ Easy
14Rustic Olive Oil Herb Flatbread✨ Any Occasion✅ Easy
15Sherry Vinegar Marinated Artichokes✨ Any Occasion✅ Easy

1. Sweet Membrillo Quince Paste

Golden quince paste brings deep fruity sweetness that balances manchego's nutty saltiness. The thick, jammy texture contrasts with the cheese's firm crumble.

Quick tips:

  • Slice thin wedges - Cut quince paste into quarter-inch pieces for easy pairing with cheese.
  • Room temperature works - No need to chill before serving.

The combination is traditional Spanish tapas that feels elegant without effort. When you want a easy side to try, this delivers every time.

Quick Tip
Cut quince paste with a knife dipped in warm water to prevent sticking.

2. Toasted Crusty Baguette Slices

Crunchy bread provides neutral base that lets manchego's flavor shine. Brush with olive oil before toasting for golden edges and richer taste.

The details:

  • Slice on the diagonal - Angled cuts create larger surface area for cheese.
  • Toast at 375°F - Bake for 8-10 minutes until edges turn golden.

The mild flavor and crisp texture work as a vehicle without competing. Perfect for building small bites with cheese and toppings.

3. Marcona Almonds with Sea Salt

Buttery Spanish almonds add rich crunch that complements manchego's nutty notes. The salt enhances both elements without overpowering.

Quick tips:

  • Warm briefly - Toast almonds in a dry skillet for 2-3 minutes to wake up the oils.
  • Use flaky sea salt - Maldon or fleur de sel adds delicate salinity.
  • Buy blanched - Skinless marcona almonds have softer texture than regular almonds.
  • Serve at room temp - Cold almonds taste flat.

If you enjoy a classic side to try, this combination works for casual snacking or formal cheese boards.

If You WantTry This
Buttery richnessMarcona almonds
More crunchRegular roasted almonds
Sweeter notesHoney-roasted cashews

4. Cured Jamón Ibérico Slices

Paper-thin ham echoes manchego's saltiness while adding silky texture. The meaty richness creates a traditional Spanish pairing that feels sophisticated.

Serve slices draped over cheese or arranged separately on the board. Room temperature brings out the nutty, acorn-fed flavor that makes ibérico special.

5. Fresh Green Apple Slices

Crisp apples offer bright acidity that cuts through manchego's richness. The juicy crunch refreshes the palate between bites.

Keep in mind:

  • Toss in lemon juice - Prevents browning if slicing ahead.
  • Use Granny Smith - Tart green apples work better than sweet red varieties.
  • Slice thick - Quarter-inch pieces hold up without getting floppy.

Try roasted apple slices we love when you want something that balances salty cheese with natural sweetness.

Our Pick
Slice apples just before serving for maximum crispness and bright flavor.

6. Marinated Spanish Olives

Briny olives bring herbal complexity that complements manchego's nutty profile. The combination is classic Mediterranean tapas.

Mix green manzanilla and black arbequina olives for varied flavors and textures. The saltiness enhances the cheese without overwhelming other elements on the board.

Green Olives

Works for: Briny sharpness and firm texture

Skip if: You prefer milder flavors

Black Olives

Works for: Softer texture and mellower taste

Skip if: You want stronger brine notes

7. Fig Jam Spread

Dark fig jam offers deep sweetness with subtle earthiness that contrasts manchego's saltiness. The sticky texture clings to cheese and bread.

A few notes:

  • Serve in small bowl - Makes spreading easier than using a jar.
  • Room temperature - Cold jam is too stiff to spread smoothly.
  • Add balsamic - A few drops of aged balsamic vinegar deepens the flavor.

If you need a homemade side to try, fig jam works for weeknight snacks or holiday entertaining.

MethodTimeBest For
Store-bought fig jam0 minQuick assembly
Homemade fig preserves45 minCustom sweetness level
Fresh figs with honey5 minPeak fig season

8. Roasted Red Peppers Drizzled with Olive Oil

Smoky sweet peppers add silky texture and charred flavor that contrasts manchego's firmness. The olive oil ties everything together.

Quick tips:

  • Peel after roasting - Charred skins slip off easily once peppers cool.
  • Seed thoroughly - Seeds add bitterness.
  • Use good olive oil - Fruity extra virgin enhances the sweetness.
  • Serve at room temp - Cold peppers lose their smoky aroma.

When you want a fresh side to try, roasted peppers bring Mediterranean authenticity to the board.

Shortcut
Use jarred roasted peppers and drain well to skip the roasting step.

9. Crisp Endive Leaves for Scooping

Pale green endive spears provide natural edible vessels with slight bitterness. The crisp texture contrasts manchego's crumbly firmness.

The details:

  • Keep whole - Individual leaves work as built-in spoons.
  • Chill before serving - Cold endive stays crisper longer.

The bitter notes balance rich cheese and sweet accompaniments. Try this roasted side dish recipe when you want something light that adds elegance.

Golden Rule
Trim the bitter core but leave leaves connected so guests can pull them apart easily.

10. Sweet Grapes on the Stem

Juicy grapes bring bright sweetness that refreshes the palate between salty bites. The pop of fresh fruit balances rich cheese perfectly.

Red or green grapes both work-choose based on color preference for your board. Rinse and dry thoroughly so water does not dilute flavors.

If You WantTry This
Classic pairingRed seedless grapes
Milder sweetnessGreen grapes
Dramatic presentationChampagne grapes on stem

11. Smoky Spanish Chorizo Slices

Cured chorizo adds spicy richness and paprika notes that echo Spanish flavors. The firm texture matches manchego's density.

Quick tips:

  • Slice thin - Quarter-inch rounds work best for stacking with cheese.
  • Room temperature - Cold chorizo tastes flat and the fat feels waxy.

If you want a side that pairs well, Spanish chorizo brings authentic tapas flavor without cooking.

Watch Out
Use cured chorizo, not fresh Mexican chorizo that requires cooking.

12. Classic Spanish Gazpacho Shot

Chilled tomato soup offers tangy refreshment that cleanses the palate. The liquid element contrasts solid cheese and charcuterie.

A few notes:

  • Serve in small glasses - Two-ounce portions work as palate cleansers.
  • Chill thoroughly - Warm gazpacho loses its refreshing quality.

The acidity cuts through rich cheese while the vegetables add nutrition. Small portions keep the focus on the main board elements.

Traditional Gazpacho

Works for: Classic tomato-forward flavor

Skip if: Guests dislike raw tomatoes

White Gazpacho

Works for: Milder almond-based alternative

Skip if: You want bright acidity

13. Honey Drizzle with Cracked Black Pepper

Golden honey adds floral sweetness while black pepper brings subtle heat. The combination enhances manchego's nutty complexity.

Keep in mind:

  • Drizzle just before serving - Prevents cheese from getting soggy.
  • Use raw honey - More complex flavor than processed varieties.
  • Crack pepper fresh - Pre-ground pepper tastes flat.
  • Start conservative - Too much honey overwhelms the cheese.

When you need an easy black pepper to try, this simple drizzle transforms plain cheese into something special.

Quick Tip
Warm honey briefly in microwave for 10 seconds to make drizzling easier.

14. Rustic Olive Oil and Herb Flatbread

Chewy flatbread provides neutral base with subtle herb aroma. The oil-brushed surface adds richness without competing flavors.

Tear into irregular pieces for rustic presentation or slice into neat squares for formal boards. Warm briefly before serving to refresh the texture.

MethodTimeBest For
Store-bought flatbread5 min warmupQuick entertaining
Homemade flatbread30 minCustom herb blend
Naan bread5 min warmupSofter texture preference

15. Sherry Vinegar Marinated Artichokes

Tangy artichoke hearts bring tender texture and sharp acidity. The sherry vinegar echoes Spanish flavors while cutting through rich cheese.

Use jarred marinated artichokes to skip prep work entirely. Quarter the hearts so guests can spear them easily with toothpicks.

Our Pick
Look for artichokes marinated in olive oil rather than water for better flavor.

For more tapas ideas, explore satisfying plant-based dishes, light seafood dinner ideas, or hearty beef dinner ideas that work alongside cheese boards.

These sides create balanced boards where manchego cheese can shine without overpowering other elements.

Frequently Asked Questions

What sides go best with manchego cheese?

Sweet quince paste, crisp apple slices, toasted baguette, and cured jamón ibérico balance manchego's nutty saltiness with contrasting textures and flavors.

What vegetables go with manchego cheese?

Roasted red peppers, marinated artichokes, crisp endive leaves, and marinated Spanish olives provide fresh contrast and Mediterranean authenticity.

Can I prep sides for manchego cheese ahead of time?

Most sides like quince paste, olives, chorizo, and marinated vegetables can be prepped hours ahead and stored covered at room temperature.

What drinks pair well with manchego cheese boards?

Spanish red wines like Rioja or Tempranillo, dry sherry, and crisp white wines complement manchego's nutty saltiness without overwhelming the palate.

How much manchego cheese should I serve per person?

Plan for two to three ounces of manchego per person when serving it as part of a cheese board with multiple accompaniments.

Serving Manchego Cheese Tonight? 15 Best Side Ideas

Serving Manchego Cheese Tonight? 15 Best Side Ideas

No ratings yet
We provide a list of 15 sides that complement manchego cheese by adding bright fruits, crunchy breads, and savory cured meats. These options offer a range of textures, temperatures, and easy to medium preparation levels for balanced appetizer boards.
Print Recipe Pin Recipe
Prep Time 15 minutes mins
Cook Time 10 minutes mins
Total Time 25 minutes mins
Servings: 4 servings
Course: Dinner, Side Dish
Cuisine: Spanish
Ingredients Equipment Method Notes

Ingredients
  

  • Sweet Membrillo Quince Paste sweet
  • Toasted Crusty Baguette Slices crunchy
  • Marcona Almonds with Sea Salt rich crunch
  • Cured Jamón Ibérico Slices rich
  • Fresh Green Apple Slices bright
  • Marinated Spanish Olives herbal
  • Fig Jam Spread sweet
  • Roasted Red Peppers with Olive Oil silky
  • Crisp Endive Leaves for Scooping crisp
  • Sweet Grapes on the Stem bright
  • Smoky Spanish Chorizo Slices spicy
  • Classic Spanish Gazpacho Shot tangy
  • Honey Drizzle with Black Pepper sweet
  • Rustic Olive Oil Herb Flatbread chewy
  • Sherry Vinegar Marinated Artichokes tangy

Equipment

  • Sheet pan For roasting vegetables
  • Mixing bowl For salads or marinades
  • Cutting board Always needed for slicing
  • Serving platter To arrange cheese board

Method
 

  1. Assess what the main dish already provides-if it has starch, focus on vegetables and fresh sides.
  2. Choose 2-3 sides that fill different gaps: one vegetable, one starch or bread, one sauce or dip.
  3. Start the longest-cooking side first. Prep quick items like salads while the oven works.
  4. Balance temperatures-pair hot roasted vegetables with a cold slaw or chilled dip.
  5. Plate the main dish with sides arranged around it. Drizzle sauce or add garnish last.
Notes

Add a vegetable side like marinated artichokes and keep it chilled until serving. This prevents the board from feeling too heavy or unbalanced with rich cheese and meats.

Tried this recipe?

Let us know how it was!

You Might Also Like

  • Serving Corn on the Cob? Try These 15 Easy Sides
  • What Goes Well With Crawfish Bread? 15 Best Sides
  • 15 Best Sides to Serve with Hungarian Mushroom Soup for Cozy Meals

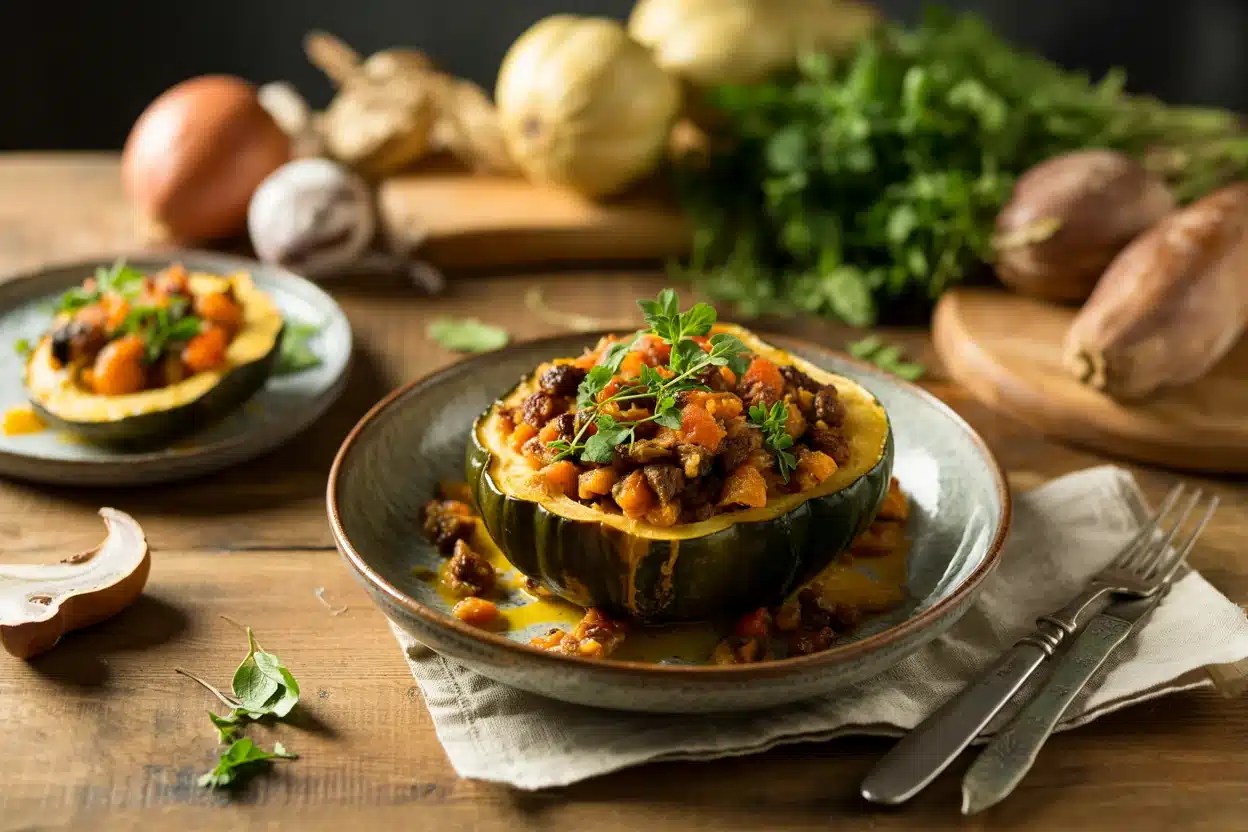
Stuffed Acorn Squash

February 5, 2026

Roast acorn squash face down at 400°F with a savory filling of cooked grains, ground meat, and herbs. The high heat caramelizes the edges while keeping the flesh tender, and the filling gets a chance to brown without spilling over.

Stuffed Acorn Squash

Pre-cooked grains are the secret. Raw rice or quinoa won't finish cooking in the squash, leaving you with crunchy filling.

This works for weeknight dinners when you need something that looks intentional but doesn't require constant attention. Also good for meal prep since the filled squash reheats without turning soggy.

QUICK SUMMARY

Stuffed Acorn Squash roasts in 50 minutes with a savory filling of cooked grains, ground meat, onion, garlic, and herbs. Roast the squash cut side down first to prevent steaming, then flip and stuff before the final bake. The result is tender squash with caramelized edges and a moist, flavorful filling.

⏱️Time Reality: 15 minutes prep, 50 minutes total cooking (hands-off)
🔑Critical First Move: Roast squash face down 25-30 minutes before stuffing
⚠️Watch Out: Don't overstuff-leave ¼ inch space or filling spills during baking

Why This Recipe Works

Roasting the squash face down drives moisture out instead of trapping steam inside. For a version that comes together quickly, simple homemade salmon pairs well when you need a full meal.

Quick Reference
⏱️
Prep Time
15 min
🔥
Cook Time
50 min
⏰
Total Time
65 min
🍽️
Servings
4 servings
📊
Difficulty
Medium
🏷️
Category
Main Dish
💡
Quick Tip
Roast squash face down for moist flesh
🎯
Best For
Weeknight | Meal prep | Entertaining

Here's what makes it work:

  • Face-down roasting prevents soggy squash: Steam escapes instead of pooling in the cavity, keeping the flesh tender without waterlogging
  • Pre-cooked grains ensure uniform texture: Raw grains won't finish cooking in the squash; fully cooked rice or quinoa heats through evenly in 20 minutes
  • Sautéing the filling develops flavor: Cooking ground meat, onion, and garlic in a skillet for 5-7 minutes creates caramelized bits that plain mixed filling can't match
  • Medium-sized squash cook evenly: Large squash take too long and dry out at the edges; medium halves (about 1.5 pounds each) roast through in 50 minutes
  • A final broil creates golden edges: Two to three minutes under the broiler browns cheese and crisps the squash rim without overcooking the filling
Quick Tip
Use a serrated knife to cut the squash-it grips the tough skin better than a chef's knife and reduces slipping

What You'll Need

Stuffed Acorn Squash - Stuffed Acorn Squash

Shopping for this means hitting the produce section for squash and grabbing pantry staples. Rich mains need something to cut through, and simple homemade potato does exactly that.

🥬
Squash Base
  • 2 medium acorn squash (1.5 lbs each)
  • Olive oil for roasting
🍗
Filling Protein
  • 1 lb ground meat (beef, turkey, or sausage)
  • Option: plant-based meat or cooked lentils
🍜
Grains & Bulk
  • 2 cups cooked grains (quinoa, rice, or farro)
  • 1 medium onion, diced
🧄
Aromatics & Flavor
  • 3 cloves garlic, minced
  • Fresh sage or thyme (1 tablespoon chopped)
  • Salt and black pepper
🥬
Optional Add-Ins
  • Bell peppers, spinach, or mushrooms (1 cup total)
  • ½ cup cheese (Parmesan or mozzarella)
  • ¼ cup pecans or dried cranberries

Ingredient Details

  • Acorn squash
    Choose medium-sized squash with firm skin and no soft spots; large squash take longer to roast and may dry out at the edges
  • Ground meat
    Turkey or beef work best; sausage adds extra seasoning but may be saltier-taste filling before adding salt
  • Cooked grains
    Rice, quinoa, or farro all work; cook grains fully ahead of time since they only reheat in the squash, not cook through
  • Onion and garlic
    Sauté these first to build flavor; raw onion won't soften enough in the baking time
  • Fresh herbs
    Sage and thyme are classic fall choices; add them in the last 2 minutes of sautéing to keep their aroma bright
  • Cheese
    Optional but adds creaminess; Parmesan melts into the filling while mozzarella creates stretchy texture
  • Nuts or dried fruit
    Pecans add crunch, cranberries add sweetness; both are optional and can be omitted for simpler filling

Ingredient Swaps

You can adjust this based on what's in the fridge or dietary needs. For a version that comes together quickly, a tender fried rice side works as an alternative grain base.

Four common swaps:

  • Ground meat → lentils or plant-based meat: Cooked lentils work but take longer to cook-simmer 25-30 minutes until tender before adding to filling
  • Parmesan cheese → nutritional yeast: Use 3 tablespoons nutritional yeast for umami without dairy; filling will be less creamy but still flavorful
  • Rice → quinoa or gluten-free grain: Quinoa cooks faster (15 minutes vs 20 for rice) and adds nuttier flavor; measure cooked volume, not dry weight
  • Acorn squash → butternut or delicata squash: Butternut takes 10 minutes longer to roast; delicata has thinner skin and roasts 5-10 minutes faster

Ground Beef Filling

Works for: Rich, savory filling with classic texture; pairs well with cheese and herbs

Skip if: You want a lighter option or need dairy-free protein

Lentil Filling (Vegetarian)

Works for: Plant-based meals; absorbs seasoning well and adds fiber

Skip if: You're short on time-lentils need 25-30 minutes to cook fully before stuffing

Quinoa Base

Works for: Gluten-free needs; cooks in 15 minutes and has nutty flavor

Skip if: You prefer traditional rice texture; quinoa is lighter and less sticky

Instructions

The squash roasts first, then you stuff and bake it again. Most people skip this juicy chicken, but it balances the meal.

  1. Roast the squash face down: Preheat oven to 400°F. Cut 2 acorn squash in half lengthwise, scoop out seeds, brush cut sides with olive oil, and place face down on a baking sheet. Roast 25-30 minutes until flesh is fork-tender.
  2. Sauté the filling: While squash roasts, heat 1 tablespoon olive oil in a skillet over medium heat. Add 1 pound ground meat and cook 5-7 minutes, breaking it into crumbles, until browned. Add 1 diced onion and 3 minced garlic cloves; cook 3-4 minutes until onion softens. Stir in 2 cups cooked grains, 1 tablespoon chopped sage or thyme, and season with salt and pepper.
  3. Flip and stuff the squash: Remove squash from oven and flip cut side up. Divide filling among the four halves, pressing gently to compact but leaving ¼ inch space at the top. Sprinkle with ½ cup cheese if using.
  4. Bake until heated through: Return stuffed squash to oven and bake 20 minutes until filling is hot and cheese melts. For golden edges, broil 2-3 minutes-watch closely to prevent burning.
  5. Rest before serving: Let squash rest 5 minutes after removing from oven. The filling sets slightly and flavors meld.
Golden Rule
Don't skip the face-down roasting step-it's the difference between tender squash and watery, steamed flesh

What to Serve With It

A good side can make or break the plate. For savory steak meal ideas, check the full guide.

Side Dish Prep Why It Works How to Serve
Simple Green Salad Easy Light, crisp contrast to rich filling; adds freshness Toss mixed greens with lemon vinaigrette; serve alongside
Steamed Broccoli Easy Bright texture and nutrients; quick to prepare Steam 5-7 minutes, season with salt and olive oil
Crusty Bread Easy Soaks up filling juices; adds carb balance Slice and toast; serve warm with butter
Roasted Carrots Easy Complements fall flavors; adds sweetness Roast with olive oil and thyme at 400°F for 25 minutes
Maple-Glazed Brussels Sprouts Medium Sweet-savory contrast; adds color to the plate Roast with maple syrup and balsamic; serve hot

Three ways to serve it:

  • With garlic herb yogurt sauce: Mix ½ cup Greek yogurt with 1 minced garlic clove, 1 tablespoon chopped parsley, and lemon juice-adds tang and moisture
  • With maple mustard glaze: Whisk 2 tablespoons maple syrup with 1 tablespoon Dijon mustard-drizzle over squash for sweet-savory punch
  • With simple marinara: Warm ½ cup marinara sauce and spoon alongside-classic pairing with meat-filled squash
Best Pick
Steamed broccoli takes 7 minutes and adds the bright, crisp contrast this dish needs without competing for oven space

Store and Reheat

Stuffed squash keeps well but reheats better in the oven than the microwave. Pork adds the contrast this plate needs, but timing matters-we keep a batch ready for nights like this with classic pork dish.

Method Time Best For
🍳 Stovetop 5-7 min on medium-low Reheating filling only; scoop out and warm in skillet to avoid soggy squash
🔥 Oven 20 min at 350°F Whole stuffed squash; preserves texture and crisps edges without drying
📦 Microwave 2-3 min on high Quick reheating; may soften squash edges but works in a pinch

For best results when storing:

  • Refrigerate within 2 hours: Cool stuffed squash to room temperature, then store in airtight, shallow containers; keeps 3-4 days
  • Freeze filling separately: Scoop filling into freezer-safe bags (up to 2 months); freeze squash halves separately if desired but texture may soften
  • Reheat in oven for best texture: Place stuffed squash on baking sheet, cover with foil, and warm at 350°F for 20 minutes-removes foil last 5 minutes to crisp edges
  • Add moisture when reheating: Drizzle 1-2 tablespoons broth or water over filling before reheating to prevent dryness
  • Don't reheat multiple times: Reheat only once to avoid mushy squash; store leftovers in single-serving portions for easier reheating

Frequently Asked Questions

How long to cook stuffed acorn squash at 400°F?

Roast squash face down for 25-30 minutes, then flip, stuff, and bake another 20 minutes (total 50 minutes). Squash is done when a fork slides through the flesh easily and edges are golden.

Can I make stuffed acorn squash ahead and reheat?

Yes-stuff and bake the squash fully, then refrigerate up to 3 days. Reheat in a 350°F oven for 20 minutes, covered with foil, removing foil the last 5 minutes to crisp edges.

What goes with stuffed acorn squash for sides?

Serve with a simple green salad, steamed broccoli, or crusty bread. For fall dinners, add roasted carrots or maple-glazed brussels sprouts.

How do I know when stuffed acorn squash is fully cooked?

Insert a fork into the squash flesh-it should slide through easily with no resistance. The filling should be hot throughout (165°F if using meat) and the edges should be golden or caramelized.

Can I use quinoa instead of rice in stuffed acorn squash?

Yes-quinoa works well and cooks faster (15 minutes vs 20 for rice). Use the same measurement of cooked quinoa as you would cooked rice; the texture will be lighter and slightly nuttier.

Stuffed Acorn Squash

Stuffed Acorn Squash

No ratings yet
Stuffed Acorn Squash features roasted squash halves filled with a savory mix of cooked grains, ground meat, and fresh herbs. Roasting the squash face down first avoids soggy flesh while the filling gets browned and flavorful for a comforting, hands-off weeknight meal.
Print Recipe Pin Recipe
Prep Time 15 minutes mins
Cook Time 50 minutes mins
Total Time 1 hour hr 5 minutes mins
Servings: 4 servings
Course: Main Dish
Cuisine: American
Ingredients Equipment Method Notes

Ingredients
  

  • 2 medium acorn squash halved and seeded
  • 1 tablespoon olive oil for roasting squash
  • 1 lb ground meat beef, turkey, or sausage
  • 1 medium onion diced
  • 3 cloves garlic minced
  • 2 cups cooked grains quinoa, rice, or farro
  • 1 tablespoon fresh herbs chopped sage or thyme
  • salt to taste
  • black pepper to taste
  • 0.5 cup cheese Parmesan or mozzarella, optional
  • 1 tablespoon olive oil for sautéing filling

Equipment

  • Oven For roasting squash and baking stuffed squash
  • Baking sheet To roast acorn squash halves
  • Skillet To sauté ground meat, onion, and garlic
  • Knife Serrated knife recommended for cutting squash

Method
 

  1. Preheat oven to 400°F. Cut acorn squash in half lengthwise, scoop out seeds, brush cut sides with olive oil, and place face down on a baking sheet. Roast for 25-30 minutes until flesh is fork-tender.
    2 medium acorn squash, 1 tbsp olive oil
  2. Heat 1 tablespoon olive oil in a skillet over medium heat. Add ground meat and cook for 5-7 minutes, breaking it into crumbles until browned. Add diced onion and minced garlic; cook another 3-4 minutes until onion softens. Stir in cooked grains, fresh herbs, salt, and pepper and mix to combine.
    1 lb ground meat, 1 medium onion, 3 cloves garlic, 2 cups cooked grains, 1 tbsp fresh herbs, salt, black pepper, 1 tbsp olive oil
  3. Remove squash from oven and flip halves cut side up. Divide filling evenly among the four halves, pressing gently but leaving ¼ inch space at the top. Sprinkle with cheese if using.
    0.5 cup cheese
  4. Return stuffed squash to oven and bake for 20 minutes until filling is heated through and cheese melts. For golden edges, broil 2-3 minutes, watching closely to prevent burning.
  5. Let the stuffed squash rest for 5 minutes after removing from the oven to let the filling set and flavors meld.

Notes

  • Roast the squash face down first to prevent soggy, steamed flesh.
  • Use fully cooked grains to ensure the filling is tender and hot in the final bake.
  • Don't overstuff the squash; leave ¼ inch space to avoid filling spilling during baking.

Tried this recipe?

Let us know how it was!

Vegetable Fried Rice

February 5, 2026

When you need a quick weeknight dinner that uses what's in the fridge, vegetable fried rice delivers. One pan, 20 minutes, and enough flexibility to swap in whatever vegetables need using.

Vegetable Fried Rice

High heat crisps the rice while the eggs scramble into soft curls. The soy sauce coats every grain without turning anything soggy.

Perfect for meal prep Sundays or nights when takeout feels like too much effort but cereal feels like too little.

QUICK SUMMARY

Vegetable fried rice turns day-old rice into crispy, restaurant-style dinner in 20 minutes. Use cold rice straight from the fridge so the grains stay separate instead of clumping. The vegetables cook fast, the eggs scramble in under two minutes, and the whole thing comes together in one pan.

⏱️Timing: 20 minutes total, 10 for prep and 10-12 for cooking
🔥Method: Cook on medium-high heat, stir constantly to prevent sticking
⚠️Watch Out: Fresh rice turns mushy - use day-old or spread hot rice on a sheet pan to cool

Why This Recipe Works

Day-old rice has less moisture than fresh, so the grains fry instead of steam. Most people skip chicken, but it balances the meal. For a version that comes together quickly, simple chicken recipe works when you need protein on the side.

Quick Reference
⏱️
Prep Time
10 min
🔥
Cook Time
10-12 min
⏰
Total Time
20-22 min
🍽️
Servings
4 servings
📊
Difficulty
Easy
🏷️
Category
Main Dish | Side
💡
Quick Tip
Use day-old rice for best texture
🎯
Best For
Weeknight | Meal prep | Budget

What makes this work:

  • Cold rice from the fridge fries crisp because the grains firm up overnight and release less starch
  • Medium-high heat creates slight char on the rice without burning the garlic or vegetables
  • Scrambled eggs cooked separately stay fluffy instead of turning rubbery when mixed with hot rice
  • Uniform vegetable cuts cook at the same rate so nothing ends up raw or mushy
  • Soy sauce added last coats the rice without making it soggy or overly salty
Quick Tip
Heat the wok until a drop of water sizzles and evaporates in 2 seconds before adding oil

What You'll Need

Vegetable Fried Rice - Vegetable Fried Rice

The vegetables can flex based on what needs using up. Vindaloo brings the color this plate needs. For a version that comes together quickly, this easy vindaloo recipe adds spice when the meal feels flat.

🍜
Base
  • 4 cups cooked rice, day-old
  • 2 eggs, beaten
🥬
Vegetables
  • 1 cup carrots, diced
  • 1 cup frozen peas
  • 1 bell pepper, diced
🧄
Aromatics
  • 3 cloves garlic, minced
  • 1 onion, diced
  • 3 green onions, sliced
🥢
Seasoning
  • 3 tablespoon soy sauce
  • 2 tablespoon vegetable oil
  • 1 teaspoon sesame oil (optional)

Ingredient Details

  • Day-old rice
    Store cooked rice in the fridge for at least 12 hours so the grains firm up and separate easily
  • Mixed vegetables
    Dice everything into ¼-inch pieces so they cook evenly in 3-4 minutes
  • Soy sauce
    Start with 2 tablespoons, taste, then add more - you can always add but can't take away
  • Eggs
    Beat with a pinch of salt before cooking so they scramble into soft, uniform curds
  • Vegetable oil
    Use 1.5 tablespoons per 2 cups of rice for light crisping without greasiness
  • Garlic
    Mince fine and cook for just 60 seconds - longer turns it bitter and burnt
  • Green onions
    Slice thin and add half during cooking, half as garnish for layered onion flavor

Ingredient Swaps

The base stays the same but the mix-ins flex. Corn adds the contrast this plate needs, but timing matters. For a version that comes together quickly, classic corn dish works when you need something hearty.

Four swaps that work:

  • Tamari for soy sauce - Same salty depth, no gluten, use the same amount
  • Quinoa for rice - Nuttier flavor, cooks faster, needs less oil because it's drier
  • Frozen mixed vegetables for fresh - Skip the chopping, cook 2 minutes less, slightly softer texture
  • Silken tofu for eggs - Crumble it in for vegan protein, cooks in 1-2 minutes, softer than scrambled eggs

Fresh Vegetables

Works for: Crisp texture, bright color, meal prep when you're chopping anyway

Skip if: Short on time or don't want to dice everything small

Frozen Mixed Vegetables

Works for: Speed, budget-friendly, no prep beyond opening the bag

Skip if: You want crisp-tender texture or visual variety

Instructions

The whole thing cooks in 10-12 minutes once the rice is cold. The chicken works best when it hits the table at the same time as the main. For a version that comes together quickly, this flaky shrimp adds richness when fried rice feels light.

  1. Heat wok or large skillet over medium-high heat for 2 minutes. Add 1 tablespoon oil, swirl to coat, then pour in beaten eggs. Scramble for 60-90 seconds until just set but still soft, then transfer to a plate.

  2. Add remaining oil to the hot pan. Toss in garlic and onion, stir constantly for 60 seconds until fragrant but not browned. Add diced vegetables, cook 3-4 minutes, stirring every 30 seconds, until tender-crisp.

  3. Add cold rice straight from the fridge. Break up clumps with your spatula, toss to coat with oil, then spread in an even layer. Let sit undisturbed for 60 seconds to crisp the bottom.

  4. Drizzle soy sauce around the edge of the pan. Stir everything together for 30 seconds, taste, add more soy sauce if needed. Fold in scrambled eggs and half the green onions.

  5. Cook 1 more minute, stirring constantly. Remove from heat when rice looks slightly crispy at the edges and everything smells toasted. Top with remaining green onions and serve immediately.

Golden Rule
Keep the wok moving - constant stirring prevents burning and ensures even cooking

What to Serve With It

Fried rice needs something fresh or tangy to cut the richness. A good beef can make or break the plate. When planning meals that need sides, easy chicken meal planning covers what works for weeknight plates.

Side Dish Prep Why It Works How to Serve
Miso Soup Easy Light, warming, balances the fried rice's richness Serve in small bowls alongside as a starter
Steamed Edamame Easy Adds extra protein and snappy texture Sprinkle with sea salt, serve warm
Cucumber Salad Easy Crisp, refreshing, cuts through savory flavors Toss with rice vinegar and sesame seeds
Pickled Vegetables Medium Acidity balances soy sauce, adds crunch Quick-pickle carrots and radishes, serve cold
Stir-Fried Greens Easy Nutrient boost, adds color to the plate Sauté bok choy or spinach with garlic

Three ways to serve it:

  • As a main dish - Add pan-seared tofu or shrimp on top for extra protein
  • As a side - Pair with grilled chicken, salmon, or beef for a complete meal
  • For meal prep - Portion into containers with steamed broccoli or snap peas
Shortcut
Make a double batch on Sunday and reheat portions throughout the week for quick lunches

Store and Reheat

Fried rice keeps for 3-4 days but dries out in the fridge. Potato adds the contrast this plate needs, but timing matters. For a version that comes together quickly, quick potato dish fills the plate when rice feels light.

Method Time Best For
🍳 Stovetop 4-5 min Best texture, adds slight crisp back to the rice
🔥 Oven 10 min at 350°F Large batches, even reheating without stirring
📦 Microwave 1-2 min Speed when texture doesn't matter much

For best results when storing:

  • Cool fried rice quickly by spreading it on a sheet pan for 10 minutes before refrigerating
  • Store in shallow containers so it chills fast and reheats evenly
  • Add a tablespoon of water when reheating to restore moisture without making it soggy
  • Reheat on stovetop over medium heat with a splash of oil for crispy edges
  • Freeze in portions for up to 2 months - thaw overnight in the fridge before reheating

Frequently Asked Questions

Can I make vegetable fried rice ahead and reheat it?

Yes, it keeps for 3-4 days in the fridge. Reheat on the stovetop with a splash of oil for 4-5 minutes to restore the crispy texture.

How do I avoid soggy rice in vegetable fried rice?

Use day-old rice straight from the fridge and cook on medium-high heat. Fresh rice has too much moisture and steams instead of frying.

What is the best way to tell when vegetable fried rice is done?

Look for slightly crispy edges on the rice, tender-crisp vegetables, and a toasted smell. The eggs should be fully set and mixed throughout.

Can I substitute quinoa or cauliflower rice for regular rice?

Quinoa works - use cooked, chilled quinoa and reduce oil slightly since it's drier. Cauliflower rice releases more water, so cook it separately first to dry it out.

What sides or sauces pair well with vegetable fried rice?

Miso soup, cucumber salad, or steamed edamame balance the richness. For sauces, try chili garlic sauce for heat or sweet chili sauce for tangy sweetness.

Vegetable Fried Rice

Vegetable Fried Rice

No ratings yet
Vegetable fried rice is a quick and flexible weeknight dish that crisps day-old rice and scrambles eggs in one pan. The soy sauce coats the rice perfectly without making it soggy. This recipe is perfect for meal prep or whenever you want a fast, satisfying dinner using fridge staples.
Print Recipe Pin Recipe
Prep Time 10 minutes mins
Cook Time 12 minutes mins
Total Time 22 minutes mins
Servings: 4 servings
Course: Main Dish, Side
Cuisine: Asian-Inspired
Ingredients Equipment Method Notes

Ingredients
  

  • 4 cups rice cooked, day-old
  • 2 eggs beaten with a pinch of salt
  • 1 cup carrots diced into ¼-inch pieces
  • 1 cup peas frozen
  • 1 bell pepper diced into ¼-inch pieces
  • 3 cloves garlic minced finely
  • 1 onion diced
  • 3 green onions sliced thin, half for cooking, half for garnish
  • 3 tablespoon soy sauce add last for coating
  • 2 tablespoon vegetable oil divided
  • 1 teaspoon sesame oil optional

Equipment

  • Wok or large skillet Used for stir-frying rice and vegetables
  • Spatula For stirring and tossing ingredients

Method
 

  1. Heat wok or large skillet over medium-high heat for 2 minutes. Add 1 tablespoon vegetable oil, swirl to coat, then pour in beaten eggs. Scramble for 60-90 seconds until just set but still soft, then transfer to a plate.
    2 eggs, 2 tbsp vegetable oil
  2. Add remaining oil to the hot pan. Toss in garlic and onion, stir constantly for 60 seconds until fragrant but not browned. Add diced carrots, peas, and bell pepper, cook 3-4 minutes stirring every 30 seconds until tender-crisp.
    3 cloves garlic, 1 onion, 1 cup carrots, 1 cup peas, 1 bell pepper, 2 tbsp vegetable oil
  3. Add cold day-old rice straight from the fridge. Break up clumps with your spatula, toss to coat with oil, then spread in an even layer. Let sit undisturbed for 60 seconds to crisp the bottom.
    4 cups rice, 2 tbsp vegetable oil
  4. Drizzle soy sauce around the edge of the pan. Stir everything together for 30 seconds, taste and add more soy sauce if needed. Fold in scrambled eggs and half the sliced green onions.
    3 tbsp soy sauce, 2 eggs, 3 green onions
  5. Cook 1 more minute, stirring constantly. Remove from heat when rice looks slightly crispy at the edges and everything smells toasted. Top with remaining green onions and serve immediately.
    3 green onions

Notes

  • Use day-old rice straight from the fridge to keep grains separate and prevent mushiness.
  • Cook eggs separately to keep them fluffy and avoid rubbery texture.
  • Maintain medium-high heat and keep stirring to prevent burning and get a slight crisp.

Tried this recipe?

Let us know how it was!

Sweet Potato Black Bean Enchiladas

February 5, 2026

Roasting sweet potatoes with black beans and wrapping them in corn tortillas creates tender, saucy enchiladas. The high heat caramelizes the sweet potato edges while the beans add protein and texture contrast.

Sweet Potato Black Bean Enchiladas

You don't need complex assembly skills. The filling holds together on its own and the sauce does most of the flavor work.

This is what we make for weeknight vegetarian dinners that work for meal prep or family gatherings when you need something filling that doesn't taste like compromise.

QUICK SUMMARY

Sweet potato black bean enchiladas use roasted sweet potatoes and black beans wrapped in corn tortillas with enchilada sauce. The key is roasting the sweet potatoes until tender but not mushy so they hold their shape inside the tortillas. Warm the tortillas before rolling to prevent cracking and tearing during assembly.

⏱️Time Reality: 60 minutes total - 20 min prep, 40 min baking
🔥First Critical Move: Cut sweet potatoes into ½ inch cubes for even roasting
⚠️Watch Out: Too much sauce makes soggy enchiladas - use moderate coating and broil uncovered last 3-5 min

Why This Recipe Works

Roasted sweet potatoes bring natural sweetness that balances the savory spice of enchilada sauce. Most people skip beef, but it balances the meal - for this rich beef, the combination creates a complete vegetarian protein source with complementary textures.

Quick Reference
⏱️
Prep Time
20 min
🔥
Cook Time
40 min
⏰
Total Time
60 min
🍽️
Servings
6 servings
📊
Difficulty
Medium
🏷️
Category
Main Dish
💡
Quick Tip
Roast sweet potatoes until tender but not mushy
🎯
Best For
Weeknight | Meal prep

What makes this work:

  • Roast sweet potatoes at 425°F for 25-30 minutes - the high heat caramelizes the edges while keeping the interior tender enough to hold shape inside tortillas
  • Sauté aromatics first - cooking onion and garlic in oil for 5 minutes until soft creates the flavor base that coats every bite of filling
  • Cover while baking - baking covered with foil for the first 20 minutes keeps tortillas moist, then uncovering for the last 10 minutes browns the edges
  • Warm tortillas before assembling - wrapping corn tortillas in a damp towel and microwaving for 30 seconds makes them flexible enough to roll without cracking
  • Layer sauce on the pan bottom - spreading a thin layer of enchilada sauce prevents sticking and adds moisture from underneath so the bottom tortillas don't dry out
Quick Tip
Cut sweet potatoes into uniform ½ inch cubes so they roast evenly and finish at the same time

What You'll Need

Sweet Potato Black Bean Enchiladas - Sweet Potato Black Bean Enchiladas

The grocery list is straightforward and budget-friendly. Rich mains need something to cut through, and korma does exactly that - for a tender korma on the side, you'll find similar vegetarian-friendly ingredients that work well together.

🥬
Vegetables
  • 2 medium sweet potatoes
  • 1 medium onion
  • 3 cloves garlic
🍗
Protein
  • 1 can (15 oz) black beans, drained
🍜
Base
  • 12 corn tortillas (6-inch)
🥢
Sauce & Seasonings
  • 2 cups enchilada sauce
  • 1 teaspoon ground cumin
  • 2 tablespoon olive oil
🧀
Optional Toppings
  • 1 cup shredded cheese
  • ¼ cup fresh cilantro

Ingredient Details

  • Sweet potatoes
    Choose firm sweet potatoes without soft spots - they hold their shape better when roasted and prevent mushy filling
  • Corn tortillas
    Use fresh corn tortillas for best flexibility - old tortillas crack even when warmed, making assembly difficult
  • Enchilada sauce
    Pick thick enchilada sauce over thin for better coating - watery sauce creates soggy enchiladas that fall apart
  • Black beans
    Drain and rinse canned beans to remove excess sodium and starchy liquid that can make the filling too wet
  • Cumin
    Toast cumin in the pan for 30 seconds before adding other ingredients to bloom the flavor and deepen the southwestern profile
  • Cheese
    Omit cheese entirely for dairy-free or use vegan cheese - the filling is flavorful enough to stand alone
  • Olive oil
    Use enough oil to coat the pan when sautéing aromatics - this prevents sticking and helps onions soften evenly

Ingredient Swaps

The base recipe adapts to what you have on hand. Potato adds the contrast this plate needs, but timing matters - for more potatoes ideas, you can swap several components without losing the core texture or flavor.

Four reliable swaps:

  • Swap black beans for pinto beans - pinto beans are slightly creamier with a milder flavor, same texture contrast, cook the same way
  • Use flour tortillas instead of corn - flour tortillas are softer and chewier, add gluten to the dish, less traditional but easier to roll without tearing
  • Replace enchilada sauce with salsa roja - salsa roja is thinner and lighter, adjust by using less liquid, may need to simmer to thicken before assembling
  • Substitute sweet potatoes with butternut squash - butternut squash offers similar sweetness and creamy texture, roasts slightly faster so check at 20 minutes

Corn Tortillas

Works for: Traditional texture, gluten-free, authentic southwestern flavor

Skip if: You don't have time to warm them - they crack when cold

Flour Tortillas

Works for: Easier assembly, more flexible when cold, softer texture

Skip if: You need gluten-free or want traditional enchilada texture

Instructions

The method is straightforward with built-in safeguards. A good pockets can make or break the plate - for this simple pockets, the same attention to timing and texture applies here.

  1. Roast the sweet potatoes: Preheat oven to 425°F (220°C). Cut sweet potatoes into ½ inch cubes, toss with 1 tablespoon olive oil, spread on a sheet pan, and roast 25-30 minutes until tender with golden edges. Check doneness by piercing with a fork - it should slide in easily but the cubes should hold their shape.

  2. Sauté the aromatics: Heat remaining 1 tablespoon olive oil in a large skillet over medium heat. Add diced onion and cook 5 minutes until soft and translucent. Add minced garlic and cumin, cook 1 minute until fragrant. Remove from heat.

  3. Make the filling: Add roasted sweet potatoes and drained black beans to the skillet with aromatics. Mash roughly with a fork or potato masher, leaving some chunks for texture. Season with salt and pepper to taste. The filling should hold together but not be completely smooth.

  4. Assemble the enchiladas: Spread ½ cup enchilada sauce in the bottom of a 9x13 inch baking dish. Wrap corn tortillas in a damp towel and microwave 30 seconds to soften. Spoon ⅓ cup filling down the center of each tortilla, roll tightly, and place seam-side down in the dish. Pour remaining sauce over the top and sprinkle with cheese if using.

  5. Bake: Cover the dish tightly with foil and bake at 375°F (190°C) for 20 minutes. Remove foil and bake uncovered 10 more minutes until sauce is bubbly and edges are slightly crisp. Let rest 5 minutes before serving. The filling should be hot throughout and the tortillas soft but not falling apart.

Golden Rule
Always warm tortillas before rolling - cold corn tortillas crack no matter how careful you are with assembly

What to Serve With It

These enchiladas need sides that add freshness and crunch. The gap is texture contrast - something crisp or fresh cuts through the soft, saucy enchiladas, and planning your quinoa salad dinner offers similar vegetarian pairing strategies that balance the plate.

Side Dish Prep Why It Works How to Serve
Mexican Rice Easy Soaks up extra sauce and adds neutral starch to balance spicy filling Serve warm alongside or underneath enchiladas to catch drips
Refried Beans Easy Extra protein and creamy texture that complements without competing Spread on the plate as a base or serve in a small side bowl
Simple Green Salad Easy Fresh crunch and acidity cut through rich, saucy enchiladas Dress with lime vinaigrette and serve cold on the side
Guacamole Medium Creamy, cooling contrast that mellows spice and adds richness Dollop on top of each enchilada or serve in a bowl for dipping
Street Corn Salad Medium Bold flavors and charred corn bring festive, crunchy contrast Serve cold in a bowl as a bright, colorful side

Three ways to serve it:

  • Weeknight plate: Mexican rice on the bottom, two enchiladas on top, simple green salad on the side - the rice catches sauce and the salad adds freshness
  • Meal prep bowls: Slice enchiladas into thirds, pack with refried beans and guacamole in separate containers - reheat the enchiladas and beans, add cold guacamole when serving
  • Hosting platter: Arrange enchiladas on a large platter, surround with street corn salad and fresh cilantro, serve sour cream and hot sauce on the side for guests to customize
Best Pick
A simple green salad with lime vinaigrette adds the crunch and acid this plate needs without adding more heat or heaviness

Store and Reheat

Enchiladas keep well but need careful reheating to avoid sogginess. The this chicken works best when it hits the table at the same time as the main - for simple sauce recipe, store these the same way for best results when reheating leftovers.

Method Time Best For
🔥 Oven 20 min at 350°F (175°C) Even reheating and restoring texture - cover with foil first 15 min then uncover last 5 min
📦 Microwave 2-3 min covered Quick reheating single portions - tortillas soften but filling stays hot
🍳 Stovetop 5-7 min in covered skillet on low Reheating 1-2 enchiladas while preserving crispy edges - add 1 tablespoon water to pan

For best results when storing:

  • Cool completely before refrigerating - let enchiladas rest 20 minutes at room temperature to prevent condensation that creates soggy tortillas
  • Store in shallow, airtight containers - stack enchiladas in a single layer or separate with parchment to prevent sticking
  • Keep up to 3-4 days in the fridge - the filling stays fresh but tortillas soften over time, so eat within this window for best texture
  • Freeze for up to 2 months - wrap individual enchiladas tightly in plastic wrap then foil, freeze flat on a sheet pan before stacking
  • Add fresh toppings after reheating - cilantro, sour cream, and hot sauce lose quality when stored, so add these right before serving

Frequently Asked Questions

Can I make Sweet Potato Black Bean Enchiladas ahead and freeze them?

Yes, assemble the enchiladas completely but don't bake them. Wrap tightly in plastic wrap then foil and freeze for up to 2 months. Bake from frozen at 375°F (190°C) covered for 40 minutes, then uncover and bake 10 more minutes until hot throughout.

How should I store and reheat leftover enchiladas for best texture?

Store in an airtight container in the fridge for 3-4 days. Reheat in the oven at 350°F (175°C) for 20 minutes covered with foil to prevent drying. For single portions, microwave covered for 2-3 minutes, though the tortillas will soften more than oven reheating.

How do I know when sweet potato enchiladas are fully cooked?

The sauce should be bubbly around the edges and the filling hot all the way through. Insert a knife into the center of an enchilada and touch it to your lip - it should feel hot, not warm. The edges should be slightly crisp and golden.

Why are my enchiladas soggy and how can I fix it?

Too much sauce makes them soggy. Use a moderate coating and always bake covered first, then uncovered last 10 minutes to dry the top layer. If they're already soggy, broil uncovered for 3-5 minutes to crisp the edges and evaporate excess moisture.

Can I substitute flour tortillas and how does it affect the dish?

Yes, flour tortillas work but they're softer and add gluten to the dish. They're easier to roll without warming and won't crack, but the texture is less traditional. Use the same amount and follow the same assembly method.

Sweet Potato Black Bean Enchiladas

Sweet Potato Black Bean Enchiladas

No ratings yet
Sweet Potato Black Bean Enchiladas feature roasted sweet potatoes and black beans wrapped in soft corn tortillas with enchilada sauce. Roasting the sweet potatoes until tender but firm creates a balanced texture, while warming tortillas before rolling prevents cracking during assembly.
Print Recipe Pin Recipe
Prep Time 20 minutes mins
Cook Time 40 minutes mins
Total Time 1 hour hr
Servings: 6 servings
Course: Main Dish
Cuisine: Mexican
Ingredients Method Notes

Ingredients
  

  • 2 medium sweet potatoes cut into ½ inch cubes
  • 1 medium onion diced
  • 3 cloves garlic minced
  • 15 oz black beans canned, drained and rinsed
  • 12 count corn tortillas 6-inch, warmed before rolling
  • 2 cups enchilada sauce prefer thick variety
  • 1 teaspoon ground cumin toasted briefly before use
  • 2 tablespoon olive oil divided for roasting and sautéing
  • 1 cup shredded cheese optional topping
  • 0.25 cup fresh cilantro optional topping

Method
 

  1. Preheat oven to 425°F (220°C). Toss ½ inch cubed sweet potatoes with 1 tablespoon olive oil. Spread evenly on a sheet pan and roast 25-30 minutes until tender with golden edges. Check doneness by piercing with a fork; it should slide in easily but cubes hold their shape.
    2 medium sweet potatoes, 2 tbsp olive oil
  2. Heat remaining 1 tablespoon olive oil in a large skillet over medium heat. Add diced onion and cook 5 minutes until soft and translucent. Add minced garlic and toasted ground cumin, cook 1 minute until fragrant. Remove from heat.
    1 medium onion, 3 cloves garlic, 1 tsp ground cumin, 2 tbsp olive oil
  3. Add the roasted sweet potatoes and drained black beans to the skillet with the aromatics. Roughly mash with a fork or potato masher, leaving some chunks for texture. Season with salt and pepper to taste.
    2 medium sweet potatoes, 15 oz black beans, 1 medium onion, 3 cloves garlic
  4. Spread ½ cup enchilada sauce evenly on the bottom of a 9x13 inch baking dish. Wrap corn tortillas in a damp towel and microwave for 30 seconds to soften.
    12 count corn tortillas, 2 cups enchilada sauce
  5. Spoon about ⅓ cup of filling along the center of each warmed tortilla. Roll tortillas tightly and place seam-side down in the baking dish. Pour remaining enchilada sauce evenly over the enchiladas and sprinkle with shredded cheese if using.
    12 count corn tortillas, 2 cups enchilada sauce, 1 cup shredded cheese
  6. Cover the dish tightly with foil and bake at 375°F (190°C) for 20 minutes. Remove foil and bake uncovered for an additional 10 minutes until sauce is bubbly and edges are slightly crisp. Let rest for 5 minutes before serving.

Notes

  • Cut sweet potatoes into uniform ½ inch cubes for even roasting and consistent texture.
  • Warm corn tortillas before rolling to prevent cracking and tearing during assembly.
  • Bake covered first to keep tortillas moist, then uncovered to crisp the edges and avoid sogginess.

Tried this recipe?

Let us know how it was!

Layered Vegetable Lasagna

February 5, 2026

When you need a vegetarian main that works for meal prep or a weeknight potluck, this lasagna delivers. Roasted vegetables layer with creamy ricotta and marinara in a 9x13 inch baking dish, then bake until the edges bubble and the cheese browns.

Layered Vegetable Lasagna

The vegetables get roasted first, which removes moisture and prevents soggy layers. That step takes 25 minutes but saves you from watery lasagna.

Perfect for batch cooking when you want comfort food that holds up in the fridge for three days.

QUICK SUMMARY

Roasted zucchini and eggplant layer with ricotta, mozzarella, and marinara sauce in a 9x13 inch dish, then bake covered at 375°F for 30 minutes. Roasting vegetables first removes excess moisture so the noodles stay firm and the layers hold together when sliced.

⏱️Time Reality: 30 minutes prep to roast vegetables and layer, then 45 minutes baking with a 15-minute rest before slicing.
🔪Critical First Move: Roast zucchini and eggplant at 400°F for 20-25 minutes to release water before layering.
⚠️Watch Out: Wet vegetables make soggy lasagna - drain roasted veggies on paper towels and pat dry before assembling.

Why This Recipe Works

Roasting the vegetables before layering means you control the moisture. Most people skip this step and end up with watery lasagna. For a version that comes together quickly, this quick soup dish uses similar Italian herbs without the assembly work.

Quick Reference
⏱️
Prep Time
30 min
🔥
Cook Time
45 min
⏰
Total Time
1 hr 15 min
🍽️
Servings
8 servings
📊
Difficulty
Medium
🏷️
Category
Main Dish
💡
Quick Tip
Roast vegetables before layering for best texture
🎯
Best For
Weeknight | Meal prep | Entertaining

Five reasons this method works:

  • High-heat roasting at 400°F drives moisture out of zucchini and eggplant before they go into the pan
  • No-boil noodles absorb sauce during baking without needing a separate pot of boiling water
  • Covering with foil for the first 30 minutes traps steam so noodles cook through without drying out
  • Draining ricotta in a mesh strainer for 30 minutes prevents a wet cheese layer that makes everything slide apart
  • Resting 15 minutes after baking lets the layers set so slices hold their shape on the plate
Golden Rule
Salt each vegetable layer lightly before adding sauce - underseasoned vegetables make bland lasagna even with good marinara

What You'll Need

Layered Vegetable Lasagna - Layered Vegetable Lasagna

The vegetable section takes up half your shopping list. Rich mains need something to cut through, and a creamy fry on the side does exactly that with similar hearty textures.

🍜
Noodles
  • 12 lasagna noodles (regular or no-boil)
🧀
Cheese
  • 15 oz ricotta cheese
  • 2 cups shredded mozzarella
  • ½ cup grated Parmesan
  • 1 large egg (optional, for binding)
🥬
Vegetables
  • 2 medium zucchini
  • 1 medium eggplant
  • 2 cups fresh spinach
🥢
Sauce & Oil
  • 3 cups marinara sauce
  • 2 tablespoon olive oil
  • 3 garlic cloves, minced

Ingredient Details

  • Lasagna noodles
    No-boil noodles save time but need extra sauce to hydrate - soak in warm water 15 minutes if the sauce is thick
  • Ricotta cheese
    Whole milk ricotta spreads easier and tastes richer than part-skim - drain in a mesh strainer 30 minutes to remove excess liquid
  • Mozzarella cheese
    Low-moisture mozzarella melts without releasing water - shred from a block instead of buying pre-shredded for better texture
  • Zucchini
    Slice ¼-inch thick so pieces roast evenly without burning edges - pat dry after roasting to remove surface moisture
  • Eggplant
    Salt sliced eggplant for 20 minutes before roasting to draw out bitterness - rinse and pat dry before tossing with oil
  • Marinara sauce
    Use a smooth sauce without big chunks so it spreads evenly - season with extra garlic or herbs if it tastes bland from the jar
  • Spinach
    Sauté fresh spinach until wilted and squeeze out water, or thaw frozen spinach and press dry in a towel

Ingredient Swaps

Dairy-free versions need multiple swaps to match the texture. A good salad can make or break the plate. For a version that comes together quickly, something fresh like salad balances rich layers with acidity and crunch.

Four swaps that work:

  • Ricotta cheese → blended silken tofu - whip tofu with lemon juice and nutritional yeast for a creamy dairy-free layer (smoother texture, less tangy)
  • Lasagna noodles → gluten-free lasagna noodles - follow package directions for baking time since GF noodles sometimes need longer to soften
  • Mozzarella cheese → dairy-free mozzarella shreds - melts on top but won't stretch like real mozzarella (less gooey pull when sliced)
  • Spinach → kale or Swiss chard - chop smaller and sauté 2-3 minutes longer since these greens are tougher than spinach

Regular Noodles

Works for: Traditional texture, need to boil separately for 8-10 minutes before layering

Skip if: You want to save a pot and don't mind slightly different texture from no-boil

No-Boil Noodles

Works for: Quick assembly, hydrate during baking with sauce moisture

Skip if: Your sauce is very thick - noodles won't soften without enough liquid

Gluten-Free Noodles

Works for: Celiac or gluten sensitivity, texture close to regular when baked properly

Skip if: Budget matters - GF noodles cost 2-3x more than regular lasagna noodles

Instructions

The layering takes 10 minutes once vegetables are roasted. Most people skip salad, but it balances the meal. We keep a batch ready for nights like this - golden fries recipe adds a crispy contrast to creamy layers.

  1. Roast vegetables: Preheat oven to 400°F, slice zucchini and eggplant ¼-inch thick, toss with 2 tablespoons olive oil and salt, spread on a sheet pan, roast 20-25 minutes until edges brown and vegetables release moisture, then pat dry with paper towels.

  2. Prepare ricotta mixture: Drain ricotta in a mesh strainer for 30 minutes, transfer to a bowl, mix with 1 egg (if using), ½ cup Parmesan, and minced garlic until smooth.

  3. Layer lasagna: Spread 1 cup marinara in the bottom of a 9x13 inch baking dish, add 4 noodles (no overlap), spread half the ricotta mixture, layer half the roasted vegetables, sprinkle ⅓ of the mozzarella, repeat layers (sauce, noodles, ricotta, vegetables, mozzarella), finish with final layer of noodles, remaining sauce, and remaining mozzarella.

  4. Bake covered: Cover dish tightly with foil, bake at 375°F for 30 minutes until sauce bubbles at edges and noodles soften.

  5. Brown top and rest: Remove foil, bake 10-15 minutes more until cheese browns lightly, remove from oven, let rest 15 minutes before slicing with a serrated knife.

Shortcut
Use jarred roasted red peppers instead of roasting your own vegetables - drain well and layer between ricotta and sauce

What to Serve With It

Lasagna needs something acidic or crunchy to balance all that cheese. Rich, layered mains pair best with simple sides that add texture without competing for attention. For easy lasagna dinner nights, plan one fresh element and one starch.

Side Dish Prep Why It Works How to Serve
Simple green salad Easy Crisp lettuce and tangy vinaigrette cut through creamy cheese Toss with lemon juice and olive oil, serve cold alongside hot lasagna
Garlic bread Easy Crunchy toast soaks up extra marinara and adds buttery richness Toast under broiler 3-4 minutes until golden, serve warm in a basket
Steamed broccoli Easy Light green vegetable balances heavy pasta without extra fat Steam 5-6 minutes until tender, season with salt and lemon zest
Roasted carrots Easy Natural sweetness contrasts savory tomato sauce and herbs Roast at 425°F for 20 minutes with olive oil, serve hot or room temp
Caprese salad Easy Fresh mozzarella and tomatoes echo lasagna flavors with lighter feel Layer with basil, drizzle balsamic, serve chilled before main course

Three ways to serve it:

  • Weeknight dinner: Pair with simple green salad and garlic bread for a complete meal that doesn't require extra cooking
  • Meal prep: Cut into 8 portions, store in individual containers with steamed broccoli for grab-and-go lunches
  • Potluck or entertaining: Serve with antipasto platter and bruschetta so guests can graze before the main dish
Best Pick
A crisp green salad with lemon vinaigrette - the acidity and crunch balance rich cheese without adding more carbs

Store and Reheat

Lasagna holds well for three days but gets watery if stored too warm. Cool completely before refrigerating so condensation doesn't make the noodles soggy. Most people skip this dip, but it balances the meal. For a version that comes together quickly, creamy sauce side dish uses similar herbs and can be drizzled over reheated slices.

Method Time Best For
🍳 Stovetop 10 min covered on low Small portions, adds moisture back without drying edges
📦 Microwave 3-5 min on medium power Single servings, fastest option but cheese may get rubbery
🔥 Oven 20-25 min at 350°F covered Large portions or whole pan, even heating with crispy top if uncovered last 5 minutes

For best results when storing:

  • Cool completely before covering - lasagna straight from the oven creates steam that makes noodles mushy when refrigerated
  • Store in shallow containers - lasagna cools faster in a wide dish than a deep one, which prevents bacterial growth
  • Cover tightly with plastic wrap - press wrap directly onto the surface to prevent top layer from drying out in the fridge
  • Freeze individual portions - cut into squares, wrap each piece in foil, freeze up to 3 months for quick single servings
  • Add extra sauce when reheating - drizzle 2 tablespoons marinara over each portion before microwaving to restore moisture

Frequently Asked Questions

Can I make layered vegetable lasagna ahead and freeze it?

Yes - assemble the lasagna completely but don't bake it, wrap tightly in plastic wrap and foil, freeze up to 3 months. Bake from frozen at 375°F covered for 60 minutes, then uncover and bake 15 minutes more until cheese browns.

What is the best way to reheat leftover vegetable lasagna?

Oven reheating at 350°F covered for 20-25 minutes gives the most even heating without drying the edges. Add 2 tablespoons of water or extra marinara before covering with foil to restore moisture.

How do I know when the lasagna noodles are fully cooked?

Insert a knife through the center of the lasagna - it should slide through noodles with slight resistance but no crunch. If noodles feel hard, cover with foil and bake 10-15 minutes longer.

Why is my vegetable lasagna soggy and how do I fix it?

Soggy lasagna comes from vegetables releasing water during baking - roast zucchini and eggplant first at 400°F for 20-25 minutes and pat dry before layering. If already baked and soggy, bake uncovered at 375°F for 15-20 minutes to evaporate excess moisture.

Can I double this recipe for a larger crowd?

Yes - use two 9x13 inch pans instead of one deeper dish, which bakes more evenly. Keep baking time the same at 375°F for 30 minutes covered, then 10-15 minutes uncovered.

Layered Vegetable Lasagna

Layered Vegetable Lasagna

No ratings yet
This layered vegetable lasagna features roasted zucchini and eggplant with creamy ricotta and marinara sauce in a 9x13 inch baking dish. Roasting the vegetables first removes excess moisture, preventing soggy layers and ensuring the noodles stay firm. The lasagna bakes covered to lock in moisture and finishes uncovered for a lightly browned cheese top.
Print Recipe Pin Recipe
Prep Time 30 minutes mins
Cook Time 45 minutes mins
Total Time 1 hour hr 15 minutes mins
Servings: 8 servings
Course: Main Dish
Cuisine: Italian
Ingredients Method Notes

Ingredients
  

  • 12 pieces lasagna noodles regular or no-boil
  • 15 oz ricotta cheese drained in a mesh strainer for 30 minutes
  • 2 cups mozzarella cheese shredded low-moisture
  • 0.5 cup Parmesan cheese grated
  • 1 egg large, optional for binding
  • 2 medium zucchini sliced ¼-inch thick, pat dry after roasting
  • 1 medium eggplant salted for 20 minutes, rinsed and pat dry before roasting
  • 2 cups spinach fresh, sautéed until wilted and drained
  • 3 cups marinara sauce smooth, seasoned as needed
  • 2 tablespoons olive oil for tossing vegetables
  • 3 cloves garlic minced, added to ricotta mixture

Method
 

  1. Preheat oven to 400°F. Slice zucchini and eggplant ¼-inch thick. Toss with olive oil and salt, spread on a sheet pan, and roast for 20-25 minutes until edges brown and vegetables release moisture. Pat dry with paper towels.
    2 medium zucchini, 1 medium eggplant, 2 tablespoons olive oil
  2. Drain ricotta in a mesh strainer for 30 minutes. Transfer to a bowl and mix with egg (if using), grated Parmesan, and minced garlic until smooth.
    15 oz ricotta cheese, 0.5 cup Parmesan cheese, 1 egg, 3 cloves garlic
  3. Spread 1 cup marinara sauce in the bottom of a 9x13 inch baking dish. Arrange 4 noodles without overlap, spread half the ricotta mixture over noodles, add half the roasted vegetables, sprinkle one-third of the mozzarella cheese. Repeat layers with sauce, noodles, ricotta, vegetables, and mozzarella. Finish with a final layer of noodles, remaining sauce, and remaining mozzarella.
    12 pieces lasagna noodles, 15 oz ricotta cheese, 2 cups mozzarella cheese, 2 medium zucchini, 1 medium eggplant, 3 cups marinara sauce
  4. Cover the dish tightly with foil and bake at 375°F for 30 minutes until sauce bubbles at the edges and noodles soften.
  5. Remove foil and bake an additional 10-15 minutes until cheese browns lightly. Remove from oven and let rest for 15 minutes before slicing with a serrated knife.

Notes

  • Roast zucchini and eggplant first to remove moisture and prevent soggy lasagna.
  • Drain ricotta cheese well to avoid a wet layer that causes sliding.
  • Let the lasagna rest after baking so slices hold their shape when serving.

Tried this recipe?

Let us know how it was!

Rosemary Garlic Focaccia Bread

February 5, 2026

Homemade focaccia often turns out dense or bland because the dough doesn't get enough oil or the herbs taste flat.

The fix is dimpling the dough deeply so olive oil pools in the pockets and using fresh rosemary with minced garlic pressed into the surface.

Rosemary Garlic Focaccia Bread

High heat creates a golden crust while the inside stays airy and tender. The yeast does the work during a one-hour rise, then 20 minutes in the oven finishes it.

This works for weeknight dinners when you want warm bread without kneading for 20 minutes or waiting half a day for dough to proof.

QUICK SUMMARY

This Italian focaccia bread uses active dry yeast for an airy crumb, fresh rosemary and garlic for aromatic flavor, and generous olive oil for crispy edges. Dimple the dough deeply before baking so the oil creates golden pockets across the surface.

⏱️Time Reality: 20 minutes hands-on work, but plan for 1 hour rising time before baking
🔑Critical First Step: Proof yeast in 110°F water with sugar for 5 minutes until foamy
⚠️Common Mistake: Using water that's too hot kills the yeast-stick to 105-110°F for activation

Why This Recipe Works

Focaccia gets its airy texture from proper yeast activation and a long rise, not from heavy kneading. For something that pairs well with the herby bread, try a homemade bread recipe that uses similar Italian flavors and a rustic approach.

Quick Reference
⏱️
Prep Time
20 min
🔥
Cook Time
20-25 min
⏰
Total Time
1 hr 30 min (including rising)
🍽️
Servings
8 servings
📊
Difficulty
Medium
🏷️
Category
Side
💡
Quick Tip
Dimple dough deeply for crisp, airy bread
🎯
Best For
Weeknight | Meal prep | Entertaining

Five things that make this work:

  • Water at 110°F activates yeast without killing it - foamy bubbles after 5 minutes confirm the yeast is alive and ready to rise
  • Olive oil brushed before and after baking - creates the signature crispy crust and prevents the bread from drying out
  • Deep dimpling with fingertips - traps oil in pockets across the surface, which bake into golden crispy spots
  • One-hour rise in a warm spot - gives the dough time to double in size and develop an airy crumb structure
  • 425°F baking temperature - high heat sets the crust quickly while keeping the inside tender and slightly chewy
Quick Tip
Cover the dough with a damp kitchen towel during rising to prevent the surface from drying out and forming a crust.

What You'll Need

Rosemary Garlic Focaccia Bread - Rosemary Garlic Focaccia Bread

The ingredient list stays short because yeast, flour, and olive oil do most of the heavy lifting. If you're stocking up on basics for multiple recipes, this homemade dip recipe uses similar pantry staples and takes even less time to pull together.

🍞
Base
  • All-purpose flour
  • Active dry yeast
  • Warm water (110°F)
  • Sugar
  • Salt
🫒
Fat & Flavor
  • Olive oil
🧄
Aromatics
  • Fresh rosemary
  • Garlic cloves
  • Coarse sea salt

Ingredient Details

  • All-purpose flour
    Provides gluten structure for chewy texture and airy crumb-bread flour works but makes denser focaccia
  • Active dry yeast
    Needs 5 minutes in warm water to activate-foamy bubbles mean it's working, no bubbles mean start over
  • Olive oil
    Use extra-virgin for better flavor-brush 2 tablespoons on dough before baking and drizzle more after for crispy crust
  • Fresh rosemary
    Strip leaves off stems and chop roughly-dried rosemary works in a pinch but use half the amount
  • Garlic cloves
    Mince finely and mix with olive oil so it spreads evenly-raw garlic burns at 425°F, oil protects it
  • Warm water
    Must be 105-110°F-too hot kills yeast, too cold slows rising to 2+ hours
  • Coarse sea salt
    Sprinkle just before baking for crunchy texture-fine salt works but dissolves into the dough instead of staying on top

Ingredient Swaps

Most swaps change texture or proofing time, so pick based on what you're willing to adjust. If you're experimenting with bread variations, a similar snack recipe uses different flour ratios and adds cheese for a richer result.

Four swaps that work:

  • Instant yeast instead of active dry - Skip the proofing step and mix directly into flour, cuts 5 minutes but rising time stays the same
  • Bread flour instead of all-purpose - Creates chewier texture with denser crumb, add 1-2 tablespoons more water since bread flour absorbs more liquid
  • Dried rosemary instead of fresh - Use half the amount called for, flavor is harsher and less aromatic but saves a trip to the store
  • Vegetable oil instead of olive oil - Same crispy crust but less flavor, fine for budget-friendly batches when olive oil costs too much

Instant Yeast

Works for: Quick prep when you skip the proofing bowl and stir yeast directly into flour

Skip if: You're new to bread baking-active dry yeast shows you when it's working with visible bubbles

Gluten-Free Flour Blend

Works for: Celiac or gluten-free diets when you need bread texture without wheat

Skip if: You want airy crumb-gluten-free versions turn out crumbly and dense without gluten structure

Instructions

The dough needs 1 hour to rise before baking, so start early if you're serving this for dinner. When planning a fuller spread, homemade guanciale recipe timing overlaps nicely since both finish in under 30 minutes of active work.

  1. Proof the yeast: Combine warm water (110°F), sugar, and active dry yeast in a mixing bowl. Let sit 5 minutes until foamy bubbles appear on the surface-no bubbles means the yeast is dead, start over with fresh yeast.

  2. Mix and rest the dough: Add flour, salt, and 2 tablespoons olive oil to the yeast mixture. Stir with a wooden spoon until a sticky dough forms, then cover the bowl with a damp kitchen towel. Let rise in a warm spot for 1 hour until doubled in size.

  3. Shape and dimple: Transfer dough to an oiled baking sheet and press into a 9x13-inch rectangle. Use fingertips to dimple the dough every 1 inch, pressing down about 2 cm deep so oil pools in the pockets. Brush surface with 2 tablespoons olive oil mixed with minced garlic.

  4. Add toppings: Sprinkle chopped fresh rosemary and coarse sea salt evenly across the dimpled surface. Press herbs lightly into the dough so they stick during baking.

  5. Bake: Place in a 425°F oven for 20-25 minutes until the top turns golden brown and edges crisp up. Cool on a wire rack for 10 minutes before slicing-cutting too soon releases steam and softens the crust.

Golden Rule
Press fingertips firmly when dimpling-shallow dents don't hold enough oil and the bread bakes flat instead of airy.

What to Serve With It

Focaccia fills the bread basket but works better when something else anchors the plate. For meatless meal ideas that round out the table, pair with vegetable-forward mains that benefit from bread for scooping.

Side Dish Prep Why It Works How to Serve
Simple green salad Easy Fresh, crisp greens cut the richness of oily bread Toss arugula with lemon vinaigrette, serve alongside warm focaccia
Roasted vegetables Medium Earthy flavors complement herby rosemary and garlic notes Roast zucchini, bell peppers, and cherry tomatoes at 425°F for 25 minutes
Tomato soup Easy Dipping focaccia into broth balances savory bread with tangy tomato Ladle hot soup into bowls, tear focaccia into strips for dunking
Marinated olives Easy Briny contrast enhances the herb-forward bread without competing Toss olives with olive oil, lemon zest, and thyme, serve in a small bowl
Caprese salad Easy Fresh mozzarella and tomato brighten the rich, oily bread Layer sliced tomatoes, mozzarella, and basil, drizzle with balsamic glaze

Three ways to serve it:

  • Appetizer spread: Tear focaccia into pieces, arrange on a board with marinated olives, hummus, and sliced salami for a casual antipasto platter
  • Soup dipper: Slice into thick strips and serve alongside minestrone or tomato soup-the crispy crust holds up to broth without falling apart
  • Sandwich base: Split horizontally and fill with prosciutto, arugula, and fresh mozzarella for a pressed Italian sandwich
Best Pick
Serve focaccia warm within 2 hours of baking-reheated bread works but never matches the texture of fresh-from-the-oven crust.

Store and Reheat

Focaccia dries out faster than denser breads because of the high oil content and airy crumb. If you're batch-cooking for the week, flaky homemade salmon recipe reheats similarly and benefits from the same low-moisture storage approach.

Method Time Best For
🍳 Stovetop 3-4 min covered on low Small slices when you want to restore crispness without drying out the inside
📦 Microwave 20-30 sec Quick warm-up when texture doesn't matter-focaccia softens and loses crust
🔥 Oven 8-10 min at 375°F Whole or thick slices when you want to revive the crispy crust closest to fresh-baked

For best results when storing:

  • Fridge storage: Wrap tightly in plastic wrap or store in an airtight container for 3-4 days-focaccia stales faster than sandwich bread because of the high oil content
  • Freezer prep: Slice before freezing so you can pull out individual pieces without thawing the whole loaf, wrap slices in foil and freeze for up to 2 months
  • Avoid countertop storage: Room temperature focaccia molds within 2 days unless you live in a very dry climate-fridge is safer for humid kitchens
  • Reheat from frozen: Place frozen slices directly in a 375°F oven for 10-12 minutes, no need to thaw first
  • Restore crispy crust: Brush reheated focaccia with olive oil right out of the oven, then return to heat for 2 minutes to crisp up the surface

Frequently Asked Questions

Can I make rosemary garlic focaccia ahead and refrigerate?

Yes, bake the focaccia fully, let it cool completely, then wrap tightly and refrigerate for up to 4 days. Reheat in a 375°F oven for 8-10 minutes to restore the crispy crust before serving.

What is the best way to store and reheat focaccia?

Store in an airtight container in the fridge for 3-4 days or freeze slices for up to 2 months. Reheat in a 375°F oven for 8-10 minutes to crisp the crust-microwave works for speed but softens the bread.

How do I tell when focaccia is fully baked?

The top should be golden brown with darker edges, and the bread should feel springy when pressed lightly in the center. If it leaves an indent or feels wet, bake for 3-5 minutes longer.

Why is my focaccia dense instead of airy?

Dense focaccia usually means the yeast didn't activate properly or the dough didn't rise long enough. Use water at 105-110°F and let the dough double in size during the 1-hour rise-rushing this step collapses the crumb structure.

Can I halve or double this rosemary garlic focaccia recipe?

Yes, halve or double all ingredients proportionally and adjust the baking sheet size to match. Rising time stays the same, but baking time may increase by 3-5 minutes for a doubled batch depending on thickness.

Rosemary Garlic Focaccia Bread

Rosemary Garlic Focaccia Bread

No ratings yet
This rosemary garlic focaccia bread features an airy crumb achieved with active dry yeast and a one-hour rise. Deep dimpling traps olive oil and herbs, creating golden crispy pockets and a tender, flavorful crust baked at high heat.
Print Recipe Pin Recipe
Prep Time 20 minutes mins
Cook Time 25 minutes mins
Total Time 45 minutes mins
Servings: 8 servings
Course: Side Dish
Cuisine: Italian
Ingredients Method Notes

Ingredients
  

  • 3 cups all-purpose flour Provides gluten structure for chewy texture and airy crumb
  • 1 packet active dry yeast Needs 5 minutes in warm water to activate
  • 1 ¼ cups warm water At 110°F to activate yeast
  • 1 tablespoon sugar Helps yeast activation
  • 1 teaspoon salt For dough seasoning
  • 4 tablespoons olive oil Use extra-virgin; 2 tablespoon for dough and 2 tablespoon for brushing top with garlic
  • 2 tablespoons fresh rosemary Chopped roughly, pressed onto dough surface
  • 2 cloves garlic Minced finely and mixed with olive oil
  • 1 teaspoon coarse sea salt Sprinkled on top for crunchy texture

Method
 

  1. Combine warm water (110°F), sugar, and active dry yeast in a mixing bowl. Let sit 5 minutes until foamy bubbles appear on the surface. If no bubbles form, the yeast is dead; start over with fresh yeast.
    1 packet active dry yeast, 1 ¼ cups warm water, 1 tablespoon sugar
  2. Add flour, salt, and 2 tablespoons olive oil to the yeast mixture. Stir with a wooden spoon until a sticky dough forms. Cover the bowl with a damp kitchen towel and let rise in a warm spot for 1 hour until doubled in size.
    3 cups all-purpose flour, 1 teaspoon salt, 4 tablespoons olive oil
  3. Transfer dough to an oiled baking sheet and press into a 9x13-inch rectangle. Use fingertips to dimple the dough every 1 inch, pressing down about 2 cm deep so olive oil pools in the pockets. Brush the surface with 2 tablespoons olive oil mixed with minced garlic.
    4 tablespoons olive oil, 2 cloves garlic
  4. Sprinkle chopped fresh rosemary and coarse sea salt evenly across the dimpled surface. Press herbs lightly into the dough so they stick during baking.
    2 tablespoons fresh rosemary, 1 teaspoon coarse sea salt
  5. Place in a 425°F oven for 20-25 minutes until the top turns golden brown and edges crisp up. Cool on a wire rack for 10 minutes before slicing to preserve crust texture.

Notes

  • Proof yeast in 105-110°F water; too hot kills yeast, too cold slows rising.
  • Use deep dimpling to trap olive oil, creating crispy golden pockets.
  • Brush with olive oil before and after baking for a tender, flavorful crust.

Tried this recipe?

Let us know how it was!

Flaky Cheddar Cheese Straws

February 5, 2026

Bland snacks get passed over at parties. The fix is cheese straws made with sharp cheddar and actual butter that creates crispy, flaky layers people reach for twice.

Flaky Cheddar Cheese Straws

Cold butter is the key. When you cut chilled butter into flour instead of melting it first, you get those shatteringly crisp edges.

Make this for weekend snacking when chips feel boring or when you need something that looks intentional but takes under an hour.

QUICK SUMMARY

Flaky cheddar cheese straws bake in 15-18 minutes with sharp cheddar, cold butter, and flour. The dough chills before rolling so the butter stays solid, creating layers that crisp in the oven. Roll to ⅛ inch thickness and bake at 375°F until the edges turn golden.

⏱️Time Reality: 20 minutes prep, 30 minutes chilling, 15-18 minutes baking
🔪First Move: Cut cold butter into flour with a pastry cutter until it looks like coarse crumbs
⚠️Watch Out: Warm butter melts into the dough and kills flakiness - chill everything and work fast

Why This Recipe Works

Sharp cheddar and cold butter create layers that shatter when you bite. A good pecans can make or break the plate. For a version that comes together quickly, we keep an easy pecans side ready for nights like this - they add texture contrast without extra work.

Quick Reference
⏱️
Prep Time
20 min
🔥
Cook Time
15-18 min
⏰
Total Time
35-40 min
🍽️
Servings
12-16 straws
📊
Difficulty
Medium
🏷️
Category
Appetizer
💡
Quick Tip
Keep butter cold for flakier texture
🎯
Best For
Entertaining | Weeknight | Party snack

What makes them work:

  • Cold butter below 50°F creates visible fat pockets that melt in the oven and leave behind flaky layers
  • Rolling dough to exactly ⅛ inch ensures even baking without burnt edges or undercooked centers
  • Chilling dough 30-45 minutes keeps butter solid so it doesn't blend into the flour
  • Sharp cheddar contributes both flavor and texture - aged cheese has less moisture and crisps better
  • Baking at 375°F melts butter slowly enough to form layers before the dough sets
Quick Tip
Use a pastry cutter or two forks to cut butter into flour - your warm hands melt the butter too fast

What You'll Need

Shopping for this takes one trip. Rolls adds the contrast this plate needs, but timing matters. For a version that comes together quickly, we keep a classic rolls dish ready for nights like this - it pairs with the sharp cheese without fighting it.

🧀
Dairy
  • 8 oz sharp cheddar cheese, finely grated
  • ½ cup (1 stick) unsalted butter, cold and cubed
🍜
Dry Ingredients
  • 1½ cups all-purpose flour
  • ½ teaspoon salt
🌶️
Spices
  • ½ teaspoon paprika
  • ¼ teaspoon chili powder (optional)
  • ¼ teaspoon black pepper
🫙
Liquid
  • 3-4 tablespoon cold water

Ingredient Details

  • Unsalted butter
    Must be cold (below 50°F) - cube it and chill for 10 minutes before mixing to maintain flakiness
  • Sharp cheddar cheese
    Grate finely for even distribution - pre-shredded cheese has anti-caking coating that affects texture
  • All-purpose flour
    Spoon into measuring cup and level off - scooping packs flour and creates dry, crumbly dough
  • Cold water
    Add 1 tablespoon at a time until dough just holds together - too much makes straws tough
  • Paprika
    Use smoked paprika for deeper flavor or skip entirely if you want pure cheese taste
  • Salt
    Essential for balancing cheese richness - taste dough before chilling and adjust if needed
  • Parchment paper
    Prevents sticking and ensures even browning - silicone mats work but may brown bottoms less

Ingredient Swaps

Most swaps change texture more than flavor. Use these when you need to work around dietary needs or missing ingredients.

  • Gluten-free flour blend for all-purpose flour - texture becomes more crumbly and less flaky, but still crisp
  • Dairy-free margarine or coconut oil for butter - reduces buttery flavor and changes how layers form, less tender
  • Vegan cheddar shreds for sharp cheddar - milder taste and different melt, won't crisp the same way
  • Cayenne pepper for paprika - adds real heat instead of mild smokiness, use half the amount

Gluten-Free Flour Blend

Works for: Celiac or gluten sensitivity, maintains crunch

Skip if: You want classic flaky layers - texture stays crisp but crumblier

Whole Wheat Flour

Works for: Adding fiber and nuttier flavor on a budget

Skip if: You need light, delicate texture - makes straws denser and less flaky

Sharp White Cheddar

Works for: Same sharpness with paler color, identical texture

Skip if: You want traditional golden-orange look for parties

Instructions

The rolling and chilling matter more than mixing speed. Rich mains need something to cut through, and shrimp does exactly that. For a version that comes together quickly, we keep a homemade shrimp recipe ready for nights like this - it adds protein without overwhelming the cheese flavor.

  1. Cut cold butter into flour mixture. Whisk flour, salt, paprika, chili powder, and black pepper in a mixing bowl. Add cold cubed butter and use a pastry cutter or two forks to cut it into the flour until the mixture looks like coarse crumbs with pea-sized butter pieces visible.

  2. Mix in cheese and form dough. Stir in grated sharp cheddar until evenly distributed. Add cold water 1 tablespoon at a time, mixing gently with a fork until dough just holds together when pressed - it should look shaggy, not wet.

  3. Chill dough completely. Shape dough into a flat disk, wrap tightly in plastic wrap, and refrigerate for 30-45 minutes until firm. Cold dough rolls easier and keeps butter from melting before baking.

  4. Roll and cut into strips. Roll chilled dough on a lightly floured surface to ⅛ inch thickness, about the thickness of two stacked credit cards. Use a sharp knife or pizza cutter to slice into strips ½ inch wide and 6 inches long.

  5. Bake until golden and crisp. Arrange strips on a parchment-lined baking sheet with ½ inch space between them. Bake at 375°F for 15-18 minutes until edges turn golden brown and straws feel firm to touch - they crisp more as they cool. Let cool on the baking sheet for 10 minutes before serving.

Golden Rule
Roll dough to ⅛ inch thickness exactly - thinner burns before the center cooks, thicker stays soft instead of crisp

What to Serve With It

These work as appetizers or snacks depending on what else you serve. Most people skip shrimp, but it balances the meal. For more ideas on planning the full spread, check out weeknight croissants meal ideas - the same principles apply for building a balanced snack plate.

Side Dish Prep Why It Works How to Serve
Tomato basil soup Easy Acidity cuts through buttery richness, warm soup complements crisp texture Serve soup in small cups for dipping cheese straws
Mixed green salad Easy Fresh greens provide light contrast to heavy cheese and butter Toss with vinaigrette right before serving to keep crisp
Roasted vegetable platter Medium Adds variety and texture contrast with natural sweetness Roast vegetables at 425°F while straws cool
Charcuterie board Medium Pairs well with cured meats, olives, and pickles for entertaining Arrange cheese straws as the crunchy element on the board
Garlic aioli dip Easy Creamy, mild garlic enhances sharp cheddar without fighting it Serve in a small bowl for dunking hot straws

Three ways to serve it:

  • Party appetizer spread: Arrange on a platter with spiced nuts, herb cream cheese dip, and pickled vegetables for contrast
  • Casual snack plate: Serve with fresh fruit slices and mixed nuts for sweet-savory balance
  • Soup companion: Pair with tomato soup or chili for a complete light meal
Shortcut
Make dough up to 2 days ahead and keep wrapped in the fridge - roll and bake when you need fresh straws

Store and Reheat

Crisp texture fades fast in humid conditions. A good chicken can make or break the plate. For a version that comes together quickly, we keep an easy chicken side ready for nights like this - the protein makes cheese straws feel like a complete snack instead of just nibbles.

Method Time Best For
🔥 Oven 5-7 min at 350°F Restoring crisp texture without drying - best method for entertaining
📦 Microwave 20-30 seconds Quick warm-up when texture doesn't matter - softens straws slightly
🍳 Air Fryer 3-4 min at 350°F Re-crisping individual servings fast without heating the oven

For best results when storing:

  • Cool straws completely before storing - trapped steam makes them soggy within hours
  • Store in an airtight container with a paper towel layer at the bottom to absorb moisture
  • Keep at room temperature for 3-4 days if your kitchen stays under 70°F
  • Refrigerate in humid climates to prevent cheese from turning oily or developing off flavors
  • Freeze unbaked dough for up to 2 months - cut strips and freeze flat on a baking sheet, then transfer to a freezer bag and bake directly from frozen, adding 2-3 minutes to baking time

Frequently Asked Questions

Can I make cheddar cheese straws ahead and freeze them?

Freeze unbaked cut strips on a baking sheet, then transfer to a freezer bag for up to 2 months. Bake directly from frozen at 375°F for 18-20 minutes without thawing.

How do I store cheddar cheese straws to keep them crisp?

Store in an airtight container at room temperature with a paper towel at the bottom to absorb moisture. They stay crisp for 3-4 days in dry conditions.

What are signs that cheddar cheese straws are baked properly?

Edges turn golden brown, straws feel firm when gently pressed, and bottoms show light browning. They crisp more as they cool for 10 minutes.

Why did my cheese straws turn out soggy and how to fix?

Butter was too warm or dough was overmixed. Rebake at 375°F for 3-5 minutes to restore crispness, and next time keep butter chilled below 50°F while mixing.

Can I substitute gluten-free flour and still get flaky straws?

Yes, but texture becomes more crumbly than flaky. Use a 1:1 gluten-free flour blend and expect less layering but still crisp results.

Flaky Cheddar Cheese Straws

Flaky Cheddar Cheese Straws

No ratings yet
Flaky cheddar cheese straws combine sharp cheddar and cold butter to create crispy, layered snacks perfect for parties or casual snacking. The dough chills before rolling to keep butter solid, ensuring flaky texture that crisps beautifully in the oven.
Print Recipe Pin Recipe
Prep Time 20 minutes mins
Cook Time 18 minutes mins
Total Time 38 minutes mins
Servings: 14 straws
Course: Appetizer, Snack
Cuisine: American
Ingredients Equipment Method Notes

Ingredients
  

  • 8 oz sharp cheddar cheese finely grated
  • 0.5 cup unsalted butter cold and cubed, below 50°F
  • 1.5 cups all-purpose flour spooned and leveled
  • 0.5 teaspoon salt
  • 0.5 teaspoon paprika smoked paprika optionally for deeper flavor
  • 0.25 teaspoon chili powder optional
  • 0.25 teaspoon black pepper
  • 3 tablespoon cold water add as needed until dough just holds together

Equipment

  • Pastry cutter To cut cold butter into flour
  • Mixing bowl For combining ingredients
  • Plastic wrap To chill dough
  • Sharp knife or pizza cutter For cutting dough into strips
  • Baking sheet For baking cheese straws
  • Parchment paper To line baking sheet for even browning

Method
 

  1. Whisk together flour, salt, paprika, chili powder, and black pepper in a mixing bowl. Add cold cubed butter and cut into the flour mixture using a pastry cutter or two forks until it looks like coarse crumbs with pea-sized butter pieces visible.
    1.5 cups all-purpose flour, 0.5 tsp salt, 0.5 tsp paprika, 0.25 tsp chili powder, 0.25 tsp black pepper, 0.5 cup unsalted butter
  2. Stir in grated sharp cheddar until evenly distributed. Add cold water 1 tablespoon at a time, mixing gently with a fork until dough just holds together when pressed and looks shaggy, not wet.
    8 oz sharp cheddar cheese, 3 tbsp cold water
  3. Shape dough into a flat disk, wrap tightly in plastic wrap, and refrigerate for 30-45 minutes until firm and cold.
  4. Roll chilled dough on a lightly floured surface to ⅛ inch thickness, approximately the thickness of two stacked credit cards. Use a sharp knife or pizza cutter to slice into strips ½ inch wide and 6 inches long.
  5. Arrange strips on a parchment-lined baking sheet spacing each ½ inch apart. Bake in a 375°F oven for 15-18 minutes until edges are golden brown and straws feel firm to touch. Let cool on the baking sheet for 10 minutes before serving.

Notes

  • Keep butter cold (below 50°F) to maintain flaky texture.
  • Roll dough exactly to ⅛ inch thickness for even baking without burning or undercooking.
  • Chill dough fully before rolling to prevent butter melting and losing layers.

Tried this recipe?

Let us know how it was!

What to Serve With Bo Ssam? 15 Best Side Dishes

February 5, 2026

Bo ssam-slow-braised pork shoulder roasted until the edges crisp-comes to the table juicy and deeply savory. That tender richness wants something to balance it.

What to Serve With Bo Ssam? 15 Best Side Dishes

The best sides bring fresh greens, tangy pickles, or sticky starches that soak up the juices. Lettuce leaves wrap each bite, kimchi adds fermented heat, and rice keeps things simple.

You want options that work for game day spreads or hosting friends who expect more than chips.

Weeknight meals lean on easy banchan-style vegetable sides. Hosting calls for homemade ssamjang and a spread that feels generous without complicated cooking.

QUICK SUMMARY

Bo ssam delivers rich, tender pork belly with crispy edges. It needs fresh greens, tangy pickles, and neutral starches. Butter lettuce wraps catch every piece, kimchi adds fermented heat, and sticky jasmine rice soaks up juices. Starches balance the richness, vegetables provide crunch, and ssamjang sauce brings smoky depth.

🍚Soak it up: Sticky rice or rice cakes catch the juices
🥗Add crunch: Pickled daikon and cucumber salads cut through fat
⏱️Quick pick: Butter lettuce leaves-just rinse and chill

15 Delicious Sides to Pair with Bo Ssam

These sides bring the fresh, tangy, and starchy elements a bo ssam spread needs. Some add crunch, others provide cooling contrast, and a few soak up every drop of pork juice.

# Side Dish Best For Prep
1 Sticky Jasmine Rice ✨ Any Occasion ✅ Easy
2 Spicy Ssamjang Sauce ✨ Any Occasion ✅ Easy
3 Garlic Soy Blanched Spinach ✨ Any Occasion ✅ Easy
4 Crunchy Pickled Daikon Radish ✨ Any Occasion ✅ Easy
5 Kimchi Cabbage ✨ Any Occasion ✅ Easy
6 Sesame Roasted Sweet Potatoes ✨ Any Occasion ⚡ Medium
7 Lettuce Butter Bibb Wraps ✨ Any Occasion ✅ Easy
8 Soy Garlic Scallion Salad ✨ Any Occasion ✅ Easy
9 Grilled Shiitake Mushrooms 🎉 Hosting ✅ Easy
10 Crispy Korean Scallion Pancakes 🎉 Hosting ⚡ Medium
11 Cold Cucumber and Chili Salad ✨ Any Occasion ✅ Easy
12 Toasted Sesame Garlic Green Beans ✨ Any Occasion ✅ Easy
13 Steamed Jasmine Rice Cakes ✨ Any Occasion ⚡ Medium
14 Fresh Korean Pear Slices ✨ Any Occasion ✅ Easy
15 Chilled Tofu with Scallion Oil ✨ Any Occasion ✅ Easy

1. Sticky Jasmine Rice

Tender jasmine rice balances the pork's richness with mild, slightly sticky grains. The neutral base soaks up juices without competing for attention.

  • Rinse until water runs clear - This removes excess starch and prevents gummy texture.
  • Soak for 15 minutes - Soaked rice cooks more evenly and turns out fluffier.
  • Use a rice cooker - Hands-off cooking delivers consistent results every time.

Try something tender on the side when you want a starch that feels special without extra work.

Quick Tip
Let rice rest covered for 5 minutes after cooking-it finishes steaming and turns perfectly sticky.

2. Spicy Ssamjang Sauce

Smoky, savory fermented soybean paste mixed with gochujang brings the umami punch bo ssam needs. This sauce acts as both condiment and flavor anchor for each bite wrapped in lettuce.

Mix equal parts doenjang and gochujang with minced garlic, toasted sesame oil, and a spoonful of honey. The paste thickens on its own-no cooking required-and holds up in the fridge for two weeks.

Adjust heat by starting with less gochujang and adding more to taste. If you need our favorite ssamjang sauce side, this delivers without complicated steps.

3. Garlic Soy Blanched Spinach

Bright garlicky greens add color and freshness to the pork-heavy plate. The quick blanching keeps spinach tender without turning mushy.

A few notes:

  • Blanch for 30 seconds - Drop spinach in boiling water just until wilted, then shock in ice water.
  • Squeeze out excess water - Wet spinach dilutes the garlic soy dressing.

Toss with minced garlic, soy sauce, and toasted sesame seeds while still warm. Try this easy blanched spinach recipe when you want a vegetable side that takes less than five minutes of active work.

If You Want Try This
Milder greens Blanch bok choy instead-same method, less bitterness
More texture Sauté spinach in a hot pan for 90 seconds instead of blanching
Make-ahead option Blanch and dress spinach up to 4 hours ahead, keep chilled

4. Crunchy Pickled Daikon Radish

Tangy, crisp daikon cuts through pork fat with bright acidity. The quick pickle needs just vinegar, sugar, and an hour in the fridge to transform raw radish into a palate cleanser.

Slice daikon into thin matchsticks using a mandoline for uniform texture. Mix rice vinegar with sugar and a pinch of salt, then pour over radish in a shallow dish.

The longer it sits, the softer it gets-we like the texture best after one to two hours. If you want a side that pairs well with rich meats, this hits every note without turning sweet or cloying.

Our Pick
Add a few red pepper flakes to the brine for subtle heat that complements without overpowering.

5. Kimchi Cabbage

Fermented cabbage brings spicy, funky depth that feels right at home next to bo ssam. Kimchi adds the acid and heat the plate needs without any cooking required.

Keep in mind:

  • Serve it cold - Chilled kimchi refreshes between rich bites of pork.
  • Drain excess liquid - Too much brine pools on the plate and waters down other flavors.

Buy a jar from the refrigerated section or make your own if you have a week to let it ferment. The tangy crunch balances every fatty, savory element on the plate, and this roasted side dish recipe shows how flexible fermented cabbage can be.

Store-Bought Kimchi

Works for: Quick weeknight spreads, reliable flavor, zero prep time

Skip if: You want to control spice level or prefer less funk

Homemade Kimchi

Works for: Hosting, customized heat, fresher vegetable crunch

Skip if: You need it tonight-fermentation takes at least 3 days

6. Sesame Roasted Sweet Potatoes

Natural sweetness and caramelized edges add contrast to the savory pork. Roasting at high heat turns sweet potato cubes golden and tender with crispy corners.

Toss cubes with sesame oil, salt, and a pinch of gochugaru before spreading on a sheet pan. Roast at 425°F for 25 minutes, flipping halfway, until edges char slightly.

The nutty sesame flavor ties into the Korean profile without competing with the pork. If you love quick sides that work for both easy pork meals to try, these potatoes deliver every time.

Shortcut
Use pre-cut sweet potato cubes from the produce section to skip the peeling and chopping.

7. Lettuce Butter Bibb Wraps

Tender, mild leaves act as edible plates for wrapping pork, rice, and ssamjang together. Butter lettuce stays crisp without tearing and holds more filling than romaine.

What to know:

  • Keep leaves whole - Separate each leaf gently at the base to avoid ripping.
  • Chill before serving - Cold lettuce adds refreshing crunch that warm leaves lack.
  • Pat dry thoroughly - Wet leaves make wraps soggy and hard to handle.

Arrange leaves on a platter next to the pork so everyone builds their own ssam wrap. The mild flavor lets pork and sauce shine, and a bright side to try shows how flexible lettuce wraps can be across cuisines.

Method Time Best For
Whole butter lettuce 5 minutes Traditional ssam wraps with tender leaves
Iceberg cups 3 minutes Extra crunch, holds more filling, less delicate
Napa cabbage leaves 5 minutes Mild crunch, wider leaves for bigger wraps

8. Soy Garlic Scallion Salad

Zesty green onion salad adds sharp, pungent bite that cuts through pork richness. The quick marinade in soy sauce and sesame oil softens the scallions just enough without turning them limp.

Slice scallions into thin rounds and toss with soy sauce, rice vinegar, sesame oil, and a pinch of sugar. Let it sit for 10 minutes before serving so flavors meld and scallions lose their raw sharpness.

  • Use only the white and light green parts - Dark green tops turn bitter when marinated.
  • Add toasted sesame seeds - They provide nutty crunch that goes with the soft scallions.
  • Serve within 2 hours - Scallions turn mushy if they sit too long in the dressing.
  • Double the batch - This keeps for one day and works as a topping for rice or noodles.

Try this bright scallion salad recipe when you want a side that comes together faster than most vegetables.

Golden Rule
Taste before serving-if scallions feel too sharp, add a teaspoon of honey to balance the bite.

9. Grilled Shiitake Mushrooms

Smoky mushrooms with chewy texture bring umami depth that complements pork without competing. Brushing caps with soy sauce before grilling adds savory richness and helps them caramelize.

Remove stems and brush mushroom caps with a mix of soy sauce, garlic, and sesame oil. Grill over medium heat for 4 minutes per side until edges char and centers turn tender.

Keep in mind:

  • Do not crowd the grill - Mushrooms need space to develop char, not steam.
  • Flip once only - Too much flipping prevents caramelization.
  • Serve warm - Cold mushrooms lose their tender texture and turn rubbery.

These work as a standalone side or sliced and added to lettuce wraps. If you want fresh shiitake mushrooms we love, grilling delivers more flavor than roasting.

Watch Out
Skip the oil-shiitakes absorb it like a sponge and turn greasy instead of crispy.

10. Crispy Korean Scallion Pancakes

Golden, savory pancakes add crispy contrast to the tender pork. The batter-flour, water, egg, and sliced scallions-comes together in minutes and fries up fast in a hot pan.

Mix batter until just combined, then pour into a skillet with hot oil. Cook over medium-high heat for 3 minutes per side until edges turn golden and center sets.

  • Use a nonstick pan - Prevents sticking and makes flipping easier.
  • Slice scallions on the bias - Angled cuts look better and distribute more evenly in the batter.
  • Serve with dipping sauce - Mix soy sauce, rice vinegar, and chili flakes for a tangy kick.
  • Cut into wedges - Smaller pieces are easier to grab and eat alongside pork.

The crispy texture holds up better than steamed sides, and the savory bite pairs naturally with rich, fatty pork. Hosting guests who love comforting beef dinner options shows how flexible scallion pancakes work across meals.

If You Want Try This
Extra crunch Add a handful of chopped kimchi to the batter
Less oil Bake on a sheet pan at 425°F for 15 minutes, flipping once
Gluten-free option Swap all-purpose flour for rice flour-texture stays crispy

11. Cold Cucumber and Chili Salad

Cooling, crisp cucumber tossed with rice vinegar and chili flakes refreshes between bites of fatty pork. The mild spice adds interest without overwhelming the clean cucumber flavor.

Slice cucumbers thin, sprinkle with salt, and let sit for 10 minutes to draw out water. Drain, then toss with rice vinegar, sesame oil, chili flakes, and a pinch of sugar.

The quick marination softens cucumbers just enough while keeping them snappy. Try a quick chili salad side dish when you want something cold that takes less than 15 minutes start to finish.

English Cucumbers

Works for: Thin skin, fewer seeds, no peeling required

Skip if: You prefer firmer texture-these turn soft faster

Persian Cucumbers

Works for: Crunchier texture, smaller size, sweeter flavor

Skip if: You need larger pieces-these stay bite-sized

12. Toasted Sesame Garlic Green Beans

Tender-crisp beans with nutty garlic flavor add a fresh green element to the plate. Sautéing quickly over high heat keeps beans snappy without turning mushy.

Trim ends and toss green beans in a hot pan with oil for 5 minutes, stirring occasionally. Add minced garlic and cook for 1 more minute until fragrant, then finish with toasted sesame seeds and a drizzle of soy sauce.

  • Use a large pan - Crowded beans steam instead of sear.
  • Add garlic at the end - Raw garlic burns fast and turns bitter.
  • Toast sesame seeds separately - Dry-toast in a small pan for 2 minutes until golden.
  • Serve immediately - Green beans lose their snap as they cool.

The nutty sesame ties into the Korean flavor, and something fresh on the side like this balances heavier elements without feeling heavy.

Quick Tip
Add a splash of water to the hot pan if beans start to char before they turn tender-it creates steam that finishes cooking.

13. Steamed Jasmine Rice Cakes

Soft, chewy rice cakes provide a starchy alternative to regular rice. The glutinous texture holds up when wrapped with pork and lettuce without falling apart.

Steam thin rice cakes in a bamboo steamer or on a plate over boiling water for 8 minutes. Brush lightly with sesame oil to prevent sticking, then serve warm.

  • Line the steamer with parchment - Prevents cakes from sticking to the basket.
  • Steam in batches - Overlapping cakes stick together and cook unevenly.
  • Serve within 20 minutes - Rice cakes turn hard and rubbery as they cool.

These work as wraps or starch on the side, and the neutral flavor lets pork and sauce take center stage. Hosting friends for fresh seafood dinner options shows how flexible steamed starches adapt across cuisines.

Shortcut
Buy pre-steamed rice cakes from the refrigerated section-just microwave for 30 seconds.

14. Fresh Korean Pear Slices

Sweet, juicy pear adds a refreshing crunch that cleanses the palate between rich bites. The mild sweetness contrasts savory pork without feeling like dessert.

A few notes:

  • Slice thin - Thick wedges are harder to eat and lose their delicate texture.
  • Serve chilled - Cold pear feels more refreshing than room temperature.
  • Toss with lemon juice - Prevents browning and adds a hint of acid.
  • Peel or leave skin on - Both work-skin adds fiber, peeled feels more refined.

Arrange slices on a platter next to the pork so everyone grabs a piece between bites. The crisp texture and gentle sweetness work like a palate cleanser, and our favorite pear slices side shows how fruit balances rich proteins.

Method Time Best For
Raw slices 5 minutes Maximum crunch, mild sweetness, no cooking
Lightly grilled 10 minutes Caramelized edges, softer texture, deeper flavor
Quick-pickled 30 minutes Tangy-sweet contrast, holds up longer on the table

15. Chilled Tofu with Scallion Oil

Soft, silky tofu drizzled with fragrant scallion oil adds a mild protein that contrasts pork richness. The cool, neutral base soaks up soy sauce and sesame oil without competing for attention.

Drain firm or silken tofu and slice into cubes. Drizzle with hot oil infused with sliced scallions, then finish with soy sauce and a sprinkle of sesame seeds.

The scallion oil-made by heating neutral oil with scallions until fragrant-adds savory depth without overwhelming the delicate tofu. Serve cold or at room temperature as a light side that balances heavier elements on the plate.

Our Pick
Use silken tofu for the smoothest texture-it melts on the tongue and feels lighter than firm tofu.

Common questions come up when building a bo ssam spread. Here are answers to the ones we hear most.

Frequently Asked Questions

What sides go best with bo ssam?

Butter lettuce leaves, kimchi, sticky jasmine rice, ssamjang sauce, and pickled daikon work best because they add fresh crunch, tangy acid, neutral starch, and savory depth.

What vegetables go with bo ssam?

Blanched spinach, grilled shiitake mushrooms, sesame green beans, and cucumber salad provide fresh greens, umami depth, and cooling contrast that balance rich pork.

Can I prep bo ssam sides ahead of time?

Kimchi, pickled daikon, ssamjang sauce, and scallion salad keep for days in the fridge, while lettuce needs washing and chilling the day of serving.

How many sides should I serve with bo ssam?

Plan for 4-6 sides-lettuce, rice, kimchi, ssamjang, and two vegetable or pickled options cover texture, flavor, and function without overwhelming the table.

What's a healthy or low-carb side for bo ssam?

Blanched spinach, cucumber salad, kimchi, and grilled shiitake mushrooms provide vegetables, fermented probiotics, and crunch without starch or added carbs.

What to Serve With Bo Ssam? 15 Best Side Dishes

What to Serve With Bo Ssam? 15 Best Side Dishes

No ratings yet
We provide a list of 15 sides that balance bo ssam by adding fresh greens, tangy pickles, and starchy options. These choices offer a variety of textures, temperatures, and preparation efforts to help create a well-rounded meal around rich, slow-braised pork.
Print Recipe Pin Recipe
Prep Time 15 minutes mins
Cook Time 10 minutes mins
Total Time 25 minutes mins
Servings: 4 servings
Course: Dinner, Side Dish
Cuisine: Korean
Ingredients Equipment Method Notes

Ingredients
  

  • Sticky Jasmine Rice sticky
  • Spicy Ssamjang Sauce smoky
  • Garlic Soy Blanched Spinach bright
  • Crunchy Pickled Daikon Radish crunchy
  • Kimchi Cabbage tangy
  • Sesame Roasted Sweet Potatoes caramelized
  • Lettuce Butter Bibb Wraps crisp
  • Soy Garlic Scallion Salad zesty
  • Grilled Shiitake Mushrooms smoky
  • Crispy Korean Scallion Pancakes crispy
  • Cold Cucumber and Chili Salad cooling
  • Toasted Sesame Garlic Green Beans tender-crisp
  • Steamed Jasmine Rice Cakes chewy
  • Fresh Korean Pear Slices refreshing
  • Chilled Tofu with Scallion Oil silky

Equipment

  • Sheet pan For roasting sweet potatoes
  • Mixing bowl For salads and dips
  • Cutting board
  • Serving platter To arrange sides and main

Method
 

  1. Assess what the main dish already provides-if it has starch, focus on vegetables and fresh sides.
  2. Choose 2-3 sides that fill different gaps: one vegetable, one starch or bread, one sauce or dip.
  3. Start the longest-cooking side first. Prep quick items like salads while the oven works.
  4. Balance temperatures-pair hot roasted vegetables with a cold slaw or chilled dip.
  5. Plate the main dish with sides arranged around it. Drizzle sauce or add garnish last.
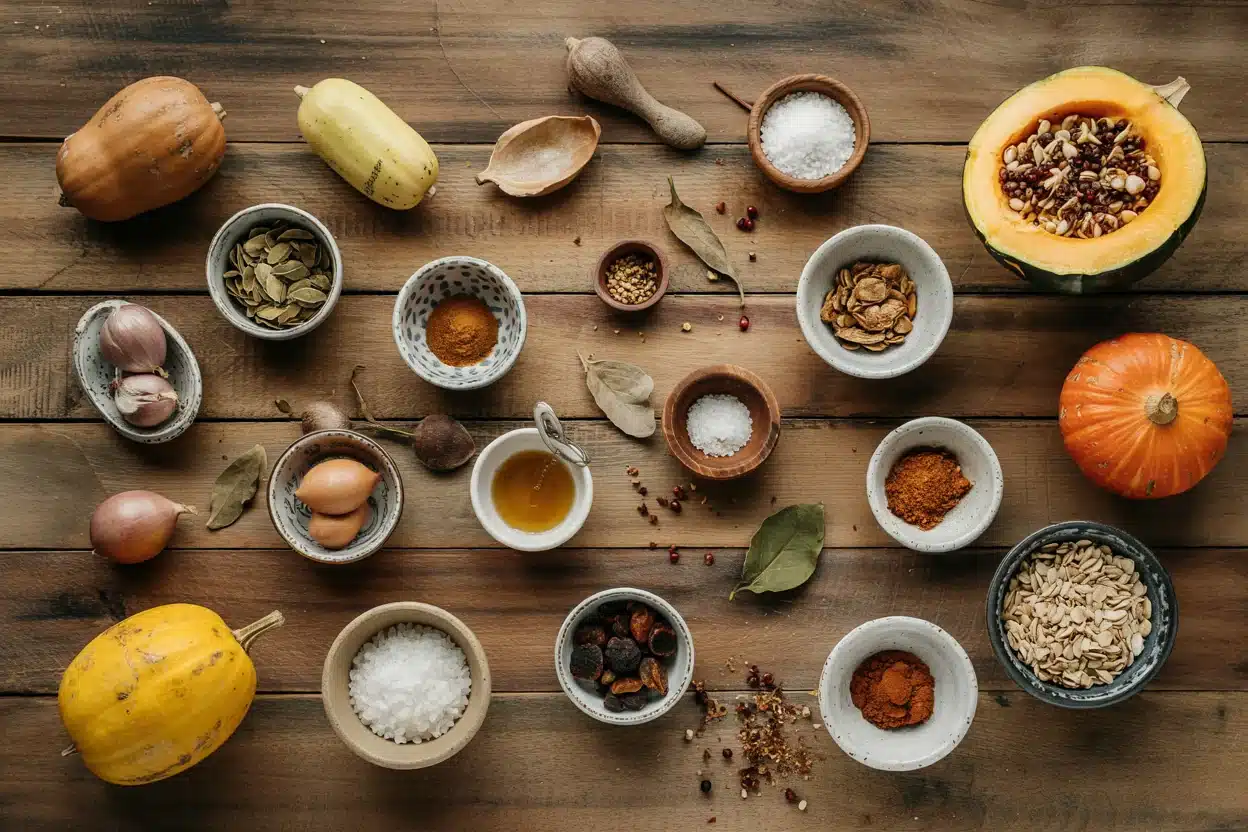
Notes

Add a fresh vegetable side and a sauce like ssamjang, and prep ahead when possible to keep ingredients separate and chilled. This prevents the meal from feeling too heavy or bland.

Tried this recipe?

Let us know how it was!

What Goes With Chicken Pot Pie? 15 Quick & Easy Sides

February 5, 2026

Chicken pot pie delivers flaky pastry, tender chicken, and creamy filling in every bite. That combination covers comfort and richness.

What Goes With Chicken Pot Pie? 15 Quick & Easy Sides

What's missing is contrast-something crisp, bright, or fresh to cut through the buttery gravy. Some sides bring vegetables, others add crunch, and a few work as palate cleansers between forkfuls.

We look for options that either echo the comfort or provide textural variety the pie cannot deliver on its own.

QUICK SUMMARY

Chicken pot pie is rich, creamy, and buttery with flaky crust and savory filling. It needs sides that bring brightness, crunch, or freshness to balance the plate. Roasted carrots add natural sweetness, apple cider slaw cuts through richness with tangy crunch, and steamed asparagus provides crisp green contrast. Starches soak up extra gravy while salads refresh the palate.

🥕Add brightness: Roasted vegetables, fresh salads, citrus greens
🥗Cut richness: Tangy slaw, vinaigrette salads, crisp vegetables
⏱️Quick pick: Mixed green salad with vinaigrette (10 minutes)

What to Serve With Chicken Pot Pie: 15 Sides That Balance the Plate

These sides bring the contrast and brightness chicken pot pie needs. Each one adds something the creamy filling cannot provide on its own.

# Side Dish Best For Prep
1 Golden Herb Roasted Carrots ✨ Any Night ✅ Easy
2 Creamy Garlic Mashed Potatoes ✨ Any Night ✅ Easy
3 Zesty Apple Cider Slaw ✨ Any Night ✅ Easy
4 Steamed Lemon Zest Asparagus ✨ Any Night ✅ Easy
5 Rustic Buttermilk Cornbread ✨ Any Night ⚡ Medium
6 Roasted Brussels Sprouts with Balsamic Glaze ✨ Any Night ✅ Easy
7 Simple Mixed Green Salad with Vinaigrette ✨ Any Night ✅ Easy
8 Classic Mushroom Herb Gravy ✨ Any Night ✅ Easy
9 Roasted Garlic Green Beans Almondine ✨ Any Night ✅ Easy
10 Brown Butter Dinner Rolls 🎉 Hosting 🔪 Involved
11 Roasted Sweet Potato Wedges ✨ Any Night ✅ Easy
12 Crispy Parmesan Zucchini Chips ✨ Any Night ✅ Easy
13 Tangy Cranberry Chutney 🎉 Hosting ✅ Easy
14 Honey Glazed Roasted Parsnips ✨ Any Night ⚡ Medium
15 Fresh Cranberry Walnut Salad ✨ Any Night ✅ Easy

1. Golden Herb Roasted Carrots

Natural sweetness and crisp edges balance the creamy pie filling. The caramelized exterior adds textural variety the soft filling lacks.

Toss carrot pieces with olive oil, fresh thyme, and coarse salt before roasting at 400°F until tender with golden edges. The simple preparation lets the vegetable flavor shine without competing with the pie's savory gravy.

Quick Tip
Cut carrots into uniform pieces so they roast evenly in the same time.

2. Creamy Garlic Mashed Potatoes

Smooth, buttery potatoes echo the comfort of chicken pot pie while adding another layer of richness. The garlic adds a savory note that goes with the herb-flecked filling.

  • Use warm cream - Cold dairy makes potatoes gluey and heavy.
  • Mash until fluffy - Overmixing releases too much starch and turns them gummy.

When you want this tender mashed potatoes recipe that feels just as cozy as the main dish, this delivers.

3. Zesty Apple Cider Slaw

Bright, tangy crunch cuts through the buttery richness of pot pie. The cider vinegar dressing adds acidity that refreshes the palate between bites.

Shred cabbage and carrots, then toss with a dressing made from apple cider vinegar, a touch of honey, and olive oil. The slaw holds up well and tastes better after sitting for 30 minutes as the flavors meld.

If You Want Try This
Extra crunch Add thinly sliced apples or jicama
Creamier texture Mix in 2 tablespoons Greek yogurt
More color Use purple cabbage instead of green

4. Steamed Lemon Zest Asparagus

Crisp green spears with bright citrus notes provide a fresh counterpoint to the creamy filling. The tender-crisp texture adds snap that contrasts with the soft pie interior.

A few notes:

  • Steam for 4-5 minutes - Asparagus should bend slightly but still have bite.
  • Zest directly over hot spears - The heat releases citrus oils for stronger flavor.

If you prefer roasted vegetables, this easy zest asparagus recipe works just as well with charred edges.

Our Pick
Thin asparagus spears cook faster and stay tender without turning mushy.

5. Rustic Buttermilk Cornbread

Crumbly, slightly sweet cornbread soaks up any extra gravy pooling on the plate. The texture provides a different kind of starch that feels lighter than dense dinner rolls.

Keep in mind:

  • Mix wet and dry separately - Combine them just until incorporated to avoid tough cornbread.
  • Serve warm - Cornbread tastes best within an hour of baking.
  • Preheat the skillet - A hot cast-iron pan creates a crispy bottom crust.
  • Brush with honey butter - Adds richness and sweetness that complements savory pie.

The slightly sweet flavor pairs well with the herby chicken filling without overwhelming the meal. Cornbread also works for potlucks since it travels well and reheats easily.

Method Time Best For
Cast-iron skillet 25 minutes Crispy edges and rustic look
Baking dish 30 minutes Softer texture, easy slicing
Muffin tin 18 minutes Individual portions, faster cooking

6. Roasted Brussels Sprouts with Balsamic Glaze

Caramelized edges and smoky bitterness introduce flavors the creamy pie cannot provide. The balsamic glaze adds sweet-tart complexity that cuts through buttery richness.

Roast halved Brussels sprouts at 425°F until crispy and golden, then drizzle with reduced balsamic vinegar. The high heat creates charred edges while keeping the centers tender.

Consider fresh balsamic glaze we love when you want a tangy drizzle that brightens roasted vegetables.

Balsamic Glaze

Works for: Sweet-tart contrast, finishing touch

Skip if: You prefer savory-only sides

Garlic Butter

Works for: Extra richness, savory depth

Skip if: The pie already feels too heavy

7. Simple Mixed Green Salad with Vinaigrette

Light, fresh greens with acidity refresh the palate between rich bites. The crisp leaves provide textural contrast the soft pie filling lacks.

Use a mix of butter lettuce, arugula, and spinach for varied textures and flavors. Dress with lemon vinaigrette just before serving to keep leaves from wilting.

Golden Rule
One tablespoon of dressing per two cups of greens keeps salad from getting soggy.

8. Classic Mushroom Herb Gravy

Earthy, savory gravy adds moisture and depth to the plate. The umami-rich sauce enhances the chicken filling without masking its flavor.

  • Sauté mushrooms first - Browning them before adding liquid builds deeper flavor.
  • Use fresh thyme - Dried herbs taste dusty next to the pie's fresh filling.

Drizzle something zesty on the side when you want extra sauce for dipping crusty bread or drizzling over mashed potatoes.

Mushroom Type Flavor Best For
Cremini Earthy, mild Everyday gravy
Shiitake Rich, meaty Deeper umami flavor
Mixed Layered complexity Special occasions

9. Roasted Garlic Green Beans Almondine

Tender-crisp beans with toasted almonds add crunch and nutty richness. The simple preparation keeps the focus on fresh vegetable flavor.

Blanch green beans for three minutes, then sauté with garlic and sliced almonds until the nuts turn golden. The quick cooking preserves the bright green color and snappy texture.

Watch Out
Almonds burn quickly-watch them closely once they start browning.

10. Brown Butter Dinner Rolls

Soft, buttery bread goes with the flaky pastry crust while adding another way to soak up gravy. The nutty brown butter improves plain rolls into something special.

What to know:

  • Brush while hot - Brown butter soaks into warm rolls better than cold ones.
  • Cook butter until amber - Too light tastes plain, too dark turns bitter.
  • Use immediately - Brown butter solidifies as it cools.
  • Make ahead - Bake rolls earlier and reheat wrapped in foil.

The tender crumb works well for mopping up any extra filling that spills onto the plate. Brown butter adds a nutty, caramelized note that pairs well with herbs in the pie filling.

If you need warm dinner rolls we love for a crowd, double the batch since they disappear quickly.

Brown Butter

Works for: Nutty depth, special occasions

Skip if: You want simpler weeknight prep

Regular Butter

Works for: Quick finish, familiar flavor

Skip if: You want extra flavor complexity

11. Roasted Sweet Potato Wedges

Natural sweetness and crisp edges contrast with the savory pie filling. The caramelized exterior adds textural variety soft vegetables cannot provide.

  • Cut into even wedges - Uniform size ensures consistent roasting.
  • Season with smoked paprika - Adds warm spice that complements chicken.
  • Roast at 425°F - High heat creates crispy edges and tender centers.
  • Flip halfway through - Ensures even browning on all sides.

The slightly sweet flavor balances the savory gravy without creating odd combinations. Sweet potatoes also bring bright color to the plate, making the meal feel more complete.

When you want a creamy potato wedges side dish that comes together quickly, this works for weeknights or hosting friends.

Shortcut
Use an air fryer to cut roasting time in half and get extra-crispy edges.

12. Crispy Parmesan Zucchini Chips

Crunchy, cheesy chips add saltiness and texture contrast. The thin slices bake until crispy, providing a lighter alternative to potato chips.

Slice zucchini into thin rounds, toss with grated Parmesan and olive oil, then bake at 400°F until golden and crisp. The cheese creates a savory crust that clings to each piece.

Try an easy zucchini chips to try when you want something that feels indulgent without adding heaviness to the meal.

If You Want Try This
Extra crunch Use a mandoline for thinner slices
More flavor Add garlic powder and dried herbs
Faster prep Skip salting and draining step

13. Tangy Cranberry Chutney

Bright, tart sauce cuts through buttery richness with sweet acidity. The fruit-based condiment adds a holiday feel that pairs well with comfort food.

A few notes:

  • Simmer fresh cranberries - Frozen berries work but fresh provide better texture.
  • Add orange zest - Citrus brightens the tartness and adds aromatic complexity.
  • Include warm spices - Cinnamon and cloves complement savory chicken filling.

The jewel-toned sauce adds visual appeal and provides a palate cleanser between bites. When you need cool cranberry chutney on the side for special dinners, this delivers.

Quick Tip
Make chutney a day ahead-the flavors meld and improve overnight.

14. Honey Glazed Roasted Parsnips

Sweet, tender root vegetables balance the savory pie with natural earthiness. The honey glaze caramelizes during roasting and creates golden edges.

Keep in mind:

  • Peel parsnips first - The skin turns tough when roasted.
  • Cut into uniform pieces - Ensures even cooking and prevents burning.
  • Roast with honey and thyme - The combination adds layers of flavor without overwhelming the vegetable.

The slightly sweet, nutty flavor goes with the herb-flecked filling without creating competing tastes. Parsnips also bring a rustic, seasonal feel that works well for fall and winter meals.

Method Time Best For
Roasted whole 40 minutes Impressive presentation
Cut into chunks 30 minutes Faster cooking, more caramelization
Sliced coins 25 minutes Quick prep, even browning

15. Fresh Cranberry Walnut Salad

Crunchy nuts and tart fruit add brightness and texture. The combination refreshes the palate between rich bites of creamy filling.

Use mixed greens, dried cranberries, toasted walnuts, and lemon vinaigrette for a salad that balances sweet, tart, and nutty flavors. The contrasting textures make each bite interesting without overwhelming the main dish.

  • Toast walnuts first - Raw nuts taste bland next to tart cranberries.
  • Dress just before serving - Keeps greens crisp and prevents wilting.

If you love crisp walnut salad we love for weeknight dinners, this comes together in 15 minutes.

Our Pick
Use baby spinach instead of lettuce for extra nutrients and tender leaves.

Common questions come up when planning sides for chicken pot pie. Here are the answers that help you decide what works.

Frequently Asked Questions

What sides go best with chicken pot pie?

Fresh salads, roasted vegetables, and tangy slaws cut through the rich filling while crusty bread or cornbread soaks up extra gravy.

What vegetables go with chicken pot pie?

Roasted carrots, steamed asparagus, Brussels sprouts, and green beans add crunch and freshness that balance the creamy filling.

How many sides should I serve with chicken pot pie?

One vegetable side and one salad or bread creates a complete meal without overwhelming the table.

Can I prep sides for chicken pot pie ahead of time?

Slaw, chutney, and cornbread can be made a day ahead, while roasted vegetables taste best finished just before serving.

What's a healthy side for chicken pot pie?

Steamed asparagus, mixed green salad, or roasted Brussels sprouts add nutrients and freshness without extra calories.

What Goes With Chicken Pot Pie? 15 Quick & Easy Sides

What Goes With Chicken Pot Pie? 15 Quick & Easy Sides

No ratings yet
We provide a list of 15 sides that balance chicken pot pie by adding bright, crunchy vegetables, fresh salads, and savory sauces. This variety offers different textures, temperatures, and effort levels to help create a well-rounded meal.
Print Recipe Pin Recipe
Prep Time 15 minutes mins
Cook Time 10 minutes mins
Total Time 25 minutes mins
Servings: 4 servings
Course: Dinner, Side Dish
Cuisine: American
Ingredients Equipment Method Notes

Ingredients
  

  • Golden Herb Roasted Carrots crisp
  • Creamy Garlic Mashed Potatoes creamy
  • Zesty Apple Cider Slaw tangy
  • Steamed Lemon Zest Asparagus bright
  • Rustic Buttermilk Cornbread crumbly
  • Roasted Brussels Sprouts with Balsamic Glaze smoky
  • Simple Mixed Green Salad with Vinaigrette fresh
  • Classic Mushroom Herb Gravy rich
  • Roasted Garlic Green Beans Almondine crunchy
  • Brown Butter Dinner Rolls rich
  • Roasted Sweet Potato Wedges crispy
  • Crispy Parmesan Zucchini Chips crunchy
  • Tangy Cranberry Chutney tangy
  • Honey Glazed Roasted Parsnips sweet
  • Fresh Cranberry Walnut Salad bright

Equipment

  • Sheet pan for roasting vegetables
  • Mixing bowl for salads and slaws
  • Cutting board
  • Serving platter

Method
 

  1. Assess what the main dish already provides-if it has starch, focus on vegetables and fresh sides.
  2. Choose 2-3 sides that fill different gaps: one vegetable, one starch or bread, one sauce or dip.
  3. Start the longest-cooking side first. Prep quick items like salads while the oven works.
  4. Balance temperatures-pair hot roasted vegetables with a cold slaw or chilled dip.
  5. Plate the main dish with sides arranged around it. Drizzle sauce or add garnish last.
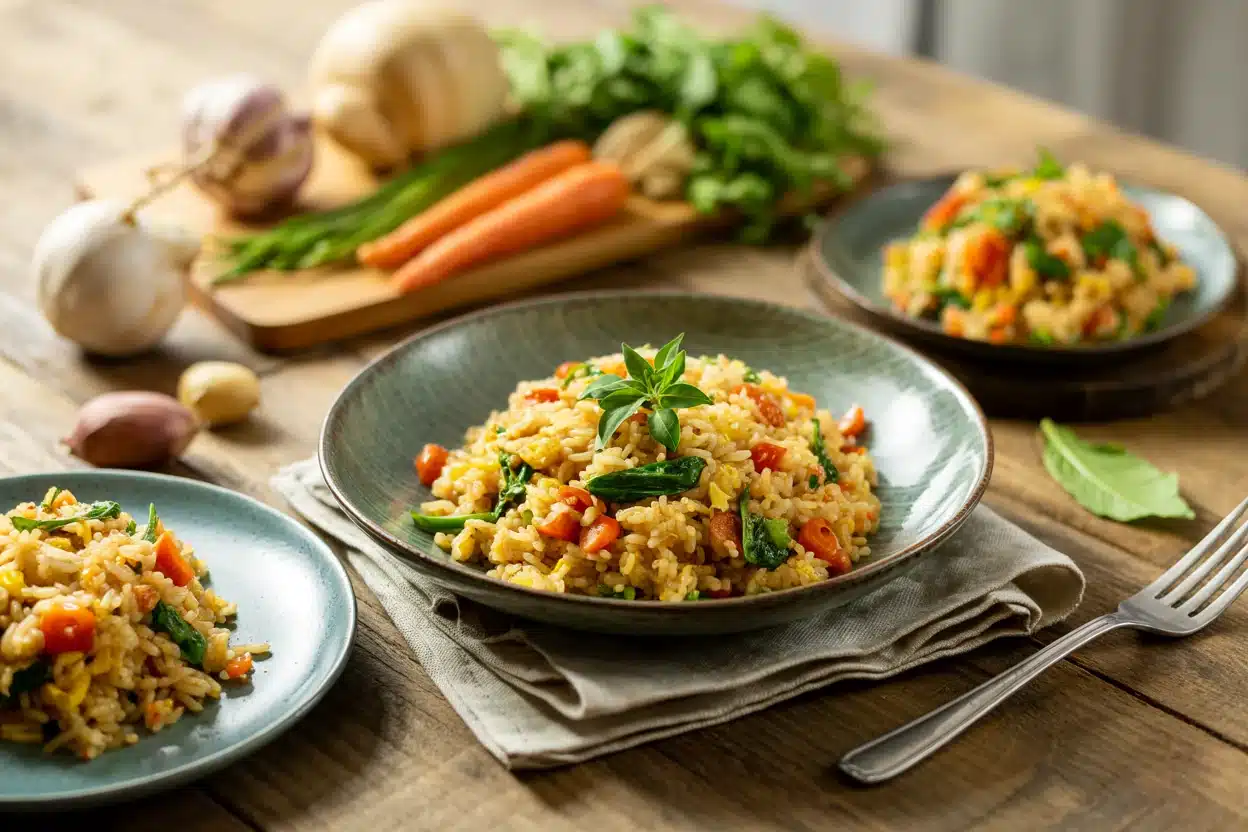
Notes

Add a fresh salad or tangy slaw and keep it chilled until serving. This prevents the plate from feeling too heavy when paired with creamy chicken pot pie.

Tried this recipe?

Let us know how it was!

15 Sides That Pair Well With Chicken Broccoli Casserole

February 4, 2026

Chicken broccoli casserole delivers creamy richness with tender chicken and soft broccoli in a cheesy sauce. That combination covers comfort, but the plate needs balance.

15 Sides That Pair Well With Chicken Broccoli Casserole

The best sides bring crunch, acid, or light freshness to cut through the heavy cream base. Crisp salads add brightness, roasted vegetables offer caramelized contrast, and tangy sauces refresh the palate between bites.

Cool fall and winter evenings call for this warming dish with sides that complement without competing.

QUICK SUMMARY

Chicken broccoli casserole brings creamy, cheesy richness that needs crisp, fresh contrast. Tangy apple cider slaw cuts through the cream sauce, roasted Brussels sprouts add caramelized bitterness, and lemon butter green beans provide bright acidity. Starches soak up sauce. Vegetables balance the richness.

🥗Add crunch: Slaw, Caesar salad, or cucumber salad
🥕Roasted sides: Brussels sprouts, carrots, or asparagus
⏱️Quick pick: Steamed green beans tossed with lemon butter
# Side Dish Best For Prep
1 Roasted Garlic Mashed Potatoes ✨ Any Occasion ⚡ Medium
2 Steamed Lemon Butter Green Beans 🌙 Weeknight ✅ Easy
3 Tangy Apple Cider Slaw ✨ Any Occasion ✅ Easy
4 Warm Crusty Garlic Bread ✨ Any Occasion ✅ Easy
5 Roasted Brussels Sprouts with Balsamic Glaze ✨ Any Occasion ⚡ Medium
6 Simple Arugula Salad with Lemon Vinaigrette ✨ Any Occasion ✅ Easy
7 Brown Butter Roasted Carrots ✨ Any Occasion ⚡ Medium
8 Herb Butter Rice Pilaf ✨ Any Occasion ⚡ Medium
9 Creamy Cucumber Dill Salad ✨ Any Occasion ✅ Easy
10 Sautéed Garlic Spinach 🌙 Weeknight ✅ Easy
11 Chimichurri Sauce ✨ Any Occasion ✅ Easy
12 Honey Glazed Sweet Potato Wedges ✨ Any Occasion ⚡ Medium
13 Classic Caesar Salad with Croutons ✨ Any Occasion ✅ Easy
14 Oven-Roasted Asparagus with Lemon Zest ✨ Any Occasion ✅ Easy
15 Buttered Egg Noodles with Fresh Parsley ✨ Any Occasion ✅ Easy

What to Serve With Chicken Broccoli Casserole: 15 Sides

These sides balance the creamy casserole with fresh vegetables, crisp textures, and bright acidity.

1. Roasted Garlic Mashed Potatoes

Creamy, buttery mashed potatoes echo the casserole's richness without adding competing flavors. Roasted garlic brings mellow sweetness instead of sharp bite.

Use Yukon Gold potatoes for natural creaminess that does not need extra butter. Roast whole garlic cloves in foil at 400°F for 40 minutes until they turn soft and golden, then mash them directly into the potatoes.

Try this fluffy mashed potatoes recipe when you want a comforting starch that soaks up casserole sauce.

Quick Tip
Warm the milk before mixing to keep potatoes hot and fluffy.

2. Steamed Lemon Butter Green Beans

Bright, snappy green beans cut through creamy richness with citrus acidity. The quick steam keeps color bright and texture crisp.

A few notes:

  • Steam for 4 minutes - Beans stay tender-crisp without turning mushy.
  • Add lemon zest and butter - Toss hot beans with both for immediate flavor.
  • Skip the microwave - Steaming preserves snap better than nuking.
  • Use fresh lemon - Bottled juice tastes flat.

Salt the water generously before steaming for beans that taste seasoned all the way through.

3. Tangy Apple Cider Slaw

Cool, crunchy slaw with apple cider vinegar dressing refreshes the palate between bites of rich casserole. Shredded cabbage and crisp apples provide textural contrast the casserole cannot deliver.

Drain shredded cabbage on paper towels for 15 minutes before dressing to prevent watery slaw. For hosting friends who expect cool cider slaw on the side, mix in julienned carrots and thinly sliced red onion for color and sharpness.

If You Want Try This
Sweeter slaw Add honey to the vinaigrette
More crunch Include julienned jicama or radish
Creamier texture Mix in Greek yogurt with vinegar

4. Warm Crusty Garlic Bread

Toasted garlic bread adds garlicky crunch that contrasts soft casserole texture. Butter soaks into warm bread for richness that feels indulgent.

Slice a baguette on the diagonal, brush with melted butter mixed with minced garlic and parsley, then broil for 3 minutes until golden and bubbly. If you want this easy crusty bread recipe to soak up casserole sauce, serve it hot straight from the oven.

5. Roasted Brussels Sprouts with Balsamic Glaze

Caramelized Brussels sprouts bring nutty bitterness that balances creamy cheese sauce. Balsamic glaze adds tangy sweetness.

  • Halve the sprouts - Cut sides caramelize better than whole sprouts.
  • Roast at 425°F - High heat creates crispy edges.
  • Drizzle glaze after roasting - Adding it before makes sprouts soggy.

Toss roasted sprouts with toasted pine nuts for extra crunch. Try a tender balsamic glaze side dish when you want vegetables that feel special enough for holiday meals.

Our Pick
Use thick balsamic glaze from a bottle instead of reducing your own to save 15 minutes.

6. Simple Arugula Salad with Lemon Vinaigrette

Peppery arugula leaves with bright lemon dressing cut through rich casserole with sharp, clean flavors. The salad takes 10 minutes to assemble.

What to know:

  • Dress just before serving - Arugula wilts fast once dressed.
  • Use fresh lemon juice - Bottled juice lacks brightness.
  • Add shaved Parmesan - Salty cheese balances peppery greens.
  • Whisk vinaigrette thoroughly - Oil and lemon separate quickly.

For meal prep, store washed arugula in paper towels inside a sealed container to keep leaves crisp. If you want a tangy salad vinaigrette side dish that pairs well with comfort food, this delivers without heavy ingredients.

Method Time Best For
Whisking by hand 2 minutes Small batches
Shaking in a jar 30 seconds Quick emulsification
Blending 1 minute Thick, creamy dressing

7. Brown Butter Roasted Carrots

Sweet roasted carrots with nutty brown butter add caramelized depth that complements creamy casserole. Roasting concentrates natural sugars.

Peel carrots and slice them into uniform sticks so they roast evenly at 425°F for 25 minutes. Brown butter in a skillet over medium heat until it smells nutty and turns amber, then toss hot carrots in the butter with fresh thyme.

Try an easy butter carrots to try when you want a vegetable side that feels elegant without complex techniques.

Watch Out
Brown butter burns fast-remove from heat as soon as it turns golden.

8. Herb Butter Rice Pilaf

Light, fragrant rice pilaf soaks up casserole sauce without adding heaviness. Toasted rice grains bring nutty flavor that plain steamed rice cannot match.

  • Toast rice first - Sauté dry rice in butter for 3 minutes before adding liquid.
  • Use chicken broth - Water makes bland pilaf.
  • Add fresh herbs at the end - Parsley and thyme stay bright green.

Fluff rice with a fork instead of stirring to keep grains separate. For game day spreads where you need something fluffy on the side, this works for crowds without requiring constant attention.

If You Want Try This
More texture Stir in toasted slivered almonds
Richer flavor Replace half the broth with white wine
Quicker prep Use instant rice and skip toasting

9. Creamy Cucumber Dill Salad

Cool cucumber salad with yogurt dressing refreshes the palate between bites of rich casserole. Greek yogurt holds up better than regular yogurt and adds tangy richness.

Keep in mind:

  • Drain sliced cucumbers - Pat them on paper towels for 10 minutes to avoid watery salad.
  • Use fresh dill - Dried dill tastes dusty.
  • Add garlic gradually - Too much overpowers the cucumber.

English cucumbers have fewer seeds and thinner skins than regular cucumbers. If you want something bright on the side that comes together in 15 minutes, this delivers without heating the kitchen.

Shortcut
Buy pre-sliced cucumbers from the produce section to skip knife work.

10. Sautéed Garlic Spinach

Tender spinach sautéed with garlic adds iron-rich greens without heaviness. High heat keeps color bright and prevents soggy leaves.

  • Cook in batches - Overcrowding the pan makes spinach steam instead of sauté.
  • Use plenty of garlic - Spinach needs bold flavor.
  • Add a squeeze of lemon - Acid brightens the finished dish.
  • Drain excess liquid - Spinach releases water as it cooks.

Heat the pan until a drop of water sizzles before adding oil and garlic. Try an easy spinach to try when you need vegetables on the table in 10 minutes for easy weeknight chicken meals.

Baby Spinach

Works for: Quick cooking, tender texture

Skip if: You want heartier greens

Mature Spinach

Works for: Stronger flavor, more structure

Skip if: You need fast prep

11. Chimichurri Sauce

Bright, herbal chimichurri cuts through creamy casserole with zesty acidity and fresh parsley. The sauce takes 10 minutes to prepare and stores well.

Chop fresh parsley and cilantro finely, then mix with minced garlic, red wine vinegar, olive oil, and red pepper flakes. Let the sauce sit for 30 minutes before serving so flavors meld together.

Drizzle chimichurri over individual portions of casserole or serve it in a small bowl on the side. For hosting friends who expect creamy chimichurri sauce on the side, double the batch and refrigerate leftovers for up to five days.

Golden Rule
Use fresh herbs only-dried parsley makes flat, dull chimichurri.

12. Honey Glazed Sweet Potato Wedges

Sweet, caramelized sweet potato wedges add natural sugar contrast to savory casserole. High heat creates crispy edges that stay tender inside.

Cut sweet potatoes into uniform wedges, toss with olive oil and honey, then roast at 425°F for 30 minutes, flipping halfway through. The honey caramelizes during roasting for sticky-sweet glaze.

Try golden potato wedges on the side when you want a starch that feels special enough for holiday meals or family potlucks.

Quick Tip
Line your sheet pan with parchment for easy cleanup and crispier wedges.

13. Classic Caesar Salad with Croutons

Crisp romaine with tangy Caesar dressing provides textural contrast and bright acidity. Homemade croutons add crunch.

A few notes:

  • Use romaine hearts - Inner leaves stay crispest.
  • Make fresh croutons - Cube stale bread, toss with olive oil and garlic, then bake at 375°F for 12 minutes.
  • Dress just before serving - Lettuce wilts quickly once coated.

Shave Parmesan with a vegetable peeler for thin curls that melt slightly when tossed with warm dressing. If you want an easy crunchy croutons to try that pairs well with comfort food, this delivers without heavy ingredients.

Method Time Best For
Store-bought dressing 1 minute Quick weeknight meals
Homemade with blender 5 minutes Best flavor and texture
Anchovy-free version 5 minutes Picky eaters

14. Oven-Roasted Asparagus with Lemon Zest

Tender asparagus spears with bright lemon zest add refreshing citrus notes that balance rich casserole. Roasting concentrates asparagus flavor.

Snap off woody ends, toss spears with olive oil and salt, then roast at 400°F for 12 minutes until just tender. Grate fresh lemon zest over hot asparagus right before serving.

What to know:

  • Choose medium spears - Thin ones overcook, thick ones stay tough.
  • Space them out - Crowding makes asparagus steam instead of roast.
  • Check at 10 minutes - Asparagus cooks fast.
  • Add Parmesan if desired - Salty cheese complements lemon.

Try this easy asparagus zest recipe when you need vegetables ready in 15 minutes for easy seafood recipes we make.

Our Pick
Use a microplane for lemon zest-it creates fine shreds that distribute evenly.

15. Buttered Egg Noodles with Fresh Parsley

Simple buttered noodles soak up casserole sauce without competing flavors. Fresh parsley adds bright color and mild herbal notes.

Cook wide egg noodles until al dente, drain but do not rinse, then toss immediately with melted butter and chopped parsley while noodles are still hot. The butter coats evenly on warm noodles.

For this buttery side dish recipe that works for casual hosting or simple sweet endings here, use wide egg noodles instead of thin ones so they catch more sauce.

Wide Egg Noodles

Works for: Soaking up sauce, hearty texture

Skip if: You want delicate presentation

Angel Hair Pasta

Works for: Light meals, quick cooking

Skip if: You need sturdier noodles

Quick Tip
Reserve a cup of pasta water before draining-add splashes if noodles seem dry.

Common questions about serving chicken broccoli casserole come up when planning weeknight dinners or hosting family gatherings.

Frequently Asked Questions

What sides go best with chicken broccoli casserole?

Crisp salads, roasted vegetables, and tangy sauces work best because they cut through the casserole's creamy richness with fresh flavors and contrasting textures.

What vegetables go with chicken broccoli casserole?

Green beans, Brussels sprouts, roasted carrots, asparagus, and sautéed spinach provide different flavors and textures that balance the soft broccoli already in the casserole.

How many sides should I serve with chicken broccoli casserole?

Two sides work for weeknight dinners-one vegetable and one starch or salad-while three or four sides suit holiday meals or potlucks.

Can I prep sides for chicken broccoli casserole ahead of time?

Mashed potatoes, rice pilaf, cucumber salad, apple cider slaw, and chimichurri sauce store well in the refrigerator for up to three days before serving.

What starch pairs with chicken broccoli casserole?

Mashed potatoes, rice pilaf, sweet potato wedges, garlic bread, and buttered egg noodles soak up the casserole sauce without competing with its creamy texture.

Sides That Pair Well With Chicken Broccoli Casserole

15 Sides That Pair Well With Chicken Broccoli Casserole

No ratings yet
We provide a list of 15 sides that balance chicken broccoli casserole by adding crisp salads, roasted vegetables, and tangy sauces. These options offer textural variety, temperature contrasts, and a range of preparation efforts to complement the creamy richness.
Print Recipe Pin Recipe
Prep Time 15 minutes mins
Cook Time 10 minutes mins
Total Time 25 minutes mins
Servings: 4 servings
Course: Dinner, Side Dish
Cuisine: American
Ingredients Equipment Method Notes

Ingredients
  

  • Roasted Garlic Mashed Potatoes creamy
  • Steamed Lemon Butter Green Beans bright
  • Tangy Apple Cider Slaw crunchy
  • Warm Crusty Garlic Bread crunchy
  • Roasted Brussels Sprouts with Balsamic Glaze nutty
  • Simple Arugula Salad with Lemon Vinaigrette sharp
  • Brown Butter Roasted Carrots caramelized
  • Herb Butter Rice Pilaf nutty
  • Creamy Cucumber Dill Salad creamy
  • Sautéed Garlic Spinach tender
  • Chimichurri Sauce zesty
  • Honey Glazed Sweet Potato Wedges sweet
  • Classic Caesar Salad with Croutons crunchy
  • Oven-Roasted Asparagus with Lemon Zest refreshing
  • Buttered Egg Noodles with Fresh Parsley creamy

Equipment

  • Sheet pan for roasted vegetables
  • Mixing bowl for salads and dips
  • Cutting board
  • Serving platter

Method
 

  1. Assess what the main dish already provides-if it has starch, focus on vegetables and fresh sides.
  2. Choose 2-3 sides that fill different gaps: one vegetable, one starch or bread, one sauce or dip.
  3. Start the longest-cooking side first. Prep quick items like salads while the oven works.
  4. Balance temperatures-pair hot roasted vegetables with a cold slaw or chilled dip.
  5. Plate the main dish with sides arranged around it. Drizzle sauce or add garnish last.
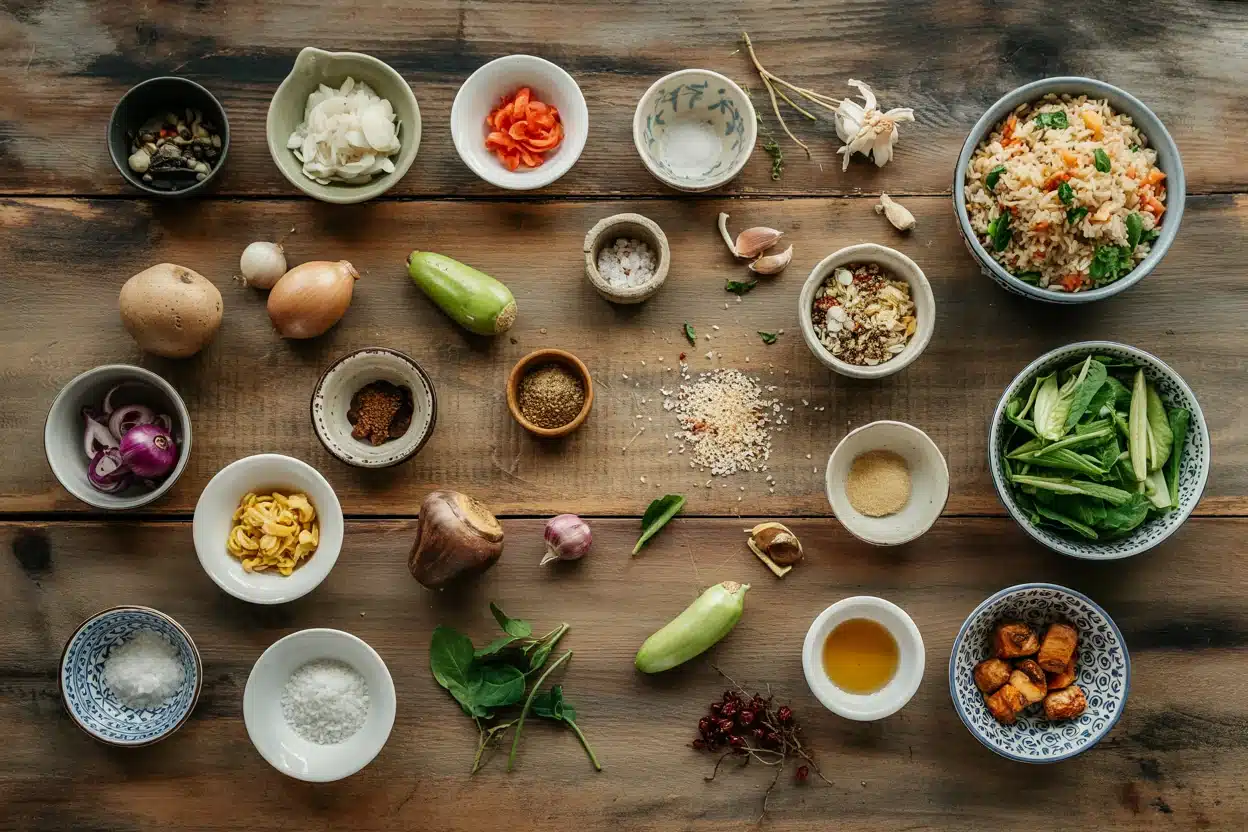
Notes

Add a crisp salad or tangy sauce and keep it chilled until serving. This prevents the meal from feeling too heavy or bland alongside the creamy casserole.

Tried this recipe?

Let us know how it was!

15 Sides That Go Perfectly With Cheese Straws

February 4, 2026

Cheese straws bring buttery richness and crispy texture to any spread. That flaky, golden crunch delivers salty satisfaction but leaves the plate feeling one-note.

We look for sides that add freshness, protein, or acidic contrast. Cool dips cut through the butter, crisp vegetables provide balance, and savory proteins round out the offerings.

During holiday season gatherings and festive potlucks, cheese straws shine as the crispy centerpiece that pairs with everything from tangy slaws to smoky cocktail bites.

QUICK SUMMARY

Cheese straws are buttery, crispy, and rich with sharp cheddar flavor. They need bright acidity, cool creaminess, or fresh crunch to balance the richness. Tangy apple cider slaw adds crisp freshness, herbed cream cheese dip provides cool contrast, and smoky bourbon sausages echo the savory notes. Starches feel redundant since the straws already deliver that element.

🥗Add freshness: Crisp slaws and pickled vegetables cut through butter
🌿Cool contrast: Creamy dips and yogurt-based sides refresh the palate
⏱️Quick pick: Herbed cream cheese dip comes together in 10 minutes

What to Serve With Cheese Straws: 15 Sides That Deliver

Cheese straws work for game day spreads, cocktail parties, and holiday buffets where variety matters. These sides add the contrast and balance your platter needs.

# Side Dish Best For Prep
1 Tangy Apple Cider Slaw ✨ Any Occasion ✅ Easy
2 Smoky Bourbon Cocktail Sausages 🎉 Hosting ⚡ Medium
3 Herbed Cream Cheese Dip ✨ Any Occasion ✅ Easy
4 Pickled Cucumber and Red Onion Salad ✨ Any Occasion ✅ Easy
5 Roasted Garlic Mashed Potatoes 🌙 Weeknight ⚡ Medium
6 Zesty Lemon Herb Grilled Chicken ✨ Any Occasion ⚡ Medium
7 Spicy Roasted Cauliflower Bites ✨ Any Occasion ⚡ Medium
8 Crisp Herb and Garlic Croutons ✨ Any Occasion ✅ Easy
9 Smoked Paprika Hummus ✨ Any Occasion ✅ Easy
10 Fresh Crudités with Ranch Dip ✨ Any Occasion ✅ Easy
11 Honey Glazed Pecan Nuts 🎉 Hosting ✅ Easy
12 Crispy Baked Parmesan Zucchini Chips ✨ Any Occasion ⚡ Medium
13 Classic Deviled Eggs with Smoked Paprika ✨ Any Occasion ⚡ Medium
14 Citrus Fruit Salad with Mint ✨ Any Occasion ✅ Easy
15 Spiced Tomato Jam 🎉 Hosting 🔪 Involved

1. Tangy Apple Cider Slaw

Bright acidity and crisp texture cut through the buttery richness of cheese straws. The cider vinegar dressing feels lighter than mayo-based slaws and adds a tangy kick that refreshes between bites.

Make the slaw a few hours ahead so the cabbage softens slightly and the flavors meld together. The chilled temperature provides contrast against room-temperature cheese straws.

Quick Tip
Drain shredded cabbage on paper towels for 10 minutes before tossing with dressing to prevent watery slaw.

2. Smoky Bourbon Cocktail Sausages

Salty, smoky notes echo the savory character of cheddar cheese straws. The bourbon glaze adds depth without overwhelming the platter.

  • Simmer in glaze - Cook sausages in bourbon, brown sugar, and tomato sauce until the liquid reduces by half.
  • Use toothpicks - Makes finger food service easier at parties.
  • Keep warm - Transfer to a slow cooker on low setting for serving.
  • Add heat - Stir in cayenne pepper or hot sauce for spicy kick.

Prep the glaze ahead and reheat with sausages just before guests arrive. If you need a quick side to try for cocktail parties, this delivers every time.

If You Want Try This
Sweeter flavor Add extra brown sugar and reduce bourbon
Smokier taste Use smoked sausages and add liquid smoke
Less alcohol Replace bourbon with apple juice and vinegar

3. Herbed Cream Cheese Dip

Cool, creamy texture provides contrast to crispy cheese straws. Fresh herbs like chives, dill, and parsley add bright color and herbaceous notes that balance the rich butter in the straws.

Softened cream cheese blends smoothly when mixed with minced garlic and lemon juice. Serve chilled in a bowl surrounded by crackers and vegetable sticks.

4. Pickled Cucumber and Red Onion Salad

Tart vinegar cuts through buttery richness and refreshes the palate. The quick-pickle method takes 30 minutes but the flavor improves after sitting overnight in the refrigerator.

What to know:

  • Slice thin - Use a mandoline for uniform cucumber and onion slices.
  • Add sugar - Balances the acidity from vinegar.
  • Include dill seeds - Adds classic pickle flavor without fresh herbs.
  • Drain before serving - Remove excess liquid so the salad does not water down the plate.

The crisp crunch provides textural variety on an appetizer spread. Try a quick onion salad side dish when you want something bright and tangy.

Our Pick
Persian cucumbers stay crunchier than regular cucumbers and hold up better in vinegar brine.

5. Roasted Garlic Mashed Potatoes

Rich, creamy texture complements buttery cheese straws when you need a more substantial side. Roasted garlic adds mellow sweetness instead of sharp raw garlic bite.

Keep in mind:

  • Roast whole - Slice the top off a garlic head, drizzle with olive oil, wrap in foil, and roast at 400°F for 40 minutes.
  • Mash warm - Cold potatoes turn gluey when mashed.

The velvety consistency soaks up any dips you serve alongside the cheese straws. Consider this buttery side dish recipe for comfort food spreads.

Yukon Gold Potatoes

Works for: Naturally buttery flavor and creamy texture

Skip if: You want fluffy mashed potatoes

Russet Potatoes

Works for: Light, fluffy texture that holds butter well

Skip if: You prefer dense, creamy mash

6. Zesty Lemon Herb Grilled Chicken

Light protein adds substance without heaviness. Bright citrus notes from lemon juice and zest cut through the richness of cheese and provide refreshing contrast.

Marinate chicken breasts in olive oil, lemon juice, minced garlic, and fresh herbs for at least one hour before grilling. The charred exterior adds smoky depth that goes with the toasted flavor in baked cheese straws.

  • Pound evenly - Flatten chicken to uniform thickness for even cooking.
  • Use high heat - Grill at 450°F for golden char marks.
  • Rest before slicing - Let chicken sit 5 minutes so juices redistribute.
  • Slice thin - Makes chicken easier to serve as finger food.

Pair a quick chicken side dish with cheese straws for game day platters that need protein options.

Shortcut
Use store-bought rotisserie chicken and toss with lemon juice and fresh herbs to skip the marinating step.

7. Spicy Roasted Cauliflower Bites

Smoky, spicy crunch adds variety to buttery cheese straws. Smoked paprika and cayenne pepper create depth and heat that wake up the palate.

A few notes:

  • Cut uniform florets - Ensures even roasting at 425°F for 25 minutes.
  • Toss in oil - Coats cauliflower so spices stick and edges caramelize.
  • Add after roasting - Sprinkle extra cayenne on top if some guests want more heat.

The charred edges provide crispy texture that echoes the flakiness of cheese straws. Golden brown florets look appealing on a party platter and offer a vegetarian option that packs flavor.

Method Time Best For
Roasting 25 minutes Caramelized edges and smoky flavor
Air frying 15 minutes Quick cooking with less oil
Grilling 20 minutes Charred flavor and outdoor cooking

8. Crisp Herb and Garlic Croutons

Additional crunch enriches the appetizer spread. Garlic and dried herbs add aromatic notes that go with the sharpness of cheddar in cheese straws.

  • Use day-old bread - Stale bread crisps better than fresh.
  • Toss in olive oil - Coats cubes evenly so they brown uniformly.
  • Bake at 375°F - Toasts croutons in 15 minutes without burning.
  • Cool completely - Warm croutons turn soggy when stored.

The golden cubes add texture to salads or work as a standalone snack next to dips. Store in an airtight container for up to three days.

Golden Rule
Cut bread cubes to half-inch size so they crisp all the way through without drying out.

9. Smoked Paprika Hummus

Creamy dip with smoky depth pairs perfectly as a savory complement. The chickpea base feels lighter than cheese-based dips and provides protein for guests who want something more substantial.

  • Add tahini - Creates silky texture and nutty flavor.
  • Use ice water - Blend in cold water for extra smooth consistency.

The smoky notes echo the toasted flavor in baked cheese straws. Serve with pita chips or carrot sticks for dipping options beyond the straws themselves.

Drizzle olive oil on top and sprinkle extra smoked paprika for visual appeal. If you want something cool on the side that works year-round, this delivers.

If You Want Try This
Extra smokiness Add chipotle powder or liquid smoke
More garlic Roast garlic cloves before blending in
Creamier texture Blend longer and add more tahini

10. Fresh Crudités with Ranch Dip

Crisp vegetables provide cooling contrast to rich cheese straws. Carrots, celery, bell peppers, and cucumber sticks add colorful crunch that looks appealing on a platter.

The cool ranch dip brings tangy buttermilk flavor and herbaceous notes from dill and chives. Raw vegetables refresh the palate between bites of buttery cheese straws.

Keep in mind:

  • Prep ahead - Cut vegetables the night before and store in ice water.
  • Pat dry - Remove excess moisture so dip adheres to vegetables.

Consider a roasted ranch dip side dish when you want something that pairs with both raw and roasted vegetables.

Quick Tip
Arrange vegetables by color for visual impact on the serving platter.

11. Honey Glazed Pecan Nuts

Sweet crunch balances salty and savory flavors from cheese straws. The honey glaze adds caramelized sweetness that contrasts with sharp cheddar notes.

A few notes:

  • Toast first - Bake pecans at 350°F for 8 minutes before adding honey.
  • Use parchment - Prevents sticky glaze from burning onto the pan.
  • Add sea salt - Sprinkle flaky salt while nuts cool for sweet-salty balance.

The glossy finish looks elegant on appetizer spreads. Break apart any clusters once the glaze cools and hardens.

Try homemade pecan nuts we love when hosting holiday gatherings or game day parties where variety matters.

Oven Method

Works for: Even toasting and controlled heat

Skip if: You need nuts ready in under 10 minutes

Stovetop Method

Works for: Quick cooking and constant monitoring

Skip if: You want hands-off preparation

12. Crispy Baked Parmesan Zucchini Chips

Addictive crunch with complementary cheesy flavor adds variety to the spread. Thin slices baked with parmesan create golden edges that rival the flakiness of cheese straws.

Slice zucchini into quarter-inch rounds and toss with olive oil, grated parmesan, and Italian seasoning. Bake at 425°F for 20 minutes until edges turn golden brown.

What to know:

  • Pat dry - Remove moisture from zucchini slices so they crisp instead of steam.
  • Use parchment - Prevents sticking and makes cleanup easier.
  • Serve immediately - Zucchini chips soften as they cool.

The vegetable base feels lighter than potato chips while still delivering satisfying crunch. If you want an easy zucchini chips to try that uses summer produce, this works.

Watch Out
Overcrowding the baking sheet creates steam instead of crisp edges. Use two pans if needed.

13. Classic Deviled Eggs with Smoked Paprika

Creamy, tangy protein-packed bites pair well with cheese straws. The mustard and vinegar filling adds sharpness that cuts through buttery richness.

Smoked paprika sprinkled on top brings aromatic depth and visual appeal. The cool temperature provides contrast to room-temperature cheese straws on the serving platter.

  • Boil properly - Cook eggs for 12 minutes then transfer to ice bath.
  • Dry halves - Pat egg whites dry before filling so yolk mixture stays in place.
  • Pipe filling - Use a plastic bag with the corner cut off for neat presentation.

Make deviled eggs a day ahead and store covered in the refrigerator. Consider an easy eggs paprika to try when you need appetizers that hold up well for several hours.

Method Time Best For
Boiling 12 minutes Traditional method with consistent results
Steaming 15 minutes Easier peeling and reduced cracking
Instant Pot 8 minutes Hands-off cooking for large batches

14. Citrus Fruit Salad with Mint

Bright acidity and fresh herbs refresh the palate between rich bites. Oranges, grapefruit, and lime segments provide juicy sweetness that contrasts with salty cheese straws.

Mint leaves add cooling herbaceous notes without overpowering the fruit. The bright colors look appealing on a buffet table next to golden cheese straws.

A few notes:

  • Supreme citrus - Remove all white pith for best texture.
  • Add honey - Drizzle on top if fruit tastes too tart.

Chill the salad for at least 30 minutes before serving so the flavors meld. Try tangy salad mint we love when you want something fresh on the side.

Our Pick
Blood oranges add deep color and slightly sweeter flavor than regular oranges.

15. Spiced Tomato Jam

Sweet and tangy condiment complements salty cheese straws. The concentrated tomato flavor with warm spices creates a sophisticated spread that improves simple appetizers.

  • Simmer low - Cook tomatoes with sugar, vinegar, and spices for 45 minutes until thick.
  • Stir often - Prevents burning on the bottom of the pot.
  • Cool completely - Jam thickens more as it cools to room temperature.

The glossy red color stands out on a serving platter. Spread on crackers or use as a dipping sauce for cheese straws when you want a smooth side to try that works for special occasions.

Store tomato jam in the refrigerator for up to two weeks. The sweet-savory balance pairs especially well with sharp cheddar flavors.

Golden Rule
Use Roma tomatoes for thicker jam with less water content than beefsteak varieties.

These sides round out your cheese straw platter with options that add freshness, protein, and contrast. If you enjoy building spreads, check out easy dessert ideas to try or explore other chicken meals to try for variety.

Frequently Asked Questions

What sides go best with cheese straws?

Fresh salads, pickled vegetables, and creamy dips cut through the buttery richness while proteins like grilled chicken or deviled eggs add substance to the spread.

What vegetables go with cheese straws?

Raw crudités like carrots and celery provide crisp contrast while roasted cauliflower or zucchini chips add smoky depth that goes with the toasted cheese flavor.

What dips should I serve with cheese straws?

Herbed cream cheese, smoked paprika hummus, and ranch dip work well because their cool temperature and tangy flavors balance the warm, buttery straws.

Can I prep sides for cheese straws ahead of time?

Slaws, dips, pickled vegetables, and deviled eggs all improve when made ahead and chilled overnight before serving with room-temperature cheese straws.

What to serve with cheese straws for a party crowd?

Build a platter with cocktail sausages, deviled eggs, crudités with ranch dip, and honey glazed pecans to offer variety that feeds different preferences and dietary needs.

15 Sides That Go Perfectly With Cheese Straws

No ratings yet
We provide a list of 15 sides that complement cheese straws by adding fresh acidity, creamy dips, and savory proteins. These options offer a variety of textures and temperatures, from crisp slaws to warm roasted vegetables, along with varied effort levels to suit different occasions.
Print Recipe
Prep Time 15 minutes mins
Cook Time 10 minutes mins
Total Time 25 minutes mins
Servings: 4 servings
Course: Dinner, Side Dish
Cuisine: American
Ingredients Equipment Method Notes

Ingredients
  

  • Tangy Apple Cider Slaw tangy
  • Smoky Bourbon Cocktail Sausages smoky
  • Herbed Cream Cheese Dip creamy
  • Pickled Cucumber and Red Onion Salad tangy
  • Roasted Garlic Mashed Potatoes creamy
  • Zesty Lemon Herb Grilled Chicken bright
  • Spicy Roasted Cauliflower Bites spicy
  • Crisp Herb and Garlic Croutons crunchy
  • Smoked Paprika Hummus creamy
  • Fresh Crudités with Ranch Dip crunchy
  • Honey Glazed Pecan Nuts crunchy
  • Crispy Baked Parmesan Zucchini Chips crunchy
  • Classic Deviled Eggs with Smoked Paprika creamy
  • Citrus Fruit Salad with Mint bright
  • Spiced Tomato Jam tangy

Equipment

  • Sheet pan for roasted vegetables
  • Mixing bowl for salads and dips
  • Cutting board
  • Serving platter

Method
 

  1. Assess what the main dish already provides-if it has starch, focus on vegetables and fresh sides.
  2. Choose 2-3 sides that fill different gaps: one vegetable, one starch or bread, one sauce or dip.
  3. Start the longest-cooking side first. Prep quick items like salads while the oven works.
  4. Balance temperatures-pair hot roasted vegetables with a cold slaw or chilled dip.
  5. Plate the main dish with sides arranged around it. Drizzle sauce or add garnish last.
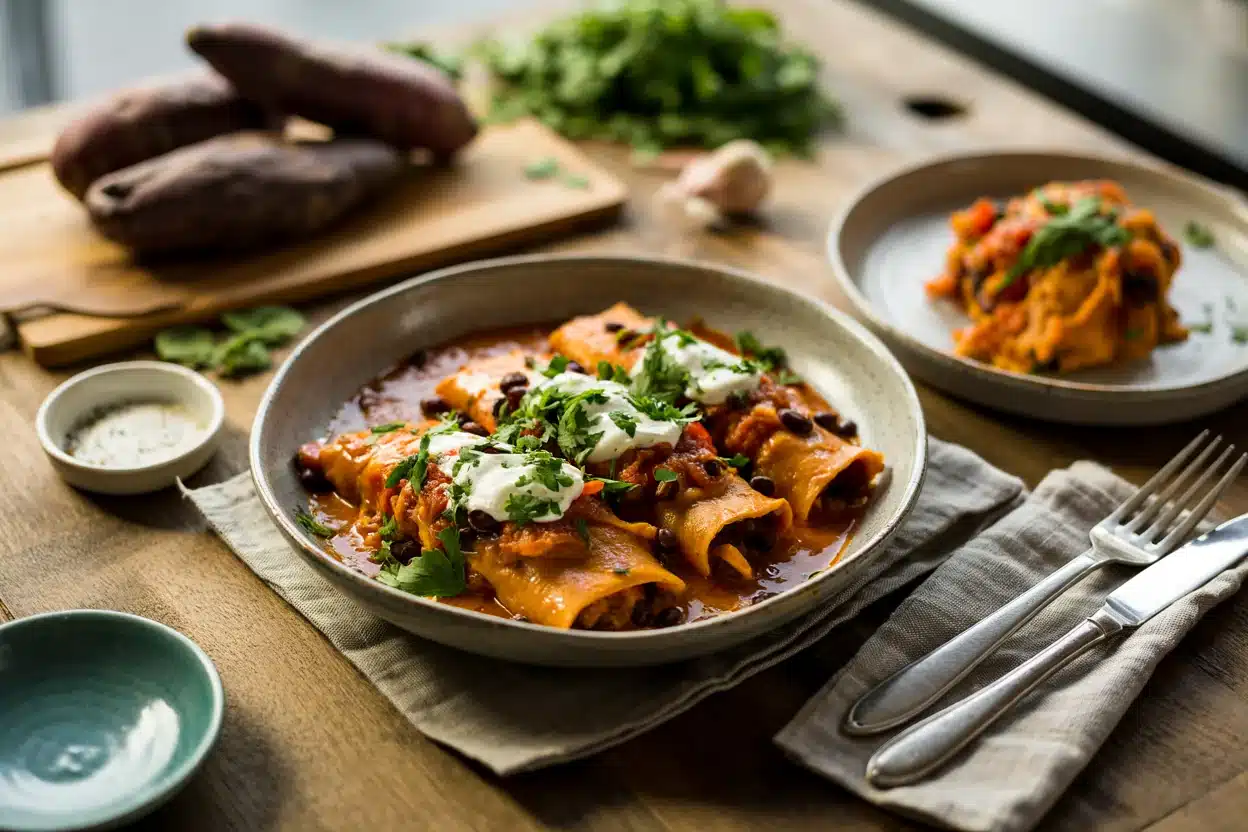
Notes

Add a fresh tangy slaw or a cool creamy dip and keep it chilled until serving. This prevents the plate from feeling too heavy or bland when paired with rich cheese straws.

Tried this recipe?

Let us know how it was!

What to Serve With Cornbread: 15 Best Side Dishes

February 4, 2026

Cornbread delivers buttery sweetness and crumbly texture, but it rarely stands alone. The starch-heavy profile wants smoky proteins, tangy vegetables, or something that soaks up those golden crumbs.

We look for sides that bring contrast-spicy heat, bright acid, or rich gravies that turn cornbread into a vehicle. Classic Southern pairings like pulled pork and collard greens work because they fill the gaps cornbread leaves open.

Fall and winter meals benefit most from these combinations. The warming comfort of cornbread shines at holiday tables and game day spreads when you need options that feed a crowd without extra fuss.

QUICK SUMMARY

Cornbread is sweet, buttery, and crumbly, so it needs smoky proteins and tangy vegetables for balance. Pulled pork adds rich smokiness, chili con carne provides hearty spice, and apple cider slaw brings bright crunch. Spreads like honey butter enhance moisture while pickled sides cut through richness.

🍖Soak it up: Chili, pulled pork, baked beans
🥗Add contrast: Coleslaw, pickled jalapeños, tomato salad
⏱️Quick pick: Honey butter spread ready in 5 minutes

15 Perfect Side Dishes to Accompany Cornbread

These sides balance cornbread's sweetness with smoky proteins, tangy vegetables, and rich spreads that make every crumb count.

# Side Dish Best For Prep
1 Smoky Barbecue Pulled Pork ✨ Any Meal ✅ Easy
2 Tangy Apple Cider Coleslaw ✨ Any Meal ✅ Easy
3 Rich Creamed Collard Greens with Bacon ✨ Any Meal ⚡ Medium
4 Honey Butter Spread ✨ Any Meal ✅ Easy
5 Classic Chili Con Carne ✨ Any Meal ⚡ Medium
6 Roasted Sweet Potato Wedges with Smoked Paprika 🌙 Weeknight ⚡ Medium
7 Spiced Black-Eyed Peas ✨ Any Meal ✅ Easy
8 Pickled Jalapeño Slices ✨ Any Meal ✅ Easy
9 Golden Garlic Mashed Potatoes ✨ Any Meal ⚡ Medium
10 Crispy Fried Okra with Lemon Aioli ✨ Any Meal ⚡ Medium
11 Smoky Baked Beans with Bacon ✨ Any Meal ✅ Easy
12 Buttermilk Fried Chicken Thighs ✨ Any Meal ⚡ Medium
13 Zesty Tomato and Cucumber Salad ✨ Any Meal ✅ Easy
14 Sweet Corn and Jalapeño Pudding 🎉 Hosting ✅ Easy
15 Garlic Herb Butter Spread ✨ Any Meal ✅ Easy

1. Smoky Barbecue Pulled Pork

Rich, smoky pork adds the protein cornbread needs while complementing its natural sweetness. The slow-cooked meat soaks into crumbly bites and creates the kind of combination that defines Southern comfort food.

Use a slow cooker to keep pork tender without constant attention. The low heat breaks down tough cuts into shreds that pull apart easily and stay juicy through hours of cooking.

Quick Tip
Add a splash of apple cider vinegar to the cooking liquid for tangy brightness that cuts through richness.

2. Tangy Apple Cider Coleslaw

Bright acidity and crunchy cabbage balance the richness cornbread brings to the plate. The vinegar-based dressing refreshes the palate between bites of buttery bread.

Dress the slaw just before serving to keep cabbage crisp and prevent wilting. If you enjoy a bright side to try, this delivers without mayo heaviness.

If You Want Try This
Maximum crunch Shred cabbage thin and dress 10 minutes before serving
Sweeter notes Add shredded apple and increase honey slightly
Spicy kick Mix in sliced jalapeño or red pepper flakes

3. Rich Creamed Collard Greens with Bacon

Smoky bacon and creamy greens add depth that works with cornbread's sweetness instead of fighting it. The combination echoes traditional Southern plates where cornbread soaks up pot liquor.

  • Wilt greens gently - Overcooking turns them mushy and dull green.
  • Cook bacon until crisp - The crunchy bits provide texture contrast against soft greens.
  • Add cream gradually - Too much at once creates a watery sauce.

Make this ahead and reheat gently before serving. When you want our favorite greens bacon side, the bacon adds salty depth.

4. Honey Butter Spread

Sweet, buttery moisture transforms crumbly cornbread into something richer without overwhelming its flavor. Whipped honey butter melts into warm bread and creates pockets of sweetness in every bite.

Keep in mind:

  • Use softened butter - Cold butter tears bread instead of spreading smoothly.
  • Whip until fluffy - Extra air makes the spread light and easy to work with.
  • Add honey gradually - Too much makes it runny and hard to control.
  • Store covered - Exposure to air causes butter to pick up fridge odors.

The spread keeps for a week in the refrigerator and tastes better when brought to room temperature before serving.

Our Pick
Add a pinch of sea salt to balance sweetness and enhance butter flavor without turning it savory.

5. Classic Chili Con Carne

Hearty, spicy warmth turns cornbread into a vehicle for soaking up thick sauce and tender beef. The combination works because cornbread's sweetness tempers chili's heat while adding substance to the meal.

A few notes:

  • Simmer slowly - Low heat develops deep flavors and tenderizes meat properly.
  • Layer spices gradually - Add cumin, chili powder, and cayenne in stages to build complexity.
  • Let it rest - Chili tastes better the next day after flavors meld overnight.

This pairs perfectly when you need something hearty on the side that feeds a crowd without extra effort.

Beef Chili

Works for: Game day crowds, make-ahead meals, feeding hungry groups

Skip if: You need something light or quick to prepare

Turkey Chili

Works for: Lighter meals, leaner protein options, faster cooking times

Skip if: You want traditional rich flavor or leftovers that improve overnight

6. Roasted Sweet Potato Wedges with Smoked Paprika

Sweet and slightly smoky wedges echo cornbread's natural sweetness while adding tender, caramelized texture. The paprika brings depth without overwhelming the plate.

  • Roast at 425°F - High heat creates crisp edges and tender centers.
  • Cut wedges evenly - Uniform size ensures everything finishes cooking at the same time.
  • Space them out - Crowded pans steam instead of roast, leaving wedges soft.
  • Flip halfway through - Both sides need direct heat for proper browning.

Try bright wedges paprika we love when you want something that complements cornbread's corn notes naturally.

Shortcut
Use pre-cut sweet potato wedges from the produce section to save 10 minutes of prep time.

7. Spiced Black-Eyed Peas

Earthy protein and warm seasoning add substance without competing with cornbread's flavor. The peas bring fiber and texture that make the meal more filling.

What to know:

  • Simmer with aromatics - Onion, garlic, and cayenne build layered flavor.
  • Add liquid gradually - Too much turns peas watery instead of creamy.
  • Season at the end - Salt added early toughens peas and extends cooking time.

This makes excellent use of pantry staples and tastes even better reheated. For those who enjoy this easy eyed peas recipe, the spices add warmth without heat.

Method Time Best For
Stovetop simmer 45 minutes Hands-on cooking with more control
Slow cooker 4 hours Set-it-and-forget meals
Pressure cooker 20 minutes Quick weeknight dinners

8. Pickled Jalapeño Slices

Spicy heat and tangy brightness cut through cornbread's buttery richness with sharp contrast. Quick-pickled jalapeños deliver more flavor than fresh peppers while lasting weeks in the fridge.

  • Quick-pickle 24 hours ahead - The vinegar needs time to mellow harsh raw pepper heat.
  • Slice thin and uniform - Thick slices stay too crisp and overpower other flavors.

When you want easy jalapeno slices we love, pickled versions add tang without turning the meal too spicy.

Watch Out
Remove seeds and membranes before pickling if you want tangy flavor without intense heat.

9. Golden Garlic Mashed Potatoes

Rich, creamy starch balances crumbly cornbread while soaking up gravies and sauces from other dishes. The garlic adds savory depth that complements cornbread's sweetness.

  • Use roasted garlic - Raw garlic turns sharp and overpowering in smooth potatoes.
  • Mash while hot - Cold potatoes turn gluey when worked too much.
  • Add butter first - Fat coats starch molecules before liquid makes them sticky.
  • Warm the cream - Cold dairy cools potatoes and makes them grainy.

This works beautifully when you need a buttery mashed potatoes side dish that holds up on a crowded holiday table.

Golden Rule
Never overmix mashed potatoes-stop when they just come together to keep them fluffy instead of gummy.

10. Crispy Fried Okra with Lemon Aioli

Crunchy, lightly fried okra adds vegetable texture that contrasts with cornbread's softness. The tangy aioli cuts through fried richness while adding bright lemon notes.

A few notes:

  • Coat well with cornmeal - Extra breading creates the crispy shell okra needs.
  • Fry in small batches - Overcrowding drops oil temperature and causes soggy coating.
  • Drain on paper towels - Proper draining keeps breading crisp instead of greasy.
  • Serve immediately - Fried okra loses crunch quickly once it cools.

If you enjoy something easy on the side, the lemon aioli adds brightness without heavy mayo flavor.

If You Want Try This
Maximum crunch Double-coat okra by dipping twice in cornmeal
Lighter option Roast at 425°F instead of frying for less oil
Spicy kick Add cayenne to the cornmeal coating

11. Smoky Baked Beans with Bacon

Sweet and smoky beans echo cornbread's flavor while adding hearty texture and protein. The molasses brings deep sweetness that works with cornbread instead of competing.

Keep in mind:

  • Slow cook with molasses - Low heat develops the thick, sticky sauce beans need.
  • Add smoked paprika - The smoky notes enhance bacon without overpowering other flavors.
  • Let it rest - Beans thicken as they cool and taste better reheated.

Make this ahead for potlucks and game day spreads. When you want this crisp side dish recipe, the bacon adds salty crunch.

Quick Tip
Use a cast iron Dutch oven for even heat distribution that prevents scorching during long cooking.

12. Buttermilk Fried Chicken Thighs

Crispy, juicy chicken adds the protein cornbread needs while creating the classic Southern combination. The buttermilk marinade tenderizes meat and builds flavor that works with cornbread's sweetness.

  • Marinate overnight - Buttermilk needs time to break down tough muscle fibers.
  • Bring to room temperature - Cold chicken cooks unevenly and stays raw inside.

This delivers traditional flavor when you need a tender side to try that satisfies hungry crowds.

Dark Meat

Works for: Juicier results, more forgiving cooking, richer flavor

Skip if: You prefer leaner protein or faster cooking times

White Meat

Works for: Lighter meals, faster cooking, less fat content

Skip if: You want the juiciest results or traditional Southern flavor

13. Zesty Tomato and Cucumber Salad

Light, fresh vegetables with bright acidity refresh the palate between bites of rich cornbread. The red wine vinegar cuts through butter and adds tang that balances the plate.

What to know:

  • Use ripe tomatoes - Underripe tomatoes taste mealy and lack the sweetness needed.
  • Toss with vinegar - Red wine vinegar brings sharper acidity than balsamic.
  • Add fresh herbs - Basil or parsley brighten the salad without adding heaviness.
  • Serve immediately - Tomatoes release water quickly and dilute dressing over time.

This works perfectly when you need a side that pairs well with other richer dishes at summer cookouts.

Our Pick
Salt tomatoes 10 minutes before dressing to draw out excess moisture and concentrate flavor.

14. Sweet Corn and Jalapeño Pudding

Soft, custard-like texture with subtle heat enhances cornbread's natural corn flavor without overpowering it. The pudding brings richness that works for holiday meals and special occasions.

A few notes:

  • Bake gently - Low oven temperature maintains creamy texture instead of turning it rubbery.
  • Use fresh corn - Frozen corn works but lacks the sweetness fresh kernels provide.

If you enjoy this easy jalapeno pudding recipe, the custard base adds elegance to simple meals.

Shortcut
Use canned creamed corn to skip cutting kernels off the cob and save 15 minutes.

15. Garlic Herb Butter Spread

Savory aromatics infuse cornbread with rich, garlicky flavor that transforms simple bread into something special. Fresh herbs add brightness that balances butter's heaviness.

  • Mix softened butter - Cold butter stays lumpy and hard to spread evenly.
  • Use fresh garlic - Garlic powder lacks the punch fresh cloves provide.

This makes an excellent addition when you want simple butter spread we love that works for weeknight meals or hosting friends.

Method Time Best For
Room temp butter 5 minutes Immediate serving
Chilled logs 2 hours Slicing neat rounds for presentation
Melted drizzle 3 minutes Soaking into warm cornbread quickly

Common questions about pairing sides with cornbread come up when planning meals for crowds or weeknight dinners.

Frequently Asked Questions

What sides go best with cornbread?

Smoky proteins like pulled pork or chili work best because they complement cornbread's sweetness while adding substance the bread lacks.

What vegetables go with cornbread?

Tangy vegetables like coleslaw, pickled jalapeños, or collard greens balance richness and add the bright contrast cornbread needs.

Can I prep sides for cornbread ahead of time?

Chili, baked beans, and pulled pork all taste better when made ahead and reheated before serving.

What to serve with cornbread for a crowd?

Chili, pulled pork, and baked beans work best because they scale easily, hold well, and satisfy large groups without complicated timing.

Should I serve cornbread warm or room temperature?

Warm cornbread tastes best because butter melts into it properly and the texture stays soft instead of dry and crumbly.

What to Serve With Cornbread: 15 Best Side Dishes

No ratings yet
We provide 15 side options to complement cornbread by balancing its sweetness with smoky proteins, tangy vegetables, and rich spreads. These sides offer variety in texture, temperature, and prep effort to create well-rounded meals.
Print Recipe
Prep Time 15 minutes mins
Cook Time 10 minutes mins
Total Time 25 minutes mins
Servings: 4 servings
Course: Dinner, Side Dish
Cuisine: Southern
Ingredients Equipment Method Notes

Ingredients
  

  • Smoky Barbecue Pulled Pork smoky
  • Tangy Apple Cider Coleslaw tangy
  • Rich Creamed Collard Greens with Bacon creamy
  • Honey Butter Spread rich
  • Classic Chili Con Carne spicy
  • Roasted Sweet Potato Wedges with Smoked Paprika sweet
  • Spiced Black-Eyed Peas warm
  • Pickled Jalapeño Slices tangy
  • Golden Garlic Mashed Potatoes creamy
  • Crispy Fried Okra with Lemon Aioli crunchy
  • Smoky Baked Beans with Bacon smoky
  • Buttermilk Fried Chicken Thighs crispy
  • Zesty Tomato and Cucumber Salad bright
  • Sweet Corn and Jalapeño Pudding soft
  • Garlic Herb Butter Spread rich

Equipment

  • Sheet pan for roasting sweet potatoes
  • Mixing bowl for salads and dips
  • Cutting board
  • Serving platter

Method
 

  1. Assess what the main dish already provides-if it has starch, focus on vegetables and fresh sides.
  2. Choose 2-3 sides that fill different gaps: one vegetable, one starch or bread, one sauce or dip.
  3. Start the longest-cooking side first. Prep quick items like salads while the oven works.
  4. Balance temperatures-pair hot roasted vegetables with a cold slaw or chilled dip.
  5. Plate the main dish with sides arranged around it. Drizzle sauce or add garnish last.
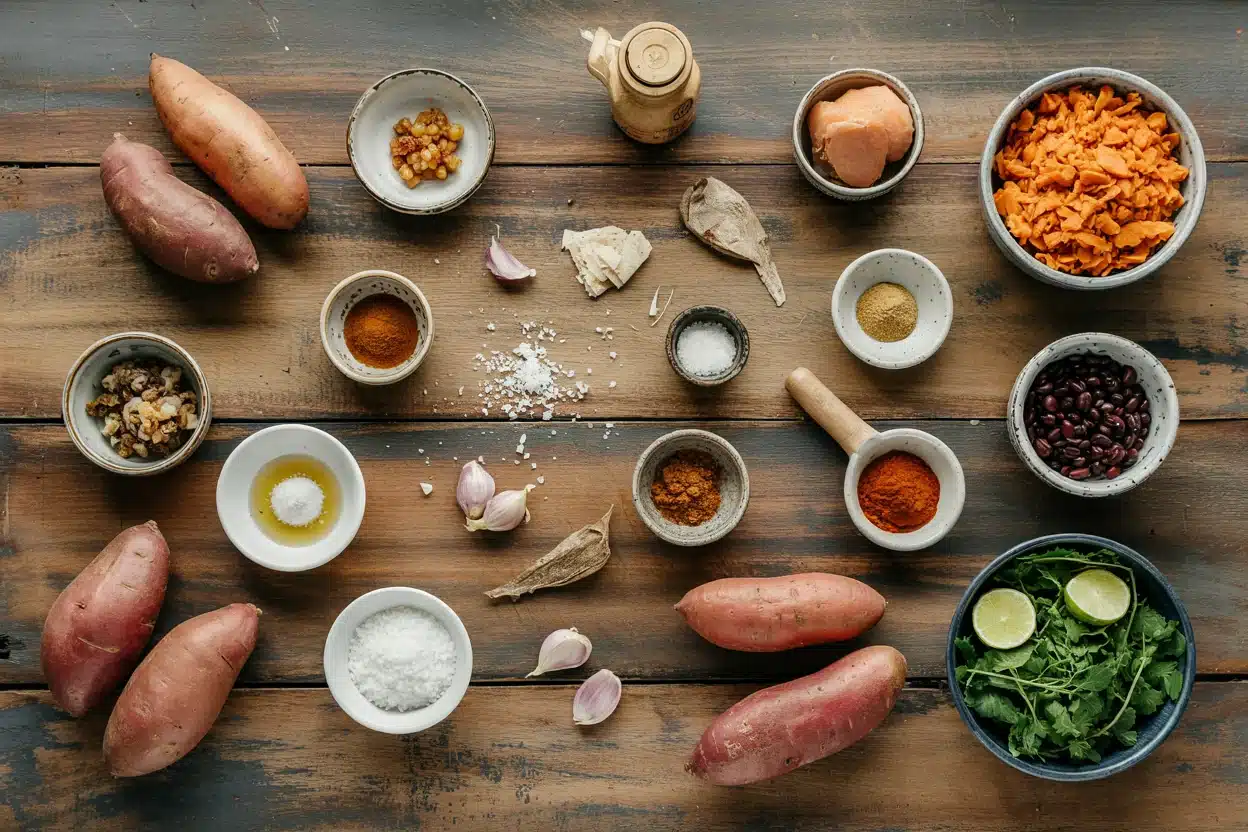
Notes

Add a fresh salad or tangy vegetable side and keep it chilled until serving. This prevents the plate from feeling too heavy or unbalanced when paired with rich or smoky mains.

Tried this recipe?

Let us know how it was!

What to Serve With Pate? 15 Quick & Easy Sides

February 4, 2026

Pate brings luscious, rich creaminess to the plate-smooth liver puree with butter, often a touch of brandy. That combination covers decadence and savory depth during holiday season gatherings and cocktail parties.

What to Serve With Pate? 15 Quick & Easy Sides

What's missing is contrast-something crisp, tangy, or bright to cut through the richness. Some sides bring acidity through pickles and mustard, others add crunch with toasted bread or crackers, and a few work as palate cleansers with fresh vegetables and herbs.

QUICK SUMMARY

Pate is rich, creamy, and intensely savory, so it needs sides that refresh and contrast. Toasted baguette slices provide a crisp base for spreading, cornichons add sharp tang, and grainy mustard brings spicy heat. Breads carry the spread, pickled vegetables cut the richness, and fresh greens lighten the plate.

🍞Crisp base: Toasted baguette, rye crackers, or crispbread
🥒Cut richness: Cornichons, pickled onions, tangy mustard
⏱️Quick pick: Cornichons straight from the jar
# Side Dish Best For Prep
1 Toasted Garlic Baguette Slices ✨ Any Night ✅ Easy
2 Classic Tangy Cornichons ✨ Any Night ✅ Easy
3 Whole Grain Dijon Mustard ✨ Any Night ✅ Easy
4 Fresh Peppery Arugula Salad ✨ Any Night ✅ Easy
5 Sweet Fig and Onion Chutney 🎉 Hosting ✅ Easy
6 Crisp Rye Crispbread Crackers ✨ Any Night ✅ Easy
7 Bright Pickled Red Onions ✨ Any Night ✅ Easy
8 Sliced Crisp Apples with Lemon Juice ✨ Any Night ✅ Easy
9 Creamy Horseradish Sauce ✨ Any Night ✅ Easy
10 Marinated Mixed Olives ✨ Any Night ✅ Easy
11 Smoked Almonds with Sea Salt ✨ Any Night ✅ Easy
12 Herbed Cream Cheese Spread ✨ Any Night ✅ Easy
13 Fresh Microgreen Garnish ✨ Any Night ✅ Easy
14 Light Lemon Vinaigrette Dressing ✨ Any Night ✅ Easy
15 Roasted Baby Carrots with Thyme 🎉 Hosting ⚡ Medium

15 Quick Side Dishes to Pair with Pate

You want sides that balance the richness without competing for attention on the charcuterie board.

1. Toasted Garlic Baguette Slices

Warm, crisp bread provides the foundation for spreading creamy pate. Lightly toasted baguette holds up without turning into dry croutons that crack under the weight of the spread.

  • Slice on the diagonal - Larger surface area gives you more room for spreading.
  • Toast at 375°F for 5 minutes - Edges turn golden while centers stay tender.
  • Rub with garlic clove - Run a halved clove over warm slices for subtle flavor.
  • Brush with olive oil - Adds richness and helps browning without butter.
Quick Tip
Keep slices thin-about half an inch-so the bread supports the pate without overwhelming it.

2. Classic Tangy Cornichons

Sharp, briny crunch cuts through the luscious texture and resets your palate between bites. These tiny French pickles bring acidity that balances the butter and liver in pate.

Serve them chilled straight from the jar. The vinegar tang and firm snap provide exactly what rich spreads need-a counterpoint that feels refreshing rather than heavy.

Our Pick
Look for French cornichons labeled "extra fine"-they stay crunchier and pack more flavor than regular pickles.

3. Whole Grain Dijon Mustard

Peppery heat and tangy vinegar notes go with the savory depth of pate. The grainy texture adds another layer of interest beyond smooth spreads.

Use it as a condiment on the side or spread a thin layer on bread before adding pate. The mustard seeds pop between your teeth and deliver bursts of spice that make each bite feel dynamic.

If You Want Try This
Mild heat Classic Dijon mustard
Texture contrast Whole grain mustard
Sweet balance Honey mustard blend

4. Fresh Peppery Arugula Salad

Crisp, slightly bitter greens provide a fresh contrast to creamy pate. The peppery bite wakes up your palate after rich, buttery mouthfuls.

A few notes:

  • Dress lightly - Just lemon juice, olive oil, and salt keep the focus on freshness.
  • Add right before serving - Arugula wilts quickly once dressed.
  • Shave Parmesan on top - Adds salty, nutty notes that bridge the gap between salad and pate.

Try our favorite arugula salad side when you want something green that takes five minutes to assemble.

5. Sweet Fig and Onion Chutney

Jammy sweetness and caramelized onion depth create a bridge between savory pate and fruit notes. The chutney brings complexity that feels special enough for hosting without requiring professional cooking skills.

Serve it at room temperature so the flavors open up. The sticky texture clings to bread and pate, creating bites that combine all three elements in one forkful.

Shortcut
Buy premade fig jam and stir in a spoonful of caramelized onions from the deli section.

6. Crisp Rye Crispbread Crackers

Thin, crunchy crackers with nutty rye flavor provide a sturdy base without adding bulk. The earthy grain notes complement liver-based spreads better than plain wheat crackers.

  • Choose thin varieties - Thick crackers overwhelm delicate pate.
  • Break into smaller pieces - Easier to eat in social settings than full crackers.
  • Store in airtight container - Humidity makes crispbread soft and chewy.
  • Warm slightly before serving - A minute in a 200°F oven refreshes staleness.
Bread Type Texture Best For
Baguette Soft center, crisp crust Generous spreads
Crispbread Snappy, thin Light bites
Crostini Crunchy throughout Sturdy support

7. Bright Pickled Red Onions

Sharp vinegar tang and crisp texture refresh your mouth between rich bites. The magenta color adds visual appeal to appetizer spreads that might otherwise look brown and beige.

  • Soak raw onions first - Rinse sliced onions in cold water for 10 minutes to remove harsh sulfur notes.
  • Use red wine vinegar - White vinegar tastes too sharp against buttery pate.

Make these at least 24 hours ahead so the onions soften and the pickling liquid mellows. Store them in a glass jar in the refrigerator for up to two weeks.

Golden Rule
Pack onions loosely in the jar-they need space for the liquid to circulate and pickle evenly.

8. Sliced Crisp Apples with Lemon Juice

Sweet, juicy crunch cuts through fatty richness and adds a fresh element to charcuterie spreads. Firm apples hold their shape and provide a clean-tasting palate cleanser between pate and other appetizers.

  • Choose tart varieties - Granny Smith or Honeycrisp balance sweetness with acidity.
  • Slice just before serving - Apples brown quickly once cut.
  • Toss with lemon juice - Citric acid prevents oxidation and adds brightness.
If You Want Try This
Tart crunch Granny Smith apples
Sweet contrast Honeycrisp or Fuji
Firm texture Pink Lady apples

9. Creamy Horseradish Sauce

Spicy heat and tangy creaminess provide a bold counterpoint to smooth pate. The sinus-clearing kick wakes up your palate and makes each bite feel more dynamic.

Keep in mind:

  • Start with less horseradish - You can always add more heat but cannot remove it.
  • Mix fresh before serving - Prepared horseradish loses potency quickly.
  • Use sour cream base - Greek yogurt works however sour cream tastes richer.
Watch Out
Pre-grated horseradish in jars is milder than fresh-double the amount if using jarred.

10. Marinated Mixed Olives

Briny, savory bites with herbal notes provide another salty element on appetizer spreads. The oily texture complements rather than competes with buttery pate because the flavors work in the same rich spectrum.

What to know:

  • Serve at room temperature - Cold olives taste flat and the oil solidifies.
  • Drain excess marinade - Too much liquid makes the serving dish messy.

Let olives sit out for 30 minutes before guests arrive so the flavors bloom. The herbs in the marinade-thyme, rosemary, garlic-echo the savory notes in pate and tie the appetizer board together.

Green Olives

Works for: Firm texture, bright brine

Skip if: You want mild, buttery flavor

Kalamata Olives

Works for: Rich, fruity depth

Skip if: You need something less intense

11. Smoked Almonds with Sea Salt

Crunchy, savory nuts add textural contrast and subtle smokiness to the spread. Toasted almonds bring warmth that goes with the earthy liver notes in pate without overpowering delicate flavors.

  • Toast nuts before serving - Five minutes at 350°F refreshes flavor and crunch.
  • Season with flaky sea salt - Fine salt disappears while flakes provide bursts of salinity.

Store almonds in an airtight container to keep them crisp. Stale nuts taste flat and chewy rather than snappy and aromatic.

Quick Tip
Buy raw almonds and smoke them yourself with a stovetop smoker for deeper flavor.

12. Herbed Cream Cheese Spread

Mild, creamy tang provides a bridge between pate and sweeter elements on the board. The soft texture matches the richness of pate however the fresh herbs add brightness that keeps things interesting.

Serve chilled with herbs visible on top so guests know what they are getting. Mix in chives, dill, and parsley for a classic combination that works with most pates.

The dairy richness feels familiar and comforting next to more assertive liver spreads.

Cream Cheese

Works for: Mild, crowd-friendly flavor

Skip if: You want something tangy

Goat Cheese

Works for: Sharp tang, crumbly texture

Skip if: You need something spreadable

13. Fresh Microgreen Garnish

Delicate, tender greens add a pop of freshness and visual appeal to rich spreads. The subtle peppery flavor enhances pate without competing for attention.

  • Add just before serving - Microgreens wilt quickly once exposed to warmth.
  • Use as garnish only - They are too delicate to mix into spreads.
  • Choose mild varieties - Pea shoots or sunflower greens work better than spicy radish microgreens.
  • Pat dry before using - Excess moisture makes the garnish soggy.
Our Pick
Pea shoot microgreens add sweet, vegetal notes that balance liver-forward pates.

14. Light Lemon Vinaigrette Dressing

Bright acidity and citrus notes refresh the palate between rich bites. The clean, sharp flavor cuts through butter and fat without adding heaviness to the plate.

Whisk fresh lemon juice with olive oil, Dijon mustard, and a pinch of salt just before serving. Drizzle over greens or use as a dip for vegetables on the appetizer board.

If You Want Try This
Bright acidity Lemon vinaigrette
Mellow sweetness Balsamic vinaigrette
Peppery heat Mustard vinaigrette

15. Roasted Baby Carrots with Thyme

Tender sweetness and earthy herb notes provide a warm vegetable option that feels more substantial than raw crudité. Caramelized edges add depth that works with savory pate spreads.

A few notes:

  • Roast at 425°F - High heat caramelizes the natural sugars and creates golden edges.
  • Leave some firmness - Mushy carrots feel out of place on appetizer boards.

Toss roasted carrots with fresh thyme leaves and a drizzle of olive oil before serving. The combination of sweet, earthy, and herbal flavors complements liver-based spreads without overwhelming them.

Golden Rule
Cut carrots into uniform sizes so they roast evenly-halve thick ones lengthwise.

These sides provide the crunch, acidity, and freshness that make pate feel balanced rather than heavy on party spreads.

Frequently Asked Questions

What sides go best with pate?

Toasted baguette slices, cornichons, grainy mustard, and pickled vegetables work best because they provide crunch and acidity to balance the rich, creamy texture of pate.

What vegetables go with pate?

Arugula salad, roasted baby carrots, and crisp apple slices work well because they add freshness and crunch that cuts through the buttery richness of pate.

Can I prep sides for pate ahead of time?

Most sides like cornichons, pickled onions, fig chutney, and marinated olives can be made days ahead and stored in the refrigerator until serving time.

What to serve with pate for a party?

Toasted baguette slices, cornichons, whole grain mustard, fig chutney, marinated olives, and fresh arugula salad create a complete appetizer spread that balances richness with brightness.

How many sides should I serve with pate?

Serve at least three sides-one bread or cracker, one pickled element, and one fresh vegetable or fruit-to provide variety and balance on your appetizer board.

15 Best Sides To Serve With Pate

What to Serve With Pate? 15 Quick & Easy Sides

No ratings yet
We provide a list of 15 sides that balance the richness of pate by adding fresh vegetables, crisp breads, tangy pickles, and savory sauces. These options offer a mix of textures, temperatures, and preparation efforts to create a well-rounded appetizer spread.
Print Recipe Pin Recipe
Prep Time 15 minutes mins
Cook Time 10 minutes mins
Total Time 25 minutes mins
Servings: 4 servings
Course: Dinner, Side Dish
Cuisine: French
Ingredients Equipment Method Notes

Ingredients
  

  • Toasted Garlic Baguette Slices crisp
  • Classic Tangy Cornichons tangy
  • Whole Grain Dijon Mustard spicy
  • Fresh Peppery Arugula Salad bright
  • Sweet Fig and Onion Chutney sweet
  • Crisp Rye Crispbread Crackers crunchy
  • Bright Pickled Red Onions tangy
  • Sliced Crisp Apples with Lemon Juice crisp
  • Creamy Horseradish Sauce creamy
  • Marinated Mixed Olives savory
  • Smoked Almonds with Sea Salt smoky
  • Herbed Cream Cheese Spread creamy
  • Fresh Microgreen Garnish bright
  • Light Lemon Vinaigrette Dressing bright
  • Roasted Baby Carrots with Thyme tender

Equipment

  • Sheet pan for roasting baby carrots
  • Mixing bowl for salads and dips
  • Cutting board for slicing bread and produce
  • Serving platter for arranging sides and pate

Method
 

  1. Assess what the main dish already provides-if it has starch, focus on vegetables and fresh sides.
  2. Choose 2-3 sides that fill different gaps: one vegetable, one starch or bread, one sauce or dip.
  3. Start the longest-cooking side first. Prep quick items like salads while the oven works.
  4. Balance temperatures-pair hot roasted vegetables with a cold slaw or chilled dip.
  5. Plate the main dish with sides arranged around it. Drizzle sauce or add garnish last.
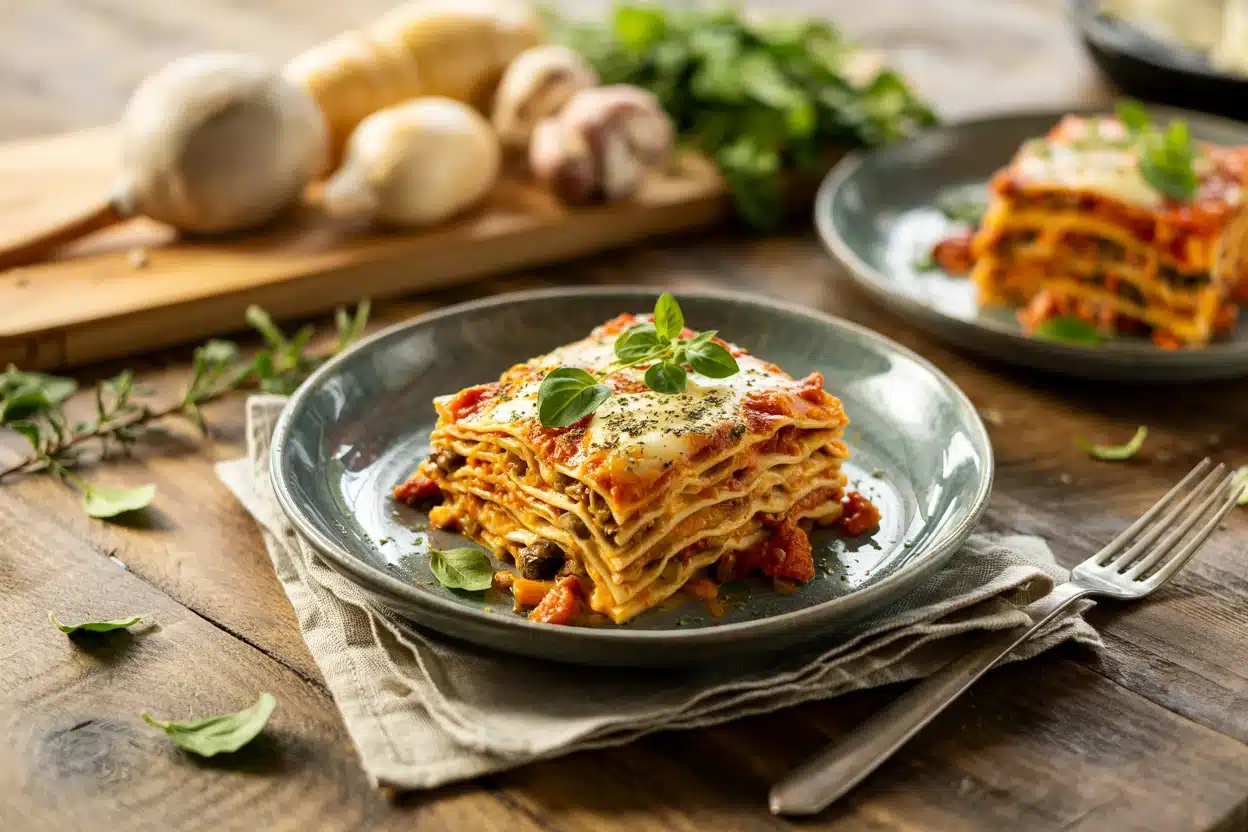
Notes

Add a fresh vegetable or salad side and keep it separate until serving. This prevents the plate from feeling too heavy or unbalanced alongside rich, creamy pate.

Tried this recipe?

Let us know how it was!

You Might Also Like

  • What to Serve With Bobotie: 15 Best Side Dishes
  • 15 Easy Sides for Hawaiian Chicken Kabobs Dinner
  • 15 Best Sides to Serve with Hungarian Mushroom Soup for Cozy Meals

7 Best Substitutes for Sucanat

February 4, 2026

You're measuring sugar for cookies and realize the Sucanat is gone. The recipe calls for its coarse texture and deep molasses flavor-neither white sugar nor regular brown sugar matches that profile.

7 Best Substitutes for Sucanat

Sucanat brings unrefined sweetness and moisture retention that affects both texture and taste. Picking the right swap depends on cooking sauces, or topping baked goods.

QUICK SUMMARY

Muscovado sugar and turbinado sugar replace Sucanat 1:1-muscovado brings similar moisture and molasses depth while turbinado offers lighter flavor and coarser texture. Dark brown sugar works in most baking but lacks the grainy texture. Mix brown sugar with molasses (1 cup + 1 tbsp) to rebuild the unrefined flavor.

🏆Closest match: Muscovado sugar for molasses depth and moisture
⚡Fastest swap: Dark brown sugar works 1:1 in most recipes
⚠️Watch texture: Date sugar doesn't dissolve-use only in toppings

7 Sweet Substitutes for Sucanat

Sucanat's unrefined structure adds both sweetness and moisture that refined sugars can't fully replicate. The swaps below cover baking, cooking, and raw applications.

Quick Substitute Reference
# Substitute Best For Ratio Key Note
1 Muscovado Sugar ✨ Both 1:1 Deep molasses flavor
2 Turbinado Sugar 🍳 Cooking 1:1 Coarse grain texture
3 Dark Brown Sugar ✨ Both 1:1 Finer texture
4 DIY Brown + Molasses ✨ Both 1 cup + 1 tbsp Adjustable flavor depth
5 Coconut Sugar 🌱 Vegan 1:1 Milder caramel notes
6 Date Sugar 🥗 Raw 1:1 Doesn't dissolve
7 Honey 🍳 Cooking ¾ cup Reduce liquids by ¼ cup

1. Muscovado Sugar 🏆

Muscovado sugar keeps the unrefined molasses content that makes Sucanat work in baking. The sticky texture and dark color match Sucanat's moisture-retention properties nearly exactly.

Use 1:1 in cookies, cakes, and rich baked goods. The deep molasses flavor adds complexity to spice cakes and gingerbread.

  • ✅ Closest match for moisture and molasses depth
  • ✅ Works in any recipe calling for Sucanat
  • ⚠️ Stickier texture clumps more than Sucanat
  • ⚠️ Darker color affects light-colored baked goods

Muscovado shines in recipes where you want bold molasses flavor. Skip it if you need coarse sugar crystals for topping-it clumps too much.

2. Turbinado Sugar 🥄

Turbinado sugar brings coarse crystals and light molasses flavor without the stickiness. It's less processed than white sugar but drier than Sucanat.

The coarse texture works great sprinkled on muffin tops or mixed into cookie dough for crunch. Use 1:1 anywhere you'd use Sucanat in cooking or topping.

  • 🍳 In cooking: Dissolves slower than Sucanat in sauces
  • 🍰 In baking: Less moisture means drier final texture
  • ⚠️ Mild flavor: Won't match Sucanat's molasses depth
  • ✅ Topping: Coarse crystals add crunch to baked goods

Turbinado runs drier, so moisture-critical recipes like soft cookies might need slight liquid adjustments. If you're also short on turbinado, Turbinado Sugar substitutes for cooking cover those gaps.

3. Dark Brown Sugar 💧

Dark brown sugar contains molasses bound to refined white sugar-it adds moisture and rich sweetness similar to Sucanat. The finer texture dissolves faster but doesn't provide the same grainy structure.

Use 1:1 in most baking and cooking. It works in cookies, cakes, marinades, and glazes without adjustment.

The molasses content mimics Sucanat's depth, though the flavor runs slightly softer. Baked goods come out moist and tender but lack the texture contrast from coarse crystals.

If you're running low, swaps when Brown Sugar runs out give you backup options.

4. DIY Brown Sugar + Molasses 🔧

Mixing brown sugar with extra molasses rebuilds Sucanat's unrefined profile at home. Combine 1 cup brown sugar + 1 tablespoon molasses to replace 1 cup Sucanat.

Stir the molasses into brown sugar until evenly distributed. The mix adds both sweetness and the deep molasses tone Sucanat brings naturally.

This works when you need Sucanat's flavor but don't have any specialty sugars on hand. The texture depends on mixing-it won't match Sucanat's natural graininess perfectly.

If molasses is also scarce, check what to use for Molasses to find alternatives.

5. Coconut Sugar 🥥

Coconut sugar comes from unrefined coconut palm sap-it adds moisture and mild caramel notes without heavy molasses flavor. Use 1:1 in baking and raw applications.

The sweetness runs gentler than Sucanat, with earthy undertones instead of bold molasses. It works in recipes where you want unrefined sugar but don't need deep flavor.

  • ✅ Unrefined structure adds moisture
  • 🌱 Vegan-friendly: Plant-based and minimally processed
  • ⚠️ Milder taste: Won't match molasses-forward recipes

Coconut sugar dissolves smoothly in batters and doughs. Skip it when strong molasses flavor is essential-the caramel tone won't fill that gap.

6. Date Sugar 🌴

Date sugar is ground dried dates-it brings fruity sweetness and texture without dissolving like regular sugar. Use 1:1 by volume, but only in recipes where undissolved crystals work.

The granules don't melt, so they stay visible and slightly crunchy. This works great sprinkled on granola, no-bake bars, or oatmeal toppings.

Skip date sugar in smooth batters, sauces, or anything needing melted sugar. It'll leave gritty bits throughout.

The flavor runs fruity-sweet without molasses depth. If dates are also in short supply, quick Date replacements to try cover backup swaps.

7. Honey 🍯

Honey adds liquid sweetness and moisture that changes recipe structure. Use ¾ cup honey per 1 cup Sucanat and reduce other liquids by ¼ cup.

The floral sweetness differs completely from molasses-there's no earthy depth. Honey works in sauces, glazes, marinades, and salad dressings where liquid sweeteners fit naturally.

  • 🍳 In cooking: Adds moisture and sweetness to sauces
  • ⚠️ Different flavor: No molasses tone at all
  • ⚠️ Texture change: Liquid form affects baking structure

Don't use honey in recipes needing dry sugar crystals-the liquid base won't work. Baked goods need recipe adjustments to account for added moisture.

For honey alternatives in other contexts, Honeycrisp Apple alternatives to try may help with related fruit-sweetness swaps.

Best Pick
Muscovado sugar is the swap we reach for first-it matches Sucanat's moisture and molasses depth without recipe changes.

Picking Your Sucanat Swap 🎯

  • 🏆 Closest match: Muscovado for deep molasses and moisture
  • ⚡ Fastest pantry swap: Dark brown sugar works 1:1 in most recipes
  • 🔧 DIY option: Brown sugar + molasses (1 cup + 1 tbsp) rebuilds flavor

Baking calls for moisture-retaining sugars like muscovado or brown sugar. Topping baked goods works best with coarse turbinado or coconut sugar for texture contrast.

Frequently Asked Questions

Can I use white sugar instead of Sucanat?

White sugar won't match Sucanat's molasses flavor or moisture content. Use it only if you add 1-2 tablespoons molasses per cup to rebuild some depth. The texture stays finer, so baked goods won't have the same grainy quality.

Is Sucanat the same as brown sugar?

No-Sucanat is unrefined cane sugar with natural molasses intact, while brown sugar is refined white sugar with molasses added back. Sucanat has a coarser texture and stronger molasses flavor. Brown sugar works as a substitute but delivers softer flavor and finer texture.

What's the difference between Sucanat and turbinado sugar?

Sucanat retains more molasses and moisture, giving it deeper flavor and stickier texture. Turbinado is partially refined with lighter molasses notes and drier, coarser crystals. Both work in baking, but Sucanat adds more complexity and moisture.

Can I substitute Sucanat in chocolate chip cookies?

Yes-muscovado or dark brown sugar work 1:1 in chocolate chip cookies. They add moisture and molasses depth similar to Sucanat. Turbinado works too but runs drier, so cookies may spread less and come out slightly crisper.

Is coconut sugar a good Sucanat replacement?

Coconut sugar works 1:1 but brings milder caramel flavor instead of molasses depth. It adds moisture and unrefined sweetness, so it fits recipes where you don't need bold flavor. Skip it in gingerbread or spice cakes-muscovado matches better there.

Substitutes for Sucanat

7 Best Substitutes for Sucanat

No ratings yet
Sucanat is an unrefined sugar known for its coarse texture and deep molasses flavor. These substitutes range from those that mimic Sucanat's moisture and flavor to options better suited for toppings or specific dietary preferences.
Print Recipe Pin Recipe
Prep Time 8 minutes mins
Cook Time 5 minutes mins
Total Time 13 minutes mins
Servings: 4 servings
Course: Kitchen Tips, Substitutes
Cuisine: Various
Ingredients Method Notes

Ingredients
  

  • 1 cup Muscovado Sugar Use 1:1 to replace Sucanat for similar moisture and molasses depth.
  • 1 cup Turbinado Sugar Use 1:1 as a coarse sugar substitute; lighter flavor and coarser texture.
  • 1 cup Dark Brown Sugar Use 1:1; finer texture with molasses flavor but less grainy than Sucanat.
  • 1 cup Brown Sugar + Molasses Mix 1 cup brown sugar with 1 tablespoon molasses for each cup of Sucanat.
  • 1 cup Coconut Sugar Use 1:1; mild caramel notes and moisture, but less molasses flavor.
  • 1 cup Date Sugar Use 1:1 only for toppings; does not dissolve well in batters or sauces.
  • 0.75 cup Honey Use ¾ cup and reduce other liquids by ¼ cup;

Method
 

  1. Select the substitute best suited for your recipe needs, such as moisture, texture, or flavor.
  2. If using DIY brown sugar with molasses, blend thoroughly to distribute molasses evenly.
  3. Measure substitute according to recommended ratios, adjusting liquids if using honey.
  4. Incorporate the substitute into your recipe as called for and check consistency and flavor.
  5. For toppings, consider coarser substitutes like turbinado or date sugar for texture contrast.

Notes

  • Choose muscovado sugar for the closest match in moisture and flavor.
  • Dark brown sugar is the fastest pantry swap for most baking needs.
  • Date sugar is best only for toppings as it does not dissolve well.

Tried this recipe?

Let us know how it was!

What to Serve With Sliders? 15 Delicious Sides

February 4, 2026

Sliders deliver juicy beef patties, melted cheese, and soft toasted buns in a compact package. The meal already covers protein and bread.

what-to-serve-with-sliders

What we need are sides that bring crunch, freshness, or tang to balance the richness. Crispy fries add golden potato comfort, tangy slaw cuts through the fat, and pickles provide sharp acidity.

This combination works for game day spreads, weeknight dinners, or backyard cookouts where you want casual food that satisfies without fuss.

QUICK SUMMARY

Sliders are savory, juicy, and slightly salty but need crisp textures and acidic contrast. Shoestring fries add golden crunch, apple cider slaw brings bright tanginess, and dill pickles offer sharp refreshing bites. Starches soak up drippings while vegetables cut the richness.

🍟Add crunch: Fries, onion rings, or potato chips
🥗Cut richness: Coleslaw, pickles, or fresh salads
⏱️Quick pick: Dill pickle spears straight from the jar

What to Serve With Sliders: 15 Sides That Work

These sides balance the savory richness of sliders with textures and flavors that refresh the palate.

#Side DishBest ForPrep
1Crispy Shoestring French Fries✨ Any Time⚡ Medium
2Tangy Apple Cider Vinegar Coleslaw✨ Any Time✅ Easy
3Classic Dill Pickle Spears✨ Any Time✅ Easy
4Creamy Garlic Mashed Potatoes✨ Any Time⚡ Medium
5Zesty Barbecue Baked Beans✨ Any Time✅ Easy
6Golden Crispy Onion Rings🎉 Hosting⚡ Medium
7Fresh Garden Tomato Salad✨ Any Time✅ Easy
8Crunchy Dill Pickled Vegetables✨ Any Time✅ Easy
9Creamy Honey Mustard Sauce✨ Any Time✅ Easy
10Crisp Sweet Potato Fries✨ Any Time⚡ Medium
11Garlic Herb Roasted Broccoli✨ Any Time✅ Easy
12Chilled Ranch Potato Salad✨ Any Time⚡ Medium
13Kettle-Cooked Sea Salt Potato Chips✨ Any Time✅ Easy
14Fresh Watermelon and Feta Salad🎉 Hosting✅ Easy
15Spicy Chipotle Mayo Dip✨ Any Time✅ Easy

1. Crispy Shoestring French Fries

Golden, thin-cut potatoes with crispy edges offer classic comfort alongside sliders. The salty crunch balances the juicy beef patties.

Toss fries in a little oil and salt before baking at 425°F for maximum crispiness. If you need this easy french fries recipe, it works beautifully with simple seasoning or upgraded with herbs.

Quick Tip
Soak cut potatoes in cold water for 30 minutes to remove excess starch and improve crispiness.

2. Tangy Apple Cider Vinegar Coleslaw

Bright acidity and crisp cabbage shreds cut through slider richness with every bite. The vinegar dressing feels lighter than mayo-based versions.

Quick tips:

  • Make ahead - Let slaw sit 2-4 hours in the fridge for flavors to meld properly.
  • Drain cabbage first - Salt shredded cabbage for 10 minutes, rinse, and pat dry to avoid watery dressing.
  • Add sugar gradually - Start with one tablespoon and adjust based on tartness preference.
If You WantTry This
Creamy textureAdd a tablespoon of Greek yogurt to vinegar dressing
Extra crunchToss in julienned carrots and sliced radishes
Spicy kickMix in sliced jalapeños or red pepper flakes

3. Classic Dill Pickle Spears

Sharp acidity and snappy crunch from cold pickles refresh the palate between slider bites. The briny flavor contrasts beautifully with savory beef and melted cheese.

Serve chilled straight from the jar for refreshing contrast. We reach for this homemade side dish recipe when traditional dill pickles feel too expected.

4. Creamy Garlic Mashed Potatoes

Smooth, buttery potatoes with garlicky richness feel comforting without overpowering sliders. The creamy texture soaks up any meat drippings on the plate.

A few notes:

  • Use warm milk - Cold milk makes potatoes gluey and dense.
  • Don't overmix - Whip just until smooth to keep texture light and fluffy.
  • Add garlic carefully - Roasted garlic tastes sweeter and milder than raw minced cloves.

Try a golden mashed potatoes side dish when you want something that feels like a meal rather than just a snack.

Traditional Mashed

Works for: Classic comfort, soaking up juices

Skip if: You want something crisp or acidic

Garlic Mashed

Works for: Adding savory depth, pairing with beef

Skip if: Sliders already have strong garlic flavor

5. Zesty Barbecue Baked Beans

Sweet and smoky flavors with tender beans complement slider savoriness perfectly. The sauce adds a hint of tang that brightens the plate.

Warm gently on the stovetop to keep beans tender and prevent drying out. Look for a homemade barbecue beans side dish if you prefer controlling sweetness and spice levels.

Our Pick
Simmer beans with a splash of apple cider vinegar for extra brightness that cuts through rich sliders.

6. Golden Crispy Onion Rings

Crunchy, flaky coating with sweet caramelized onions inside adds indulgent texture that feels special. The golden exterior offers satisfying crunch without being heavy.

What to know:

  • Use cold batter - Chill batter for 30 minutes before dipping onions for lighter coating.
  • Keep oil hot - Maintain 375°F to prevent soggy rings that absorb too much grease.

Try a easy onion rings side dish when you want something that works for parties or game day spreads.

MethodTimeBest For
Deep-fried15 minutesCrispy texture, traditional flavor
Air-fried20 minutesLess oil, easier cleanup
Baked25 minutesHands-off cooking, lower fat

7. Fresh Garden Tomato Salad

Light, juicy tomato slices with fresh herbs provide refreshing contrast to rich sliders. The bright acidity cuts through beef fat and cheese.

The details:

  • Dress just before serving - Salt draws water from tomatoes and makes salad soggy.
  • Use ripe tomatoes - Underripe ones taste bland and lack juiciness.
Golden Rule
Let tomatoes sit at room temperature for 30 minutes before serving to enhance natural sweetness.

8. Crunchy Dill Pickled Vegetables

Tangy crunch from quick-pickled carrots, cucumbers, and onions adds variety in texture and flavor. The vinegar brine refreshes the palate between bites.

Quick tips:

  • Slice evenly - Uniform thickness ensures consistent pickling and texture.
  • Use fresh dill - Dried dill lacks the bright herbal notes fresh sprigs provide.
  • Let sit overnight - Flavors deepen after 12-24 hours in the fridge.
  • Drain before serving - Excess brine makes other sides soggy on shared plates.

We reach for something classic on the side when traditional pickles feel too one-note. Consider making a batch for summer cookouts where you need sides that hold up in warm weather.

If You WantTry This
Mild tangQuick-pickle with rice vinegar and less salt
Spicy biteAdd red pepper flakes or sliced jalapeños to brine
Sweet-sour balanceMix in a tablespoon of sugar with the vinegar

9. Creamy Honey Mustard Sauce

Sweet and tangy dip with smooth texture enhances slider bites and works for fries too. The honey balances Dijon sharpness perfectly.

Keep in mind:

  • Combine Dijon mustard, honey, and mayo - Use equal parts for balanced flavor.
  • Add mustard gradually - Start with less and build to preferred tanginess.
  • Thin with water if needed - A teaspoon at a time prevents sauce from being too thick.
  • Chill before serving - Cold sauce tastes brighter and holds better on sliders.

Try a quick mustard sauce side dish when you want something that doubles as both dip and spread.

Shortcut
Use store-bought honey mustard and add a squeeze of lemon juice for fresher taste.

10. Crisp Sweet Potato Fries

Sweet earthiness with crispy edges offers a lighter alternative to regular fries. The natural sweetness complements savory sliders without competing.

Slice evenly and bake at high heat for maximum crispness. Consider creamy potato fries on the side for barbecue-style gatherings where sweet and smoky flavors already dominate the plate.

Watch Out
Sweet potato fries burn faster than regular fries-check them every 5 minutes during the last 15 minutes of baking.

11. Garlic Herb Roasted Broccoli

Smoky char and garlicky notes on crisp-tender florets add a healthy vegetable option. The roasted edges provide satisfying texture contrast.

A few notes:

  • Roast at 425°F - High heat creates crispy edges without overcooking stems.
  • Use olive oil generously - Dry broccoli tastes bland and chewy rather than caramelized.

We love this fresh broccoli recipe when we need something green that feels substantial rather than like an afterthought.

Roasted Broccoli

Works for: Smoky flavor, crispy texture, meal prep

Skip if: You prefer raw crunch or mild vegetables

Steamed Broccoli

Works for: Quick cooking, preserving bright green color

Skip if: You want char and caramelization

12. Chilled Ranch Potato Salad

Creamy, cool side with herbal freshness balances hot sliders with refreshing contrast. The ranch dressing adds tangy depth without feeling heavy.

Quick tips:

  • Use waxy potatoes - Yukon Gold or red potatoes hold shape better than russets.
  • Cool completely before dressing - Warm potatoes make mayo separate and turn oily.
  • Add celery for crunch - Diced celery provides texture contrast to soft potatoes.
  • Make ahead - Flavors improve after sitting in the fridge for 2-4 hours.
Quick Tip
Add a splash of pickle juice to potato salad for extra tang that brightens the ranch flavor.

13. Kettle-Cooked Sea Salt Potato Chips

Salty crunch and hearty texture provide easy finger food that needs zero prep. Thick-cut chips hold up better than thin varieties when piled on plates.

Choose kettle-style chips for substantial crunch that does not get soggy. If you prefer homemade options, consider creamy potato chips on the side for parties where presentation matters.

Chip StyleTextureBest For
Kettle-cookedThick, crunchyCasual gatherings, hearty crunch
Regular chipsThin, crispyQuick snacking, lighter texture
Ridged chipsMedium, sturdyDipping, holding sauces

14. Fresh Watermelon and Feta Salad

Sweet, juicy fruit with salty feta offers refreshing contrast perfect for summer cookouts. The bright combination cleanses the palate between rich slider bites.

What to know:

  • Add fresh mint - Torn mint leaves provide bright herbal notes that enhance watermelon sweetness.
  • Cut large cubes - Bite-sized pieces around 1 inch work best for fork-friendly eating.

We serve a quick feta salad side dish when temperatures climb and heavy sides feel too filling for outdoor meals.

Our Pick
Drizzle with balsamic glaze for sweet-tart depth that ties together watermelon and feta beautifully.

15. Spicy Chipotle Mayo Dip

Creamy with smoky heat pairs well with both fries and sliders. The lime juice adds brightness that cuts through richness.

The details:

  • Mix mayo, chipotle peppers in adobo, and lime juice - Start with one teaspoon of adobo sauce and build heat gradually.
  • Blend smooth - Use an immersion blender or food processor for silky texture without chunks.
  • Adjust heat level - Add more adobo sauce for spice or more mayo to tone it down.

Try a quick mayo dip side dish when you want something that works as both spread for buns and dip for sides.

Golden Rule
Make chipotle mayo the day before to let flavors meld-it tastes better after sitting overnight.

Here are answers to common questions about serving sides with sliders.

Frequently Asked Questions

What sides go best with sliders?

Crispy fries, tangy coleslaw, and dill pickles work best because they add crunch and acidity that balance the rich, savory sliders.

What vegetables go with sliders?

Roasted broccoli, fresh tomato salad, and pickled vegetables provide healthy options with textures that contrast the soft slider buns.

How many sides should I serve with sliders?

Serve two to three sides for casual meals-one starchy option like fries, one vegetable or salad, and one dip or sauce works well.

Can I prep sides for sliders ahead of time?

Coleslaw, potato salad, pickled vegetables, and dips can be made 1-2 days ahead, while fries and onion rings taste best fresh.

What to serve with sliders for a party?

Offer fries, onion rings, coleslaw, potato chips, and multiple dipping sauces so guests can mix and match based on preferences.

What to Serve With Sliders? 15 Delicious Sides

What to Serve With Sliders? 15 Delicious Sides

No ratings yet
We provide a list of 15 sides that balance sliders by adding crisp textures, bright acidity, and creamy dips. These options offer variety in texture and temperature with a range of easy to medium prep options to create a balanced and satisfying meal.
Print Recipe Pin Recipe
Prep Time 15 minutes mins
Cook Time 10 minutes mins
Total Time 25 minutes mins
Servings: 4 servings
Course: Dinner, Side Dish
Cuisine: American
Ingredients Equipment Method Notes

Ingredients
  

  • Crispy Shoestring French Fries crunchy
  • Tangy Apple Cider Vinegar Coleslaw tangy
  • Classic Dill Pickle Spears crisp
  • Creamy Garlic Mashed Potatoes creamy
  • Zesty Barbecue Baked Beans smoky
  • Golden Crispy Onion Rings crunchy
  • Fresh Garden Tomato Salad bright
  • Crunchy Dill Pickled Vegetables tangy
  • Creamy Honey Mustard Sauce creamy
  • Crisp Sweet Potato Fries crunchy
  • Garlic Herb Roasted Broccoli smoky
  • Chilled Ranch Potato Salad creamy
  • Kettle-Cooked Sea Salt Potato Chips crunchy
  • Fresh Watermelon and Feta Salad bright
  • Spicy Chipotle Mayo Dip creamy

Equipment

  • Sheet pan for roasted vegetables and fries
  • Mixing bowl for salads and dips
  • Cutting board for prepping vegetables and sides
  • Serving platter to arrange main and sides

Method
 

  1. Assess what the main dish already provides-if it has starch, focus on vegetables and fresh sides.
  2. Choose 2-3 sides that fill different gaps: one vegetable, one starch or bread, one sauce or dip.
  3. Start the longest-cooking side first. Prep quick items like salads while the oven works.
  4. Balance temperatures-pair hot roasted vegetables with a cold slaw or chilled dip.
  5. Plate the main dish with sides arranged around it. Drizzle sauce or add garnish last.
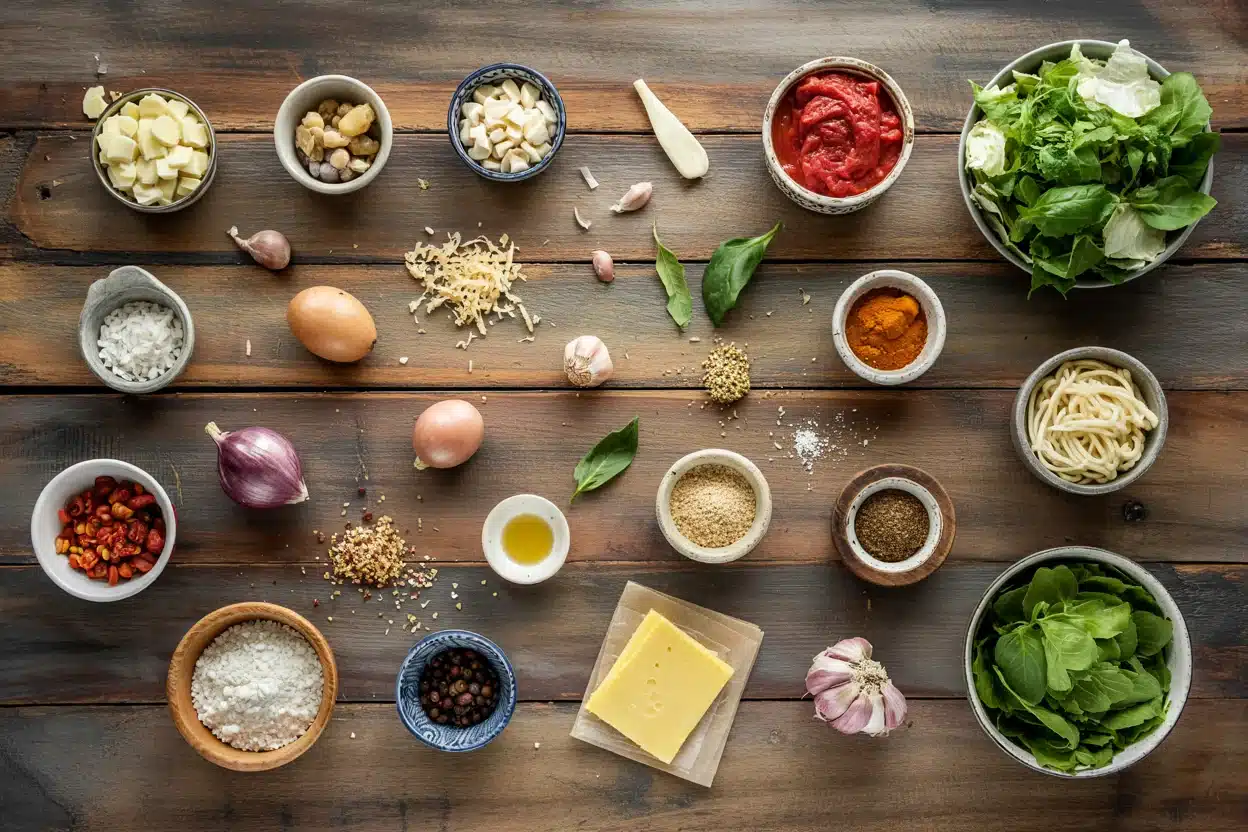
Notes

Add a fresh salad or crunchy side and keep it chilled until serving. This prevents the plate from feeling too heavy or bland alongside rich sliders.

Tried this recipe?

Let us know how it was!

15 Best Side Dishes to Serve With Pesto Gnocchi

February 4, 2026

Pesto gnocchi brings tender potato pillows coated in creamy basil sauce with nutty parmesan and garlic. That combination covers richness and herby flavor but leaves gaps in the meal.

what-to-serve-with-pesto-gnocchi

The plate needs protein, crunch, and something fresh to cut through all that creaminess. Grilled chicken adds lean substance, roasted vegetables provide caramelized edges, and bright salads bring acidity that balances the dish.

QUICK SUMMARY

Pesto gnocchi is creamy, herby, and rich with parmesan and pine nuts, so it needs protein and fresh contrast. Grilled chicken or lemon garlic shrimp add lean substance without competing. Arugula salad and roasted asparagus cut through richness with peppery greens and bright citrus notes.

🍗Add protein: Grilled chicken, shrimp skewers, or stuffed mushrooms
🥗Fresh contrast: Arugula salad, tomato salad, or lemon green beans
⏱️Quick pick: Arugula salad tosses together in 10 minutes

What to Serve With Pesto Gnocchi: 15 Sides That Balance the Plate

We picked sides that add what pesto gnocchi lacks-protein, crunch, and brightness to cut the richness.

#Side DishBest ForPrep
1Garlic Parmesan Roasted Asparagus✨ Any Meal✅ Easy
2Lemon Herb Grilled Chicken Breast✨ Any Meal⚡ Medium
3Tangy Cherry Tomato and Red Onion Salad✨ Any Meal✅ Easy
4Crisp Garlic Herb Breadsticks🎉 Hosting⚡ Medium
5Zesty Arugula and Parmesan Salad✨ Any Meal✅ Easy
6Roasted Garlic Mashed Cauliflower✨ Any Meal⚡ Medium
7Light Lemon Vinaigrette Green Beans✨ Any Meal✅ Easy
8Sautéed Zucchini with Garlic and Basil🌙 Weeknight✅ Easy
9Crispy Parmesan Polenta Fries🎉 Hosting⚡ Medium
10Herbed Ricotta and Spinach Stuffed Mushrooms🎉 Hosting⚡ Medium
11Simple Arugula and Toasted Pine Nut Salad✨ Any Meal✅ Easy
12Balsamic Roasted Brussels Sprouts✨ Any Meal⚡ Medium
13Lemon Garlic Butter Shrimp Skewers🎉 Hosting⚡ Medium
14Pine Nut and Herb Pesto Drizzle✨ Any Meal✅ Easy
15Crunchy Radicchio and Walnut Salad✨ Any Meal✅ Easy

1. Garlic Parmesan Roasted Asparagus

Crisp-tender spears with roasted garlic and nutty parmesan echo the pesto's flavors without overpowering them. The snap of fresh asparagus cuts through creamy gnocchi with earthy brightness.

Roast at 425°F for 12 minutes until tips turn golden and stalks stay tender-crisp. Use crisp parmesan asparagus we love when spring brings thick stalks to the market.

Quick Tip
Snap off woody ends by bending stalks-they break naturally at the right spot.

2. Lemon Herb Grilled Chicken Breast

Citrus-marinated chicken provides lean protein that complements basil without adding more richness to the plate. The bright lemon notes balance pesto's creamy intensity.

Quick tips:

  • Marinate 30 minutes minimum - Acid tenderizes and flavors penetrate deeper.
  • Grill over medium-high heat - Sear marks add smoky depth without drying meat.

Try a golden chicken breast side dish when you need something substantial that cooks quickly on the grill.

If You WantTry This
Weeknight speedSlice chicken thin for faster cooking
Hosting presentationLeave breasts whole and slice after resting
Make-ahead optionMarinate overnight for deeper flavor

3. Tangy Cherry Tomato and Red Onion Salad

Sweet tomatoes and sharp onion bring acidity that cuts straight through creamy pesto. The raw vegetables add crisp texture the gnocchi cannot provide.

A few notes:

  • Salt tomatoes first - Draw out moisture and concentrate sweetness.
  • Slice onions thin - Paper-thin rounds taste milder and less harsh.

Red onions mellow in the dressing while tomatoes hold their shape. Make a fresh side to try when cherry tomatoes hit peak season in summer.

4. Crisp Garlic Herb Breadsticks

Golden breadsticks with buttery garlic coating mop up every drop of pesto sauce left on the plate. The crunchy exterior and tender interior add textural contrast.

The details:

  • Brush butter twice - Once before baking and once when hot from the oven.
  • Use fresh herbs - Dried herbs burn under high heat.
  • Bake on parchment - Prevents sticking and ensures even browning.
  • Serve immediately - Breadsticks soften as they cool.

The warm bread absorbs pesto beautifully. Check this warm side dish recipe when hosting friends who appreciate something to soak up sauces.

Our Pick
Mix parmesan into the butter for extra savory depth that matches the gnocchi.

5. Zesty Arugula and Parmesan Salad

Peppery greens and bright lemon dressing provide sharp contrast against rich pesto. The arugula's bite refreshes the palate between forkfuls of creamy gnocchi.

Dress the salad just before serving to keep leaves crisp and perky. Shaved parmesan adds salty richness that complements rather than competes with the pesto.

Shortcut
Buy pre-washed arugula to skip rinsing and spinning-toss and serve in minutes.

6. Roasted Garlic Mashed Cauliflower

Creamy mashed cauliflower brings buttery texture with fewer carbs than traditional potatoes. The roasted garlic adds sweet depth that echoes pesto's savory notes.

Keep in mind:

  • Roast garlic first - Whole cloves turn sweet and spreadable after 30 minutes at 400°F.
  • Drain cauliflower well - Excess moisture makes the mash watery and loose.
  • Blend until smooth - A food processor works better than a masher for silky texture.
  • Season generously - Cauliflower needs more salt than potatoes to taste right.

The mild vegetable base soaks up pesto without overwhelming the plate. Try this easy mashed cauliflower recipe when you want comfort food that feels lighter.

MethodTimeBest For
Roasting35 minutesDeeper flavor and less moisture
Steaming15 minutesFaster weeknight prep
Boiling12 minutesQuickest but needs draining

7. Light Lemon Vinaigrette Green Beans

Blanched green beans tossed in citrus vinaigrette add crisp snap and bright acidity. The simple preparation lets fresh vegetables shine without competing for attention.

What to know:

  • Blanch then shock - Boil 3 minutes then plunge into ice water to stop cooking.
  • Dry completely - Pat beans dry so dressing clings instead of sliding off.
  • Dress warm - Slightly warm beans absorb more flavor than cold ones.

The clean vegetable flavor provides a side that pairs well with rich pasta dishes throughout the year.

Blanched Green Beans

Works for: Crisp texture and bright color

Skip if: You prefer softer vegetables

Roasted Green Beans

Works for: Caramelized edges and deeper flavor

Skip if: You need something ready in 10 minutes

8. Sautéed Zucchini with Garlic and Basil

Tender zucchini with fresh basil echoes pesto's herby profile while adding soft vegetable texture. The quick sauté keeps zucchini from turning mushy.

Quick tips:

  • Slice uniform rounds - Even thickness ensures consistent cooking.
  • Cook over high heat - Fast searing prevents watery texture.
  • Add basil last - Toss in fresh leaves after removing from heat.
  • Season while hot - Salt draws out flavor immediately.

The simple side comes together in minutes for weeknight meals. Use a crisp zucchini basil side dish when summer gardens overflow with tender squash.

Watch Out
Overcrowding the pan steams zucchini instead of searing-cook in batches if needed.

9. Crispy Parmesan Polenta Fries

Golden polenta sticks with crispy edges and creamy centers add textural variety to the plate. The cheesy coating complements pesto without doubling up on similar flavors.

A few notes:

  • Chill polenta first - Firm texture slices cleanly into fries.
  • Use parchment paper - Prevents sticking and ensures even browning.
  • Bake at 425°F - High heat creates crispy exterior while keeping interior soft.

The hearty side soaks up extra pesto sauce. Consider something tender on the side when hosting casual dinners that need something impressive yet easy.

If You WantTry This
Maximum crunchPan-fry in olive oil instead of baking
Lighter optionBake without extra oil coating
Make-ahead prepCut fries morning of and refrigerate

10. Herbed Ricotta and Spinach Stuffed Mushrooms

Earthy mushroom caps filled with creamy ricotta and fresh herbs provide savory bites that match pesto's intensity. The stuffed caps add protein and vegetables in one elegant package.

Quick tips:

  • Remove stems completely - Create space for maximum filling.
  • Drain spinach thoroughly - Squeeze out all moisture to prevent soggy filling.

Bake at 375°F for 20 minutes until mushrooms soften and tops turn golden. We love this homemade side dish recipe when planning Italian-themed dinner parties.

Golden Rule
Use baby bella mushrooms for meatier texture-white buttons turn too watery.

11. Simple Arugula and Toasted Pine Nut Salad

Peppery greens with toasted pine nuts echo pesto's nutty richness while adding fresh crunch. The minimal dressing lets quality ingredients shine through.

Toast pine nuts in a dry skillet over medium heat for 3 minutes until fragrant and golden. The warm nuts release oils that intensify flavor when tossed with cool arugula.

Quick Tip
Watch pine nuts constantly-they burn fast and turn bitter in seconds.

12. Balsamic Roasted Brussels Sprouts

Caramelized sprouts with tangy balsamic glaze provide sweet-savory contrast that cuts pesto's richness. The crispy edges add crunch the tender gnocchi lacks.

The details:

  • Halve sprouts evenly - Uniform size ensures consistent roasting.
  • Roast cut-side down - Direct contact with the pan creates caramelized browning.
  • Toss in balsamic last - Add after roasting to prevent burning.

The Brussels develop deep flavor when roasted at high heat. Find a side that pairs well with Italian pasta dishes any season of the year.

MethodTimeBest For
Oven roasting25 minutesHands-off cooking and batch size
Air frying15 minutesExtra crispy texture quickly
Pan searing12 minutesDeep caramelization on stovetop

13. Lemon Garlic Butter Shrimp Skewers

Tender shrimp with bright citrus notes add lean seafood protein that complements basil pesto. The quick-cooking skewers bring elegance without fussy preparation.

A few notes:

  • Marinate 15 minutes - Lemon and garlic penetrate quickly.
  • Thread tightly - Prevents spinning when flipping on the grill.
  • Grill over high heat - Sear marks develop in 2 minutes per side.
  • Remove promptly - Overcooked shrimp turn rubbery and tough.

The seafood adds sophisticated protein for entertaining. Try a grilled shrimp skewers side dish when hosting summer dinners on the patio.

Grilled Shrimp

Works for: Smoky char and outdoor cooking

Skip if: Weather prevents grilling

Pan-Seared Shrimp

Works for: Year-round indoor preparation

Skip if: You want maximum smoky flavor

14. Pine Nut and Herb Pesto Drizzle

Extra pesto sauce provides concentrated basil flavor that ties the entire meal together. The additional sauce enriches both gnocchi and side vegetables with herby richness.

Make fresh pesto by blending basil, toasted pine nuts, garlic, parmesan, and olive oil until smooth. The homemade version tastes brighter than store-bought and takes only minutes to prepare.

Our Pick
Double the pesto recipe when cooking gnocchi-use half for pasta and half for drizzling.

15. Crunchy Radicchio and Walnut Salad

Bitter radicchio with toasted walnuts adds sharp contrast against pesto's creamy sweetness. The crunchy salad refreshes the palate with every bite.

Dress the radicchio lightly to mellow natural bitterness while maintaining crisp texture. The purple leaves add visual contrast on the plate alongside golden gnocchi and green pesto.

Shortcut
Buy pre-toasted walnuts from the bulk section to skip stovetop preparation.

Common questions come up when planning sides for this Italian favorite.

Frequently Asked Questions

What sides go best with pesto gnocchi?

Grilled chicken or shrimp provide lean protein, while arugula salad and roasted asparagus add fresh contrast to cut the richness.

What vegetables go with pesto gnocchi?

Roasted asparagus, sautéed zucchini, balsamic Brussels sprouts, and lemon green beans all balance pesto with crisp texture and bright flavors.

What protein pairs well with pesto gnocchi?

Lemon herb grilled chicken, garlic butter shrimp skewers, and herbed ricotta stuffed mushrooms add protein without overwhelming the basil pesto.

Can I prep sides for pesto gnocchi ahead of time?

Marinate chicken overnight, roast vegetables earlier in the day, and make pesto drizzle up to 3 days ahead for easier dinner assembly.

How many sides should I serve with pesto gnocchi?

Serve one protein and one vegetable or salad for weeknight meals, or add a third side like breadsticks when hosting dinner parties.

Side Dishes to Serve With Pesto Gnocchi

15 Best Side Dishes to Serve With Pesto Gnocchi

No ratings yet
We provide a list of 15 sides that balance pesto gnocchi by adding protein, fresh vegetables, and flavorful breads. These options vary in texture and temperature, from crunchy roasted vegetables to bright salads and creamy sauces, suitable for both quick meals and entertaining.
Print Recipe Pin Recipe
Prep Time 15 minutes mins
Cook Time 10 minutes mins
Total Time 25 minutes mins
Servings: 4 servings
Course: Dinner, Side Dish
Cuisine: Italian
Ingredients Equipment Method Notes

Ingredients
  

  • Garlic Parmesan Roasted Asparagus crisp
  • Lemon Herb Grilled Chicken Breast bright
  • Tangy Cherry Tomato and Red Onion Salad tangy
  • Crisp Garlic Herb Breadsticks crunchy
  • Zesty Arugula and Parmesan Salad bright
  • Roasted Garlic Mashed Cauliflower creamy
  • Light Lemon Vinaigrette Green Beans bright
  • Sautéed Zucchini with Garlic and Basil tender
  • Crispy Parmesan Polenta Fries crispy
  • Herbed Ricotta and Spinach Stuffed Mushrooms creamy
  • Simple Arugula and Toasted Pine Nut Salad crunchy
  • Balsamic Roasted Brussels Sprouts crunchy
  • Lemon Garlic Butter Shrimp Skewers bright
  • Pine Nut and Herb Pesto Drizzle rich
  • Crunchy Radicchio and Walnut Salad crunchy

Equipment

  • Sheet pan for roasted vegetables
  • Mixing bowl for salads and dips
  • Cutting board always included
  • Serving platter for meal assembly

Method
 

  1. Assess what the main dish already provides-if it has starch, focus on vegetables and fresh sides.
  2. Choose 2-3 sides that fill different gaps: one vegetable, one starch or bread, one sauce or dip.
  3. Start the longest-cooking side first. Prep quick items like salads while the oven works.
  4. Balance temperatures-pair hot roasted vegetables with a cold slaw or chilled dip.
  5. Plate the main dish with sides arranged around it. Drizzle sauce or add garnish last.
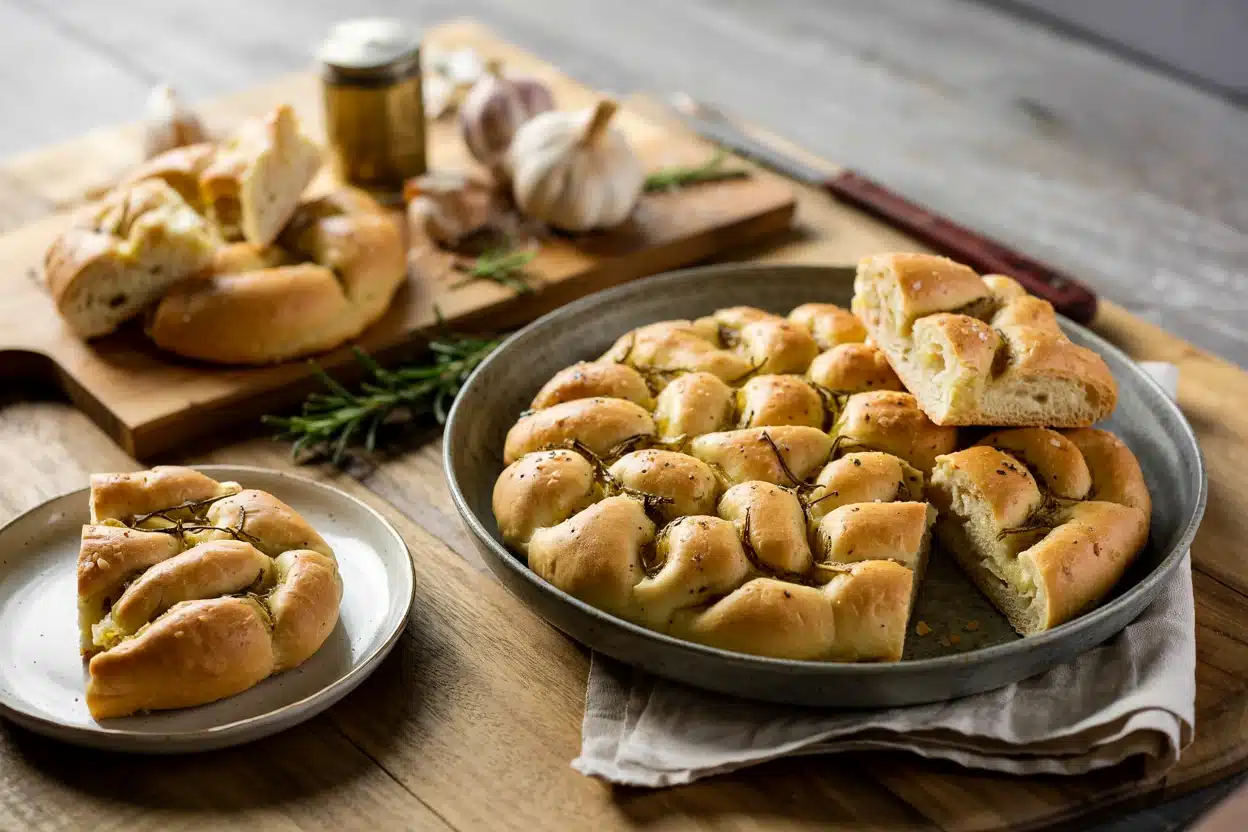
Notes

Add a fresh salad or bright vegetable and keep it separate until serving. This prevents the plate from feeling too heavy or bland with rich pesto gnocchi.

Tried this recipe?

Let us know how it was!

15 Easy Sides to Serve With Chicken Scarpariello

February 4, 2026

Chicken scarpariello brings tender braised chicken thighs, crispy Italian sausage, tangy vinegar sauce, and roasted peppers to the table. That combination covers richness, protein, and bold savory flavor.

what-to-serve-with-chicken-scarpariello

What it needs is something to soak up the sauce, add freshness, or provide textural contrast. The dish runs heavy and saucy, so sides work best when they bring starch to catch every drop, greens to cut through fat, or bread to mop the plate clean.

This Italian-American classic feels comforting year-round, and the right sides turn it into a complete meal without competing for attention.

QUICK SUMMARY

Chicken scarpariello is rich, tangy, and loaded with sausage and peppers, so it needs sides that soak up sauce or add brightness. Creamy polenta or roasted garlic mashed potatoes catch the vinegar-wine sauce, while arugula salad and lemon green beans cut through the richness with fresh, peppery notes.

🍚Soak it up: Mashed potatoes, polenta, crusty bread
🥗Add brightness: Arugula salad, lemon green beans, Caesar salad
⏱️Quick pick: Sautéed garlic spinach in 10 minutes

What to Serve With Chicken Scarpariello: 16 Sides That Work

We look for sides that either catch the tangy sauce or add contrast the dish does not provide. The flavors run bold and savory, so fresh vegetables, neutral starches, and crusty bread all have a place on the plate.

#Side DishBest ForPrep
1Roasted Garlic Mashed Potatoes✨ Any Occasion✅ Easy
2Crisp Italian Green Beans with Lemon✨ Any Occasion✅ Easy
3Honey Glazed Roasted Carrots✨ Any Occasion✅ Easy
4Soft and Creamy Polenta✨ Any Occasion✅ Easy
5Arugula and Parmesan Salad✨ Any Occasion✅ Easy
6Crusty Italian Bread✨ Any Occasion✅ Easy
7Sautéed Garlic Spinach🌙 Weeknight✅ Easy
8Rosemary Roasted Fingerling Potatoes🎉 Hosting⚡ Medium
9Crisp Caesar Salad✨ Any Occasion✅ Easy
10Lemon Roasted Brussels Sprouts✨ Any Occasion✅ Easy
11Zesty Italian Salsa Verde🎉 Hosting✅ Easy
12Olive and Garlic Tapenade🎉 Hosting✅ Easy
13Tangy Apple Cider Slaw✨ Any Occasion✅ Easy
14Italian Roasted Cauliflower✨ Any Occasion✅ Easy
15Herb Focaccia Bread🎉 Hosting🔪 Involved
16Sautéed Broccolini with Chili Flakes🌙 Weeknight✅ Easy

1. Roasted Garlic Mashed Potatoes

Creamy texture and roasted garlic richness soak up every drop of tangy sauce. The buttery base goes with the savory chicken without competing for attention.

Quick tips:

  • Use warm milk and butter - Cold dairy makes the mash dense and gluey.
  • Mash while hot - Potatoes turn gummy if they cool before mashing.

We reach for a buttery mashed potatoes side dish when the sauce runs thick and we want something that holds its shape on the plate.

Quick Tip
Roast garlic cloves in foil at 400°F for 30 minutes to bring out sweet, mellow flavor.

2. Crisp Italian Green Beans with Lemon

Bright citrus and snappy texture cut through the richness of sausage and chicken. The lemon zest adds a clean, sharp note that refreshes the palate between bites.

Blanch beans in salted boiling water for 3 minutes, then toss with olive oil, lemon zest, and a pinch of red pepper flakes. Consider bright green beans we love when you want something fast that adds color and crunch to the plate.

3. Honey Glazed Roasted Carrots

Caramelized edges and mild sweetness contrast the tangy vinegar sauce in the chicken. Roasted carrots add earthy depth without heaviness.

A few notes:

  • Cut evenly - Uniform pieces roast at the same rate and finish together.
  • Toss with rosemary - Fresh herbs echo the Italian flavors in the main dish.

The glaze thickens as carrots roast, creating a sticky coating that clings to each piece. Try a side that pairs well when you want something sweet that balances bold savory flavors.

If You WantTry This
Sweet contrastHoney glazed carrots with rosemary
Crisp textureBlanched green beans with lemon
Earthy richnessRoasted Brussels sprouts with garlic

4. Soft and Creamy Polenta

Mild corn flavor and velvety texture catch the sauce without overwhelming the dish. Polenta offers neutral richness that complements tangy chicken and sausage.

Stir constantly over medium heat to prevent lumps from forming. We turn to fluffy soft polenta on the side when the meal needs a starch that feels lighter than mashed potatoes but still soaks up every drop of sauce.

Our Pick
Finish with butter and Parmesan to add silky texture and savory depth.

5. Arugula and Parmesan Salad

Peppery greens and sharp cheese provide fresh contrast to rich, saucy chicken. The bite from arugula cuts through fat and cleanses the palate.

Dress leaves just before serving to keep them crisp. A simple lemon vinaigrette adds brightness without masking the greens. Reach for this easy parmesan salad recipe when you want something that feels light and takes less than 10 minutes to assemble.

Arugula Salad

Works for: Peppery contrast, quick prep, no cooking

Skip if: You prefer mild greens or creamy dressings

Caesar Salad

Works for: Creamy dressing, crunchy croutons, crowd appeal

Skip if: You want something lighter than the main dish

6. Crusty Italian Bread

Chewy texture and golden crust mop up every bit of sauce left on the plate. The bread's neutral flavor lets the tangy chicken and sausage shine.

Keep in mind:

  • Warm before serving - A quick toast in the oven crisps the crust and softens the interior.
  • Slice thick - Thin slices turn soggy under heavy sauce.
  • Brush with olive oil - A light coating adds richness and prevents drying.

We grab our favorite italian bread side when the sauce runs thick and we want something simple that does not require cooking.

Shortcut
Pick up a fresh loaf from the bakery section to skip baking entirely.

7. Sautéed Garlic Spinach

Tender greens with garlicky richness balance the heaviness of sausage and braised chicken. Spinach wilts quickly and adds color without bulk.

Quick tips:

  • Cook over high heat - Spinach wilts in under 3 minutes and retains its bright green color.
  • Drain excess liquid - Press cooked spinach with a spoon to remove water before plating.
  • Add garlic at the end - Raw garlic burns easily, so stir it in during the last 30 seconds.

This side comes together faster than rice and offers more flavor than plain steamed vegetables. If you prefer a side that pairs well with Italian-American dinners, spinach works every time.

MethodTimeBest For
Sauté in skillet10 minutesQuick weeknight sides
Blanch and shock8 minutesPrepping ahead
Steam in microwave5 minutesMinimal cleanup

8. Rosemary Roasted Fingerling Potatoes

Crisp edges and herbal aroma echo the rosemary in chicken scarpariello. The potatoes offer a starchy base that soaks up sauce while adding textural contrast.

Toss with olive oil, fresh rosemary, and coarse salt before roasting at 425°F for 35 minutes. We turn to this easy fingerling potatoes recipe when hosting because the hands-off cooking leaves time for other prep.

Golden Rule
Do not crowd the pan-potatoes need space to crisp instead of steam.

9. Crisp Caesar Salad

Crunchy romaine and creamy dressing cut through the richness of braised chicken and sausage. The anchovy-laced dressing adds umami depth that complements savory Italian flavors.

What to know:

  • Add croutons last - Toss them in right before serving to keep them crunchy.
  • Use fresh Parmesan - Pre-grated cheese lacks the sharp, nutty flavor of freshly shaved curls.

We reach for cool caesar salad we love when we want something familiar that feels substantial without being heavy. The salad holds up next to bold, saucy dishes and provides textural contrast in every bite.

For those who enjoy quick chicken dinner ideas during busy weeks, pairing Caesar salad with chicken scarpariello keeps meal prep straightforward.

10. Lemon Roasted Brussels Sprouts

Caramelized edges and bright citrus balance the tangy vinegar sauce in the chicken. The slight bitterness of Brussels sprouts contrasts the richness of sausage and braised meat.

A few notes:

  • Roast cut-side down - Direct contact with the pan creates golden, crispy edges.
  • Finish with lemon zest - Fresh zest adds brightness without extra liquid.
  • Do not overcrowd - Crowded sprouts steam instead of roast.

The caramelization takes about 25 minutes at 425°F. If you want a fresh side to try that adds color and texture, roasted Brussels sprouts deliver every time.

VegetableRoasting Timeflavor
Brussels sprouts25 minutesNutty, slightly bitter
Carrots35 minutesSweet, earthy
Cauliflower30 minutesMild, nutty

11. Zesty Italian Salsa Verde

Herbaceous parsley, capers, and garlic heighten the complexity of chicken scarpariello. The bright, briny sauce adds another layer of flavor without heaviness.

Serve chilled on the side so diners can spoon it over chicken or sausage as desired. We turn to a zesty side to try when we want something that feels restaurant-quality but takes 15 minutes to make.

Our Pick
Make salsa verde a day ahead to let the flavors meld and intensify.

12. Olive and Garlic Tapenade

Briny olives and savory garlic add depth to the plate without competing with the main dish. The spread pairs with crusty bread and enhances every bite.

The details:

  • Use good quality olives - Kalamata or Castelvetrano olives bring fruity, complex flavor.
  • Pulse, do not purée - A chunky texture works better than a smooth paste.
  • Add fresh lemon juice - Acidity brightens the rich olive flavor.
  • Store in the fridge - Tapenade keeps for a week and tastes better after a day.

We reach for an easy olive tapenade to try when hosting because guests can spread it on bread while the main dish finishes cooking. The prep takes 10 minutes, and the flavor feels bold enough to hold up next to tangy chicken and sausage.

For those exploring hearty veggie dinners we love, tapenade adds savory richness to meatless meals as well.

Salsa Verde

Works for: Fresh herb flavor, spoonable sauce, light finish

Skip if: You prefer thick, briny spreads

Olive Tapenade

Works for: Rich, salty spread, pairs with bread, make-ahead option

Skip if: You want something lighter than the main dish

13. Tangy Apple Cider Slaw

Crunchy cabbage and apple cider vinegar dressing refresh the palate between bites of rich chicken and sausage. The slaw adds brightness and textural contrast without heaviness.

Quick tips:

  • Shred cabbage thin - Thick shreds stay tough and chewy.
  • Make dressing ahead - Flavors meld and improve after 30 minutes in the fridge.
  • Drain excess liquid - Press shredded cabbage before dressing to prevent watery slaw.

We turn to a bright side to try when the meal needs something crisp that cuts through fat. The tangy dressing goes with the vinegar notes in chicken scarpariello without repeating the same flavors.

Watch Out
Do not dress slaw more than 2 hours ahead-cabbage wilts and loses its crunch.

14. Italian Roasted Cauliflower

Nutty, caramelized florets contrast the tangy sauce in the chicken. Roasting brings out sweetness in cauliflower that balances bold, savory flavors.

Toss florets with olive oil, garlic, and red pepper flakes before roasting at 425°F for 30 minutes. Flip halfway through to ensure even browning on all sides. We reach for a quick italian cauliflower side dish when we want a vegetable that feels substantial without being heavy.

Quick Tip
Roast until edges turn golden brown for the best flavor and texture.

15. Herb Focaccia Bread

Soft, olive oil rich bread with rosemary and sea salt adds aromatic lift to the plate. The dimpled surface catches sauce, and the tender crumb soaks up every drop.

A few notes:

  • Push dimples deep - Shallow indentations disappear during baking.
  • Drizzle generously with oil - Focaccia needs more oil than regular bread to stay moist.

The dough requires rising time, so plan ahead if making from scratch. We turn to this warm side dish recipe when hosting because the aroma fills the kitchen and impresses guests before the meal even starts.

Bread TypePrep TimeBest For
Focaccia20 min + risingHosting, impressive presentation
Crusty ItalianStore-boughtWeeknight convenience
Garlic bread10 minutesQuick, crowd-pleasing option

16. Sautéed Broccolini with Chili Flakes

Tender-crisp stems and mild heat balance the richness of braised chicken and sausage. The broccolini adds green color and a slight bite that contrasts the soft texture of the main dish.

What to know:

  • Cook over high heat - Broccolini chars slightly and stays tender-crisp in 6 minutes.
  • Add garlic at the end - Raw garlic burns quickly, so stir it in during the last minute.
  • Use whole stalks - The stems are tender and cook at the same rate as the florets.
  • Finish with lemon - A squeeze of fresh lemon brightens the flavor and cuts through richness.

The chili flakes echo the heat in chicken scarpariello without overpowering the dish. Broccolini wilts faster than broccoli and feels more elegant on the plate, making it a solid choice when you want something green that does not require much effort.

If you enjoy preparing rich beef dishes to try for special occasions, the same pairing principles apply-balance richness with brightness and texture.

Golden Rule
Do not cover the pan-trapped steam turns broccolini soggy instead of crisp.

Common questions come up when planning sides for chicken scarpariello, so we cover the practical details here.

Frequently Asked Questions

What sides go best with chicken scarpariello?

Mashed potatoes, creamy polenta, and crusty Italian bread soak up the tangy sauce, while arugula salad, lemon green beans, and roasted Brussels sprouts add brightness and crunch.

What starch pairs with chicken scarpariello?

Creamy polenta and roasted garlic mashed potatoes catch the vinegar-wine sauce without overwhelming the dish, while rosemary roasted fingerling potatoes add crisp edges and herbal notes.

Can I prep sides for chicken scarpariello ahead of time?

Salsa verde, olive tapenade, apple cider slaw, and focaccia dough can be made a day ahead, while vegetables can be prepped and stored raw in the fridge until ready to cook.

How many sides should I serve with chicken scarpariello?

Two sides work for weeknight dinners-one starch and one vegetable-while three or four sides suit hosting or larger gatherings.

What bread goes with chicken scarpariello?

Crusty Italian bread and herb focaccia both mop up the sauce effectively, with focaccia offering more aromatic flavor and Italian bread providing a neutral, chewy texture.

Sides to Serve With Chicken Scarpariello

15 Easy Sides to Serve With Chicken Scarpariello

No ratings yet
We provide a list of 15 sides that complement chicken scarpariello by adding starches to soak up sauce, fresh vegetables to cut through richness, and bright sauces. These options offer a range of textures, temperatures, and effort levels for versatile meal planning.
Print Recipe Pin Recipe
Prep Time 15 minutes mins
Cook Time 10 minutes mins
Total Time 25 minutes mins
Servings: 4 servings
Course: Dinner, Side Dish
Cuisine: Italian-American
Ingredients Equipment Method Notes

Ingredients
  

  • Roasted Garlic Mashed Potatoes creamy
  • Crisp Italian Green Beans with Lemon bright
  • Honey Glazed Roasted Carrots sweet
  • Soft and Creamy Polenta creamy
  • Arugula and Parmesan Salad peppery
  • Crusty Italian Bread chewy
  • Sautéed Garlic Spinach tender
  • Rosemary Roasted Fingerling Potatoes crisp
  • Crisp Caesar Salad crunchy
  • Lemon Roasted Brussels Sprouts caramelized
  • Zesty Italian Salsa Verde bright
  • Olive and Garlic Tapenade savory
  • Tangy Apple Cider Slaw crunchy
  • Italian Roasted Cauliflower nutty
  • Herb Focaccia Bread aromatic
  • Sautéed Broccolini with Chili Flakes tender-crisp

Equipment

  • Sheet pan For roasting vegetables
  • Mixing bowl For salads and dips
  • Cutting board
  • Skillet For sautéing spinach and broccolini
  • Serving platter
  • Small bowls For sauces and dips

Method
 

  1. Assess what the main dish already provides-if it has starch, focus on vegetables and fresh sides.
  2. Choose 2-3 sides that fill different gaps: one vegetable, one starch or bread, one sauce or dip.
  3. Start the longest-cooking side first. Prep quick items like salads while the oven works.
  4. Balance temperatures-pair hot roasted vegetables with a cold slaw or chilled dip.
  5. Plate the main dish with sides arranged around it. Drizzle sauce or add garnish last.
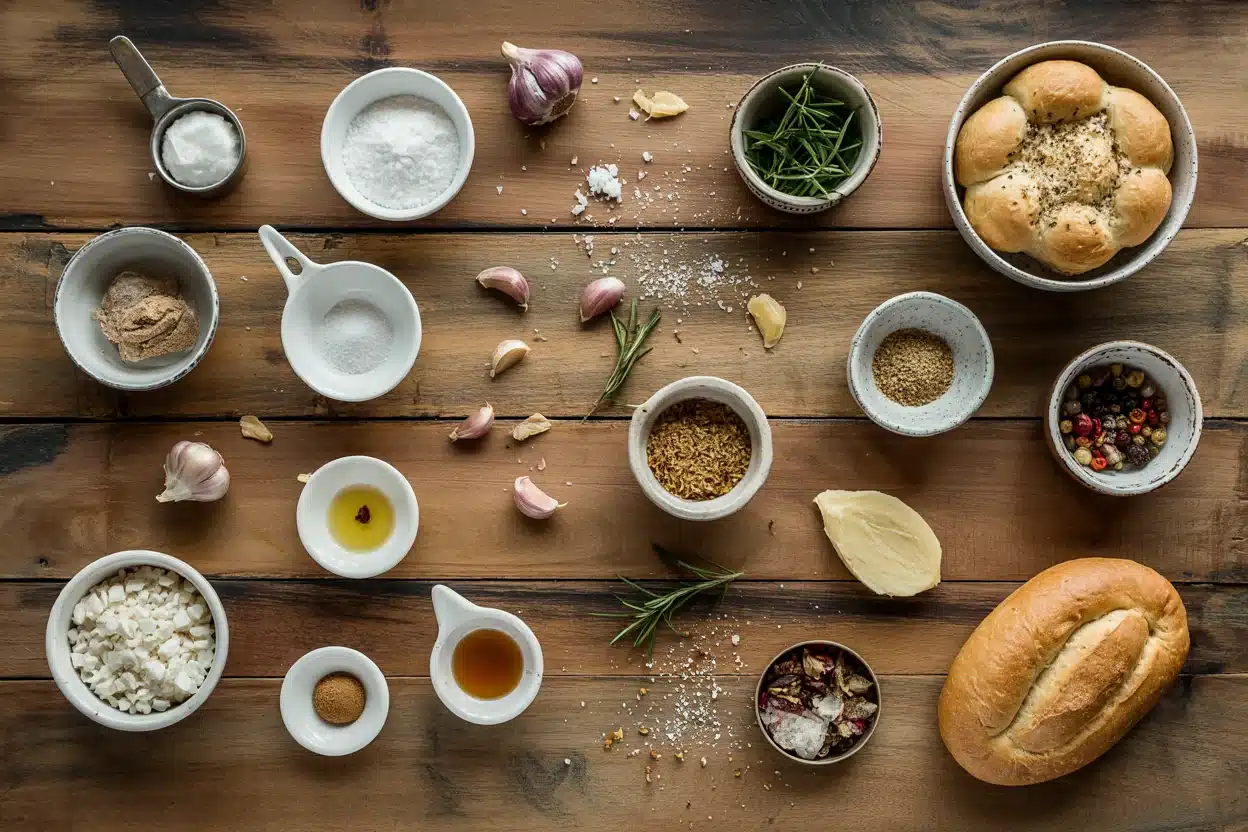
Notes

Add a fresh vegetable side or bright salad and keep it chilled until serving. This prevents the meal from feeling too heavy and ensures balance with rich, saucy chicken scarpariello.

Tried this recipe?

Let us know how it was!

15 Quick & Easy Sides for Chicken Tikka Masala

February 4, 2026

Chicken tikka masala delivers creamy tomato sauce with warm spices and tender marinated chicken. The richness coats every bite.

what-to-serve-with-chicken-tikka-masala

We need sides that either soak up that sauce or cut through the intensity with something fresh. Basmati rice and naan handle the gravy. Cooling raita and crisp vegetables balance the heat and add textural contrast.

QUICK SUMMARY

Chicken tikka masala is rich, spiced, and creamy-needs neutral starches and cooling sides. Basmati rice and naan bread soak up sauce. Cucumber raita and kachumber salad add freshness and cool the palate between bites.

🍚Soak it up: Basmati rice, naan, cauliflower rice
🥗Add freshness: Raita, kachumber salad, green beans
⏱️Quick pick: Steamed basmati rice in 20 minutes

What to Serve With Chicken Tikka Masala: 15 Quick Sides

These sides work whether you need something ready in ten minutes or want to make an impression for hosting.

#Side DishBest ForPrep
1Fragrant Basmati Steamed Rice✨ Any Meal✅ Easy
2Soft Garlic Butter Naan Bread✨ Any Meal⚡ Medium
3Cooling Cucumber and Mint Raita✨ Any Meal✅ Easy
4Roasted Spiced Cauliflower Florets✨ Any Meal✅ Easy
5Tangy Mango Chutney Relish✨ Any Meal✅ Easy
6Simple Lemon-Spiced Green Salad✨ Any Meal✅ Easy
7Steamed Garlic Green Beans🌙 Weeknight✅ Easy
8Lentil Dal with Turmeric and Cumin✨ Any Meal⚡ Medium
9Crispy Spiced Potato Wedges✨ Any Meal⚡ Medium
10Mint and Cilantro Chutney✨ Any Meal✅ Easy
11Roasted Carrot and Cumin Spears🌙 Weeknight⚡ Medium
12Simple Tomato and Onion Kachumber Salad✨ Any Meal✅ Easy
13Masala Spiced Roasted Eggplant🎉 Hosting🔪 Involved
14Warm Turmeric Cauliflower Rice🌙 Weeknight✅ Easy
15Charred Grilled Zucchini Ribbons🎉 Hosting⚡ Medium

1. Fragrant Basmati Steamed Rice

Light, fluffy grains absorb every drop of tikka masala sauce without competing with the spices. Rinsing rice well before cooking removes excess starch for tender, separate grains.

Quick tips:

  • Use a 2:1 water ratio - Two cups water per cup rice produces consistent results.
  • Let it steam off heat - After cooking, cover the pot and rest for 5 minutes.
  • Fluff with a fork - Avoid stirring, which breaks grains and creates mush.

If you want a quick basmati rice side dish with butter and spices, that version works just as well here.

Quick Tip
Toast rice in the dry pot for 2 minutes before adding water for nuttier flavor.

2. Soft Garlic Butter Naan Bread

Warm naan offers pillowy texture perfect for scooping creamy curry. The garlic butter adds richness that echoes the sauce without overwhelming it.

Brush melted garlic butter on hot naan right after baking for maximum flavor absorption. Store-bought naan works fine when warmed in a skillet or under the broiler for 30 seconds per side.

If You WantTry This
Homemade textureMake dough from scratch and cook in cast iron
Quick optionWarm store-bought naan and brush with garlic butter
Extra flavorAdd fresh cilantro to melted butter before brushing

3. Cooling Cucumber and Mint Raita

Cool, tangy yogurt with crisp cucumber refreshes the palate between bites of spiced curry. Greek yogurt holds up better than regular yogurt and adds creamy richness without turning watery.

A few notes:

  • Drain cucumbers first - Pat sliced cucumbers on paper towels for 10 minutes.
  • Chop mint finely - Large pieces overpower the delicate yogurt base.

For something tangy on the side that takes 10 minutes, this delivers cooling contrast every time.

Our Pick
Use English cucumbers for less water content and fewer seeds to remove.

4. Roasted Spiced Cauliflower Florets

Charred edges and tender centers add earthy contrast to the creamy curry. Tossing florets with garam masala before roasting echoes the tikka masala spices without duplicating them.

The details:

  • Roast at 425°F - High heat creates golden caramelization in 20 minutes.
  • Cut florets evenly - Uniform pieces cook at the same rate.
  • Do not crowd the pan - Leave space between florets for crispy edges.

Try a roasted cauliflower florets side dish when you want vegetables that feel substantial enough to stand up to bold curry flavors.

Oven Roasted

Works for: Feeding a crowd, hands-off cooking

Skip if: You need it done in under 15 minutes

Air Fryer

Works for: Quick weeknight sides, small batches

Skip if: Cooking for more than four people

5. Tangy Mango Chutney Relish

Bright, sweet fruit with a hint of spice cuts through the curry's richness. Serve chilled or at room temperature for the best contrast between hot curry and cool condiment.

Store-bought chutney works perfectly here however homemade versions let you control sweetness and spice levels. A small spoonful on each bite balances the creamy tomato sauce without overwhelming the plate.

Shortcut
Keep jarred mango chutney in the pantry for last-minute meals-it holds for months unopened.

6. Simple Lemon-Spiced Green Salad

Crisp mixed greens with lemon vinaigrette add fresh, bright acidity that refreshes between bites of rich curry. Baby spinach and arugula work better than iceberg because they hold up to warm curry and add peppery notes.

What to know:

  • Dress just before serving - Greens wilt quickly once dressed.
  • Use fresh lemon juice - Bottled juice tastes flat and bitter.

When you need something tangy on the side that comes together in minutes, this delivers clean contrast without extra cooking.

Quick Tip
Add toasted cumin seeds to the vinaigrette for a subtle echo of curry spices.

7. Steamed Garlic Green Beans

Tender-crisp texture with mild garlic flavor complements curry spices without competing. Steam until just tender to keep the bright color and snap intact.

Keep in mind:

  • Trim ends first - Remove tough stem ends before cooking.
  • Do not overcook - Pull beans when they still have bite, around 4 minutes.
  • Add garlic after steaming - Toss hot beans with minced garlic and butter.
  • Season lightly - The curry provides most of the salt.

If you love fresh green beans on the side that stay bright and snappy, this method works every time.

MethodTimeBest For
Steamed5 minutesQuick weeknight meals
Blanched3 minutesMake-ahead prep, serving cold
Sautéed8 minutesAdding garlic or spices directly

8. Lentil Dal with Turmeric and Cumin

Earthy lentils simmered with warm spices add plant-based protein alongside chicken. The creamy texture mirrors the curry's richness however the lighter flavor keeps the plate from feeling heavy.

Simmer lentils with turmeric and cumin for rich, warming flavor that echoes curry spices. Red lentils cook fastest and break down into a silky consistency perfect for scooping with naan.

Golden Rule
Start lentils in cold water and bring to a boil-hot water makes them cook unevenly.

9. Crispy Spiced Potato Wedges

Crunchy edges with fluffy centers provide starchy contrast to the creamy curry. Roasting with paprika and coriander adds warm spices that feel authentic without duplicating tikka masala flavors.

Cut wedges evenly so they cook at the same rate. Toss with oil and spices before roasting at 425°F for 30 minutes until golden and crisp on the edges.

If You WantTry This
Extra crispySoak wedges in cold water for 30 minutes before roasting
More spiceAdd cayenne pepper or chili powder to the seasoning mix
Faster cookingCut smaller wedges-they roast in 20 minutes

10. Mint and Cilantro Chutney

Zesty herb blend with green chili and lemon juice cuts through creaminess and adds bright, sharp contrast. Fresh herbs blended with spice create a condiment that balances richness without adding more heat.

The details:

  • Use fresh herbs only - Dried herbs turn bitter and muddy.
  • Start with less chili - Add more after tasting rather than overpowering the blend.
  • Add lemon gradually - Too much makes the chutney sour instead of bright.

Try something tangy on the side when you want a condiment that stays fresh in the fridge for up to a week.

Watch Out
Blending too long turns the chutney brown-pulse just until smooth and stop.

11. Roasted Carrot and Cumin Spears

Sweet caramelized carrots with earthy cumin provide texture and contrast to creamy sauce. Use whole baby carrots or slice larger ones into spears lengthwise for even roasting.

Quick tips:

  • Roast at 425°F - High heat brings out natural sweetness and creates browning.
  • Toss with cumin seeds - Whole seeds toast while roasting and release nutty flavor.

When you want a fresh side to try that adds color and mild spice, roasted carrots deliver every time.

Baby Carrots

Works for: Quick prep, uniform cooking, hosting

Skip if: You want more caramelized surface area

Carrot Spears

Works for: More browning, rustic presentation

Skip if: Feeding picky eaters who prefer smaller pieces

12. Simple Tomato and Onion Kachumber Salad

Fresh, tangy, crunchy salad with diced tomatoes and onions adds bright contrast to rich curry. Dice vegetables finely so every bite delivers crisp texture without overwhelming the plate.

A few notes:

  • Use ripe tomatoes - Underripe tomatoes taste sour and watery.
  • Soak onions briefly - Five minutes in cold water mellows sharp bite.
  • Add cilantro at the end - Chopping too early bruises leaves and dulls flavor.
  • Squeeze fresh lemon - Bottled juice lacks the brightness this salad needs.

When you love this easy kachumber salad recipe that comes together in minutes, it works for weeknight dinners or hosting friends.

Quick Tip
Salt the salad 5 minutes before serving to draw out tomato juices and create natural dressing.

13. Masala Spiced Roasted Eggplant

Smoky, tender eggplant with warm spices adds depth and echoes curry flavors without duplicating them. Slice eggplant into rounds or halve lengthwise and roast until soft with masala rub for rich, earthy contrast.

Stack thin slices on a sheet pan brushed with oil and roast at 400°F for 35 minutes until golden and collapsing. The texture turns silky and absorbs spice flavors during roasting.

MethodTimeBest For
Oven roasted40 minutesHands-off cooking, feeding a crowd
Grilled25 minutesAdding smoky char, summer meals
Pan-fried15 minutesQuick weeknight option, smaller batches

14. Warm Turmeric Cauliflower Rice

Low-carb alternative with mild spice and fluffy texture soaks up curry sauce without the heaviness of regular rice. Sauté riced cauliflower with turmeric and mustard seeds for flavor that complements curry spices.

Keep in mind:

  • Do not overcook - Cauliflower rice turns mushy after 5 minutes.
  • Drain excess moisture - Pat riced cauliflower dry before cooking.
  • Use high heat - Medium-high heat evaporates water quickly and prevents sogginess.
  • Season lightly - The curry provides most of the salt and spice.

For a buttery side to try that feels lighter than traditional rice, this delivers satisfying texture in 15 minutes.

Shortcut
Buy pre-riced cauliflower from the produce section to skip chopping and processing.

15. Charred Grilled Zucchini Ribbons

Light smokiness and tender bite balance richness of curry without adding heaviness. Use a vegetable peeler to create ribbons and grill quickly over high heat for char marks and soft texture.

Toss ribbons with olive oil and salt before grilling for 2 minutes per side. The thin slices cook fast and develop golden edges that add visual appeal to the plate.

Quick Tip
Grill ribbons perpendicular to grates so they do not fall through-use a grill basket if needed.

15 Common questions about pairing sides with chicken tikka masala

Frequently Asked Questions

What sides go best with chicken tikka masala?

Basmati rice and naan bread soak up sauce while cucumber raita and kachumber salad add cooling contrast to balance the rich, spiced curry.

What vegetables go with chicken tikka masala?

Roasted cauliflower, steamed green beans, and grilled zucchini add texture and freshness without competing with the curry's bold flavors.

How many sides should I serve with chicken tikka masala?

Serve one starch like rice or naan plus one cooling element like raita for weeknight meals or add a vegetable and chutney when hosting.

Can I prep sides for chicken tikka masala ahead of time?

Raita, chutneys, and lentil dal hold well in the fridge for up to three days however rice and naan taste best when made fresh.

What is a healthy low-carb side for chicken tikka masala?

Turmeric cauliflower rice and roasted vegetables like green beans or zucchini provide texture and nutrition without adding extra carbs.

& Easy Sides for Chicken Tikka Masala

15 Quick & Easy Sides for Chicken Tikka Masala

No ratings yet
We provide a list of 15 sides that balance chicken tikka masala by adding neutral starches, cooling condiments, and fresh vegetables. These options offer a range of textures and temperatures from creamy raitas to crisp salads and roasted vegetables, suited for quick prep or hosting.
Print Recipe Pin Recipe
Prep Time 15 minutes mins
Cook Time 10 minutes mins
Total Time 25 minutes mins
Servings: 4 servings
Course: Dinner, Side Dish
Cuisine: Indian
Ingredients Equipment Method Notes

Ingredients
  

  • Fragrant Basmati Steamed Rice light
  • Soft Garlic Butter Naan Bread soft
  • Cooling Cucumber and Mint Raita cool
  • Roasted Spiced Cauliflower Florets earthy
  • Tangy Mango Chutney Relish tangy
  • Simple Lemon-Spiced Green Salad bright
  • Steamed Garlic Green Beans tender-crisp
  • Lentil Dal with Turmeric and Cumin creamy
  • Crispy Spiced Potato Wedges crunchy
  • Mint and Cilantro Chutney zesty
  • Roasted Carrot and Cumin Spears caramelized
  • Simple Tomato and Onion Kachumber Salad crunchy
  • Masala Spiced Roasted Eggplant smoky
  • Warm Turmeric Cauliflower Rice fluffy
  • Charred Grilled Zucchini Ribbons light

Equipment

  • Sheet pan for roasted vegetables
  • Mixing bowl for salads and dips
  • Cutting board
  • Serving platter

Method
 

  1. Assess what the main dish already provides-if it has starch, focus on vegetables and fresh sides.
  2. Choose 2-3 sides that fill different gaps: one vegetable, one starch or bread, one sauce or dip.
  3. Start the longest-cooking side first. Prep quick items like salads while the oven works.
  4. Balance temperatures-pair hot roasted vegetables with a cold slaw or chilled dip.
  5. Plate the main dish with sides arranged around it. Drizzle sauce or add garnish last.

Notes

Add a fresh salad or cooling raita and keep it chilled until serving. This prevents the plate from feeling too heavy or one-dimensional.

Tried this recipe?

Let us know how it was!

You Might Also Like

  • 15 Best Sides for Corned Beef Hash for Brunch & Dinner
  • 15 Best Sides for Cauliflower Cheese (Easy Ideas)
  • 15 Best Sides to Serve With Chicken Marbella Ina Garten

7 Best Substitutes for Agave Nectar in Baking & Dressings

February 4, 2026

You're adding the final drizzle to overnight oats when the agave bottle tips over-empty. The recipe depends on that liquid sweetness and smooth texture to blend into cold ingredients without grittiness.

7 Best Substitutes for Agave Nectar in Baking & Dressings

Agave nectar dissolves easily in cold liquids and brings mild sweetness without overpowering. Granulated sugar won't work the same way-it needs heat to dissolve fully.

Most liquid sweeteners can step in with small adjustments to ratio or flavor expectations.

QUICK SUMMARY

Honey and maple syrup replace agave nectar 1:1 in most recipes-both dissolve in cold liquids and add moisture. Simple syrup (equal parts sugar and water) works for beverages and dressings but lacks flavor depth. Avoid honey in vegan recipes and expect stronger flavor from maple syrup in delicate dishes.

🏆Closest match: Honey mimics texture and sweetness level exactly
⚡Fastest swap: Simple syrup ready in 5 minutes
⚠️Watch out: Most swaps add distinct flavor-not neutral like agave

7 Alternatives to Replace Agave Nectar

Agave's neutral sweetness and syrupy texture don't translate directly to every liquid sweetener. The swaps below cover baking, beverages, dressings, and vegan applications.

Quick Substitute Reference
# Substitute Best For Ratio Key Note
1 Honey ✨ Both 1:1 Floral flavor, not vegan
2 Maple Syrup ✨ Both 1:1 Woody taste, thinner texture
3 Simple Syrup 🥗 Raw 1:1 Neutral but no complexity
4 Date Syrup 🌱 Vegan 1:1 Deep caramel notes, thicker
5 Brown Rice Syrup 🍳 Cooking 1.25:1 Less sweet, malty flavor
6 Coconut Nectar 🥗 Raw 1:1 Caramel-vanilla undertone
7 DIY Sugar Syrup 🥗 Raw 1:1 Pure sweet, no added flavor

1. Honey 🍯

Honey steps in as the closest match for agave's syrupy texture and sweetness level. It dissolves in cold liquids just as easily and adds moisture to baked goods.

Use 1:1 in any recipe calling for agave nectar. The floral notes are stronger than agave's neutral profile but don't overpower most dishes.

  • ✅ Matches texture and sweetness exactly
  • ⚠️ Not suitable for vegan diets

Honey works everywhere-drizzled over yogurt, stirred into tea, or baked into muffins. If you're working with common Honeycrisp Apple swaps ranked, honey brings the natural sweetness those dishes need.

The flavor runs richer than agave, so expect a slight shift in delicate recipes like vanilla panna cotta or lemon bars.

2. Maple Syrup 🍁

Maple syrup brings liquid sweetness with a woodsy undertone that agave doesn't have. It works in baking, glazing, and salad dressings without grittiness.

Use 1:1 in place of agave nectar. The slightly thinner texture won't affect most recipes, but the maple flavor shows up more clearly.

Maple syrup shines in oatmeal, pancakes, roasted vegetables, and baked goods where its distinctive taste complements other ingredients. It's vegan-friendly and dissolves in cold liquids just like agave.

Skip it in recipes requiring neutral sweetness-lime vinaigrettes or delicate fruit compotes don't benefit from the woody notes. For other swaps, check out tested Maple Syrup replacements that work in specific applications.

3. Simple Syrup (Sugar + Water) 💧

Simple syrup replicates agave's liquid form and sweetness without adding flavor. Mix 1 cup sugar with 1 cup water in a saucepan, heat until dissolved, then cool-it matches 1 cup of agave nectar.

This swap works best in beverages, cocktails, and salad dressings where neutral sweetness matters. The thin texture blends instantly into cold drinks.

  • ✅ Dissolves in cold liquids immediately
  • ✅ Neutral flavor doesn't compete with other ingredients
  • ⚠️ No depth-just pure sweetness
  • ⚠️ Won't add moisture to baked goods the same way

Simple syrup lacks the subtle complexity agave brings to recipes. It's purely functional-sweetness and moisture without personality.

Use it for iced tea, lemonade, or vinaigrettes. Skip it in baking where you need texture and moisture retention beyond just sugar water.

4. Date Syrup 🌴

Date syrup adds sweetness with a deep caramel-fruity flavor that agave doesn't have. It brings the same moisture and liquid consistency but with more intensity.

Use 1:1 in recipes where richer flavor works-raw desserts, energy balls, or tahini-based dressings. The darker color shows up in light-colored dishes.

Date syrup works in overnight oats, smoothie bowls, and drizzled over vanilla ice cream. It's vegan, gluten-free, and naturally thick enough to coat spoons and fruit.

Skip it when you need mild sweetness-it'll dominate subtle flavors in delicate custards or light vinaigrettes. For more options, see tested Date Syrup replacements that match different flavors.

5. Brown Rice Syrup 🌾

Brown rice syrup brings syrupy texture but runs less sweet than agave. It works in baking and cooking where you can adjust quantities without throwing off liquid ratios.

Use 1¼ cups brown rice syrup per 1 cup agave nectar to match sweetness. The malty, nutty flavor adds complexity that agave doesn't have.

Brown rice syrup holds up in granola bars, baked cookies, and stir-fry glazes where the mild malt note fits naturally. It's vegan and gluten-free, though maltier than agave's clean sweetness.

Avoid it in recipes needing high sweetness without extra volume-you'll need more syrup to reach the same level, which affects texture. Check Brown Rice Syrup substitutes for bulk when you're working with larger batches.

6. Coconut Nectar 🥥

Coconut nectar matches agave's syrupy texture with a caramel-vanilla undertone. It's sweeter than you'd expect from coconut products-closer to agave than coconut sugar.

Use 1:1 in raw toppings, smoothie bowls, and dressings where the distinct flavor adds interest. The thick consistency clings to fruit and drizzles slowly.

  • ✅ Vegan and minimally processed
  • ⚠️ Flavor is more pronounced than agave's neutrality

Coconut nectar works drizzled over fresh berries, stirred into nut butter, or mixed into raw desserts. It doesn't disappear into recipes the way agave does-it leaves a subtle signature.

Skip it when neutral sweetness matters, like in delicate citrus dressings or light sorbets. For similar swaps, try easy Coconut Nectar swaps that work across different uses.

7. DIY Sugar Syrup (Granulated Sugar + Water) ⚗️

DIY sugar syrup creates a liquid sweetener from pantry staples. Dissolve 1 cup sugar in ¾ cup boiling water, cool completely, then use the same volume as agave nectar.

This works for beverages, dressings, and cocktails where you need liquid sweetness without texture changes. The neutral flavor won't interfere with other ingredients.

  • ✅ Ready in under 10 minutes
  • ✅ Pure sweetness without added flavor
  • ⚠️ Thinner than agave-won't coat or cling as well

DIY sugar syrup dissolves instantly in cold drinks and blends smoothly into vinaigrettes. It won't add the body agave brings to baked goods or the gloss it gives to glazes.

Use it for iced coffee, fruit salads, or quick dressings. Skip it in recipes requiring thickness or moisture retention beyond basic sweetness.

Picking Your Agave Nectar Swap

  • For baking: Honey or maple syrup add moisture and sweetness 1:1
  • For beverages: Simple syrup or DIY sugar syrup dissolve instantly
  • For vegan recipes: Maple syrup, date syrup, or coconut nectar work without animal products

Match the swap to what you're making-baked goods need moisture, beverages need instant dissolving, and raw dishes benefit from richer flavors.

Frequently Asked Questions

Can I use regular sugar instead of agave nectar?

Granulated sugar won't dissolve in cold liquids the way agave does. Use it in baked goods by reducing other liquids slightly-swap 1 cup agave for ¾ cup sugar plus 3 tablespoons water. This works in cookies, cakes, and muffins but not in cold applications like smoothies or dressings.

Is honey healthier than agave nectar?

Honey and agave have similar calorie counts but different sugar compositions-honey contains glucose and fructose in roughly equal amounts, while agave runs higher in fructose. Both are liquid sweeteners that add moisture to recipes. Neither qualifies as a health food, but honey offers trace minerals and enzymes that agave doesn't.

What's the best vegan substitute for agave nectar?

Maple syrup works 1:1 as the most flexible vegan swap-it dissolves in cold liquids and adds moisture to baked goods. Date syrup brings deeper caramel notes for raw desserts and dressings. Coconut nectar offers similar texture with a distinct flavor that works in smoothie bowls and fruit toppings.

Does agave nectar dissolve better than honey in cold drinks?

Agave nectar dissolves slightly faster in cold liquids because of its thinner consistency and higher fructose content. Honey works in cold drinks too but may need more stirring, especially if it's crystallized. Both dissolve completely without heating-simple syrup matches agave's instant-dissolve performance in iced beverages.

Can I substitute agave nectar with corn syrup?

Corn syrup works 1:1 in recipes requiring liquid sweetness and moisture, like glazes and baked goods. It's less sweet than agave and has a neutral flavor that won't add depth. Use light corn syrup for recipes needing mild sweetness-dark corn syrup adds molasses notes that agave doesn't have.

Substitutes for Agave Nectar in Baking & Dressings

7 Best Substitutes for Agave Nectar

No ratings yet
Agave nectar can be replaced by several liquid sweeteners with minor adjustments. These substitutes vary in sweetness, texture, and flavor, making them suitable for baking, beverages, and vegan recipes.
Print Recipe Pin Recipe
Prep Time 10 minutes mins
Cook Time 6 minutes mins
Total Time 16 minutes mins
Servings: 4 servings
Course: Kitchen Tips, Substitutes
Cuisine: Various
Ingredients Method Notes

Ingredients
  

  • 1 cup Honey Use 1:1 ratio; not vegan, floral flavor
  • 1 cup Maple Syrup Use 1:1 ratio; thinner texture, woody taste
  • 1 cup Simple Syrup Use 1:1 ratio; made by dissolving equal parts sugar and water
  • 1 cup Date Syrup Use 1:1 ratio; thick, deep caramel notes
  • 1.25 cup Brown Rice Syrup Use 1.25:1 ratio to match sweetness; malty flavor
  • 1 cup Coconut Nectar Use 1:1 ratio; caramel-vanilla undertone, vegan
  • DIY Sugar Syrup Dissolve 1 cup sugar in ¾ cup boiling water, cool,

Method
 

  1. Choose substitute based on your recipe needs: baking, beverages, or vegan options.
  2. Prepare the substitute if needed (e.g., dissolve sugar for simple syrup or DIY sugar syrup).
  3. Apply the substitute using the recommended ratios, adjusting for sweetness and flavor.
  4. Check the final taste and texture; adjust amounts if necessary to match desired sweetness.

Notes

  • Honey closely matches agave's texture and sweetness but is not vegan.
  • Simple syrup and DIY sugar syrup dissolve easily in cold drinks but lack flavor complexity.
  • Maple syrup and date syrup add distinct flavors and are vegan-friendly alternatives.

Tried this recipe?

Let us know how it was!

5 Best Substitutes for Tarragon in Sauces & Dressings

February 4, 2026

You're finishing a roasted chicken with herbs when you realize the fresh tarragon is missing from your fridge. The recipe counts on that subtle anise-like brightness and herbal depth to cut through the richness.

5 Best Substitutes for Tarragon in Sauces & Dressings

Tarragon adds a distinctive licorice flavor with a slightly sweet, herbaceous note. Most herbs don't carry that same profile-swapping randomly leaves the dish tasting off.

QUICK SUMMARY

Fennel fronds or dried tarragon (1 teaspoon per 1 tablespoon fresh) replace fresh tarragon's anise notes in most dishes. Chervil works 1:1 for herbal brightness but lacks the licorice kick. Basil + anise extract (1 tablespoon basil + ⅛ teaspoon extract) rebuilds the profile for dressings. Dill adds freshness but skips the anise entirely.

🌿Closest match: Fennel fronds mimic anise flavor naturally
⚡Pantry staple: Dried tarragon works everywhere at 1:3 ratio
⚠️Watch out: Dill swaps freshness but drops licorice notes

5 Substitutes for Tarragon: Anise and Herbal Brightness 🌿

Each substitute below delivers different aspects-some match the licorice flavor, others just bring herbaceous freshness.

Quick Substitute Reference
# Substitute Best For Ratio Key Note
1 Fennel Fronds ✨ Both 1:1 Anise flavor present
2 Dried Tarragon 🍳 Cooking 1 teaspoon per 1 tbsp Less fresh aroma
3 Chervil ✨ Both 1:1 Milder anise hint
4 Basil + Anise 🥗 Raw 1 tablespoon + ⅛ tsp Easy to overdo
5 Dill 🍳 Cooking 1:1 No licorice flavor

1. Fresh Fennel Fronds 🌿

Fennel fronds carry the same anise-forward flavor that makes tarragon work in French sauces and salad dressings. The licorice note comes through clearly without needing any adjustments.

Use 1:1 fresh fennel fronds for fresh tarragon. Chop them finely just like you would tarragon leaves.

The texture runs slightly coarser with a more vegetal undertone. Fennel fronds work best in raw applications-vinaigrettes, finishing garnishes, and herb butters-where the fresh anise flavor shines.

Skip them when tarragon is the dominant flavor, like in béarnaise sauce. The vegetal edge doesn't translate well when the herb takes center stage.

2. Dried Tarragon 🍳

Dried tarragon delivers the same herbal anise profile but with less aromatic punch. The flavor concentrates during drying, so you need less to match the intensity.

Use 1 teaspoon dried per 1 tablespoon fresh. Add it early in cooking so the flavor has time to bloom and mellow.

  • 🍳 In slow-cooked dishes: Works great in braises and marinades
  • 🥗 In raw applications: Too muted for fresh dressings
  • ⚠️ Flavor note: Slight bitterness develops if stored too long

Dried tarragon fits recipes where the herb plays a supporting role-chicken stock, roasted vegetables, or stews. If you're also looking for broader herb options, Tarragon alternatives to try cover more ground.

3. Fresh Chervil 🌿

Chervil brings delicate herbal freshness with a faint anise whisper. It doesn't hit as hard as tarragon but adds brightness and a mild licorice undertone to light sauces and poultry dishes.

Use 1:1 fresh chervil for fresh tarragon. The leaves bruise easily, so add them at the end of cooking or use them raw.

Chervil's soft texture and mild flavor work in dishes where tarragon's intensity would overpower-cream sauces for fish, egg dishes, or spring salads. It won't carry recipes that depend on strong anise notes.

If chervil isn't available either, easy Chervil swaps that work include parsley and other delicate herbs.

4. Basil + Anise Extract 🥗

Basil with a pinch of anise extract rebuilds tarragon's profile from two separate ingredients. Basil brings the fresh leafy character, anise extract supplies the licorice kick.

Use 1 tablespoon chopped basil + ⅛ teaspoon anise extract per 1 tablespoon fresh tarragon. Start with less extract-it's easy to overshoot.

  • 🥗 Best for raw: Dressings and finishing garnishes
  • 🍳 In cooking: Basil's flavor fades in heat
  • ⚠️ Extract caution: Too much tastes medicinal
  • 💡 Mix method: Combine them right before serving

This combo works when you need the licorice note but don't have fennel or tarragon on hand. The anise extract adds intensity quickly-for more controlled swaps, check our simple Anise substitutes list.

5. Dill 🌿

Dill adds fresh herbal brightness but skips the anise flavor entirely. It brings tangy, grassy notes that work in seafood dishes and light sauces where you need green freshness more than licorice complexity.

Use 1:1 fresh dill for fresh tarragon. Chop it just before adding-dill loses flavor quickly once cut.

  • 🐟 Seafood dishes: Natural pairing with fish and shellfish
  • 🥗 In salads: Bright tang without licorice

Dill won't fool anyone expecting tarragon's anise kick, but it keeps dishes from tasting flat when you need herbal freshness. It works when the recipe calls for tarragon more for brightness than for its signature licorice note.

Picking Your Tarragon Swap

Got fennel fronds? Use them 1:1-they're the closest match for anise flavor and fresh texture.

Only dried tarragon? Use 1 teaspoon per tablespoon fresh, and add it early so the flavor blooms.

Need anise notes but no fennel? Mix basil with a tiny pinch of anise extract-start with ⅛ teaspoon and taste as you go.

Frequently Asked Questions

Can I use parsley instead of tarragon?

Parsley adds herbal brightness but lacks tarragon's anise flavor entirely. It works when you just need green freshness, but it won't replicate the licorice notes that define tarragon in French dishes like béarnaise sauce.

What's the best dried tarragon to fresh tarragon ratio?

Use 1 teaspoon dried tarragon per 1 tablespoon fresh. Dried herbs concentrate in flavor during drying, so you need less to match the intensity. Add dried tarragon early in cooking so it has time to rehydrate and release its flavor.

Does tarragon lose flavor when cooked?

Fresh tarragon loses some of its brightness when cooked for extended periods, but the anise flavor holds up well. Add it near the end of cooking for raw applications, or cook it longer in braises and sauces where you want the flavor to mellow and blend with other ingredients.

Can I mix fennel fronds with another herb?

Fennel fronds pair well with parsley or chervil to soften their vegetal edge while keeping the anise flavor. Use equal parts fennel fronds and the second herb to balance the licorice note with more neutral herbal freshness.

Why does my dried tarragon taste bitter?

Old or improperly stored dried tarragon develops bitterness as the essential oils break down. Check the date and store it in an airtight container away from light and heat. If it smells musty or looks faded, replace it-bitterness won't cook out.

Tarragon Substitutes 5 Great Alternatives

5 Best Substitutes for Tarragon

No ratings yet
These five substitutes cover different aspects of tarragon's unique anise and herbal flavor profile. From fennel fronds matching its anise notes to dill's bright herbal freshness, each option suits specific recipes and preparations.
Print Recipe Pin Recipe
Prep Time 8 minutes mins
Cook Time 5 minutes mins
Total Time 13 minutes mins
Servings: 4 servings
Course: Kitchen Tips, Substitutes
Cuisine: Various
Ingredients Method Notes

Ingredients
  

  • 1 cup Fresh Fennel Fronds Use 1:1 fresh fennel fronds for fresh tarragon; chop finely.
  • 1 teaspoon Dried Tarragon Use 1 teaspoon dried tarragon per 1 tablespoon fresh; add early in cooking.
  • 1 cup Fresh Chervil Use 1:1 fresh chervil for fresh tarragon; add at end of cooking or raw.
  • Basil + Anise Extract Use 1 tablespoon chopped basil plus ⅛ teaspoon anise extract per 1 tablespoon fresh tarragon;
  • 1 cup Fresh Dill Use 1:1 fresh dill for fresh tarragon; chop just before adding.

Method
 

  1. Select your substitute based on the recipe and desired flavor - fennel fronds or dried tarragon for anise notes, chervil or dill for herbal freshness, or basil with anise extract for raw applications.
  2. Prepare the substitute accordingly: chop fresh herbs finely; measure dried herbs or extracts precisely.
  3. Apply the indicated substitution ratios and integrate the substitute into your recipe.
  4. Adjust seasoning and check the flavor balance, especially when using anise extract to avoid overpowering taste.
  5. For dried tarragon, add early in cooking to bloom flavors; for delicate herbs like chervil, add near the end or raw.

Notes

  • Fennel fronds offer the closest fresh anise flavor but can be slightly coarser in texture.
  • Dried tarragon is potent; use less and store properly to avoid bitterness.
  • Basil with anise extract is best for dressings but use extract sparingly as it can taste medicinal if overused.

Tried this recipe?

Let us know how it was!
« Previous Page
Next Page »

Primary Sidebar

ForkliftKitchen recipe developer

Welcome!

Recipe Developer · 12+ Yr Kitchen Veteran

I'm the recipe developer behind this site, focused on practical, well-tested dishes and smart ingredient swaps. Every recipe is written to be clear, reliable, and easy to make at home.

650+ Recipes
12+ Yrs Exp.
3x Tested
Our Story →

As Featured In

Allrecipes

TASTE OF HOME

Food52

HUFFPOST

Yahoo! Life

Our Editorial Standards

  • ✓ Every recipe tested at least 3 times before publishing
  • ✓ Substitutes verified by real kitchen trials, not guesswork
  • ✓ Reviewed for accuracy by our editorial team
  • ✓ Updated regularly with seasonal info and reader feedback

Most Popular

  • Creamy Lemon Shrimp Linguine
    Creamy Lemon Shrimp Linguine
  • Creamy Garlic Mushroom Chicken
    Creamy Garlic Mushroom Chicken
  • Sesame Ginger Chicken Noodle Bowls
    Sesame Ginger Chicken Noodle Bowls
  • Baked Lemon Herb Fish Fillets
    Baked Lemon Herb Fish Fillets
  • Veggie Loaded Fried Rice
    Veggie Loaded Fried Rice
  • Spicy Garlic Shrimp Stir Fry
    Spicy Garlic Shrimp Stir Fry

Join 8,000+ Home Cooks

Weekly Kitchen Tips

Easy recipes, smart substitutes, and real cooking shortcuts — every Thursday.

Subscribe Free →


Side Dishes

  • What to Serve With Asian Salmon? 15 Best Side Dishes
    What to Serve With Asian Salmon? 15 Best Side Dishes
  • Side Dishes for Strawberry Spinach Salad
    15 Best Side Dishes for Strawberry Spinach Salad
  • Sides for Grilled Cauliflower Steaks to Complete the Meal
    15 Sides for Grilled Cauliflower Steaks to Complete the Meal
  • 15 Sides To Serve With Calabacitas
    15 Best Sides for Calabacitas – Mexican-Inspired Favorites


Substitutes

  • 7 Best Substitutes for Hot Sauce in Marinades & Stir-Fries
    7 Best Substitutes for Hot Sauce in Marinades & Stir-Fries
  • 9 Best Substitutes for Butter in Baking and Cooking
  • 7 Best Substitutes for Tagliatelle for Italian Pasta Dishes
    7 Best Substitutes for Tagliatelle for Italian Pasta Dishes
  • 7 Best Substitutes for Udon Noodles in Asian Stir-Fries
    7 Best Substitutes for Udon Noodles in Asian Stir-Fries


Browse by Topic

  • Side Dishes320
  • Substitutes785
  • Dinner163
  • Air Fryer77
  • Taste Profiles484
  • Food Storage123


Reader Reviews

★★★★★

"Finally a food blog that tells you exactly why a substitute works instead of just listing options."

— Sarah M., via email

★★★★★

"The side dish recommendations are so specific — saved my dinner party twice this month."

— James R., Pinterest comment

★★★★★

"I trust this site more than most because they actually test everything. You can tell."

— Priya K., blog comment

Footer

↑ Back to Top

Forklift Kitchen

We do the heavy lifting so you can enjoy the cooking. Tested recipes, smart substitutes, and perfect pairings—built for real home cooks.

Content

  • Recipes
  • Substitutes
  • What to Serve With
  • Blog

Company

  • About Us
  • Contact
  • Subscribe

Legal

  • Privacy Policy
  • Terms of Service

As an Amazon Associate I earn from qualifying purchases.

© 2026 Forklift Kitchen.

Rate This Recipe

Your vote:


A rating is required
A name is required
An email is required