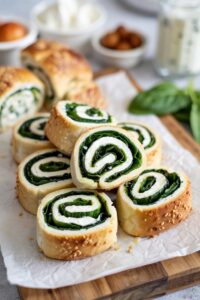
Cherry tomatoes meet creamy mozzarella and fresh basil on bite-size skewers that stay crisp and clean. Assemble them 15 minutes before guests arrive or pack them for a no-fuss picnic snack.

Tomato Basil Mozzarella Skewers are bite-size snacks combining cherry tomatoes, bocconcini, and fresh basil. Pat-dry the mozzarella to prevent sogginess and assemble just before serving to keep basil bright and tomatoes crisp.
Tangy sweetness from the tomatoes balances the mild creaminess of the cheese while the basil adds a bright herby note. These no-cook snack bites deliver big flavor without heat or mixing.
Threading each piece in a uniform order creates visual appeal and ensures every bite tastes balanced. Pat the mozzarella dry before skewering so it holds its shape, and save the drizzle for the last second to keep everything fresh, which pairs well alongside quick main dish without extra fuss.
Prep Time
10 minutes
Cook Time
0 minutes
Total Time
10 minutes
Servings
12 skewers
Difficulty
Easy
Category
Appetizer
Quick Tip
Pat mozzarella dry before threading
Best For
Parties
Why This Recipe Works
Cold assembly preserves the juicy snap of the tomatoes and the soft bounce of the mozzarella. You skip any wilting or texture breakdown, so every skewer stays bright and inviting, making them easy to serve alongside simple dinner idea without extra fuss.
Remember it later
Planning to try this recipe soon? Save it for a quick find later!
- Uniform sizing - Cherry tomatoes and bocconcini match in diameter, creating even bites that hold together on the pick.
- No-cook method - Skipping heat keeps basil leaves bright green and prevents mozzarella from turning rubbery or oozing moisture.
- Pat-dry technique - Removing excess liquid from the cheese stops pooling on the platter and maintains clean presentation.
- Last-minute drizzle - Adding olive oil and balsamic glaze right before serving locks in shine without making components soggy.
- Tight layering - Threading tomato, folded basil, and mozzarella in a repeating pattern builds color contrast and distributes flavor evenly across each piece.
What You'll Need
Gather cherry tomatoes, fresh mozzarella balls, basil leaves, olive oil, balsamic glaze, and wooden picks. Select firm, dry ingredients and assemble within 30 minutes of serving so textures stay crisp, and herby salad option rounds out the table nicely.
- Cherry tomatoes - 24 pieces (about 1 pint), firm and glossy for clean threading and juicy bite.
- Fresh mozzarella balls - 24 bocconcini or ciliegine, drained and patted completely dry to prevent slippery assembly.
- Fresh basil leaves - 24 medium leaves, unblemished and dry, providing herbal brightness without wilting.
- Extra virgin olive oil - 2 tablespoons, drizzled at the end for richness and shine.
- Balsamic glaze - 1 tablespoon, adds sweet-tart finish without making skewers wet.
- Wooden picks - 12 skewers (3-4 inches long), sturdy enough to hold three layered components without bending.
- Sea salt and black pepper - Light sprinkle just before serving to enhance natural flavors without overpowering the mild cheese.
Ingredient Swaps
Swap cherry tomatoes for grape tomatoes or halved Campari tomatoes if you want a firmer bite, and trying classic finger food gives you a different angle. Keep fresh mozzarella and basil in place for authentic caprese flavor, but feel free to adjust the finishing oil or glaze.
- Grape tomatoes - Use instead of cherry tomatoes for a slightly firmer texture that holds shape longer on the skewer.
- Burrata - Substitute for bocconcini if you want a creamier center, but serve immediately because it softens and oozes quickly.
- Baby spinach - Replace basil leaves for a milder green note, though you lose the signature herbal punch that defines caprese.
- Pomegranate molasses - Swap for balsamic glaze to add fruity tartness with a deeper ruby color and thicker consistency.
Instructions
Rinse and dry all produce before you start. Thread each skewer in a repeating order so colors alternate and flavors balance.
Pat the mozzarella balls dry with a paper towel, pressing gently to remove surface moisture. Lay them on a clean plate in a single layer while you prep the tomatoes and basil.
Thread one cherry tomato onto a wooden pick, followed by one basil leaf folded in half, then one mozzarella ball. Push each piece snug against the next so the skewer stays compact and easy to pick up.
Repeat the threading pattern for the remaining picks, keeping the stacks uniform in height. Line finished skewers on a serving platter in a single row so they stand upright and display the layered colors.
Drizzle olive oil lightly over the skewers, using a spoon to control the flow and avoid pooling on the platter. Follow with a thin ribbon of balsamic glaze, targeting the top of each skewer for visual contrast.
Sprinkle sea salt and freshly ground black pepper across the tray just before serving. Serve immediately or cover tightly with plastic wrap and refrigerate for up to 30 minutes until guests arrive.
What to Serve With It
These skewers deliver cool, creamy bites that work for casual weeknight snacking or platter-style hosting. Focus on crunchy or starchy sides that add texture contrast and stretch the spread without heavy prep.
- Garlic bread slices - Arrange toasted slices on a separate tray for guests to grab. The warm, crisp bread soaks up any drizzled oil and adds a filling starch element. For more practical pairings, see Baked Potatoes game-day menu ideas.
- Mixed greens salad - Toss arugula and spinach with a light vinaigrette in a bowl. The peppery greens cut through the creamy mozzarella and add a fresh, crunchy contrast.
- Marinated olives - Spoon kalamata or Castelvetrano olives into a small dish. Their salty brine goes with the mild cheese and introduces a briny note without extra cooking.
- Whole-grain crackers - Stack crackers in a basket next to the skewers. The nutty, crunchy texture balances the soft mozzarella and helps guests build custom bites.
- Sparkling water - Pour chilled sparkling water into glasses with lemon slices. The bubbles refresh the palate between bites and keep the meal light and clean.
Store and Reheat
Cover assembled skewers tightly with plastic wrap and refrigerate for up to 4 hours before serving. If basil begins to darken, replace the leaves with fresh ones and re-drizzle the oil and glaze, so it works well next to simple dinner idea without extra fuss.
- Refrigerate components separately - Store tomatoes, mozzarella, and basil in separate airtight containers for up to 24 hours, then assemble skewers just before serving to prevent wilting.
- Pat dry again - Blot mozzarella with a fresh paper towel right before threading if it releases more liquid in the fridge, keeping the skewers from getting slippery.
- Refresh basil - Wrap wilted leaves in a damp paper towel for 5 minutes to restore some crispness before replacing them on the skewers.
- Avoid freezing - Freezing turns mozzarella crumbly and tomatoes mushy, so only refrigerate assembled skewers for short-term storage.
- Re-drizzle before serving - Add a fresh drizzle of olive oil and balsamic glaze just before plating to restore shine and boost flavor after chilling.
Frequently Asked Questions
You can cube regular mozzarella into 1-inch pieces, but it will be firmer and less creamy than fresh bocconcini.
Leaves should feel pliable and bright green; discard any that are brown-edged, slimy, or completely limp.
Store the components separately overnight and assemble skewers up to 4 hours before serving to keep basil from wilting and mozzarella from releasing too much moisture.
Excess moisture from the mozzarella or tomatoes pools under the skewers; pat both dry thoroughly before threading and drizzle oil only at the last minute.
Pair them with crusty bread, marinated olives, and a light salad to create a balanced antipasto spread without heavy cooking.
Tomato Basil Mozzarella Skewers
Ingredients
Equipment
Method
- Pat the mozzarella balls dry with a paper towel, pressing gently to remove surface moisture. Lay them on a clean plate in a single layer while you prep the tomatoes and basil.
- Thread one cherry tomato onto a wooden pick, followed by one basil leaf folded in half, then one mozzarella ball. Push each piece snug against the next so the skewer stays compact and easy to pick up.
- Repeat the threading pattern for the remaining picks, keeping the stacks uniform in height. Line finished skewers on a serving platter in a single row so they stand upright and display the layered colors.
- Drizzle olive oil lightly over the skewers, using a spoon to control the flow and avoid pooling on the platter. Follow with a thin ribbon of balsamic glaze, targeting the top of each skewer for visual contrast.
- Sprinkle sea salt and freshly ground black pepper across the tray just before serving. Serve immediately or cover tightly with plastic wrap and refrigerate for up to 30 minutes until guests arrive.