Cannoli filling often turns runny or the shells get soggy before you serve them. The trick is draining your ricotta overnight and filling the shells within 20 minutes of serving.
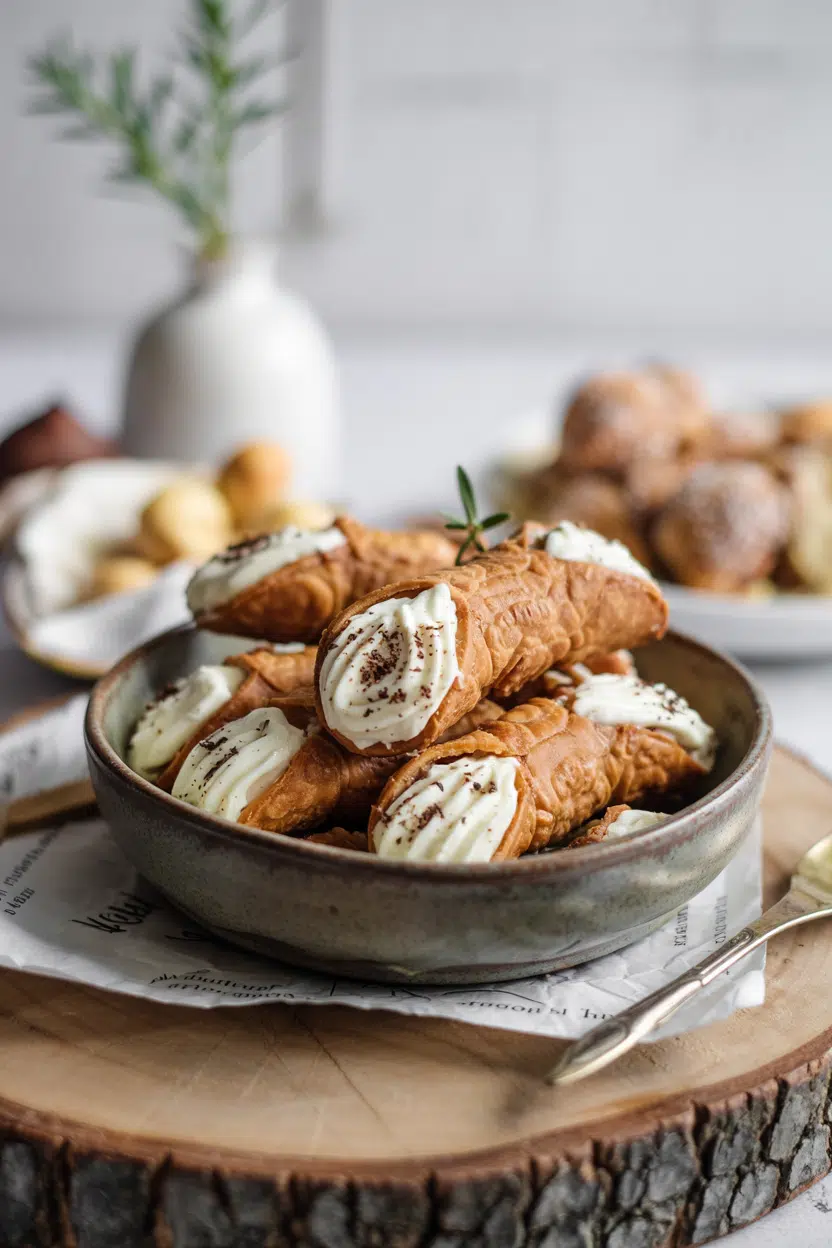
High-quality ricotta makes the difference. A sieve and some patience create that thick, creamy filling that holds its shape.
This works for dinner parties when you need a dessert that looks impressive but doesn't require baking skills.
Italian cannoli with ricotta filling delivers crispy shells packed with smooth, sweetened ricotta. The key is draining the ricotta thoroughly so the filling stays thick and doesn't make the shells soggy. Fill shells just before serving for maximum crunch.
Why This Recipe Works
The filling stays creamy because you drain the ricotta before mixing. For a version that comes together quickly, a similar dessert recipe uses store-bought pastry shells and skips the overnight drain.
Remember it later
Planning to try this recipe soon? Save it for a quick find later!
Prep Time
20 min
Cook Time
5 min
Total Time
25 min
Servings
6-8 servings
Difficulty
Medium
Category
Dessert
Quick Tip
Drain ricotta well for creamy, not runny filling
Best For
Entertaining | Weekend treat
What makes this work:
- Overnight draining removes excess moisture - Ricotta loses 20-30% of its liquid weight, which keeps the filling thick and prevents soggy shells
- Powdered sugar dissolves completely - Granulated sugar leaves a grainy texture, but powdered sugar creates a smooth, velvety filling
- Chilling the filling for one hour sets the texture - Cold ricotta holds its shape better when you pipe it into the shells
- Mini chocolate chips stay crunchy - Folding them in at the end keeps them from breaking down or melting into the filling
- Filling shells just before serving preserves crispness - Store-bought cannoli shells absorb moisture within 30 minutes of contact with the filling
What You'll Need

Most ingredients come from your pantry except the shells. The ricotta works best when it hits the table at the same time as the main, so for a classic beef dish or weeknight dinner, keep a batch ready for nights like this.
- 16 oz ricotta cheese (whole milk)
- 1 cup powdered sugar
- 12-16 store-bought cannoli shells
- 1 teaspoon vanilla extract
- ½ cup mini chocolate chips
- ½ teaspoon cinnamon (optional)
- 1 teaspoon lemon zest (optional)
- Pinch of salt
Ingredient Details
- Ricotta cheese
Use whole-milk ricotta for richness-part-skim ricotta creates a thinner, less creamy filling - Powdered sugar
Sift the sugar if it has lumps to avoid a gritty texture in the finished filling - Cannoli shells
Store shells in an airtight container at room temperature-moisture makes them lose their snap - Vanilla extract
Pure vanilla extract tastes cleaner than imitation, which can leave a chemical aftertaste - Mini chocolate chips
Regular-sized chips are too heavy and can crack the shells-mini chips distribute evenly - Cinnamon
A small amount adds warmth without overpowering the ricotta-skip it if you want pure vanilla flavor - Lemon zest
Fresh zest brightens the filling-dried lemon peel doesn't have the same punch
Ingredient Swaps
Rich mains need something to cut through, and ricotta does exactly that. We keep a batch ready for nights like this, so for this quick chicken dish or weekend entertaining, swap ingredients based on what's in your fridge.
Four swaps that work:
- Mascarpone for ricotta - Richer and denser texture, slightly sweeter flavor, use the same 16 oz amount but drain it for 4 hours instead of overnight
- Gluten-free shells for regular cannoli shells - May be more fragile and slightly different in texture, but they work for guests with gluten restrictions
- Powdered erythritol for powdered sugar - Reduces sugar content significantly, may leave a slight cooling aftertaste, use ¾ cup instead of 1 cup
- Chopped pistachios for mini chocolate chips - Adds a nutty crunch and traditional Sicilian flavor, toast them lightly first for extra depth
Mascarpone
Works for: Richer, creamier filling with a silkier texture
Skip if: You want traditional flavor or a lighter dessert
Dairy-Free Cashew Ricotta
Works for: Vegan guests or dairy sensitivities
Skip if: You need authentic Italian flavor or don't have a high-speed blender
Cream Cheese (Softened)
Works for: Tangy, thicker filling that holds shape well
Skip if: You want light, airy texture-cream cheese makes it denser
Instructions
Most of the work happens in the mixing bowl. The filling works best when it hits the table at the same time as the main, so for a classic sauce dish or holiday dinners, follow this timeline exactly.
- Drain the ricotta overnight - Place ricotta in a fine-mesh sieve lined with cheesecloth, set over a bowl, and refrigerate for 8-12 hours until about ¼ cup of liquid collects in the bowl
- Mix the filling - In a medium bowl, whisk together drained ricotta, powdered sugar, vanilla extract, salt, and optional cinnamon and lemon zest until smooth and fluffy, about 2 minutes by hand
- Fold in chocolate chips - Add mini chocolate chips to the filling and gently fold with a spatula until evenly distributed without crushing the chips
- Chill the filling - Cover the bowl with plastic wrap and refrigerate for at least 1 hour to firm up the texture
- Fill the shells - Transfer filling to a piping bag or a plastic bag with one corner snipped off, then pipe filling into both ends of each cannoli shell from the center outward until filled but not overflowing
What to Serve With It
Cannoli are rich and sweet, so pair them with something light or acidic. This side adds the contrast this plate needs, so for a simple tahini on the side or casual gatherings, timing matters.
| Side Dish | Prep | Why It Works | How to Serve |
|---|---|---|---|
| Fresh Berries | Easy | Bright acidity cuts through the creamy, sweet filling | Rinse and drain strawberries, raspberries, or blueberries, serve on the side |
| Espresso or Strong Coffee | Easy | Traditional Italian pairing that balances the sweetness | Brew espresso or strong drip coffee, serve hot alongside cannoli |
| Light Whipped Cream | Easy | Adds airy texture without making the plate too heavy | Whip heavy cream with a touch of sugar, dollop on the plate |
| Simple Fruit Salad | Easy | Fresh acidity and juice cleanse the palate between bites | Toss orange segments, kiwi, and grapes with lemon juice |
| Amaretto or Almond Liqueur | Easy | Enhances nutty flavor notes and adds sophistication | Pour 1 oz into a small glass, sip between bites |
Three ways to serve it:
- For dinner parties: Dust filled cannoli with powdered sugar, arrange on a platter with candied orange peel, and serve with espresso
- For casual gatherings: Plate individual cannoli with a handful of fresh berries and a drizzle of chocolate sauce
- For weekend treats: Serve cannoli with a scoop of vanilla gelato and a light raspberry coulis on the side
Store and Reheat
Cannoli filling stores well but shells don't. The filling works best when it hits the table at the same time as the main, so keep ricotta and shells separate until you're ready to fill and serve.
| Method | Time | Best For |
|---|---|---|
| 🔥 Oven | 3-5 min at 350°F | Restoring crispness to slightly softened shells |
| 🍳 Stovetop | 1-2 min on low heat | Gently warming shells wrapped in foil without drying them out |
| 📦 Microwave | Avoid | Not recommended-microwaving makes shells chewy and soft |
For best results when storing:
- Store filling separately in an airtight container - Ricotta filling keeps for 2-3 days in the fridge, but don't fill shells until you're ready to serve
- Keep shells at room temperature in a dry container - Store-bought shells stay crisp for up to 1 week if they're sealed tightly and kept away from humidity
- Freeze filling for up to 1 month - Transfer filling to a freezer-safe container, thaw overnight in the fridge, then stir gently before using
- Dust with powdered sugar just before serving - Apply the sugar topping within 5 minutes of serving so it doesn't melt or dissolve into the filling
- Don't refrigerate filled cannoli - Once filled, cannoli shells absorb moisture from the ricotta and turn soggy within 30-60 minutes even when chilled
Frequently Asked Questions
Yes, you can make the filling up to 2-3 days ahead. Store it in an airtight container in the fridge and stir gently before filling shells.
Fill shells no more than 20 minutes before serving. The longer the filling sits in the shells, the faster they absorb moisture and lose their crunch.
Line a fine-mesh sieve with cheesecloth, place ricotta inside, and set it over a bowl in the fridge for 8-12 hours. You'll drain off about ¼ cup of liquid.
Runny filling usually means the ricotta wasn't drained long enough. Drain it again for a few more hours, or fold in extra powdered sugar to thicken it.
Yes, mascarpone creates a richer, creamier filling with a slightly sweeter flavor. Drain it for 4 hours instead of overnight since it's already thicker than ricotta.
Italian Cannoli with Ricotta Filling
Ingredients
Equipment
Method
- Place the ricotta in a fine-mesh sieve lined with cheesecloth. Set it over a bowl and refrigerate for 8 to 12 hours until about ¼ cup of liquid collects in the bowl.16 oz ricotta cheese
- In a medium bowl, whisk together the drained ricotta, powdered sugar, vanilla extract, salt, and optional cinnamon and lemon zest until smooth and fluffy, about 2 minutes by hand.16 oz ricotta cheese, 1 cup powdered sugar, 1 tsp vanilla extract, 0.5 tsp cinnamon, 1 tsp lemon zest, pinch salt
- Add mini chocolate chips to the filling and gently fold with a spatula until evenly distributed without crushing the chips.0.5 cup mini chocolate chips
- Cover the bowl with plastic wrap and refrigerate for at least 1 hour to allow the filling to firm up.
- Transfer filling to a piping bag or a plastic bag with one corner snipped off. Pipe filling into both ends of each cannoli shell from the center outward until filled but not overflowing. Fill just before serving for maximum crunch.12-16 count cannoli shells
Notes
- Drain ricotta overnight to prevent soggy cannoli shells and maintain a thick filling.
- Use powdered sugar for a smooth, velvety texture in the filling without graininess.
- Fill cannoli shells no more than 20 minutes before serving to keep shells crisp.