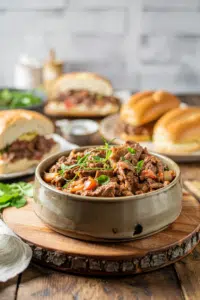
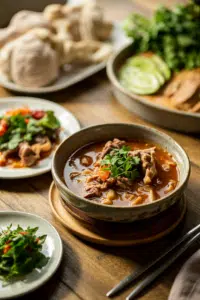
Slow cooker chicken often turns out dry or tastes like boiled protein. The fix is using thighs instead of breasts and adding a peanut sauce that actually sticks.

High heat isn't an option here, so the sauce does all the work. Peanut butter and coconut milk create a thick coating that clings to the meat while it cooks low and slow.
This works for meal prep when you need something that reheats well and still tastes like you made an effort.
Crockpot Thai Peanut Chicken uses chicken thighs slow-cooked in a creamy peanut-coconut sauce. The low heat keeps dark meat tender while the sauce thickens without burning. Sear the chicken first if you want deeper flavor, or skip it when pressed for time.
Why This Recipe Works
Slow cookers don't brown or caramelize, so all the flavor comes from the sauce ingredients working together over hours. A good chicken can make or break the plate, and a juicy chicken side uses similar timing strategies for tender results.
Remember it later
Planning to try this recipe soon? Save it for a quick find later!
Prep Time
10 min
Cook Time
4-6 hours
Total Time
4 hours 10 min
Servings
4-6 servings
Difficulty
Easy
Category
Main Dish
Quick Tip
Use chicken thighs for moisture retention
Best For
Weeknight | Meal prep
What makes this work:
- Dark meat stays juicy - Thighs have enough fat to withstand long cooking without drying out
- Full-fat coconut milk prevents separation - Low-fat versions turn watery and split under slow heat
- Peanut butter added late thickens gradually - Stirring it in during the last 30 minutes keeps sauce from getting pasty
- Soy sauce and lime balance sweetness - Brown sugar needs acid and salt to avoid cloying flavor
- Low setting renders fat slowly - 5-6 hours on low produces tender, shreddable chicken without toughening
What You'll Need
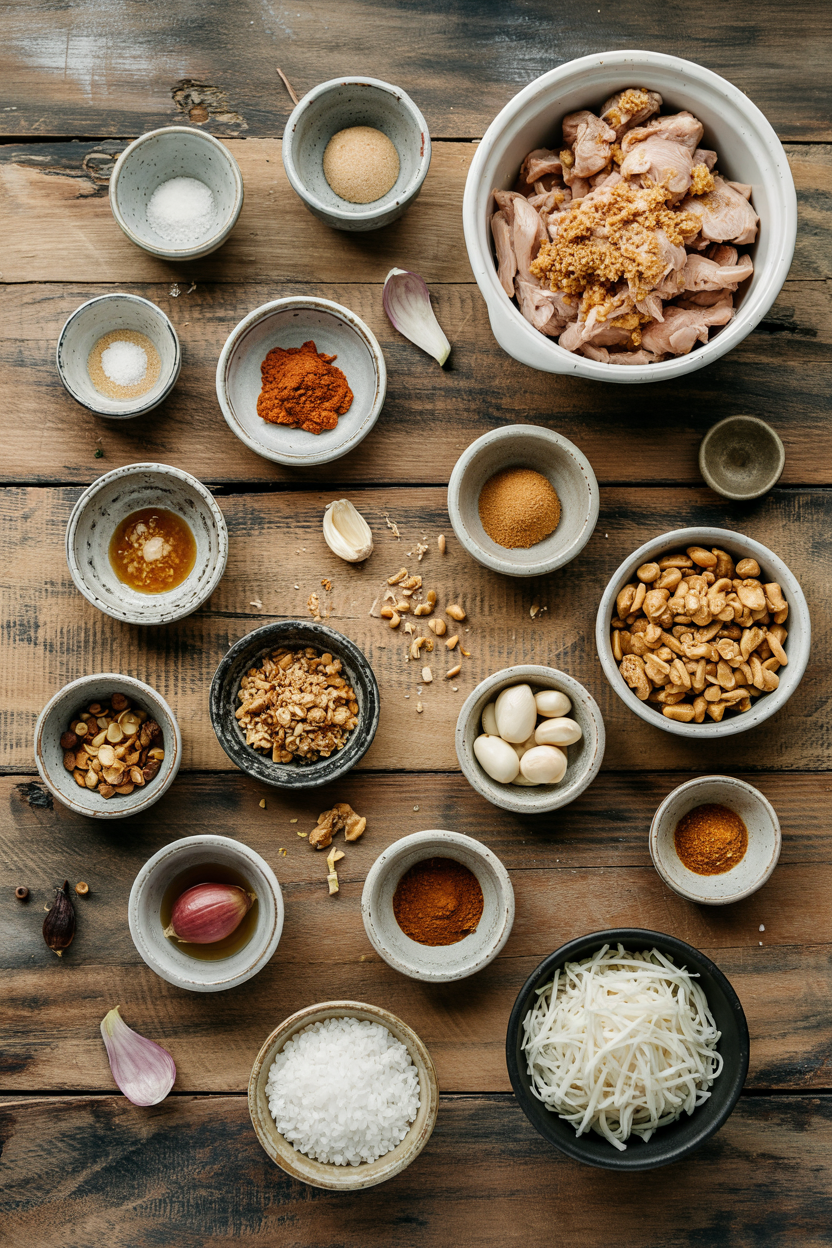
Shopping for this takes 10 minutes if you stock Asian basics. The peanut sauce works for meal prep because it holds up in the fridge for 3-4 days without breaking.
- 2 lbs chicken thighs (boneless, skinless)
- ½ cup peanut butter (creamy, not natural)
- 1 can (13.5 oz) coconut milk (full-fat)
- 3 tablespoon soy sauce
- 2 tablespoon lime juice (fresh)
- 2 tablespoon brown sugar
- 4 cloves garlic (minced)
- 1 tablespoon fresh ginger (grated)
- ¼-½ teaspoon red pepper flakes
- Fresh cilantro (chopped)
- Lime wedges
- Crushed peanuts (optional)
Ingredient Details
- Chicken thighs
More tender after slow cooking than breasts; fat content prevents drying - Peanut butter
Use creamy, not natural-natural separates and turns oily in the crockpot - Full-fat coconut milk
Light versions make watery sauce; full-fat stays creamy under low heat - Soy sauce
Provides salt and umami; measure carefully as it concentrates during cooking - Lime juice
Fresh juice only-bottled tastes flat after hours in the crockpot - Brown sugar
Balances salty-spicy elements; reduce by 1 tablespoon if you prefer less sweetness - Red pepper flakes
Start with ¼ teaspoon and add more at the end if needed-heat intensifies over time
Ingredient Swaps
Some substitutions change the sauce texture while others just shift the flavor profile slightly. Rich mains need something to cut through, and potato does exactly that, so for a version that comes together quickly, try fluffy mashed potato dish on the side.
Four swaps that work:
- Almond butter instead of peanut butter - Less authentic but equally creamy; thins sauce slightly so reduce coconut milk by 2 tbsp
- Tamari instead of soy sauce - Same salty-umami depth, safe for gluten-free diets with no flavor loss
- Chicken breasts instead of thighs - Leaner but dries out faster; reduce cook time to 3-4 hours on low and check temp at 3 hours
- Heavy cream instead of coconut milk - Richer but loses Thai flavor; use 1 cup cream + ¼ cup chicken broth to avoid overly thick sauce
Natural peanut butter
Works for: Cleaner ingredient list, no added sugar
Skip if: You want stable sauce-natural separates and turns oily under slow heat
Honey instead of brown sugar
Works for: Slightly different sweetness, thins sauce for easier stirring
Skip if: You want thick coating-honey keeps sauce runnier
Sriracha instead of red pepper flakes
Works for: More complex heat with garlic notes, easier to control spice
Skip if: You want dry spice only-sriracha adds liquid and changes consistency
Instructions
Plan for 5-6 hours on low heat, or 3-4 hours on high if you're rushed. The this dip works best when it hits the table at the same time as the main, so for a version that comes together quickly, check out this simple sauce recipe that pairs well.
How to make it:
Mix the sauce - Whisk coconut milk, soy sauce, lime juice, brown sugar, garlic, ginger, and red pepper flakes in a bowl until smooth (2 minutes). Pour into crockpot.
Add chicken - Place chicken thighs in sauce, turning once to coat both sides. No overlap needed-pieces can stack. Searing first adds flavor but skip it if you're short on time.
Cook low and slow - Cover and cook on low for 5-6 hours or high for 3-4 hours. Check internal temp at the low end - chicken should hit 165°F (74°C) in the thickest part.
Stir in peanut butter - 30 minutes before serving, whisk peanut butter into sauce until fully incorporated. Sauce will thicken as it sits. Shred chicken with two forks if desired, or leave whole.
Finish and serve - Taste sauce and add extra lime juice, soy sauce, or red pepper flakes as needed. Garnish with cilantro, crushed peanuts, and lime wedges. Serve over jasmine rice or rice noodles.
What to Serve With It
Creamy peanut sauce needs something crisp or acidic to cut through all that richness. Salad cuts through all that richness, so for a version that comes together quickly, simple homemade salad adds the right texture contrast.
| Side Dish | Prep | Why It Works | How to Serve |
|---|---|---|---|
| Steamed jasmine rice | Easy | Neutral base soaks up sauce without competing | 1 cup per serving, spooned under chicken |
| Rice noodles | Easy | Gluten-free option with soft texture that catches sauce | Toss with sauce, top with chicken |
| Sautéed green beans | Easy | Fresh crunch contrasts creamy chicken | Cook with garlic, serve alongside |
| Cucumber salad | Easy | Refreshing acidity balances richness | Toss with rice vinegar, sesame seeds |
| Thai peanut slaw | Medium | Crunchy texture complements sauce, doubles down on peanut flavor | Toss cabbage with extra peanut dressing |
Three ways to serve it:
- Over rice bowls - Spoon chicken and sauce over jasmine rice, top with cilantro and crushed peanuts for weeknight meals
- In lettuce wraps - Shred chicken, serve in butter lettuce cups with shredded carrots and cucumber for low-carb option
- With rice noodles - Toss cooked noodles with sauce, top with chicken pieces and lime wedges for gluten-free dinner
Store and Reheat
Peanut sauce thickens in the fridge but loosens when reheated with a splash of coconut milk or water. Store chicken and sauce together in shallow containers so everything cools quickly and reheats evenly.
| Method | Time | Best For |
|---|---|---|
| 🍳 Stovetop | 5-7 min over medium heat | Even heating, best texture retention, add 2-3 tablespoon liquid to loosen sauce |
| 🔥 Oven | 15-20 min at 325°F (163°C) | Larger portions, cover with foil to prevent drying |
| 📦 Microwave | 2-3 min, stir halfway | Quick single servings, add splash of water before heating |
For best results when storing:
- Refrigerate within 2 hours - Cool chicken to room temp first, then transfer to airtight containers; keeps 3-4 days
- Freeze in portions - Separate into meal-sized containers, freeze up to 2 months; thaw overnight in fridge before reheating
- Add liquid when reheating - Sauce thickens when cold; stir in 2-3 tablespoon coconut milk or water to restore creamy texture
- Store garnishes separately - Keep cilantro, peanuts, and lime wedges in separate containers; add fresh when serving
- Use shallow containers - Speeds cooling and reheating; avoid containers deeper than 3 inches
Frequently Asked Questions
Yes, but reduce cook time to 3-4 hours on low since breasts dry out faster. Check internal temp at 3 hours-pull at 165°F to avoid rubbery texture.
Refrigerate in airtight containers for 3-4 days or freeze up to 2 months. Reheat on stovetop 5-7 minutes with 2-3 tablespoon coconut milk to loosen thickened sauce.
Check internal temp with instant-read thermometer-chicken is done at 165°F in the thickest part. It should shred easily with a fork when fully cooked.
Light coconut milk or natural peanut butter causes separation. Use full-fat coconut milk and creamy peanut butter, or thicken with 1 teaspoon cornstarch slurry simmered 5 minutes on stovetop.
Serve over jasmine rice or rice noodles to soak up sauce. Add sautéed green beans or cucumber salad for fresh crunch that cuts through richness.
Crockpot Thai Peanut Chicken
Ingredients
Method
- Whisk coconut milk, soy sauce, lime juice, brown sugar, garlic, ginger, and red pepper flakes in a bowl until smooth, about 2 minutes. Pour the sauce mixture into the crockpot.1 can coconut milk, 3 tbsp soy sauce, 2 tbsp lime juice, 2 tbsp brown sugar, 4 cloves garlic, 1 tbsp fresh ginger, ¼ tsp red pepper flakes
- Add chicken thighs to the crockpot, turning once to coat both sides with the sauce. Pieces can stack without overlapping. Optionally sear thighs before adding for deeper flavor.2 lbs chicken thighs
- Cover and cook on low heat for 5 to 6 hours or on high heat for 3 to 4 hours. Check the internal temperature toward the lower end of cooking time; chicken is done at 165°F (74°C).
- About 30 minutes before serving, stir the peanut butter into the sauce in the crockpot until fully incorporated. The sauce will thicken as it stands. Optionally shred chicken with two forks or leave whole.½ cup peanut butter
- Taste the sauce and adjust with additional lime juice, soy sauce, or red pepper flakes if needed. Garnish with chopped cilantro, crushed peanuts, and lime wedges. Serve over jasmine rice or rice noodles.fresh cilantro, lime wedges, crushed peanuts
Notes
- Use full-fat coconut milk to keep the sauce creamy and prevent separation.
- Add peanut butter late in the cooking process to avoid over-thickening.
- Check chicken temperature with an instant-read thermometer to ensure it reaches 165°F.